Electrical Outlets Under Kitchen Cabinets: Transform Your Space with Style
Modern kitchens blend form and function, and discreet power access is a key part of that balance. Installing outlets beneath upper cabinets keeps cords off the countertop, creates a cleaner workspace, and lets you plug in appliances exactly where you need them. This guide covers planning, code considerations, product types, installation basics, and a curated selection of solutions—complete with images and practical notes to help you choose the right fit.
Why Install Under‑Cabinet Power?
- Clutter reduction – Appliance cords stay hidden, freeing up valuable prep space.
- Improved workflow – Frequently used gadgets (microwave, coffee maker, immersion blender) sit within arm’s reach.
- Safety – Fewer cords snaking across the floor lower tripping hazards and keep liquids away from connections.
- Aesthetic flexibility – Options range from minimalist outlet bars to decorative baker’s racks that double as storage.
Planning Your Installation
Before buying any hardware, evaluate your cabinet layout and electrical needs.
- Measure clearance – Verify at least 1½ inches of depth behind the cabinet lip for a standard outlet box; shallow cabinets may require a low‑profile recessed unit.
- Calculate load – Add the wattage of all appliances you intend to plug simultaneously. A 15 A circuit (standard for kitchen countertop outlets) supplies up to 1,800 W; stay below 80 % of that for continuous use.
- Choose protection – The National Electrical Code (NEC) mandates GFCI protection for all kitchen countertop receptacles. See the latest NFPA 70 guidelines for details.
- Consider USB integration – Many modern strips include USB‑A or USB‑C ports for charging phones and tablets without extra adapters.
- Decide on power method – Plug‑in units are renter‑friendly and need only a nearby receptacle; hardwired options offer a permanent, code‑compliant look but usually require a licensed electrician.
- Check local amendments – Some jurisdictions add extra requirements (e.g., AFCI in certain areas). Consult your city’s building department if unsure.
Just as you would inspect a vintage military kit before a trip, verify every component of your electrical plan is present and ready for use.
Like checking the marine kit contents before a voyage, confirm your outlet location meets clearance requirements.
An empty kit box reminds you to start with a clean slate—clear the cabinet interior before drilling.
Keep a list of needed supplies handy, similar to keeping kit refill supplies on hand for a first‑aid pouch.
For lightweight projects, a backpacking first aid approach works—carry only the tools you need, like a compact plug‑in light bar.
Types of Under‑Cabinet Electrical Solutions
Power Strips and Outlet Bars
These low‑profile mounts attach to the cabinet soffit and provide two or more receptacles, often with surge protection or USB ports. Ideal for retrofits because they use an existing plug nearby.
Integrated Furniture
Baker’s racks, kitchen islands, and pantry cabinets sometimes come with built‑in outlets. They combine storage, workspace, and power in a single piece—perfect for open‑concept layouts.
Under‑Cabinet Lighting with Outlets
Combining illumination and receptacles, these fixtures eliminate the need for separate wiring runs. Look for models with dimmable LEDs and adjustable color temperatures (typically 3000K–5000K).
Pop‑Up or Recessed Outlets
Installed flush with the cabinet bottom, these units stay hidden until you press a button to raise the outlet cover. They offer a seamless look but require precise cut‑outs and often hardwiring.
Installation Basics
Safety first – Always turn off the breaker serving the work area and verify with a non‑contact tester before touching wires.
Tools & Materials
- Stud finder, pencil, measuring tape
- Drill with spade or hole‑saw bit (for recessed boxes)
- Wire strippers, needle‑nose pliers
- UL‑listed outlet box, GFCI receptacle, appropriate gauge wire (usually 12 AWG for 20 A circuits)
- Mounting brackets or adhesive strips (for plug‑in bars)
- Faceplate matching your kitchen décor
Hardwired Outlet – Step‑by‑Step
- Locate studs and mark the outlet height (usually 4–6 inches above the countertop).
- Cut an opening for the outlet box using a spade bit; ensure the box sits flush with the cabinet bottom.
- Run cable from the nearest power source (often an existing countertop outlet) through the cabinet cavity, securing with staples every 4½ feet.
- Connect wires to the GFCI: line (black) to brass screws, load (white) to silver screws, ground (bare/green) to the ground screw.
- Mount the receptacle, attach the faceplate, and restore power. Test with a GFCI tester.
Plug‑In Unit – Step‑by‑Step
- Select a mounting method (screw brackets, adhesive pads, or magnetic strips) that suits your cabinet material.
- Position the unit so the plug reaches a nearby receptacle without stretching the cord.
- Secure the unit per manufacturer instructions; double‑check that it sits level.
- Plug in and verify that the outlets and any USB ports are functional.
When in doubt, consult a licensed electrician—especially for hardwired jobs or if your home has older wiring.
Product Recommendations
Below are popular options that match various kitchen styles and budgets. Each product retains its original image; alt text has been rewritten for clarity and accessibility.
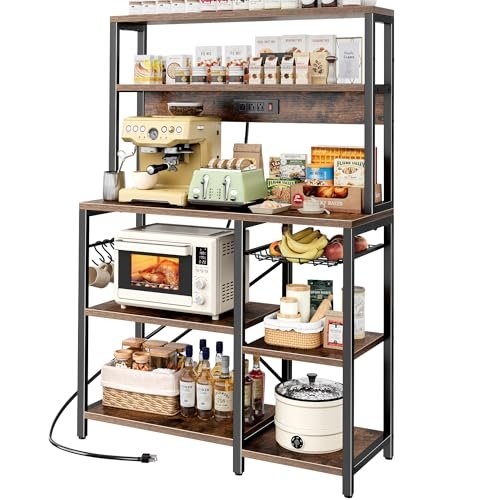
SUPERJARE Bakers Rack with Power Outlet
 Sturdy rustic‑brown rack offering open shelves, a wire basket, six S‑hooks, and a built‑in outlet for microwaves or coffee makers.
Hikaproligt 18‑inch Plug‑in Under Cabinet Lighting
 Plug‑in light bar with dimmable LEDs, three color temperatures, two USB charging ports, and a side outlet.
Hoobro Kitchen Island with Power Outlet
 Mobile island with natural/white finish, spice rack, drawer, and a convenient outlet for blending or mixing.
Shintenchi Kitchen Bakers Rack
 Vintage‑brown rack featuring six hooks, open shelving, and a power outlet for small appliances.
Denkee 39.4‑Inch Wide Large Bakers Rack
 Grey five‑tier rack with three outlets, ample storage, and a freestanding design for flexible placement.
Hoobro Kitchen Island with Storage
 Compact island offering three storage tiers, a rustic finish, and an integrated outlet for appliances like toasters or blenders.
14‑inch Plug‑in Under Cabinet Lighting
 Hardwired LED bar with dimmable LEDs, 3000K/6000K temperature options, outlets, and USB‑C/USB‑A ports.
Yitahome Bakers Rack
 Oak‑finished rattan rack with five tiers, a built‑in outlet, and a farmhouse‑style look.
ASD LED Under Cabinet Lighting
 24‑inch hardwired LED bar delivering 822 lm, three color temperatures, a single outlet, and ETL certification.
Frmobepts 71″ Kitchen Pantry Storage Cabinet
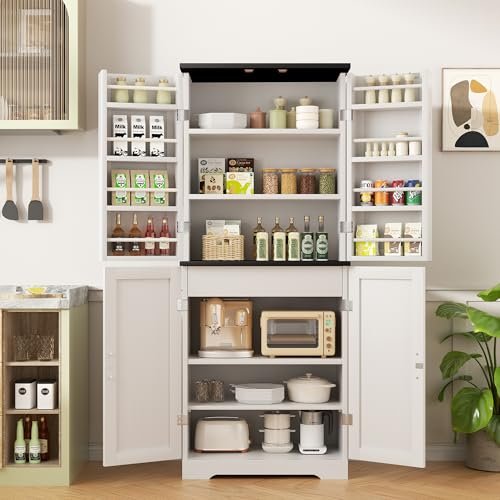
 Tall white pantry cabinet with LED lighting, an outlet, adjustable shelves, and a microwave stand.
Frequently Asked Questions
Are under‑cabinet outlets safe for high‑wattage appliances?
Yes, provided the circuit is rated for the load. Most kitchen countertop circuits are 15 A or 20 A; check the appliance’s wattage and stay under 80 % of the circuit’s capacity for continuous use.
Do I need an electrician for a plug‑in under‑cabinet light bar?
No. Plug‑in units simply connect to an existing receptacle. Ensure the cord is not pinched and that the mounting method can support the unit’s weight.
Can I install a GFCI outlet myself?
If you’re comfortable turning off the breaker, identifying line versus load wires, and following the manufacturer’s wiring diagram, a DIY GFCI install is permissible. Otherwise, hire a licensed electrician.
What’s the difference between a power strip and an integrated outlet?
A power strip is a separate accessory that mounts to the cabinet; an integrated outlet is built into a piece of furniture (e.g., a baker’s rack or island) and often includes additional storage or design features.
How do I choose between warm and cool lighting for under‑cabinet illumination?
Warm (3000K‑3500K) creates a cozy ambiance suited for dining areas; cool (4000K‑5000K) offers crisp, shadow‑free light ideal for food prep. Many fixtures let you switch between temperatures.
Conclusion
Adding electrical outlets beneath kitchen cabinets transforms a busy workspace into a streamlined, hazard‑free environment. By assessing your layout, respecting NEC GFCI requirements, and selecting the right combination of power strips, illuminated fixtures, or multifunctional furniture, you gain both convenience and style. Measure carefully, prioritize safety, and enjoy a countertop that’s ready for any culinary adventure. Happy cooking!
Kitchen Safety & Emergency Preparedness
While functional outlets streamline cooking, preparedness remains paramount. Accidents involving electricity and water can happen instantly, so maintaining a well-stocked emergency supply is wise. Following emergency preparedness guidelines is crucial for any household. Consider keeping a dedicated rugged emergency bag in the utility area for quick access to essentials. For those who prefer a comprehensive checklist, reviewing the sea rescue checklist can help ensure you haven't missed critical supplies.
If you're starting from scratch, a blank storage container allows you to customize your storage precisely. Regular maintenance matters too; restock your supplies with restock essentials annually to keep everything functional. For those who travel or entertain, a travel medical kit approach ensures a compact solution is always nearby. Even small spaces benefit from a pocket emergency kit kept in a pocket or drawer for immediate response.
By prioritizing both power access and emergency readiness, you create a kitchen environment that supports both your culinary creativity and your family's well-being.
Staying Prepared
Having a reliable power setup is only one part of a safe kitchen. Equally important is being ready for unexpected situations, from minor cuts to power surges. A rugged field pouch can hold basic supplies like bandages and antiseptic wipes, ensuring you can address small injuries without leaving the workspace. For those who enjoy outdoor cooking or lakeside gatherings, reviewing a coastal safety checklist helps verify that your gear includes waterproof matches and floatable tools. If you prefer to build your kit from the ground up, start with a versatile storage shell that you can customize with compartments for medication, gloves, and emergency contact cards. Regularly refresh your supplies with essential restock items such as fresh batteries for flashlights and sterile gauze pads to maintain readiness. For a portable solution that fits in a drawer or backpack, consider a compact travel medical kit that balances completeness with ease of transport.
By integrating both thoughtful electrical upgrades and practical emergency preparedness, your kitchen becomes a hub where creativity and safety coexist. Take the next step: evaluate your current setup, make any needed improvements, and enjoy the peace of mind that comes from a space designed for both delicious meals and confident handling of the unexpected.

Hi, I’m Daniel Brooks—a food lover and kitchen gear enthusiast. I enjoy testing cookware, utensils, and gadgets to see what really works in everyday cooking. At PlugChef.com, I share honest reviews, comparisons, and simple guides to help you choose the best tools for a safer, smarter, and more enjoyable kitchen.
Similar Posts