
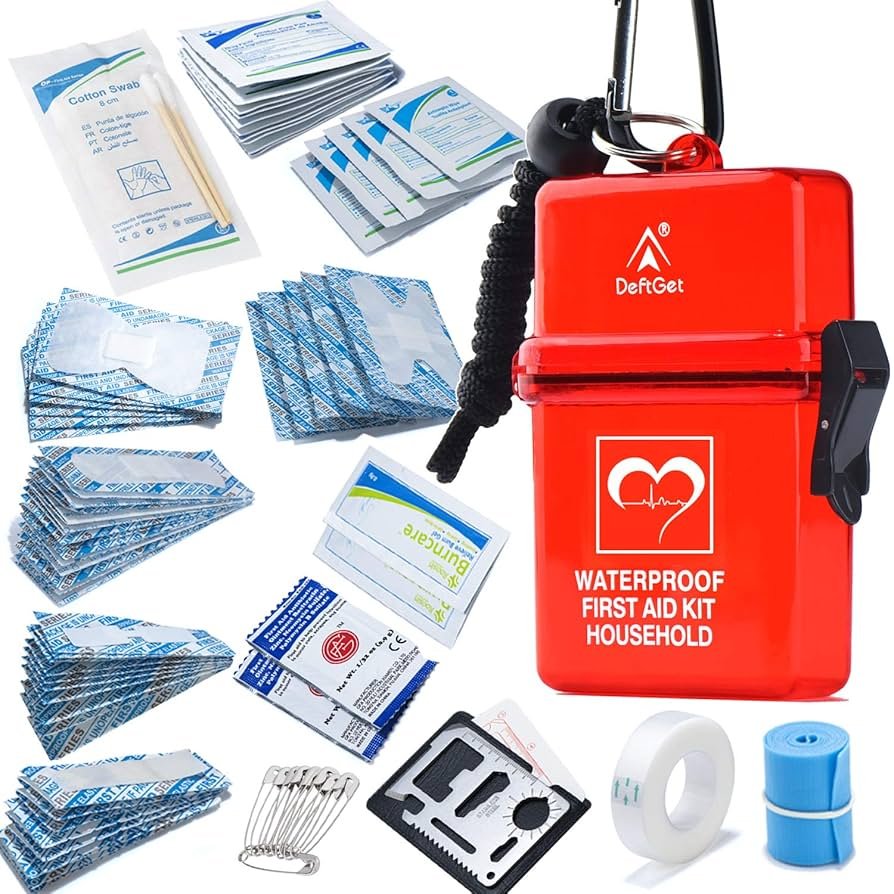
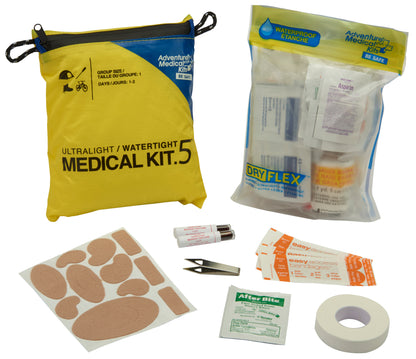
As ultralight backpacking has surged in popularity in recent years, many hikers mistakenly strip their first aid kits to save a few ounces, leaving them unprepared for common trail injuries. A properly built lightweight backpacking first aid kit balances minimal weight with full coverage for the risks you’ll actually face on the trail, tipping the scales at just 8 to 12 ounces for solo hikers and 12 to 16 ounces for groups, with zero unnecessary bulk. Unlike generic store-bought kits packed with irrelevant supplies, a custom-built kit prioritizes trail-specific needs: blisters, tick bites, sprains, and minor cuts, which make up the majority of non-fatal hiking-related medical incidents. With a few simple adjustments, you can carry all the safety gear you need without adding extra weight to your pack.
Why Generic Store-Bought Kits Fall Short for Backpacking
Pre-assembled first aid kits are designed for home or car use, not the unique demands of the trail. Most are packed with irrelevant items like burn gel, oversized splints, and bulky gauze rolls that you will never need on a day hike or multi-day backpacking trip, while missing critical trail-specific supplies like tick removers, hydrocolloid blister pads, and water purification tablets for wound cleaning in remote areas. Their hard plastic cases also add unnecessary weight and can crack if dropped or exposed to extreme temperatures. Instead of buying a pre-made kit and cutting it down, start with an empty lightweight waterproof pouch and add only the supplies you will actually use, tailored to your trip’s length, terrain, and your personal health needs. This approach eliminates dead weight while ensuring you are prepared for the risks you are most likely to encounter.
Core Non-Negotiable Supplies (Total Weight: 6–8 oz for Solo Trips)
 This waterproof roll-top pouch keeps supplies dry even in wet trail conditions.
Credit: www.gossamergear.com
The core of your lightweight first aid kit should cover 90% of common trail injuries, with no extra filler. For solo day hikes, you can get away with just 6 to 8 ounces of supplies; multi-day hikers and group leaders should scale up slightly to account for longer trip lengths and multiple users. For evidence-based wound care guidance, follow protocols from the American Red Cross first aid guidelines, which recommend cleaning wounds with antiseptic wipes before applying a dressing to reduce infection risk.
This waterproof roll-top pouch keeps supplies dry even in wet trail conditions.
Credit: www.gossamergear.com
The core of your lightweight first aid kit should cover 90% of common trail injuries, with no extra filler. For solo day hikes, you can get away with just 6 to 8 ounces of supplies; multi-day hikers and group leaders should scale up slightly to account for longer trip lengths and multiple users. For evidence-based wound care guidance, follow protocols from the American Red Cross first aid guidelines, which recommend cleaning wounds with antiseptic wipes before applying a dressing to reduce infection risk.
Wound Care Essentials
Wound care supplies make up the bulk of your kit, but you can minimize weight by choosing compact, single-use options. Pack adhesive bandages in multiple sizes, including knuckle and fingertip-specific designs for trail use, plus sterile non-adherent gauze pads (2×2 and 4×4) that can be cut to size to cover larger cuts or abrasions. Add single-use packets of antibiotic ointment and alcohol-free antiseptic wipes (safer for sensitive skin, and less likely to cause stinging on open wounds) to clean injuries before dressing them. A small tube of liquid bandage is a lightweight, space-saving alternative to traditional bandages for small cuts that won’t stay covered by adhesive strips, especially in wet or sweaty conditions.
Medications and Pain Relief
Pain relief and preventive medications are critical for keeping minor issues from turning into full emergencies. Pack 10 to 15 blister packs of ibuprofen (for inflammation from sprains, headaches, or muscle soreness) and acetaminophen (for pain relief without stomach upset, ideal for hikers with sensitive stomachs). Add a 10-count blister pack of antihistamines to treat insect stings, allergic reactions to poison ivy or oak, and seasonal allergies that can worsen at higher elevations. For multi-day hikes, include a small pack of anti-diarrheal medication, which is one of the leading causes of emergency evacuations on long trails, and electrolyte tablets to treat dehydration and heat exhaustion. Store all medications in a labeled, waterproof zippered pouch to keep them dry and easy to identify.
Trail-Specific Tools
The right tools let you address injuries quickly and safely, without adding bulk to your pack. Choose fine-tip titanium tweezers, which are lighter and rust-proof for wet conditions, to remove splinters, ticks, and debris from wounds. To reduce your risk of tick-borne illnesses, use fine-tip tweezers to remove attached ticks as close to the skin’s surface as possible, following CDC tick removal guidance to avoid leaving mouthparts embedded in the skin. Pack small medical-grade scissors with blunt tips to cut bandages, tape, or moleskin without piercing your pack or injuring yourself. Add two pairs of powder-free nitrile gloves (allergy-friendly, and more durable than latex) to protect both you and anyone you assist from infection, plus 1 to 2 N95 masks for use during wildfire smoke events or if you need to perform CPR on a fellow hiker. A compact digital thermometer, a few assorted safety pins, and a small roll of adhesive tape round out your tool supply, with all items weighing less than 2 ounces total.
Customize Your Kit for Your Trip and Personal Needs
A one-size-fits-all first aid kit will always have gaps for your specific adventure. Tailoring your supplies to your trip’s details and your personal health needs ensures you are prepared without carrying extra weight.
Adjust for Trip Length and Group Size
For solo day hikes, you only need the bare minimum core supplies listed above. Multi-day backpackers should add extra blister care supplies: 3 to 5 hydrocolloid pads and a small roll of leukotape, which can also be used to repair torn gear or secure splints in a pinch. Group leaders should carry 2x the standard supply count for every 2 people in your group, plus a 4×4 sterile trauma pad to treat larger wounds that would require more gauze than a standard bandage. If you are hiking in bear country, add bear spray to your kit (stored in an accessible external pocket) as a safety measure, not just for wildlife encounters but for any threatening situation on the trail.
Account for Personal Health Requirements
Your personal health history is the most important factor in customizing your kit. If you have prescribed medications (like an epinephrine auto-injector for severe allergies, insulin for diabetes, or an inhaler for asthma), pack them in a clearly labeled, waterproof pouch at the top of your kit for quick access. If you have a history of ankle sprains, add a small elastic bandage for extra support on uneven terrain. If you are hiking with children, pack children’s pain reliever, children’s antihistamine, and a few fun-themed bandages to keep them calm if they get injured. If you are hiking with a dog, pack extra supplies for paw pad cuts and tick removal, and store their food in a secure dog food container to keep it safe from wildlife.
Packing and Organization for Quick Access and Minimal Bulk
How you pack your first aid kit is just as important as what you put in it. A well-organized kit lets you find supplies in seconds during an emergency, even if you are injured or panicking.
Compact Storage Solutions
Skip hard plastic cases, which add unnecessary weight and can crack if dropped. Instead, use a lightweight 4×6 inch ripstop nylon or silicone roll-top pouch, which is waterproof, crush-proof, and weighs less than 1 ounce. Sort your supplies into small resealable pouches by category: wound care, medications, and tools, so you don’t have to dig through every item to find what you need. Cut gauze and tape to size before packing to eliminate bulk, and opt for single-use packets instead of full-size bottles or tubes to save space and prevent leaks. For multi-day hikes, pack pre-portioned snacks in reusable food storage containers to keep your energy up and reduce your risk of fatigue-related injuries.
Accessibility Best Practices
Store your first aid kit in an external backpack pocket or attached to your hip belt, so you can access it without taking off your pack. Keep the most frequently used items (antiseptic wipes, blister pads, pain relievers) on top of the pouch, so you don’t have to fumble for them when you are injured. Label each sub-pouch clearly with a permanent marker, using simple terms like “wound care” or “meds” so you can identify supplies quickly even in high-stress situations. A common mistake hikers make is stuffing their first aid kit at the bottom of their pack, which adds precious seconds to response time in an emergency.
 Sorted pouches let you find supplies fast during an emergency, even if you’re injured.
Credit: www.amazon.com
Sorted pouches let you find supplies fast during an emergency, even if you’re injured.
Credit: www.amazon.com
 Storing your kit on your hip belt lets you access supplies without removing your pack.
Credit: www.amazon.com
Storing your kit on your hip belt lets you access supplies without removing your pack.
Credit: www.amazon.com
Maintenance and Restocking to Keep Your Kit Reliable
A first aid kit is only useful if all its supplies are in good condition and ready to use. Regular maintenance takes less than 10 minutes per trip, and ensures your kit is always prepared for emergencies.
Pre-Trip Checks
Two weeks before every hike, go through every item in your kit: check expiration dates on all medications, antiseptic wipes, and ointments, and replace any expired supplies immediately. Test your digital thermometer to make sure it works, and restock any blister pads, bandages, or medications you used on your last trip. Keep a simple checklist on your phone to make sure you don’t forget any critical items, and double-check that your kit is stored in an accessible spot in your pack before you leave home. For multi-day hikes, use leak-proof food storage containers to pack pre-portioned meals, so you don’t have to ration food and risk energy crashes on the trail.
Post-Trip Care
After every hike, immediately replace any supplies you used, even if it’s just one bandage or a single dose of pain reliever. Wipe down reusable tools like tweezers and scissors with antiseptic, and air out the pouch to prevent mold if it got damp from rain or sweat. Store your kit in a cool, dry place away from direct sunlight, which can degrade medications and wound care supplies over time. If you notice any damaged packaging or expired items, replace them right away so you don’t have to scramble before your next trip.
Critical First Aid Skills to Pair With Your Kit
A first aid kit is useless if you don’t know how to use the supplies inside it. Before your next hike, practice these four core skills to reduce risk and improve outcomes in an emergency:
- Wound cleaning and dressing: Learn how to properly clean a cut with antiseptic wipes and apply a bandage to prevent infection, the most common trail-related medical complication.
- Blister treatment: Practice applying hydrocolloid pads or leukotape to hot spots before they turn into open blisters, which are a leading cause of hikers having to cut their trips short.
- Sprain stabilization: Learn how to wrap an elastic bandage around a sprained ankle or wrist to reduce swelling and prevent further injury.
- Tick removal and identification: Practice removing ticks with fine-tip tweezers, and learn to recognize early symptoms of tick-borne illnesses like Lyme disease, which can be treated effectively if caught early. Many outdoor organizations offer free or low-cost wilderness first aid courses that cover these skills and more, and are well worth the investment for frequent hikers. Packing a reliable kitchen knife (stored securely in your pack) can cut moleskin and tape to size quickly if you need to adjust your blister care on the trail.
Emergency Preparedness Beyond the Kit
Your first aid kit is just one part of a larger trail safety plan. Before you leave for your hike, share your full itinerary and expected return time with a trusted contact, so they can alert emergency services if you don’t check in as planned. Carry a physical map and compass as a backup to GPS, which can fail or run out of battery in remote areas. If you are hiking in very remote regions with no cell service, consider carrying a personal locator beacon (PLB) or satellite messenger, which can alert rescuers with the press of a button even when you have no signal. Before you start your hike, note the location of the nearest ranger station or medical facility to your trailhead, so you know where to go if you need professional care. For multi-day backpacking trips, large-capacity food storage containers can hold bulk supplies like extra gauze, medications, and snacks without taking up extra space in your pack. Opt for BPA-free food storage containers to pack trail snacks, so you don’t have to worry about chemicals leaching into your food if the containers get hot in the sun.
Frequently Asked Questions
What essentials should a lightweight backpacking first aid kit include?
At a minimum, your kit should cover wound care (adhesive bandages in multiple sizes, sterile gauze, antiseptic wipes, antibiotic ointment), pain and allergy relief (ibuprofen, acetaminophen, antihistamines), blister treatment (hydrocolloid pads or leukotape), and basic tools (fine-tip tweezers, small scissors, nitrile gloves, safety pins). Add trip-specific items like anti-diarrheal medication for multi-day hikes or an epinephrine auto-injector if you have severe allergies. Avoid packing items you won’t use, like burn gel or splints, which add unnecessary weight.
How do I keep my first aid kit lightweight yet effective?
Prioritize multi-use items (like leukotape, which can treat blisters, secure bandages, and repair torn gear) and opt for single-use packets instead of full-size bottles or tubes. Cut gauze and tape to size before packing to eliminate bulk, and only add supplies tailored to your trip’s length, terrain, and your personal health needs. A well-built ultralight kit for a solo day hike will weigh less than 8 ounces, while a multi-day group kit will top out at 16 ounces with no extra filler.
Why is a lightweight first aid kit important for backpacking?
Carrying excess weight on the trail increases your risk of fatigue, sprains, and heat exhaustion, so trimming non-essential items from your first aid kit reduces your overall pack load without leaving you unprepared. A lightweight kit is also easier to access quickly in an emergency, and takes up minimal space in your pack, leaving room for critical gear like shelter and water filtration. Many hikers carry 20% less weight by switching from a generic store-bought kit to a custom lightweight build.
How often should I update my backpacking first aid kit?
Do a full review of your kit 2 weeks before every trip, checking expiration dates on all medications and ointments, replacing used or damaged supplies, and restocking items you used on your last hike. After each trip, immediately replace any supplies you used, even if it’s just one bandage, to ensure your kit is always fully stocked for your next adventure. Store your kit in a cool, dry place away from direct sunlight, which can degrade medications and wound care supplies over time.
Conclusion
A lightweight backpacking first aid kit is one of the smallest, most impactful pieces of safety gear you can carry on the trail. It eliminates the trade-off between pack weight and emergency preparedness, ensuring you are ready to address minor injuries before they turn into serious problems. By tailoring your supplies to your specific trip, prioritizing multi-use and compact items, and pairing your kit with basic first aid skills, you can stay safe on any adventure without being weighed down by unnecessary bulk. If you’re planning your next backpacking trip, take 10 minutes this week to build or update your lightweight first aid kit — it’s the smallest, lightest piece of gear that could make the biggest difference in an emergency.

I’m Abby Lu, a passionate home cook who loves simplifying everyday meals. At PlugChef.com, I share product reviews and cooking guides to help you find the best tools for your kitchen.
Related posts:
 Is Nylon Cooking Utensils Safe? Unveiling the Truth
 Is Bamboo Good for Cooking Utensils: Discover the Benefits
 Can You Cut Raw Meat on a Wood Cutting Board Safely?
 Harbor Freight First Aid Kit: Essential Safety Gear for Emergencies
 First Aid Kit Supplies Refills: Essential Items You Must Restock
 10 Person First Aid Kit: Essential Gear for Emergencies

