How to Build End Grain Cutting Board: Step-by-Step Guide
Building an end grain cutting board from scratch is one of the most satisfying woodworking projects you can tackle. The result is a dense, checkered cutting surface that is gentler on blade edges, more resistant to scoring than face-grain boards, and a piece you can be proud to display on any countertop. While the technique requires a table saw, quality clamps, and an afternoon or two of focused work, the process is entirely within reach of a confident beginner — provided you move at your own pace and don't rush the glue-up.
This guide walks you through every stage: selecting wood, planning your pattern, making the cuts, layering and clamping, sanding, trimming, and sealing. I'll also cover the finishing products that are genuinely food-safe in 2026, how to maintain your board for years of service, and the mistakes that trip up most first-timers. For more on this, see our guide on cooking concepts bamboo cutting board.
By the time you finish reading, you'll have a clear roadmap from raw lumber to finished board.
Credit: www.thenavagepatch.com
Why End Grain? Understanding the Advantage
Before you cut a single board, it helps to understand why the end grain layout is worth the extra work compared to a simpler butcher block or face-grain board. In an end grain board, the wood fibers are cut perpendicular to the cutting surface, meaning each chop drives your knife edge between the fibers rather than slicing across them. The fibers compress slightly and close behind the blade, leaving far fewer visible scars than a traditional board where the grain runs parallel to the surface.
This design also distributes cutting forces evenly across the board, which reduces the chance of splitting and extends the board's useful life. In practice, an end grain board used daily for several years may still have surface imperfections, but they are shallow and largely cosmetic. A face-grain board used the same way will eventually score deeply and may require resurfacing — sanding away the damaged layer and reapplying the finish. For more on this, see our guide on do titanium cutting boards dull knives.
The trade-off is cost and labor. An end grain board requires more lumber, more precise cutting, and a significantly longer glue-up session than a simpler board. But if you plan to use the board heavily, the longevity pays for itself.
Materials and Tools
Wood Selection
The wood you choose directly determines your board's appearance, cutting performance, and stability. All boards require hardwoods — dense, broadleaf species with tight grain that resist moisture absorption and blade damage. Here are the most popular options:
| Species | Color | Hardness (Janka, lbf) | Notable Trait |
|---|---|---|---|
| Hard Maple | Cream to pale tan | 1,450 | The gold standard; tight, predictable grain |
| Black Walnut | Chocolate brown | 1,010 | Dramatic contrast; slightly softer than maple |
| Cherry | Warm red-brown | 950 | Darkens over time; very stable |
| Sycamore | Light with dark flecks | 760 | Affordable; less durable than maple |
| Hickory | Tan with dark streaks | 1,820 | The hardest option; strong visual contrast |
What to avoid: Softwoods (pine, fir, cedar), any wood with a natural oil that leaches into food, or exotic species with known toxicity concerns. The FDA and the American Wood Council both recommend using hardwoods that are food-safe and sustainably harvested. For a reliable supply, kiln-dried lumber from a local lumber yard or a home improvement center is ideal. Look for boards rated "FSC-certified" if sustainability matters to you. For more on this, see our guide on vintage military first aid kit.
A common mistake is buying lumber that is visibly green (high moisture content) or that has prominent knots. Knots are weak points that can loosen over time, and high-moisture wood will move, crack, or split as it dries. Ask your supplier for kiln-dried stock with a moisture content of 6–8%.
Adhesives and Hardware
| Item | Recommended Product/Spec | Why It Matters |
|---|---|---|
| Wood glue | Titebond III (waterproof, FDA-compliant for indirect food contact) or equivalent PVA glue | Holds through moisture exposure; rated water-resistant |
| Bar clamps | At least 6–8, sized to span the full board width | Even pressure prevents gaps during glue-up |
| Caution tape or banding | Ratchet band clamps or banded pipe clamps | Holds the entire assembly while bar clamps handle individual points |
| Dowels or biscuits | ⅛" dowels, placed every 2–3 inches along joints | Prevents vertical shifting between layers |
| Corner blocks | Scrap wood pieces placed inside and outside the assembly | Prevents side-to-side movement during clamping |
If you're on a budget, basic PVA wood glue (Titebond Original or Gorilawood) works fine for a board that won't be regularly washed with water. But for a board that will sit in a kitchen sink or be hosed down, Titebond III or an equivalent waterproof PVA is the safer choice. For more on this, see our guide on marine first aid kit contents list.
Tools You'll Need
Essential:
- Table saw (with a sharp 8-tooth-per-inch or 10-tooth-per-inch crosscut blade)
- Random orbital sander
- Hand sanding blocks (closed-celled foam or cork)
- Tape measure (at least 25 feet)
- Square (a carpenter's square or combination square)
- Pencil or marking knife
- Clamps (minimum 8 bar clamps for a standard board)
Helpful:
- Miter saw (for angled designs like herringbone)
- Router with a rounding-over bit (for edge finishing)
- Spokeshave (for fine edge work)
- Dust collection or vacuum attachment for sanding
If you don't own a table saw, you have two practical options. First, you can rent one from a hardware store for about $30–$50 per day. Second, you can use a circular saw with a straightedge guide and a hand plunge router to make straight cuts — it's slower and less precise, but workable for a beginner who doesn't mind an extra day of work.
Choosing the Right Wood Species
Wood selection is where your board's personality takes shape. You don't have to limit yourself to a single species — mixing woods is one of the most rewarding aspects of end grain construction. For more on this, see our guide on empty first aid kit box.
Hardwood vs. Softwood
Hardwoods are always the right choice. They are denser, more dimensionally stable, and more resistant to knife damage than softwoods. A softwood like pine will scar deeply, absorb moisture unevenly, and can release resins that affect food flavor. Never use a softwood for a cutting board.
Understanding Grain Orientation
This is the critical distinction that separates an end grain board from every other board type:
- Face grain: The wood is laid so the wide, flat side of the board faces up. Most butcher blocks and slab boards are face grain. They are simpler to build but score more easily.
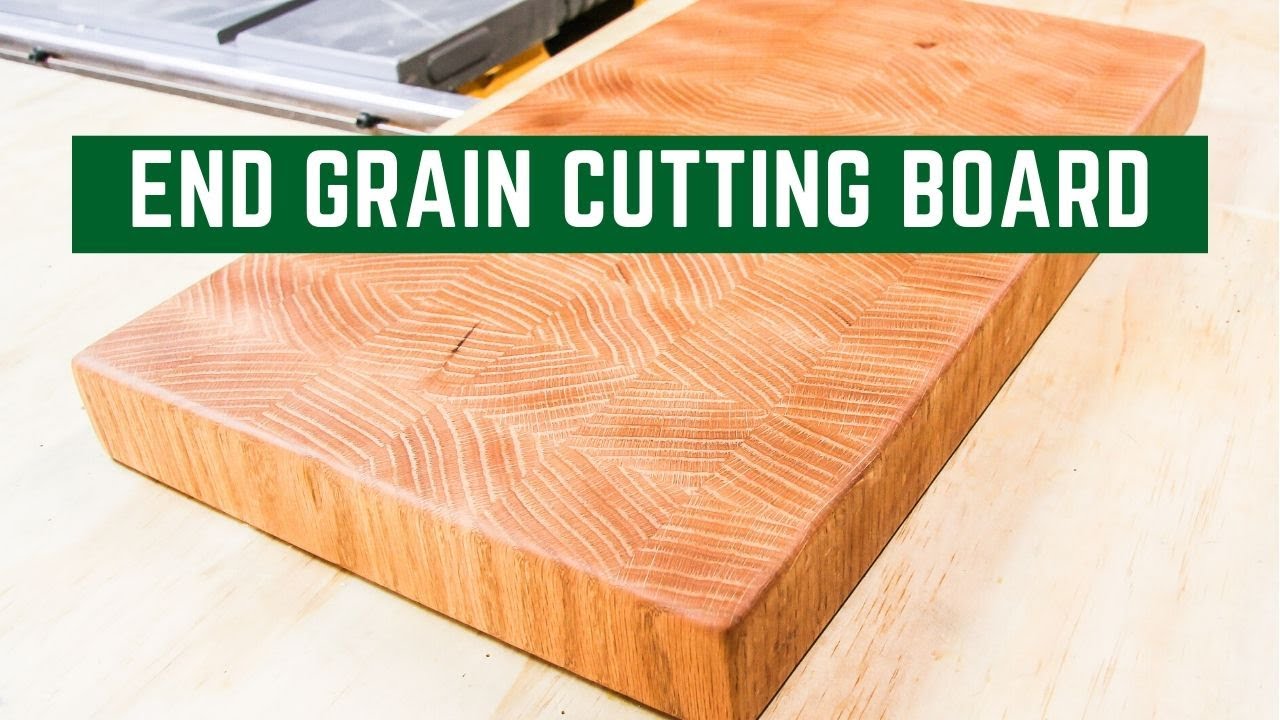
- End grain: The wood is cut into strips and stood on end, so the cross-section of each strip (the "end") faces up. This creates the signature checkerboard pattern. The board absorbs blade impacts between the fibers, making it gentler on your knives.
- Edge grain: The wood is cut so the narrow edge faces up. It's stronger than face grain in resisting end-to-end splits, but still scores more than end grain.
An end grain board is essentially a mosaic of wood end faces. The visual pattern depends on how you cut and arrange those strips.
Color, Pattern, and Contrast
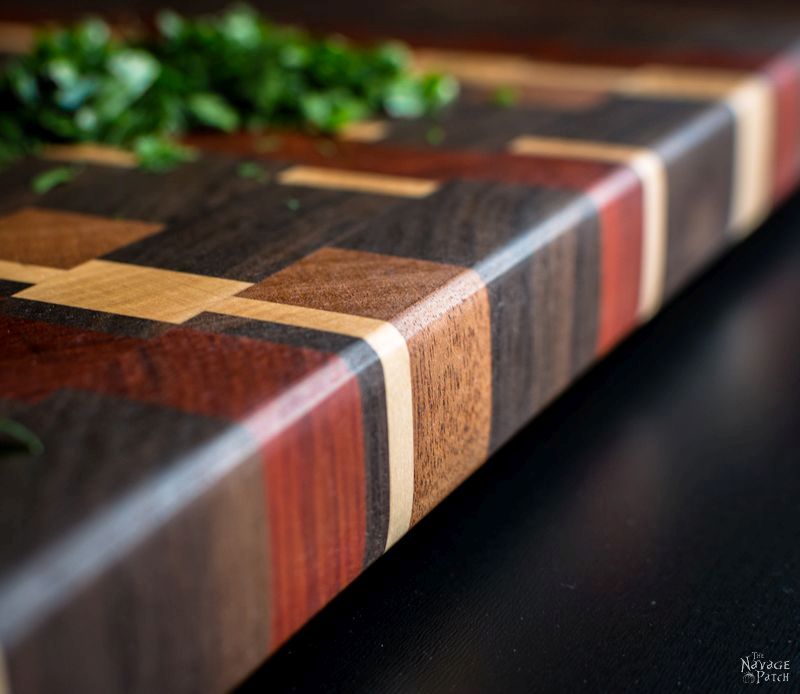
Maple's pale, clean appearance is the traditional choice for professional kitchens. Walnut adds dramatic dark contrast. Cherry starts light and warms to a deeper reddish-brown with age and light exposure. Hickory offers bold, near-black streaks against a golden background.
Most end grain boards use two or three species arranged in a checkerboard or stripe pattern. For example:
- Alternating maple and walnut strips create a classic black-and-white checkerboard
- A three-species rotation (maple, walnut, cherry) creates a rainbow striping effect
- A single-species board in pure hard maple has a minimalist, understated look
Toxicity and Food Safety
A few wood species contain natural compounds that are irritating or potentially harmful. Avoid these entirely for cutting board use:
- Teak (tannins can irritate skin and stain food)
- Osage orange (toxic sap)
- Redwood (contains compounds that may leach)
- Any exotic hardwood you cannot verify as food-safe
For peace of mind, the Food and Drug Administration provides guidance on food contact substances — if in doubt about a species, look for explicit food-safety clearance before purchasing. Common species like maple, walnut, cherry, and sycamore are well-established as safe for kitchen use.
Sustainability
If sustainability matters, look for FSC-certified lumber. The Forest Stewardship Council sets standards for responsible forest management, and FSC-certified stock is available at most lumber yards and some big-box retailers. Maple and walnut are both sustainably harvestable species when sourced from well-managed forests. Bamboo is sometimes marketed as a cutting board material — it's fast-growing and renewable, but true bamboo cutting boards are typically face grain or woven mat style, not true end grain.
Design and Layout Planning
Good planning is what separates a well-proportioned board from a frustrating, misaligned mess. Take your time here — the layout decisions you make now become permanent once the glue cures.
Determining Board Size and Thickness
Before you select or cut a single piece of wood, decide the board's final dimensions:
- Width: 12–16 inches is standard for a kitchen workhorse. Smaller boards (8–10 inches) are easier to store and clean; larger boards (18+ inches) offer more workspace.
- Length: 16–24 inches is typical. A longer board is better for rolling out pastry or arranging charcuterie; a shorter board is easier to handle.
- Thickness: 1.5 to 2 inches is the sweet spot. Thinner boards (1–1.25 inches) are lighter but less durable and more prone to warping. Boards thicker than 2.5 inches are heavy and difficult to lift, and they use significantly more glue and lumber.
- Shape: Square, rectangle, round (with rounded edges), or oval. Straight rectangles are the easiest to cut and assemble.
Choosing Your Pattern
The pattern is the visual language of your board. Here are the most common options, ranked by difficulty:
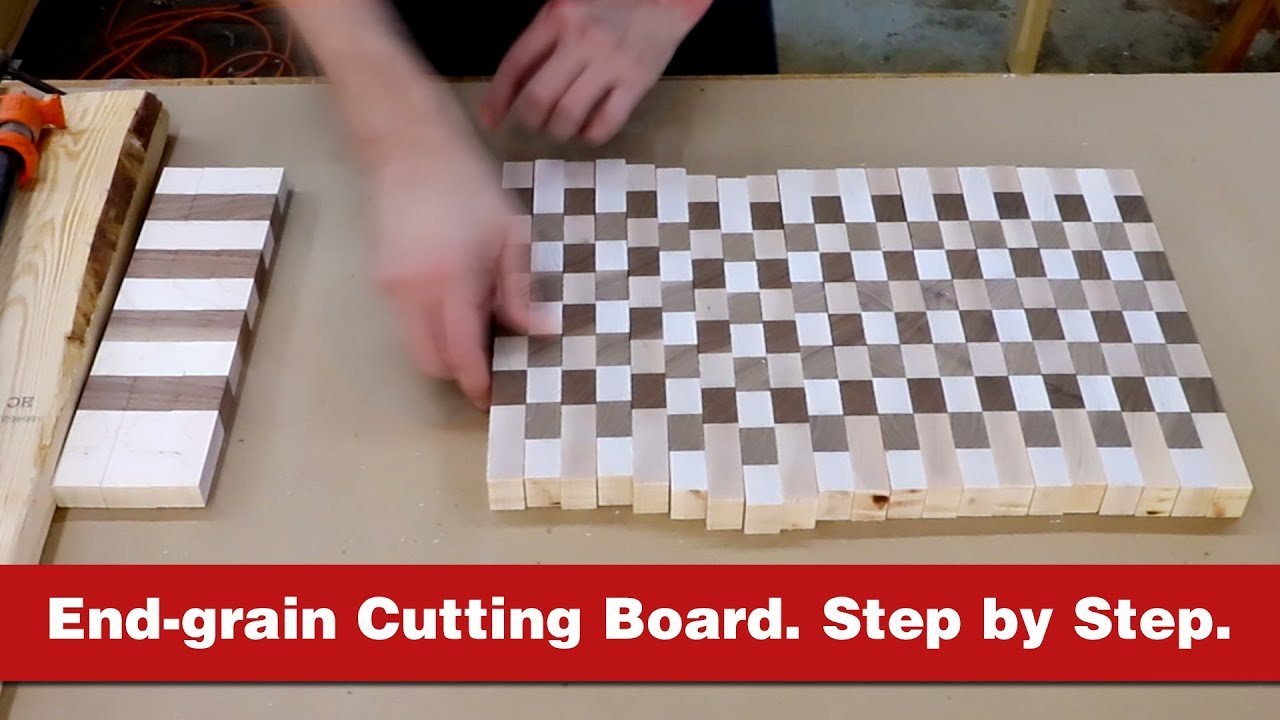
Checkerboard (beginner-friendly): Alternating strips of two wood species in a grid. This is the most classic end grain pattern and the easiest to get right. Each row is a sequence of contrasting strips laid flat and glued, then sliced crosswise and stacked to create the checkerboard effect.
Striped (beginner-friendly): Parallel rows of a single wood species, each row a different color. Cut rows of each species flat, glue each row, then stack the rows on top of each other perpendicular to the previous layer.
Basket weave (intermediate): A woven pattern where strips are oriented perpendicular to each other in alternating groups. Requires more precise cutting and careful alignment during assembly.
Herringbone (advanced): Diagonal strips at 45-degree angles create a zigzag pattern. This requires a miter saw or the ability to make precise angled cuts on a table saw with a miter gauge.
Hexagon (advanced): Hexagonal blocks are milled from stock and fitted together in a honeycomb layout. This is the most labor-intensive pattern and requires precise angular cuts. It's typically done with a CNC router or extremely careful hand work.
For a first board, a two-species checkerboard is the ideal starting point. It teaches you every essential skill (cutting, gluing, clamping, sanding) without adding the complexity of angled cuts or multiple species in close rotation.
Planning the Layer Stack
An end grain board is built in layers — typically two to four layers of individual strips stacked and glued together. Before cutting anything, sketch your pattern on paper:
- How many layers do you want? (Most boards have 2–4 layers; a typical 1.5-inch thick board will have roughly 3–4 layers of 0.5-inch strips)
- How many strips per layer? (Depends on your board width and strip width)
- What species will go in which layer? (Alternate colors to maximize contrast)
- What is the final board height? (Sum of all layer thicknesses after sanding)
A simple sketch on graph paper will help you visualize the final result and catch mistakes before you make them. A common beginner error is planning too few strips for the board width, resulting in a board that is too thick or strips that are too wide and prone to warping.
Cutting the Wood Pieces
Precision cutting is the foundation of a well-built board. Mistakes here will be visible in the final assembly and can cause gaps, uneven surfaces, and weak glue joints.
Preparing the Lumber
Before cutting, inspect each board carefully. Reject any piece with:
- Visible knots or insect galleries
- Cracks or splits
- Warping or cupping (the board curves when you lay it flat)
- Staining or discoloration
- Boards with a moisture meter reading above 10%
Kiln-dried lumber from a reputable supplier should pass these checks. If you're buying from a hardware store, ask for "killed" or "dried" stock and inspect each board under good light.
Making Crosscuts
The process involves two cutting stages:
Step 1: Cut strips from the boards
Using a table saw with a crosscut blade:
- Set your rip fence to the desired strip width (typically 1.5–2.5 inches for a standard board).
- Make test cuts on scrap wood to verify your blade height and fence accuracy.
- Set the blade height so the teeth extend just slightly above the board surface.
- Make all strips in a single species at once. Label each pile.
- Cut all strips to the desired board length using a miter gauge or crosscut sled.
A sharp blade is non-negotiable. A dull blade will tear wood fibers instead of slicing cleanly, leaving ragged edges that don't seat tightly during glue-up. Replace or sharpen your blade if you see tearing, splintering, or burning on the cut surface.
Step 2: Glue strips into flat rows
Glue the strips together into flat rows:
- Sand the joint edges flat and smooth using a hand sander or sanding block. The edges should be square and flat — any cupping will create gaps.
- Apply a thin, even layer of glue to each edge using a glue brush or a disposable plastic spatula. Avoid excess glue; it will squeeze out unevenly and create mess during clamping.
- Stack the strips, tapping them into alignment with a mallet.
- Clamp the row using bar clamps at regular intervals (every 4–6 inches). Use corner blocks if your rows are long.
- Wipe away excess squeeze-out immediately with a damp cloth while it's still wet.
- Let the row cure for at least 24 hours before proceeding.
Quality Control After Cutting
Before moving to the next stage, inspect every piece:
- Check each strip for straight, square edges using a combination square.
- Look for any torn or splintered edges and sand them smooth.
- Verify the length of each strip — they should all be the same length for a clean assembly.
- Make sure the rows are square (the corners should be at 90-degree angles).
Any pieces with visible defects should be cut down or discarded rather than used in the assembly. It's better to buy a bit more wood than to compromise on the final result.

Credit: www.instructables.com
Assembling the End Grain Layers
Now that your flat rows are glued and cured, it's time to assemble them into the full board. This is the step that most impresses beginners — the flat rows become a checkered block in a matter of minutes.
Laying Out the Pattern
The pattern is built by stacking rows perpendicular to each other:
- Lay the first row flat on a stable, clean surface.
- Place the second row on top, rotated 90 degrees so its strips run perpendicular to the first row.
- Continue stacking rows in alternating directions, rotating each one 90 degrees.
- Alternate wood species to maximize contrast (e.g., maple row, walnut row, maple row, walnut row).
For a classic checkerboard with two species, use equal-width rows of each species, alternating them. The strips within each row should be the same width for a clean grid.
Pre-Assembly Alignment Check
Before applying glue, do a dry run:
- Stack all your rows in the correct order and orientation.
- Press down firmly to check for gaps. If any row sits unevenly, it means one of your strips is the wrong width or height.
- Verify that the overall block is square and that the layers align cleanly at the edges.
- Mark the outside edges with a pencil so you can trim to a clean square edge after gluing.
Gluing the Layers
This is where patience pays off. Each layer bond requires careful attention:
Apply glue to the top surface of each row using a glue brush or small plastic spatula. Work in sections — apply glue to the top row, add the next row, then apply glue to that top surface before adding the next. This prevents glue from drying before the next layer is placed.
Align each row carefully. Tap into place with a rubber mallet if needed. Press down firmly to compress the joint.
Clamp the entire assembly. Use a combination of bar clamps along the edges and a ratchet band clamp or pipe clamp to wrap around the outside. The goal is even pressure across the entire face of the board, not just at the clamps.
Wipe away squeeze-out immediately. Use a damp cloth to remove excess glue from the edges while it's still fresh. If it dries before you clean it, it will be difficult to remove and may leave visible ridges.
Let it cure for 24 hours. Resist the urge to check the bond before it's fully cured. A partially cured joint can shift and weaken.
Checking for Gaps
After the glue has fully cured, inspect the assembly:
- Run your finger across every joint line. Any gaps you can feel indicate that one strip didn't seat tightly.
- Look at the board from an angle under good light. Gaps will show as dark lines.
- For small gaps, you can fill them with a thin layer of glue and clamp the board again for a few hours.
- For large gaps, the affected strip(s) may need to be removed and re-cut. This is one of the frustrating parts of the project, so pay extra attention during the dry run.
Sanding and Smoothing
Sanding is where your board goes from a rough block to a finished surface. An end grain board requires more sanding attention than a face grain board because the end grain pattern creates a surface with peaks and valleys — the "ends" of each wood fiber are raised above the surrounding surface, and sanding is needed to level them.
Choosing the Right Grits
Progress through grits in this order:
| Grit | Purpose | Tool |
|---|---|---|
| 80 | Level the surface; remove major unevenness | Orbital sander |
| 120 | Remove 80-grit scratches; begin smoothing | Orbital sander |
| 180 | Refine the surface; close wood pores | Orbital sander |
| 220 | Final smoothing; prepare for finishing | Hand sander or block |
A critical technique for end grain: Because the end grain surface is not flat — it has a mosaic of fiber ends at slightly different heights — you need to sand slightly longer at each grit level than you would on a flat face grain board. The raised fibers need to be levelled with the surrounding surface. On a face grain board, sanding is more about removing sanding marks; on an end grain board, it's about actually cutting the wood to a uniform plane.
A random orbital sander is ideal because it moves the sandpaper in a random, non-directional pattern that reduces the risk of deep scratches. Hand sanding with a block is slower but gives you more control in tight corners and edges.
Sanding Technique
- Always sand in the direction of the wood grain for the final grits (180 and 220). For the initial coarse grits (80), the direction matters less because you'll be sanding it away at the next step.
- Apply even, moderate pressure. Too light and you'll spend excessive time leveling the surface; too heavy and you'll create uneven spots that require more sanding later.
- Keep the sander flat and let it do the work. Pressing down with an orbital sander can create divots.
- Frequently stop and run your hand over the surface to check for ridges or high spots. You don't want to sand down one section only to discover a raised section you missed.
- Pay special attention to the edges and corners, which tend to sand faster and can become rounded or thin if you're not careful.
Working in a Clean Environment
Sand in a well-ventilated area and wear a particulate respirator (N95 or better). End grain boards generate a fine dust that can be difficult to contain. Clean the board thoroughly between grits — sanding 120 grit over 80 grit dust will just embed the old grit into the surface and waste time.
A vacuum with a sanding attachment is ideal for removing dust between grits. If you don't have one, a shop vacuum or a dedicated dust collection system works well. Wiping the board with a tack cloth between grits is also helpful, though it only picks up the fine dust — the bulk of the debris should be vacuumed first.
Checking for Smoothness
When you've reached 220 grit, the surface should feel uniformly smooth to the touch. A good test is to place a drop of water on the surface — if the water beads evenly, the surface is smooth. If it pools in spots or runs off unevenly, there are still high and low areas that need more sanding.
Run your hand over the surface slowly and listen for any spots that feel like a "catch" — these are areas where the surface height changes abruptly. Sand those areas with a hand block using 220 grit until they are flush.
Credit: www.youtube.com
Trimming and Shaping
Sanding gives you a smooth surface, but the final aesthetic depends on how the edges are finished. A rough, square edge can make even a beautiful board feel unfinished.
Trimming to Final Dimensions
After sanding, the board's edges may be slightly oversized or uneven. Use a table saw to trim the edges square:
- Place the board flat on the saw table with the finished surface down.
- Align one edge with the rip fence.
- Make a single, careful pass to trim the edge to the final width.
- Repeat for each edge, working clockwise around the board.
- After trimming, the board should have clean, square edges and be the exact final dimensions.
If you don't have a table saw, a hand plane or a power router with a straight bit can trim the edges. A router is faster but requires more skill to control.
Rounding the Edges
Square edges are functional but sharp. Rounding the edges is both a safety improvement (reducing the chance of cuts while handling the board) and an aesthetic one. A common approach is to:
- Round the top edges: Use a router with a rounding-over bit (such as a ⅛" or ¼" round-over bit) to create a gentle convex curve along the top edges of the board. This creates a smooth transition from the flat cutting surface to the sides.
- Round the bottom corners: Use a slightly smaller rounding-over bit or a spindle sander to slightly round the bottom corners. This improves stability when the board is set down.
- Round the vertical edges: A hand sanding block or a round-over sander can soften the remaining sharp vertical edges.
The degree of rounding is a personal preference. A subtle ⅛" round-over looks professional without feeling overly decorative. A ¼" round-over is more comfortable to handle but makes the board slightly less stable when set down.
Beveling or Chamfering (Optional)
For a more refined look, you can add a small bevel or chamfer along the top edges — a 45-degree angle that is ⅛" wide. This creates a crisp, polished transition and is common on production cutting boards. It requires a router with a chamfer bit or careful hand work with a spokeshave.
Edge Finishing with a Spokeshave
For the tightest corners and any areas the router can't reach, a spokeshave is an excellent hand tool. It allows you to hand-shave wood to a precise contour. It takes practice to use well — the blade needs to be sharp and the tool needs to be angled correctly — but it produces a finish that power tools can't match. If you're serious about woodworking, a quality spokeshave is a worthwhile investment.
Applying the Finish
The finish is the last step, but it's also the most important for protecting your investment. A well-finished board will look great for years and resist moisture, staining, and odor absorption.
What Finishes to Use (and What to Avoid)
For food-contact surfaces, you have two main categories of finish:
Oil finishes (the standard for cutting boards):
Food-grade mineral oil is the most common choice. It penetrates the wood fibers, hydrating them and creating a water-repellent barrier. It is odorless, and non-toxic, making it safe for surfaces that come into direct contact with food. It won't go rancid or develop an off-putting smell, which is why many commercial cutting board makers specify it as their primary finish.
Pure tung oil is another popular option. It penetrates the wood and polymerizes into a hard, water-resistant film. Unlike mineral oil, it actually creates a protective layer on the surface rather than just saturating the fibers. It requires multiple coats (usually three to five) and longer drying times between coats (24 hours per coat). The result is a board that requires less frequent maintenance but has a more plastic-like surface than a pure oil finish.
Raffinate oil is a highly refined vegetable oil that acts similarly to mineral oil. It's an alternative for those who prefer a plant-based option.
Wax finishes:
- Beeswax is traditionally used alongside mineral oil. On its own, it doesn't penetrate the wood well, but it creates a smooth, protective surface layer that repels water. It's typically blended with mineral oil or tung oil for cutting boards.
- Carnauba wax is a plant-based alternative to beeswax. It is harder than beeswax and provides excellent water resistance. It is often combined with mineral oil for a more durable finish.
What to avoid:
- Polyurethane — while it creates a tough surface, it is not safe for food contact and will eventually crack or chip on a cutting board.
- Varnish, lacquer, and shellac — these form hard films that can flake off onto food and are not food-safe.
- Linseed oil — it can go rancid over time, developing a foul odor and taste.
- Wooden spoons or uncoated wood — these should never be placed on or used with your cutting board.
Preparing the Surface
Before applying any finish, make sure the board is completely clean and dry. Here's what to do:
- Vacuum the surface to remove any sanding dust. Dust trapped under an oil finish will create a gritty, uneven surface.
- Wipe with a tack cloth to pick up any remaining fine particles.
- Inspect the surface under good light to ensure there are no high spots or rough areas.
- Allow the board to acclimate to room temperature for at least 24 hours after sanding. Applying oil to a board that is cooler than room temperature can cause uneven absorption.
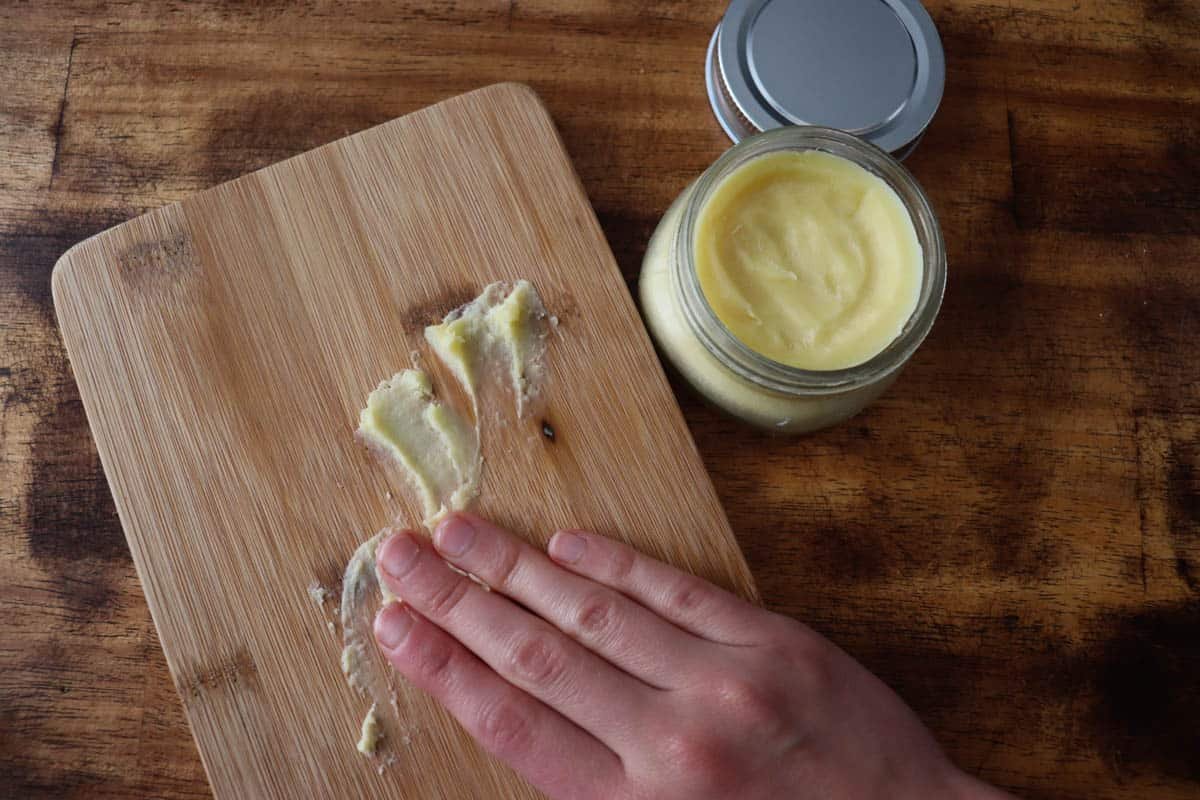
Applying Mineral Oil
- Shake the mineral oil well before use. The oil can separate, and agitating it ensures a consistent blend.
- Use a lint-free cloth — a microfiber cloth or an old cotton t-shirt works well. Avoid paper towels, which can leave fibers behind.
- Apply generously. Pour a few drops of oil onto the cloth and spread it across the entire surface of the board, including the edges and bottom. Work in a circular motion, ensuring even coverage.
- Let it soak in. Allow the oil to sit on the board for at least 15 to 20 minutes. The wood will darken as it absorbs the oil — this is normal and desirable. If the surface starts to look glossy or wet-looking, it's fully saturated.
- Wipe off the excess. After the soak time, use a clean portion of the cloth to wipe away any oil that hasn't been absorbed. Don't be afraid to wipe thoroughly — you don't want a slick, oily surface.
- Inspect the surface. The board should look slightly darker and feel smooth to the touch. If it still feels dry or chalky in some areas, apply another coat.
- Repeat as needed. End grain boards are thirsty and will typically absorb three to five coats of oil on the first application. Work through each coat methodically, wiping off excess and allowing at least 30 minutes between coats. Some woodworkers let each coat dry for 24 hours — this is ideal but time-consuming. For a first board, allowing 1–2 hours between coats is a reasonable compromise.
Creating a Beeswax-Mineral Oil Blend
For added water resistance and shine, you can create a custom blend:
Simple blend recipe:
- 1 cup of food-grade mineral oil
- 2–3 tablespoons of pure beeswax pellets (available at craft stores)
Method:
- Place the beeswax pellets in a heat-safe glass container.
- Heat gently in a double boiler (a glass bowl set over a pot of simmering water) until the wax is fully melted. Alternatively, use a microwave on low power in 15-second intervals, stirring between intervals.
- Pour the melted wax into the mineral oil and stir until fully dissolved.
- Let the mixture cool and solidify into a solid puck. When ready to use, melt the puck again in a microwave or double boiler.
Application:
- Apply the blend in the same way as mineral oil — with a lint-free cloth, in circular motions.
- Because the blend is thicker, it will feel slightly waxy on the cloth. Work it into the wood using light pressure.
- After 10–15 minutes, wipe off the excess.
- Let the board cure for at least 4 hours before use. The wax hardens as it cools, forming a protective film on the surface.
A beeswax blend is especially effective on the edges and corners of the board, where water tends to pool and soak in. Many woodworkers apply a pure oil finish to the top surface and a wax-blend finish to the sides and bottom for maximum protection.
Buffing for a Smooth Finish
Once the final coat is fully dry (typically after 2–4 hours), it's time to buff the board. Buffing polishes the surface and brings out a subtle sheen:
- Take a clean, dry cloth — microfiber works best.
- Wipe the surface of the board in circular motions with light pressure.
- Apply slightly more pressure on any dull or matte areas, but avoid scrubbing hard enough to remove the finish.
- Continue buffing until the board has a smooth, satin-like finish.
The goal is a surface that feels smooth and polished, not one that looks glossy like a varnished piece of furniture. End grain boards should have a natural, understated sheen — a "worn" look that shows the character of the wood.
Maintaining Your Cutting Board
A properly maintained end grain board can last for decades. The key is to treat it gently, clean it properly, and keep it well-oiled.
Daily Care
- Wash by hand. Never put a wooden cutting board in a dishwasher. Dishwasher detergent and high temperatures will dry out the wood, causing cracking and warping. Use warm water and a mild dish soap with a soft sponge or cloth.
- Rinse and dry immediately. Don't let the board sit wet. Wipe it down with a clean towel and let it air-dry completely before storing.
- Avoid soaking. Soaking wood causes it to swell and expand, which can lead to warping and splitting. If you need to scrub off something stuck on, use a soft brush or a non-abrasive pad — not prolonged soaking.
- Store upright. If possible, store the board leaning against a wall or in a vertical stand. This allows air to circulate around all sides and prevents moisture from pooling on the bottom.
Deep Cleaning
Every few months, or whenever the board picks up stubborn odors or stains, perform a deep clean:
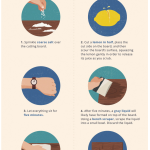
- Salt and lemon scrub. Sprinkle coarse kosher salt or coarse sea salt over the entire surface. Cut a lemon in half and squeeze juice over the salt, creating a paste. Use the cut half of the lemon to scrub the surface in circular motions. The salt acts as a mild abrasive and the lemon's acidity helps break down bacteria and odors.
- Let it sit for 15–20 minutes.
- Rinse thoroughly with warm water.
- Dry completely with a clean towel.
- Reapply mineral oil after deep cleaning, since the cleaning process removes some of the existing finish.
For stubborn stains (like from beet juice, turmeric, or coffee), make a paste of baking soda and water. Apply it to the stain, let it sit for 30 minutes, then scrub gently with a soft cloth. Baking soda is mildly abrasive and will lift surface stains without scratching the wood.
Regular Oiling Schedule
The frequency of re-oiling depends on how heavily you use the board:
| Usage Level | Re-oiling Frequency | Signs It's Time |
|---|---|---|
| Light (1–2 times per week) | Every 2–3 months | Surface feels dry to the touch |
| Moderate (3–4 times per week) | Every 4–6 weeks | Wood color appears faded |
| Heavy (daily use) | Every 2–4 weeks | Visible knife scars and dryness |
To determine if your board needs oil, rub your finger over the surface. If the wood feels dry, absorbs the moisture from your finger, or has a matte, chalky appearance, it's time for another coat. A well-oiled board will feel smooth and slightly waxy to the touch.
Handling Wear and Tear
Over time, knife scars will accumulate on the surface. Here's how to address them:
Minor scoring: If the knife marks are shallow and don't affect the board's structural integrity, leave them as is. They are normal wear and add character.
Deep scoring: If you prefer a smoother surface, you can lightly sand the board:
- Use 180-grit sandpaper on a hand sanding block.
- Sand gently in the direction of the grain (for end grain boards, this means sanding in multiple directions to smooth all the fiber ends).
- Work until the deep scars are removed and the surface is level.
- Wipe clean with a tack cloth.
- Reapply 2–3 coats of mineral oil.
This is a maintenance task, not a repair — you're not replacing the board, just refreshing the surface. Expect to do this every 1–3 years, depending on usage.
Long-Term Storage
If you're not using the board for an extended period (a month or more):
- Give the board a generous coat of mineral oil.
- Let it soak in overnight.
- Wrap the board in a clean cotton cloth or plastic grocery bag (loosely — don't seal it airtight, as this can trap moisture).
- Store in a cool, dry place away from direct sunlight and heat sources.
Do not store a wooden cutting board in a refrigerator or freezer. The temperature extremes and moisture will damage the wood.
Common Mistakes to Avoid
After building and using end grain boards for years, a few mistakes come up repeatedly among beginners. Avoiding them will save you time, lumber, and frustration:
Mistake 1: Rushing the glue-up. Cutting corners on glue cure time is the single most common mistake. A glue joint that has been clamped for only a few hours will not have reached its full strength. If the board shifts or the glue hasn't fully cured, you can end up with weak joints that fail under pressure. Always allow a full 24 hours before removing clamps.
Mistake 2: Using the wrong blade. A table saw blade designed for crosscutting (rip cutting) will tear wood fibers instead of slicing cleanly. The result is ragged, splintered edges that don't seat tightly during glue-up. Use a blade with at least 8 teeth per inch and a fine kerf. A 10-tooth-per-inch crosscut blade or a 10-inch thin-kerf blade with a positive rake angle is ideal.
Mistake 3: Skipping the dry run. A dry run — laying out all the rows without glue — catches alignment issues before they become permanent. Beginners who skip this step often discover that their strips don't line up, their rows are the wrong width, or their pattern looks different from what they expected. Ten minutes of dry assembly can save hours of re-cutting.
Mistake 4: Using too much glue. Excess glue squeezes out during clamping, creating a messy work area and potential hazards (glue on the floor can be slippery). It also leaves dried glue residue on the board edges that is difficult to remove. Apply a thin, even layer — enough to wet the surface, not enough to puddle.
Mistake 5: Sanding too aggressively. End grain boards need more sanding than face grain boards, but sanding too hard or too quickly can round off edges, thin the board unevenly, or create divots that are difficult to correct. Work slowly and check your progress frequently. Use your hand and your eye to judge the surface.
Mistake 6: Neglecting the bottom. Many beginners apply oil only to the top surface and forget the bottom and edges. The bottom is exposed to moisture just as much as the top (it absorbs condensation from the counter). Apply oil to all six sides of the board for complete protection.
Mistake 7: Buying the wrong wood. Using softwood or high-moisture-content lumber is a common rookie error. Always insist on kiln-dried hardwood. If you can't tell the difference, buy from a supplier who labels their stock as kiln-dried and specifies the moisture content.
Cost Estimates
Planning your budget in advance helps you decide whether to build or buy. Here's a rough breakdown for a standard 16x20x1.5 inch two-species end grain cutting board:
| Item | Estimated Cost | Notes |
|---|---|---|
| Hardwood lumber (3–5 board feet) | $40–$80 | Depends on species and supplier |
| Wood glue (1 quart) | $12–$18 | Reusable for future projects |
| Sandpaper (various grits) | $10–$15 | One-time cost if you don't already have it |
| Mineral oil (1 quart) | $8–$12 | Lasts for years |
| Beeswax pellets (optional) | $8–$12 | Optional blend |
| Total materials | $78–$137 | Varies by species and supplier |
Tool costs are a separate consideration. If you already own a table saw, orbital sander, and clamps, the only additional tool investment is a set of bar clamps (about $50–$100 for 8 clamps). If you need to rent tools, expect to add $50–$100 to your budget.
For comparison, a professionally made end grain cutting board of similar size typically retails for $100–$200+, with custom or artisan boards commanding higher prices. Building your own board is almost always less expensive than buying one of comparable quality.
FAQ
What is the best thickness for an end grain cutting board?
The ideal thickness for a kitchen workhorse is 1.5 to 2 inches. This range provides stability without making the board too heavy to lift. Thicker boards (2.5 inches and above) absorb more chopping impact and resist warping better, but they are heavy and expensive to build. Thinner boards (under 1.25 inches) are lighter but more prone to warping and less durable. For a first board, 1.5 inches is a good starting point.
What is the best wood for an end grain cutting board?
Hard maple is the traditional choice for professional kitchens because of its density, tight grain, and resistance to moisture. Black walnut is a popular alternative that adds dramatic color contrast and is slightly softer (easier to cut into with a knife). Cherry is another hardwood option that darkens beautifully over time. Avoid softwoods like pine, fir, or cedar — they score deeply, absorb moisture unevenly, and can release resins.
How much wood do I need for an end grain cutting board?
For a standard 16×20 inch board that is 1.5 inches thick, you'll need approximately 4 to 6 board feet of hardwood. This accounts for waste from cutting, sanding, and trimming. Always buy 20–30% more lumber than your calculations suggest, because you'll lose material to cuts, mistakes, and sanding.
How long does it take to build an end grain cutting board?
For a first-time builder, expect to spend 15–25 hours total, including planning, cutting, gluing, sanding, and finishing. Most of this time is spent waiting for glue to cure and oil to dry. The actual hands-on work takes about 10–15 hours, spread over 2–3 days. The process is slower than buying a board, but the satisfaction of using a board you built yourself is unmatched.
Can I build an end grain cutting board without a table saw?
Yes, but it requires more time and skill. You can use a circular saw with a straightedge guide and a router with a straight bit to make crosscuts. Alternatively, you can rent a table saw from a hardware store for about $30–$50 per day. Many woodworkers find that renting a saw is worth it for the precision and time savings. If you go the hand-tool route, expect to add at least 5–10 hours to your project and accept that the cuts will be slightly less precise.
How often should I reoil my cutting board?
For light use (1–2 times per week), reoil every 2–3 months. For moderate use (3–4 times per week), reoil every 4–6 weeks. For heavy use (daily), reoil every 2–4 weeks. The board will tell you when it needs oil — if the surface feels dry, looks faded, or feels chalky to the touch, it's time for another coat. A well-oiled board will have a smooth, slightly waxy feel.
Why does my end grain board have visible glue lines?
This usually happens for one of two reasons: the surfaces being glued were not flat and square (leaving gaps that are visible after the glue dries), or excess glue squeezed out and dried on the edges. To avoid this, always sand joint surfaces flat before gluing, and wipe away squeeze-out immediately while it's still wet. If you have visible glue lines after the fact, you can lightly sand the edges with 220-grit sandpaper to remove them.
Is it safe to use a cutting board that has knife scars?
Yes. Knife scars are a natural part of using a cutting board, and they do not indicate that the board is unsafe. Bacteria can grow on any surface — wood, plastic, or glass — if it is not cleaned properly. In fact, some research suggests that hardwoods have natural antibacterial properties, and wood can trap bacteria in the wood fibers where they are crushed and killed as the wood swells and contracts. The key is to wash the board thoroughly after each use and to reoil it regularly to prevent deep penetration of bacteria.
Can I use a food-safe finish on the bottom of my board?
Yes, and you should. The bottom of the board is exposed to moisture (condensation from the countertop, water from washing) just as much as the top. Applying mineral oil or a beeswax-blend finish to the bottom and edges provides complete protection and prevents the wood from drying out unevenly, which can cause warping.
What is the difference between end grain and edge grain cutting boards?
In an end grain board, the wood fibers are cut perpendicular to the cutting surface, so each chop drives the blade between the fibers. In an edge grain board, the narrow edges of the strips face up, so the blade cuts across the fibers. End grain boards are gentler on knife edges and score less than edge grain boards. Edge grain boards are slightly stronger in resisting end-to-end splits (important for very long boards) but score more easily.
How do I prevent my cutting board from warping?
Warping is caused by uneven moisture absorption. To prevent it:
- Keep the board's moisture content low by avoiding soaking and by storing it upright.
- Apply oil to all six sides of the board, not just the top.
- Store the board in a dry, well-ventilated area away from heat sources and direct sunlight.
- If the board does warp, you can often correct minor warping by soaking the concave side in water for a few hours, then clamping the board flat under weight for 24 hours. For severe warping, the board may need to be planed flat on a surface plane or disc sander.
Can I use a different finish besides mineral oil?
Yes, but mineral oil is the most commonly recommended finish for cutting boards because it is food-safe, easy to apply, and doesn't go rancid. Other safe options include pure tung oil (which creates a harder surface but requires multiple coats and longer drying times) and beeswax blends (which add water resistance). Avoid polyurethane, varnish, lacquer, and any finish that is not explicitly labeled as food-safe.
Is it safe to cut raw meat on an end grain cutting board?
Yes, as long as you clean the board thoroughly after each use. Bacteria from raw meat can be killed by washing the board with hot, soapy water and rinsing. Some people prefer to use a separate cutting board for raw meat as an extra precaution, which is a good practice if you want to minimize cross-contamination risk. End grain boards do not require special care for raw meat beyond regular cleaning.
How do I know if my board is fully dried after oiling?
A fully dried board will feel smooth and slightly waxy to the touch, with no tacky or sticky residue. If you rub your finger over the surface, the board should feel dry, not oily. If the surface feels sticky or if your finger leaves an oil mark, the board needs more time to dry. Typically, a board will be dry within 2–4 hours of applying the final coat. For a beeswax blend, allow 4–6 hours for the wax to fully harden.
Can I use a power sander on an end grain board?
Yes, but you need to use the right sander. A random orbital sander is ideal because its random orbit pattern prevents deep, directional scratches. Avoid a belt sander, which is too aggressive for fine woodwork and will leave deep marks that are difficult to remove. If you only have a belt sander, use it only for the initial coarse sanding (80 grit) and switch to an orbital sander for the finer grits.
Conclusion
Building an end grain cutting board is a multi-stage project that rewards patience, precision, and attention to detail. From selecting the right hardwood to the final coat of mineral oil, each step contributes to a finished product that is both functional and beautiful. The checkered pattern is not just a design choice — it is a structural decision that makes the board gentler on your knives and more durable over time.
If you're new to woodworking, a cutting board is an ideal first project. It teaches you essential skills — measuring, cutting, gluing, clamping, and sanding — in a manageable format. You can always make mistakes, learn from them, and improve your technique with each board you build. The lumber, tools, and finishes are inexpensive compared to professionally made boards, and the satisfaction of using a board you made with your own hands is incomparable.
Start with a simple two-species checkerboard pattern and stick to hard maple or walnut. Invest in quality lumber and a sharp table saw blade — they are the foundation of a well-built board. Take your time with each step, especially the glue-up and sanding, and you'll end up with a cutting board that lasts for years of daily use.
Once you've built your first board, the possibilities are endless. Experiment with different wood species, try a striped pattern, or challenge yourself with a herringbone design. You can even build a matching set — a large workhorse board and a smaller serving board for charcuterie or cheese. The skills you learn will transfer to every woodworking project you tackle.
For the latest research on wood finishing for food contact surfaces, visit the U.S. Department of Agriculture for updated guidelines on food-safe materials and finishes. And if you're ready to start your next kitchen project, explore our guides to complementary woodworking and kitchen upgrades for more inspiration.
Happy building.

Hi, I’m Daniel Brooks—a food lover and kitchen gear enthusiast. I enjoy testing cookware, utensils, and gadgets to see what really works in everyday cooking. At PlugChef.com, I share honest reviews, comparisons, and simple guides to help you choose the best tools for a safer, smarter, and more enjoyable kitchen.
Similar Posts