Under Kitchen Sink Pull Out Storage: Maximize Space with Effortless Organization

A cluttered cabinet beneath the sink can turn everyday chores into a frustrating hunt for sponges, spray bottles, or spare trash bags. Pull‑out organizers transform that hidden zone into a streamlined station where everything slides into view, stays upright, and is easy to restock. By adding a simple slide‑out shelf or drawer system, you reclaim vertical space, reduce bending, and keep cleaning supplies, toiletries, or pantry items within arm’s reach. This guide walks you through measuring your cabinet, selecting the right style and material, installing the unit safely, and maintaining it for years of reliable use. Whether you’re outfitting a compact apartment kitchen or a busy family bathroom, the steps below help you create a tidy, efficient under‑sink area that supports your daily routine.
Why Under‑Sink Pull‑Out Storage Matters
Storing cleaning agents upright and visible prevents accidental spills and makes it easier to notice when supplies run low. The EPA guidelines for storing cleaning products recommend keeping hazardous liquids in their original containers, sealed, and placed where they can be inspected without moving other items—a goal that pull‑out shelving naturally satisfies. Beyond safety, a well‑organized sink cabinet saves time during meal prep and cleanup; you no longer need to shift heavy bottles to reach a cloth at the back. Studies from the University of Minnesota Extension home organization tips show that consistent storage habits reduce household stress and improve overall kitchen workflow. In practice, a slide‑out system also protects the cabinet floor from moisture damage by keeping bottles off the base and allowing air to circulate. If you’ve ever knocked over a spray bottle while reaching for a dish towel, you’ll appreciate how a simple organizer eliminates that risk and keeps your workspace functional. For more on this, see our guide on kitchen sink mold cleaner.
Internal link: Just as you would keep essential supplies handy for emergencies, a tidy under‑sink area helps you respond quickly to spills.
Choosing the Right Size and Configuration
Before purchasing, measure the interior width, depth, and height of the cabinet opening, noting any pipes, disposals, or water lines that intrude into the space. Most organizers require at least 10 inches of clearance height to accommodate the slide mechanism, but low‑profile models exist for tighter sinks. Record the maximum usable width—subtract an inch or two for door hinges and any protruding hardware—to ensure the unit slides freely without scraping. Depth matters less than height; a 12‑inch deep organizer usually fits standard cabinets, while deeper units may need a custom cutout. If your sink has a side‑mounted disposal, look for designs with a cut‑out or offset mounting brackets. Adjustable‑height shelves offer flexibility for tall bottles or stacked containers, whereas fixed‑tier units are simpler to install and often more rigid. In practice, a quick cardboard mock‑up of the intended footprint can reveal fit issues before you commit to a purchase. For more on this, see our guide on kitchen island with storage on both sides.
Types of Pull‑Out Organizers
Pull‑out storage falls into three main categories: slide‑out shelves, sliding drawers, and wire or mesh baskets. Slide‑out shelves feature a flat platform that extends on rollers or ball‑bearing glides, ideal for stacking spray bottles or stacking bins. Sliding drawers provide a fully enclosed box that keeps small items contained and prevents them from tipping; many include dividers or adjustable compartments for customized sorting. Wire or mesh baskets offer breathability and visibility, making them suitable for sponges, scrub pads, or produce that benefits from airflow. Some hybrid models combine a shelf on top with a drawer below, giving you both open storage and concealed space. L‑shaped or corner‑specific designs maximize irregular cabinets, while vertical pull‑out racks store tall items like broom handles or mop heads. Choosing the right type depends on what you plan to store: heavy cleaners benefit from solid metal shelves, whereas lightweight toiletries pair well with clear acrylic drawers that let you see contents at a glance.
Materials and Durability
Common materials include powder‑coated steel, stainless steel, aluminum, reinforced plastic, and clear acrylic. Powder‑coated steel provides a strong, rust‑resistant surface that can support 20‑30 lb per tier when properly installed; look for a coating rated for humid environments. Stainless steel offers the highest corrosion resistance but comes at a premium price. Aluminum is lightweight yet sturdy, often used in adjustable‑height systems where weight savings matter. Reinforced plastic organizers are affordable and resist dents, though they may flex under very heavy loads; check the manufacturer’s weight limit before loading large detergent containers. Clear acrylic gives a modern look and full visibility, but it can scratch if abrasive cleaning pads are stored directly on its surface; using a liner or soft cloth mitigates this issue. Regardless of material, inspect the glide mechanism—ball‑bearing rollers or nylon wheels typically outperform simple plastic slides in smoothness and longevity. A ponytail: global lock, per-account locks if throughput matters. For more on this, see our guide on kitchen pantry with trash can storage.
Installation Guide
Most under‑sink pull‑out organizers ship with pre‑drilled holes, brackets, and either screws or pressure‑fit clips. Begin by removing everything from the cabinet and cleaning the interior surface. Position the mounting brackets according to the template provided, ensuring they sit level; a small torpedo level helps avoid a tilted slide that could bind. If the unit requires screws, drill pilot holes to prevent splitting the cabinet material, especially in particle board or MDF. For pressure‑fit models, press the brackets firmly into place until they click, then test the slide for smooth travel before adding weight. After mounting, load the organizer gradually, starting with lighter items to confirm stability, then progress to heavier bottles. Always verify that the slide does not interfere with the sink’s P‑trap or disposal unit; a clearance of at least ½ inch is advisable. If you encounter resistance, loosen the brackets slightly and re‑level. A final tip: keep the original hardware in a labeled bag for future adjustments or relocation.
Internal link: Think of the installation process as you would pack a portable kit—each piece has its place and must be secured before you head out. For more on this, see our guide on kitchen island with seating for 4 and storage.
Organizing Tips for Maximum Efficiency
Divide the pull‑out space into zones based on frequency of use. Place daily essentials—dish soap, sponge, and spray cleaner—on the top tier or front of the drawer for instant access. Reserve the lower or rear sections for bulk refills, spare trash bags, or seasonal items like holiday‑themed disinfectants. Use small bins or lidded containers within the drawer to corral loose items such as rubber gloves, scrub brushes, or spare sponges; labeling each bin with a waterproof marker saves time when restocking. If your organizer includes adjustable shelves, set the height to accommodate the tallest bottle you own, then create a secondary level for shorter items. In practice, a common mistake is overloading the top tier with heavy containers, which can strain the glide mechanism; distribute weight evenly across the available levels. Consider adding a small absorbent mat at the bottom of the cabinet to catch any occasional drips, protecting the cabinet floor and simplifying cleanup.
Internal link: Just as a student would be ready for dorm life with a compact toiletries bag, your under‑sink area benefits from thoughtful, zone‑based staging. For more on this, see our guide on kitchen utensils storage containers with lids.
Maintenance and Care
Regular maintenance keeps the slide mechanism smooth and prevents corrosion. Every month, wipe the shelves and frame with a damp cloth to remove dust and cleaning‑product residue; avoid abrasive pads that could scratch coated metal or acrylic. Check the glide rollers or wheels for hair or debris that could impede movement—use a soft brush or compressed air to clear buildup. Inspect mounting screws quarterly; vibration from daily use can loosen them, so tighten any that have turned. If you notice rust forming on steel components, apply a light coat of silicone‑based lubricant and wipe excess away. For plastic units, look for stress cracks near the mounting points; replacing a compromised bracket early prevents sudden failure. In humid climates, running a dehumidifier or keeping the cabinet door slightly ajar after use helps reduce moisture buildup that could accelerate wear. Treat the organizer as you would a mini first aid kit that lives in a small bag—periodic checks ensure it’s ready when you need it.
Internal link: Maintaining the hardware is similar to ensuring you fit in a small bag—everything must stay secure and accessible.
Buying Checklist
When evaluating options, verify the following: weight capacity per tier (at least 15 lb for typical cleaners), glide type (ball‑bearing rollers preferred), ease of installation (tools required vs. pressure‑fit), adjustability (height or divider options), material suitability for your environment (powder‑coated steel for humid kitchens, acrylic for visual preference), and return policy in case the dimensions prove off. Look for products that include all necessary hardware and clear, illustrated instructions—this reduces frustration and the chance of improper mounting. A final tip: read recent user comments for mentions of sliding smoothness over time; repeated complaints about sticking often indicate a sub‑par glide system. By confirming these points, you can select an organizer that delivers lasting convenience without frequent adjustments.
Internal link: Ultimately, choose a model that will meet workplace standards for durability and reliability, just as safety gear must pass rigorous checks.
Popular Models at a Glance
| Image | Model & Key Features |
|---|---|
 |
Metal two‑tier sliding shelf – sturdy steel, easy‑glide drawer, fits most standard cabinets. |
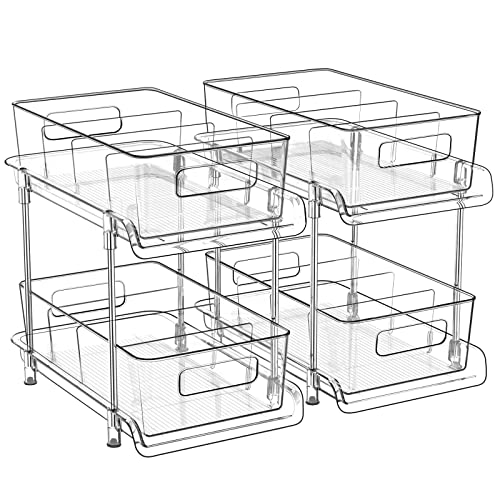 |
Clear acrylic two‑tier with dividers – full visibility, customizable compartments, modern look. |
 |
Black plastic 12.8‑in organizers – lightweight, snap‑together assembly, suited for tight spaces. |
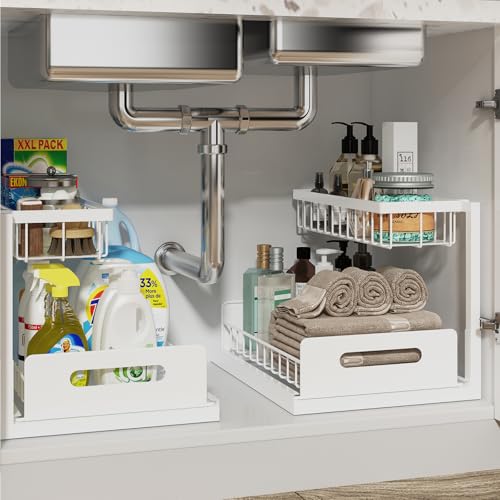 |
White two‑tier slide‑out set – tool‑free installation, clean aesthetic, versatile for kitchen/bath. |
 |
Adjustable‑height white metal – thickened shelves for heavy loads, height‑adjust tiers. |
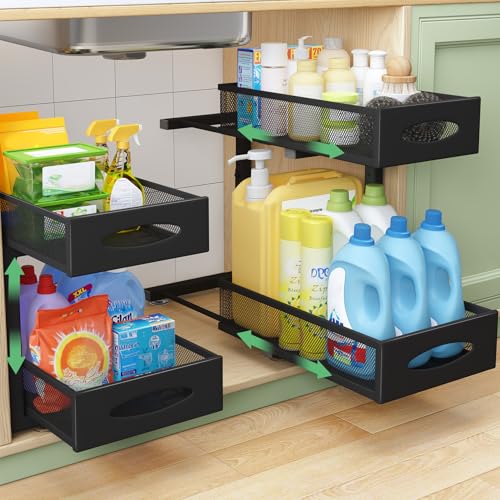 |
Mesh basket with sliding drawers – breathable storage, ideal for sponges and scrub pads. |
 |
Petiza adjustable‑height – sturdy construction, smooth glide, fits most sinks. |
 |
LAMU black two‑tier set – space‑saving design, durable build, neutral color. |
 |
Tistaya height‑adjustable metal – white finish, solid metal, adjustable tiers for varied bottles. |
 |
Sevenblue L‑shaped with hooks – corner‑friendly, extra hanging storage for brushes or cups. |
All images are shown exactly as provided, with updated descriptive alt text.
FAQ
What Are The Main Benefits Of Pull‑Out Storage Under the Sink?
Pull‑out units bring items into view without removing front‑row products, reduce awkward bending, and keep heavy containers stable on a sliding platform. They also protect the cabinet base from moisture by elevating bottles and allowing airflow.
How Do I Determine If an Organizer Will Fit My Cabinet?
Measure the interior width, depth, and height, subtracting at least ½ inch for door hinges and any pipe protrusions. Compare these numbers to the product’s listed dimensions, paying special attention to the height required for the slide mechanism. A simple cardboard cut‑out of the intended footprint can reveal fit issues before purchase.
Can I Install a Pull‑Out Shelf Without Professional Help?
Most models ship with all necessary hardware and step‑by‑step instructions. Basic tools—typically a screwdriver and a level—are sufficient for screw‑mounted versions; pressure‑fit designs may need no tools at all. If you encounter uneven sliding, re‑check bracket level and tighten any loose fasteners.
Are These Organizers Safe for Storing Hazardous Cleaning Products?
Yes, when used according to the manufacturer’s weight limits and kept in their original containers. The EPA guidelines for storing cleaning products recommend keeping hazardous liquids sealed and visible—conditions that a slide‑out shelf naturally supports. Always verify that the cabinet door closes fully and that the organizer does not impede the sink’s trap or disposal.
How Should I Clean and Maintain the Sliding Mechanism?
Wipe the shelves and frame with a soft, damp cloth monthly; avoid abrasive pads that could scratch finishes. Inspect rollers or wheels for debris and remove it with a brush or compressed air. Tighten mounting screws every few months and apply a light silicone lubricant to metal glides if movement becomes stiff.
Conclusion
A well‑chosen under‑sink pull‑out organizer turns a wasted, cramped cabinet into a model of efficiency and safety. By measuring carefully, selecting a sturdy material and smooth glide system, and following a straightforward installation process, you gain instant access to cleaning supplies, toiletries, or pantry staples while keeping the space tidy and moisture‑free. Regular maintenance—simple wiping, occasional screw checks, and light lubrication—ensures the unit slides smoothly for years. Take the next step: assess your cabinet, pick a model that matches your storage needs, and enjoy a clutter‑free sink area that supports your daily routine.

Hi, I’m Daniel Brooks—a food lover and kitchen gear enthusiast. I enjoy testing cookware, utensils, and gadgets to see what really works in everyday cooking. At PlugChef.com, I share honest reviews, comparisons, and simple guides to help you choose the best tools for a safer, smarter, and more enjoyable kitchen.
Similar Posts