Kitchen Power Strips Under Cabinet: Enhance Your Cooking Space Effortlessly
Your countertop is the most valuable square footage in the house, and a quarter of it is usually gone — buried under toasters, kettles, coffee makers, scale cables, and phone chargers. An under-cabinet power strip gives that counter back to you, but only if you plan it correctly. A strip bolted under a cabinet without attention to circuit load, heat, clearance, and cord routing isn't a shortcut; it's a slow-moving nuisance that ends in a tripped breaker, a melted cord sleeve, or a recall page you didn't check.
This guide walks through what actually matters when choosing and installing an under-cabinet power strip — wire gauge, surge ratings, GFCI rules, mounting, cable management — and then covers the task lighting that sits alongside your power in the same under-cabinet zone, since the two decisions are made together and shared shelf space is the constraint that ties them. For more on this, see our guide on best blenders for smoothies under 100.
Why Under-Cabinet Power Strips Deserve a Place in Your Kitchen
The countertop clutter problem
A modern countertop kitchen routinely wants power for six to ten devices at once: a coffee machine, kettle, toaster, food processor, slow cooker, knife-sharpening station, digital scale, air fryer, and at least one phone or tablet running a recipe. Every one of those sits on the surface. When a wall outlet lands three metres away, the solution most people reach for is an extension cord draped across the counter — a tripping hazard, a grease trap, and a cord that flexes against the edge of the range every time you use it.
Mounting a strip directly under the cabinet face flips the geometry. Outlets face you, cords run down behind the cabinet skirt, and the visible surface is clean. In practice this changes how you work: the scale and the kettle move to a fixed home, the kettle stops blocking the knife block, and you stop unplugging the toaster to free an outlet.
Small-appliance load reality
The reason under-cabinet strips exist is that kitchens were wired for fewer appliances than you own. The National Electrical Code calls for at least two 20-ampere small-appliance branch circuits in a kitchen, but many older homes share those circuits between the back of the counter, the island, and the living-room outlets behind them.
That means the real constraint isn't "how many outlets" — it's total draw. A kettle (1,500–2,200 W), a toaster (1,000–1,500 W), and an air fryer (1,200–1,800 W) running together will exceed what a single 20-amp circuit can comfortably deliver. What an under-cabinet strip can do is let you split those loads across circuits deliberately, so the kettle plugs into the strip on circuit one and the air fryer into the one on circuit two. One strip cannot solve a single-circuit kitchen, but it does make the single circuit you have usable instead of wasted on one appliance at a time.
Types of Under-Cabinet Power Solutions
Surge-protected wired strips
The workhorse. A strip with a hard lead-in cord, four to eight outlets, a surge module, and a master switch, mounted to the cabinet underside. Best for kitchens with an existing outlet within a metre of the cabinet. The most flexible option and the only one you can move when you rearrange.
Hardwired in-cabinet outlet boxes
Flush-mounted boxes wired into the home's circuitry behind or inside the cabinet, with faceplates fitted to the cabinet underside. Cleaner and more permanent, but they require an electrician, a permit in some jurisdictions, and code-compliant wiring — box type, grounding, and cover plate all matter. Worth it for an island or peninsula where a cord would look wrong, not worth it for a counter you might renovate in a few years.
Island and peninsula pop-up converters
Flush-mounted converters that flip up from inside a cabinet or the end of a peninsula to reveal outlets and USB ports, then retract. They solve the problem of power needed mid-run rather than at the wall. Because they're wired in rather than plugged in, they need the same professional installation as in-cabinet boxes.
Integrated power-and-light strips
A single under-cabinet profile combining USB-C ports with LED illumination. These are popular for a reason — one mount, one cord, and power plus task light where you need both. They trade modularity for tidiness: if the LED section fails, you replace the whole unit, and vice versa. They're also typically USB-C-only, so a kettle or toaster still needs a separate strip.
Before You Buy: Specifications That Actually Matter
| Spec | What to look for | Why it matters |
|---|---|---|
| Outlets | 4–8 on a standard strip | Enough to serve a zone without daisy-chaining a second strip |
| Surge capacity | 600+ joules; 1,000+ preferred | Total energy a strip can absorb over its life |
| Clamping voltage | Lower is better — under 400 V | How fast the strip diverts a spike |
| Outlets rated | 10 A or 15 A | The ceiling per outlet; never exceed it |
| Cord gauge | 16 AWG or 14 AWG | Thicker cord handles appliance draw without heating |
| USB ports | USB-C PD at 65 W or higher | Phones, tablets, and laptops charge at full speed |
| Switching | Master switch plus individual switches | Cuts standby draw from idle chargers and clocks |
| Plug orientation | Angled or tabbed plug | Clears a cabinet floor or tight backing |
| Mounting | Adhesive pad plus bracket, plus cord clips | Adhesive alone fails on dusty, greasy, or humid surfaces |
| Certification | UL, ETL, or cUL marking | Independent safety testing; the only mark that counts |
Safety and Code Basics
Surge protection ratings
Two numbers matter, and they measure different things. Joules is the total energy a surge module can absorb before it degrades — higher is more forgiving, and a cheap module will quietly lose protection after a few spikes. Clamping voltage is how quickly the module kicks in; a lower figure means less energy reaches your devices during a fast transient. A useful rule of thumb is 600 joules as a floor for electronics like phones and tablets, and 1,000+ joules if the strip serves appliances with sensitive control boards, such as induction cooktops or smart kettles.
Wire gauge and ampacity
Cord thickness determines how much current a cable can carry before it heats. 18 AWG is fine for low-draw devices — chargers, lamps, electronics — and it's the gauge in most inexpensive strips. 16 AWG handles normal appliance load. 14 AWG is the correct gauge for a permanent hardwired run. A common mistake is buying a long, thin 18 AWG strip to reach an outlet two metres away, then loading it with a kettle and an air fryer. The gauge isn't wrong for the strip; it's wrong for the load and the run. Short cord runs and 16 AWG or thicker are the safer combination.
GFCI protection near water
If a power strip serves outlets reachable from near the sink, dishwasher, or washing machine, GFCI protection is required. In a typical kitchen that means counter outlets within arm's reach of a water source. For a plug-in strip, put a GFCI outlet upstream of it, or use a strip that includes GFCI. For a hardwired cabinet box near a sink, GFCI is non-negotiable — it's a code requirement and, practically, the only thing standing between a splash and a shock.
Heat, ventilation, and clearance
Under-cabinet spaces are warm. A range hood exhausts heat upward, cabinets trap it, and a power strip adds its own small contribution. The strip's enclosure, the electronics plugged into it, and any batteries charging through it all need to breathe. Don't seal a strip inside a closed wooden cabinet with no gap at the back or bottom. Keep a finger's width of clearance behind the cord and at least a few centimetres from any heat-producing appliance, and never let the cord touch the underside of a range or oven — that's a slow thermal failure waiting to happen.
Listed certification
This is the one specification worth being rigid about. A strip should carry a mark from an independent testing body — Underwriters Laboratories (UL), ETL, or cUL. The mark means the product was tested against published safety standards for insulation, flame resistance, creepage distance, and overload behaviour. An unmarked strip from an unknown seller has none of that, and on a circuit that may be near water in a kitchen, that's the wrong trade-off. If you're unsure whether a specific model is still on the market safely, the Consumer Product Safety Commission maintains a searchable recall database worth checking before buying and after.
Planning Your Under-Cabinet Power Layout
Mapping appliance zones
Before you measure, write down what actually runs in your kitchen and when. Most households cluster into three zones — prep and cleaning near the sink, cooking near the range, and gathering or serving near the island or table. Put one strip per zone where possible. That keeps every appliance under 3 metres from power, which is the practical limit before a cord starts looking like a rope across the counter, and it spreads draw across circuits instead of concentrating it.
Cord routing and cable management
The strip is the easy part; the cord is what makes or breaks the install. Run the cord along the cabinet's underside edge, tucked behind the backboard, or down the cabinet's outer sidewall — never across the range or in front of a hinge. Secure it at intervals with clips so it can't sag and be pulled down by an appliance. Where the cord crosses a cabinet edge, wrap it in a thin rubber sleeve so it doesn't flex against a sharp corner — that's where cords fail first.
A useful habit: leave a small loop rather than running the cord in a straight line. Straight cords stress the plug's strain relief; a gentle loop absorbs the pull when you lift a kettle.
Clearances to respect
Measure the cabinet underside to the countertop before you buy. A strip plus plug typically needs 4–8 centimetres of vertical space; a thicker unit with a bulky plug can need more. Confirm the plug style fits that clearance — an angled or tabbed plug is often the difference between a clean install and a cord wedged at an angle it shouldn't be. Also check that the strip doesn't block a cabinet hinge, a range-hood duct, or a water supply line.
Installation, Step by Step
- Confirm circuit capacity. Run the appliances you plan to plug in together and check that total watts stays comfortably under what one circuit can deliver. If it doesn't, split the load across two strips on two circuits.
- Turn off the circuit breaker for the outlet you're working from. Verify it's dead with a tester before you touch the strip's cord or the outlet.
- Clean the mounting surface. Degrease the cabinet underside and let it dry fully. Adhesive mounted onto a greasy surface will lift within months — this is the single most common cause of under-cabinet strips ending up on the floor.
- Position and mark. Hold the strip in place, check clearance against hinges and ducting, and mark the mounting points.
- Secure with more than adhesive. Use the adhesive pad for base grip, but add the supplied bracket or zip ties for load-bearing support, especially if you'll plug in anything with weight or a long cord.
- Route and clip the cord. Clip at intervals; sleeve where it crosses an edge; keep clear of heat sources.
- Power up and test. Restore the breaker, plug in a device, confirm every outlet is live, and test any GFCI protection by pressing its reset button and confirming it trips and resets.
- Label the breaker for that circuit if you haven't already. The payoff of under-cabinet power is immediate troubleshooting when something trips.
Pairing Power With Under-Cabinet Task Lighting
An under-cabinet strip solves power. What makes a counter genuinely pleasant to work at is light — and the same vertical space serves both. Overhead kitchen lighting almost always leaves a shadow band where the cook stands, because the light source is behind you and your own body blocks it. Under-cabinet lighting removes that shadow directly, which is why kitchens with task lighting consistently feel easier to work in than the same kitchens without it.
Colour temperature is the main decision. Warm white (around 3000 K) suits ambient and dining areas; neutral white (around 4000 K) is the practical choice for food preparation, since it renders whites and colours accurately; cool daylight (5000–6500 K) is excellent for detail work but can feel clinical in a residential kitchen. Look for a colour-rendering index of at least 80, and 90 or higher if you care about judging food colour accurately. Dimmability matters for evening use — full task brightness at 7 p.m. is harder on everyone in the kitchen than a softer setting.
Fixed-bar luminaires
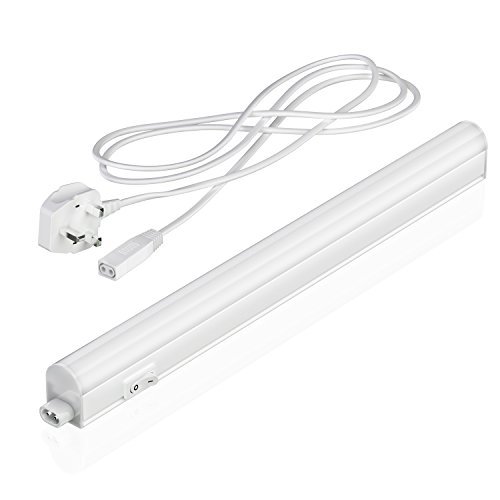
Rigid bars offer even, shadow-free light and the easiest install: mount the bar, plug it in, done. They pair naturally with a strip mounted alongside, sharing the cabinet's underside.

The Rigel in warm white: 31.3 cm and 397 lumens — a good fit for a single prep zone where a softer glow suits evening cooking.
Parlat LED Under-Cabinet Luminaire, Rigel (31.3 cm, 397 lm, warm white) Compact and easy to install, with a warm white output that suits evenings and dining-side counters better than the neutral white version. Its 397 lumens is enough for a single zone rather than a full run of cabinetry. A one-colour, one-size limitation, and it will need electrical outlet access at the installation point. View on Amazon
Parlat LED Under-Cabinet Luminaire, Rigel (31.3 cm, 445 lm, white) The same housing at a higher output — 445 lumens — and a whiter, brighter beam. The right pick where you want sharper task light over the prep area and don't mind a crisper, less ambient feel. Same caveats: one colour option, and it assumes an outlet is reachable at the cabinet. View on Amazon

Brightark 4W LED Under-Cabinet Light (30 cm, 426 lm, neutral white 4000 K) 4000 K neutral white is the practical default for food prep, and at 426 lumens this covers a single 30 cm run well. The extendable plug-in system lets you link units end-to-end, so a longer run doesn't mean extra cords. Versatile enough for wardrobes and shelves as well as kitchen counters, though the single pack won't cover a large kitchen alone. View on Amazon
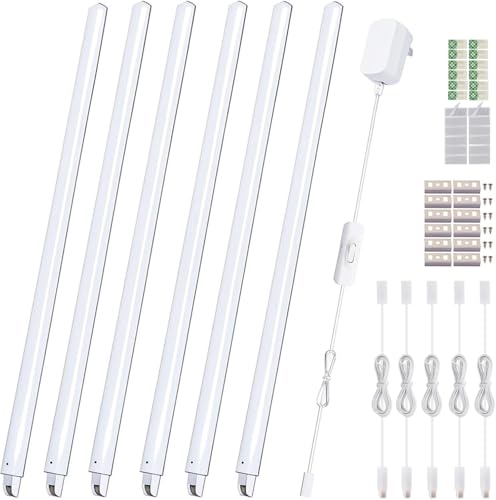
Cefrank LED Under-Cabinet Lighting (6 × 31 cm, 1200 lm total, warm white 3000 K) A complete kit for a longer cabinetry run, with seamless linkable bars and a plug-and-play install. 1200 lumens across six bars covers a substantial counter length, and 3000 K warm white suits a kitchen used for both prep and gathering. Check your plug standard before buying — this model ships with a UK plug. View on Amazon
Flexible ribbon strips
For corners, open shelves, or runs that need to bend, flexible strips adapt to the shape rather than forcing you to fit the shape to the light.
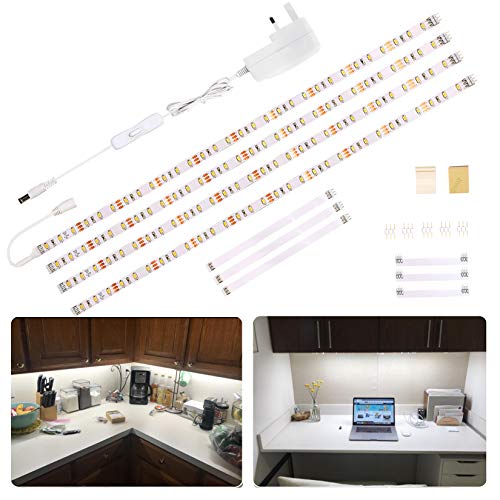
The WOBANE kit's four linkable panels at 1200 lm — cool daylight 6000 K, bright enough for detailed food work.
WOBANE LED Under-Cabinet Lighting Kit (2 m, 120 LEDs, 1200 lm, 6000 K) Four panels of 2 metres of ribbon, 12 V powered, delivering 1200 lumens of cool daylight white. 6000 K is excellent for precision tasks and showing true colour, though it reads clinical for general kitchen use. The 12 V supply is inherently low-risk and energy efficient; a small amount of extra adhesive is worth adding for a secure hold. View on Amazon

The Lepro strip is dimmable out of the box — the dimmer switch is included, so brightness changes with the moment.
Lepro LED Strip Light (5 m, 300 LEDs, 1650 lm, cool white 6000 K, dimmable) The longest run in this group and the highest output, with a built-in dimmer switch so the same strip can go from full prep brightness to a low evening glow. The flexible strip wraps corners and unusual shapes that rigid bars can't. It's 12 V powered with the plug and dimmer included, so installation is genuinely plug-in-simple. Not waterproof, so keep it indoors; expect to add adhesive where the backing loses grip over time. View on Amazon
Sensor-activated kits
Motion or hand-wave activation is a genuine quality-of-life upgrade for under-cabinet light — you stop reaching across a counter to find a switch, and you don't leave a light burning overnight.
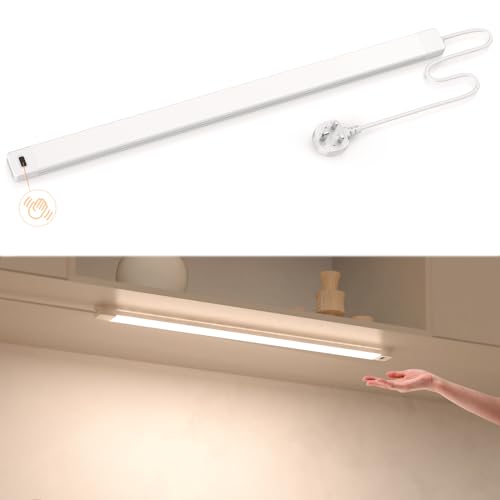
The SIBI kit switches on with a wave — useful when your hands are wet, messy, or full.
SIBI Lighting Hand-Wave Activated Under-Cabinet Kit (41 cm, 430 lm, warm white 4000 K) Hands-free operation is the standout feature: wave to toggle, and the surface stays clean — no switch to wipe, no fingerprints on a bar you touch constantly. 430 lumens at 4000 K gives balanced neutral-warm light over a single zone, and the plug-in design keeps installation simple. The plug-in form means an outlet must be nearby, and 41 cm covers one zone, so a longer counter needs multiple units. View on Amazon
Hardwired retrofit bars
For a permanent install with individual control over each section, hardwired T5-style bars with their own switches are the closest thing to fitted lighting without a full rewire.
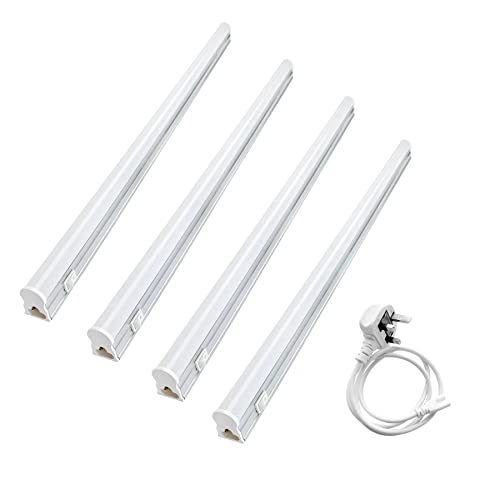
T&K TO-KING bars carry independent switches, so one section can run while the rest stays dark.
T&K TO-KING Connectible T5 LED Under-Cabinet Bars (4 × 300 mm, 4000 K) Four linkable hardwired bars with independent switches, at a comfortable 4000 K. Independent switching is a real advantage in a kitchen where one zone stays active and the rest doesn't need light. Because they're mains-wired, they need professional installation rather than a plug-in approach — but the result is a clean, permanent run that looks like fixed cabinetry rather than an add-on. View on Amazon
Lighting options at a glance
| Product | Type | Length | Output | Colour temp | Notes |
|---|---|---|---|---|---|
| Parlat Rigel (warm) | Fixed bar | 31.3 cm | 397 lm | Warm white | Cozy; single zone |
| Parlat Rigel (white) | Fixed bar | 31.3 cm | 445 lm | White | Brighter single zone |
| Brightark 4W | Fixed bar | 30 cm | 426 lm | 4000 K | Linkable; prep-friendly |
| Cefrank 6-pc | Fixed bars | 6 × 31 cm | 1200 lm | 3000 K | Long run; UK plug |
| WOBANE kit | Flexible ribbon | 2 m | 1200 lm | 6000 K | Detail work; low-voltage |
| Lepro 5 m | Flexible ribbon | 5 m | 1650 lm | 6000 K | Longest; dimmable |
| SIBI hand-wave | Fixed bar | 41 cm | 430 lm | 4000 K | Motion-activated |
| T&K TO-KING | Hardwired bar | 4 × 300 mm | — | 4000 K | Per-bar switches; needs electrician |
Kitchen Safety Worth Planning For
An under-cabinet strip is low-risk when installed sensibly, but it's still electrical equipment in a room that combines water, heat, and grease. The sensible complement is keeping a first aid kit close enough that it's actually used — ideally on a cabinet shelf within arm's reach of your main prep zone rather than in a hallway. If you have young children or pets in the kitchen, a non-toxic kit is worth the extra consideration, and a dedicated kit box keeps supplies organised instead of scattered across a drawer.
If the strip serves an area near a water source, confirm GFCI protection is present before relying on it — that's the one safety control that can't be improvised.
Common Mistakes to Avoid
- Overloading a single strip. Kettle, toaster, and air fryer together will trip a 20-amp circuit in many homes. Split the load across strips on different circuits.
- Buying an unlisted strip. Skip anything without a UL, ETL, or cUL mark. The price difference is small; the risk difference is large.
- Trusting adhesive alone. Grease and dust defeat adhesive. Add a bracket or zip ties wherever a heavy cord or appliance will pull.
- Running the cord across the range. Slow heat damage to insulation doesn't announce itself until it fails.
- Sealing the strip in a closed cabinet. Chargers and electronic devices run warm and need airflow.
- Daisy-chaining strips. A strip plugged into a strip concentrates load on the weakest point.
- Ignoring the plug style. A straight plug in a tight cabinet clearance means the cord bends at the strain relief — the first place it fails.
- Buying without checking your plug standard. Several of the products above ship with regional plugs; confirm the outlet you're installing into matches.
- Letting the cord cross a sharp edge. Sleeve it, or the flex point will work itself through the insulation eventually.
- Forgetting the circuit label. The convenience of hidden power is wasted if you can't tell which breaker trips when something goes wrong.
Ongoing Care and Inspection
An under-cabinet strip is easy to check because it's in one place you can reach. A monthly glance is enough:
- Look for discolouration or a hardening of the outlet inserts or plug face. Melting can be subtle at first — a slight warp or a yellowing ring around the socket is worth unplugging immediately.
- Smell it. A faint electrical or plastic odour near a plugged-in strip is a sign the surge module or wiring is working harder than it should.
- Check the cord at flex points, especially where it exits the strip and where it crosses a cabinet edge.
- Test the GFCI reset if your installation includes one, at least once a year.
- Recheck adhesive and clips after cleaning, since degreaser and steam can weaken them.
- Restock and rotate supplies — the same goes for the first aid kit nearby; a quick audit with restocking supplies keeps it from quietly becoming a box of expired tape.
Frequently Asked Questions
What exactly is an under-cabinet kitchen power strip?
It's a surge-protected extension strip, typically with four to eight outlets, mounted directly beneath a cabinet's underside so outlets sit at working height and cords run behind the cabinet rather than across the countertop. Many include USB-C ports, individual outlet switches, and a master switch to cut standby draw.
How do I install one safely?
Confirm the circuit can handle the appliances you'll plug in, kill the breaker, clean and degrease the mounting surface, secure the strip with adhesive plus a bracket or zip ties, route and clip the cord along the cabinet underside or sidewall, keep it clear of heat sources, restore power, and test every outlet plus any GFCI protection.
How many outlets can I safely run on one strip?
It depends on total draw, not outlet count. A strip with eight outlets can still trip a circuit if four high-draw appliances run together. Keep total wattage comfortably under what your circuit delivers, and split heavy appliances across strips on different circuits.
Does an under-cabinet strip need GFCI protection?
If it serves counter space reachable from near a sink, dishwasher, or washing machine, yes — that's a code requirement in most jurisdictions. Use a GFCI outlet upstream of a plug-in strip, or a strip with built-in GFCI.
Are LED under-cabinet lights a good match for a power strip?
Yes — they share the same under-cabinet vertical space, and task lighting at counter height removes the shadow band that overhead lighting leaves over your workspace. Pair a neutral 4000 K light over prep areas with a warmer 3000 K option near dining, and add dimming for evening use.
Can I link multiple LED strips or bars together?
Many are designed for it. Fixed bars with a plug-in link system connect end-to-end to extend a run; flexible ribbons can be cut and joined at marked points; kits like the Cefrank six-pack are built for longer cabinetry. Check compatibility between units and confirm the power supply can handle the combined wattage before you link them.
Is a hardwired cabinet outlet better than a plug-in strip?
For an island or peninsula where a cord would be unsightly or impractical, a hardwired box is cleaner and more permanent — but it needs an electrician, a permit in some areas, and code-compliant wiring. A plug-in strip is easier, cheaper, and reversible, which matters if you plan to renovate.
Conclusion
An under-cabinet power strip earns its place when it's matched to the load your kitchen actually draws, wired within the rules that keep it near water and heat, and mounted firmly enough that it doesn't end up as another cord you trip over. Pick a listed strip with adequate surge capacity and a wire gauge suited to your appliances, split heavy draws across circuits, route cords behind the cabinet rather than across the counter, and add GFCI where water is nearby.
Pair it with under-cabinet task lighting and the improvement compounds: outlets at working height, cords out of sight, and light exactly where overhead fixtures leave a shadow. A 4000 K neutral light over the prep zone, dimmable for evenings, and a motion-activated option where you're most likely to be working with messy hands — that's a kitchen that works as well as it looks.
Check your circuit capacity first, verify the certification mark before you buy, and secure the strip with more than adhesive. Done properly, the strip disappears into the background and the kitchen simply becomes easier to use.

Hi, I’m Daniel Brooks—a food lover and kitchen gear enthusiast. I enjoy testing cookware, utensils, and gadgets to see what really works in everyday cooking. At PlugChef.com, I share honest reviews, comparisons, and simple guides to help you choose the best tools for a safer, smarter, and more enjoyable kitchen.
Similar Posts