
If you’ve ever spent 15 minutes hand-grating a block of cheddar for taco night only to end up with inconsistent-sized shreds, blistered fingertips, and a pile of messy cleanup, you know how much of a bottleneck food prep can be. A shredding disc for your food processor eliminates that frustration entirely, turning tedious, labor-intensive grating tasks into 30-second, uniform, low-mess jobs that instantly boost your kitchen efficiency. Whether you’re batch-prepping meals for the week, hosting a holiday dinner, or just looking to cut down on nightly prep time, the right shredding disc is one of the most underrated upgrades for any home cook’s toolkit. In this guide, we’ll break down exactly what shredding discs are, the different types available, how to choose the perfect one for your needs, safe and effective usage tips, troubleshooting for common issues, and pro tricks to get the most out of your investment.
What Is a Shredding Disc for a Food Processor?
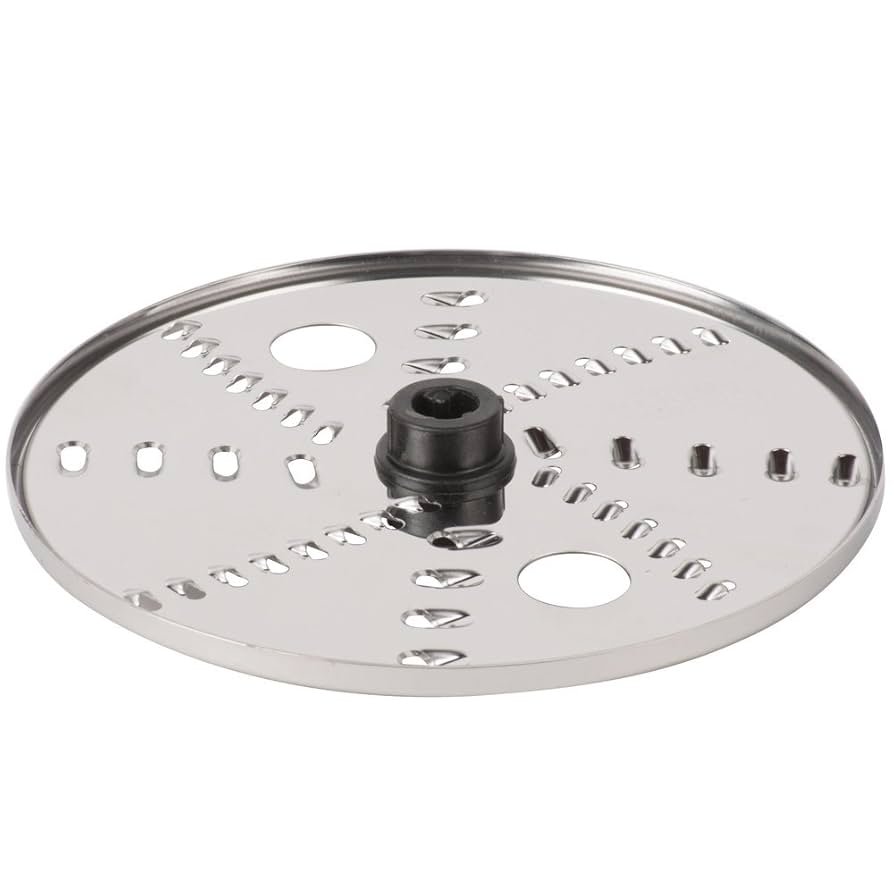
A shredding disc is a specialized, circular attachment designed to fit inside the bowl of a standard food processor, replacing the standard chopping blade for grating and shredding tasks. It features a set of sharp, evenly spaced holes around its perimeter that slice ingredients into uniform strips as they are fed through the feed chute and spun against the disc by the processor’s motor. Unlike a box grater or handheld grater, a shredding disc produces consistent results with minimal effort, and most models are compatible with a wide range of ingredients from hard cheeses to root vegetables. They are one of the most commonly used food processor attachments for home cooks, as they drastically cut down on prep time for dishes like slaws, gratins, tacos, and baked goods.
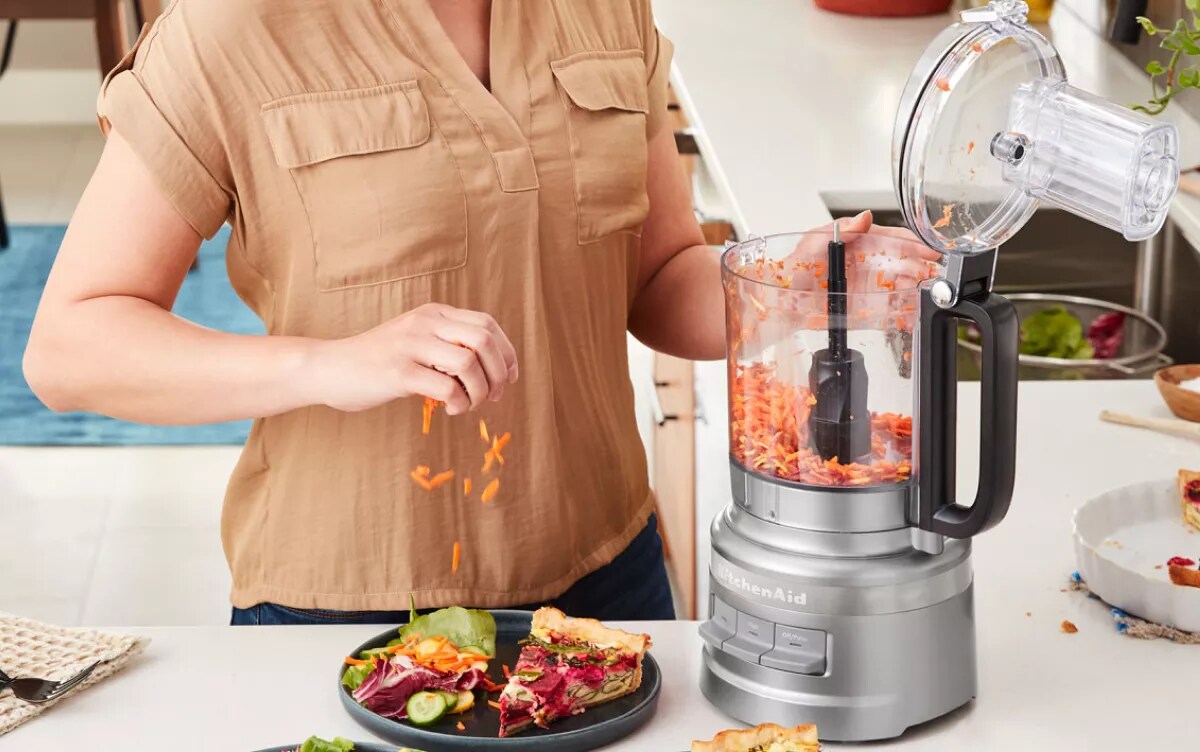 Shredding carrots with a food processor disc produces uniform pieces in 30 seconds, far faster than hand grating.
Image source: www.kitchenaid.com
Shredding carrots with a food processor disc produces uniform pieces in 30 seconds, far faster than hand grating.
Image source: www.kitchenaid.com
Core Benefits That Slash Kitchen Prep Time
A high-quality shredding disc delivers immediate, measurable improvements to your kitchen workflow, with benefits that go beyond just faster grating. Below are the most impactful advantages for home cooks:
1. Drastic Time Savings
In practice, a shredding disc can process 2 pounds of shredded carrots for a holiday slaw in 30 seconds, compared to 8–10 minutes of hand grating with a box grater—no blistered fingertips required. For high-volume meal prep, this adds up to 45+ minutes of saved time per week for regular home cooks, and even more for small-scale home caterers or batch-cooking families. What’s more, the disc works hands-free once ingredients are loaded, so you can focus on other prep tasks while it runs.
2. Perfectly Consistent Texture Every Time
A common mistake home cooks make when grating by hand is ending up with a mix of fine shreds, thick chunks, and powdery bits, which leads to uneven cooking and poor presentation. A shredding disc produces uniform pieces every single time, ensuring vegetables cook evenly in stir-fries and roasted dishes, cheese melts uniformly on pizza and pasta, and toppings have a polished, restaurant-quality look. This consistency is especially valuable for baked goods, where uneven shreds of zucchini or carrot can lead to dense, poorly cooked spots.
3. Unmatched Versatility
Modern shredding discs work with far more ingredients than just cheese and carrots. In practice, they handle firm vegetables (Brussels sprouts, potatoes, beets), hard and soft cheeses (parmesan, cheddar, mozzarella), nuts, chocolate, and even frozen butter for pastry dough (for heavy-duty models). Many discs come with reversible sides, so you can switch between coarse and fine shreds without swapping out attachments, cutting down on tool changes during busy prep sessions.
4. Reduced Mess and Hand Fatigue
Shredding by hand creates a pile of dirty graters, cutting boards, and scattered food bits, plus repeated strain on your wrist and hand from grating. A shredding disc contains all mess inside the food processor bowl, and most models are dishwasher safe for quick cleanup. For households with young children, installing childproof locks on kitchen drawers near your prep area can prevent accidental activation of the appliance while shredding.
Types of Shredding Discs
Not all shredding discs are built the same, and choosing the right type for your most frequent recipes will drastically improve your results. Below is a breakdown of the most common options on the market in 2026:
Coarse vs. Fine Shreds
The most basic distinction between shredding discs is hole size, which dictates the thickness of the final shred:
- Coarse shredding discs feature larger, wider holes that produce thick, ¼-inch strips. These are ideal for dishes that benefit from a chunky texture, like coleslaw, hash browns, taco toppings, and roasted vegetable medleys.
- Fine shredding discs have smaller, tighter holes that create thin, ⅛-inch strips. These work best for garnishes, pizza toppings, risotto, and baked goods, where a finer texture ensures even cooking and melting.
Specialty Shredding Options
For cooks with specific needs, several specialty disc types are available:
- Julienne discs cut ingredients into uniform matchstick-sized pieces, perfect for stir-fries, spring rolls, and garnished salads.
- Extra-fine (Parmesan) discs produce shreds almost as fine as grated parmesan, ideal for pasta toppings, salad seasonings, and homemade breadcrumb mixes.
- Reversible discs feature coarse holes on one side and fine holes on the other, letting you switch between textures without swapping attachments entirely.
Material and Build Quality
Shredding discs are almost universally made from stainless steel for durability and rust resistance, but construction quality varies widely between budget and premium models:
- Stamped steel discs (common in budget, third-party replacement discs) are cut from a single sheet of steel, but may have slightly uneven hole edges that can tear soft ingredients like mozzarella. They also dull faster, requiring replacement every 1–2 years with regular use.
- Laser-cut stainless steel discs (standard for OEM brand-name discs) have precision-cut edges that slice cleanly through even the hardest ingredients without tearing. They stay sharp 3–5x longer than stamped steel models, making them a better value for frequent users.
- Avoid discs with plastic hubs or mounting points, as these are prone to cracking under repeated use or high motor torque.
Compatibility With Food Processors
One of the most common points of confusion for new buyers is disc compatibility: not all shredding discs fit every food processor model. Most major brands (KitchenAid, Cuisinart, Breville, Hamilton Beach) use proprietary mounting systems or standard disc sizes (3-inch, 4-inch, or 6-inch for commercial models) that require matching discs. Always check your food processor’s model number and manual before purchasing a replacement or upgrade disc, as using an incompatible disc can lead to poor performance, motor strain, or even safety hazards. Some universal fit discs are available for popular models, but brand-specific OEM discs will always deliver the best fit and performance.
| Shredding Disc Type | Shred Size | Ideal Use Cases | Best Ingredients |
|---|---|---|---|
| Coarse | ¼-inch thick strips | Salads, slaws, taco toppings, hash browns | Carrots, cabbage, potatoes, zucchini |
| Fine | ⅛-inch thick strips | Garnishes, pizza toppings, baked goods, risotto | Hard cheeses (parmesan, cheddar), carrots, Brussels sprouts |
| Julienne | ⅛-inch thick matchsticks | Stir-fries, garnishes, spring rolls | Carrots, cucumbers, zucchini, bell peppers |
| Extra-Fine (Parmesan) | <⅛-inch, almost grated | Pasta toppings, salad seasonings, breadcrumb mixes | Hard aged cheeses, nuts, chocolate |
 Universal and brand-specific replacement shredding discs are available for most major food processor models.
Image source: www.ebay.ca
Universal and brand-specific replacement shredding discs are available for most major food processor models.
Image source: www.ebay.ca
How to Choose the Perfect Shredding Disc for Your Kitchen
With dozens of options on the market, picking the right shredding disc doesn’t have to be overwhelming. Focus on these four key factors to find a model that fits your cooking habits and existing appliances:
Match the Disc to Your Most Frequent Recipes
Start by listing the dishes you make most often that require shredded ingredients. If you regularly make tacos, slaws, and hash browns, a coarse or reversible disc will cover 90% of your needs. If you bake often or make homemade pasta, a fine or extra-fine parmesan disc is a better investment. For home cooks who make a wide range of dishes, a reversible coarse/fine disc offers the most versatility without requiring multiple separate attachments. For example, if you regularly make charcuterie boards, opt for a fine disc to create uniform cheese slices for boards that match your other toppings.
Assess Build Quality for Long-Term Use
If you plan to use your shredding disc more than once a week, prioritize laser-cut stainless steel construction over stamped steel or plastic models. While laser-cut discs cost 2–3x more upfront, their longer blade life and consistent performance make them more cost-effective over time. For occasional users, a high-quality stamped steel disc will work perfectly for light use.
Confirm Compatibility With Your Existing Appliances
Before purchasing, verify that the disc fits your food processor’s mounting system. Most brands list compatible model numbers on their product pages, and many third-party sellers include compatibility charts for universal fit discs. For households with multiple food processor models, opt for a universal disc that works with all your appliances to avoid buying separate attachments for each.
Budget Considerations
Shredding discs range from $10 for basic stamped steel third-party models to $50+ for OEM laser-cut brand-name discs. For occasional users, a $10–$15 stamped steel disc is more than sufficient. For frequent users or those with high-end food processors, investing in a $30–$50 OEM laser-cut disc will deliver better performance and last for years of regular use. Avoid extremely cheap (under $8) discs, as they are almost always made with low-quality steel that dulls after a handful of uses.
Step-by-Step Guide to Using a Shredding Disc Safely and Effectively
Using your shredding disc correctly will ensure consistent results, protect your food processor’s motor, and avoid common safety hazards. Follow these steps for optimal performance every time:
1. Pre-Shred Prep
Start by washing and thoroughly drying all ingredients before feeding them into the processor. Always follow FDA food safety guidelines for produce preparation to eliminate bacteria and reduce cross-contamination risk. Cut large ingredients (like whole potatoes or blocks of cheese) into 1–2 inch chunks to avoid overloading the feed chute and reduce strain on the motor.
2. Correct Assembly
Align the shredding disc’s center hole with the food processor’s blade shaft, then press down firmly until you hear a click to confirm it is locked in place. A loose disc will cause uneven shreds, loud rattling noises, and can even damage the processor bowl if it shifts during use. Always refer to your food processor’s manual for model-specific assembly instructions, as some brands require a separate adapter sleeve for shredding discs.
3. Safe Operation
Fill the feed chute no more than ¾ full to avoid overloading the motor. Use the included plastic pusher tool to guide ingredients down into the chute—never use your hands, as the sharp disc blades can cause serious cuts. For general kitchen appliance safety, reference CPSC guidelines for small kitchen tools to avoid common hazards like entanglement with moving parts or electrical damage from liquid exposure. If you notice the motor slowing down or making unusual noises, stop the processor immediately to clear any blockages.
4. Common Mistakes to Avoid
- Overloading the feed chute: This is the most common cause of motor strain and uneven shreds. Stick to small batches for the best results.
- Skipping the pusher tool: Forcing ingredients down with your hands is a major safety risk and can damage the disc.
- Shredding incompatible ingredients: Avoid shredding very soft foods (like ripe tomatoes or cooked pasta) or extremely hard frozen items (unless your disc is rated for frozen use), as these will clog the disc or dull the blades.
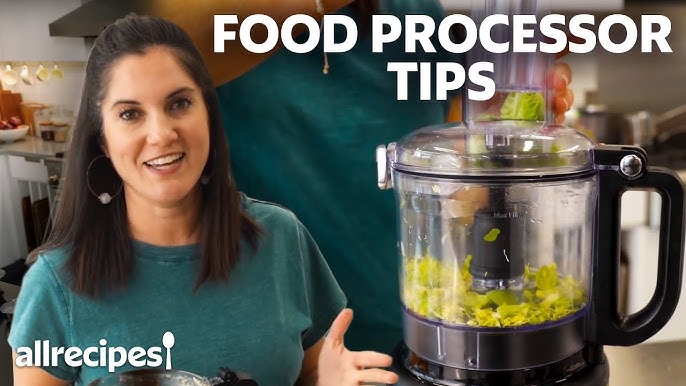 Video walkthroughs are a useful resource for first-time users learning to install and use their shredding disc correctly.
Image source: www.youtube.com
Video walkthroughs are a useful resource for first-time users learning to install and use their shredding disc correctly.
Image source: www.youtube.com
Cleaning and Maintaining Your Shredding Disc for Longevity
Proper maintenance will keep your shredding disc sharp and functional for years, and prevent foodborne illness from built-up residue. Follow these simple steps after every use:
- Unplug the food processor before removing the disc to avoid accidental activation.
- Remove stuck-on food bits immediately with a soft brush—tough residue can be lifted with a sturdy kitchen cleaning scrub brush without scratching the disc’s sharp edges. Avoid abrasive scrubbers or steel wool, as these will dull the blades.
- Wash the disc with warm, soapy water, or place it in the top rack of the dishwasher if it is labeled dishwasher safe (most stainless steel discs are, but check your manufacturer’s guidelines first).
- Dry thoroughly with a clean towel before storing to prevent rust or corrosion, especially for lower-quality stamped steel discs.
- Inspect regularly for signs of dulling, rust, or warping. A worn disc will produce uneven shreds and put unnecessary strain on your food processor’s motor.
Stubborn residue on the disc or food processor bowl can be scrubbed with a professional-grade kitchen cleaning brush to avoid scratching stainless steel surfaces. Store your shredding disc in a dry, protected drawer or container to avoid accidental damage from other kitchen tools.
Troubleshooting Common Shredding Disc Issues
Even with proper use, you may encounter occasional issues with your shredding disc. Below are the most common problems and their quick fixes:
Jammed Disc or Motor Strain
Cause: Overloading the feed chute, shredding incompatible ingredients (like very soft foods or unpeeled hard produce), or a dull disc. Fix: Unplug the processor, remove the bowl, and carefully clear any stuck food bits from the disc holes with a soft brush. Cut ingredients into smaller chunks and avoid overfilling the chute for future use. If jams happen frequently, your disc may be dull and need replacement.
Uneven Shreds
Cause: A misaligned or loose disc, dull blades, or uneven feeding of ingredients. Fix: First, confirm the disc is locked firmly in place by pressing down until you hear a click. If the disc is properly aligned but shreds are still uneven, inspect the blades for dulling or damage—if the edges are rounded or chipped, the disc needs to be replaced. Feed ingredients evenly into the chute, and avoid pushing too hard with the pusher tool.
Rust or Corrosion on the Disc
Cause: Improper drying after washing, or low-quality stamped steel construction that is more prone to rust. Fix: For minor surface rust, scrub the area with a mixture of baking soda and water, then dry thoroughly and apply a thin coat of food-safe mineral oil to prevent further corrosion. If rust is widespread or the disc is pitted, replace it immediately to avoid food contamination.
When to Replace Your Shredding Disc
Even with proper care, shredding discs will wear out over time. Replace your disc if you notice consistent uneven shreds, frequent jams, visible dulling or chipping of the blades, or rust that cannot be removed. A worn disc not only produces poor results but also puts unnecessary strain on your food processor’s motor, shortening its lifespan. Most shredding discs last 2–5 years with regular use, depending on build quality and maintenance.
Pro Tips to Maximize Kitchen Efficiency With Your Shredding Disc
Once you’ve mastered basic shredding disc use, these pro tips will help you get even more value out of your attachment and streamline your entire kitchen workflow:
Pair With Other Food Processor Attachments
Your shredding disc works seamlessly with other food processor attachments to cut down on tool changes during busy prep sessions. For example, you can shred cheese for a pizza, then swap to a slicing disc to cut peppers and onions for the same recipe in minutes. If you’re prepping for a gathering, you can even pair shredded veggie toppings with custom engraved cutting boards for a polished, personalized serving setup.
High-Impact Meal Prep Ideas
Shredded ingredients are perfect for batch prepping, as they store well in airtight containers for 3–5 days in the fridge, or up to 3 months in the freezer. Try these popular meal prep uses:
- Shredded sweet potatoes for roasted hash or breakfast burrito fillings
- Shredded Brussels sprouts for quick weeknight roasted sides or salad bases
- Shredded cauliflower for low-carb pizza crust or fried rice
- Shredded carrots and cabbage for meal-prep slaws that stay crisp for days
- Grated parmesan for quick pasta and salad toppings all week
Simplify Post-Prep Cleanup
One of the biggest efficiency wins of a shredding disc is reduced cleanup time. Unlike hand grating, which creates a mess of cutting boards, graters, and scattered food bits, the shredding disc contains all prep work inside the food processor bowl. Most discs and bowls are dishwasher safe, so you can toss them directly into the dishwasher after use with no scrubbing required. For more time-saving kitchen tips, browse our latest kitchen content on the PlugChef blog, where we share hacks for every part of your cooking routine.
Frequently Asked Questions
What is a shredding disc for a food processor?
A shredding disc is a specialized, circular attachment that fits inside a food processor bowl, designed to grate and shred ingredients into uniform strips using sharp, evenly spaced holes around its edge. It replaces the standard chopping blade for grating tasks, and produces consistent results far faster than hand grating with a box grater. Most shredding discs are compatible with a wide range of ingredients, including vegetables, cheeses, nuts, and chocolate, making them a versatile tool for everything from weeknight dinners to holiday meal prep.
How do I use a shredding disc correctly?
To use a shredding disc safely and effectively, first confirm it is securely locked into place on the food processor’s blade shaft (you should hear a click when it is properly seated). Cut ingredients into 1–2 inch chunks, then feed them into the feed chute no more than ¾ full at a time. Use the included plastic pusher tool to guide ingredients down into the chute—never use your hands, as the sharp blades can cause serious cuts. Turn on the processor and apply steady, gentle pressure with the pusher until all ingredients are shredded. Always refer to your food processor’s manual for model-specific instructions.
Can all food processors use shredding discs?
No, not all food processors support shredding discs. Compatibility depends on your model’s mounting system and bowl size: most full-size food processors (8 cups or larger) support shredding discs, while small compact models (4 cups or smaller) often do not have the necessary shaft or clearance for a shredding attachment. Always check your food processor’s manual or product specifications before purchasing a shredding disc to avoid buying an incompatible model. Some universal fit discs are available for popular brands, but brand-specific OEM discs will always deliver the best fit and performance.
What foods can I shred with a shredding disc?
Most shredding discs work well with firm, solid ingredients including carrots, cabbage, potatoes, Brussels sprouts, hard cheeses (parmesan, cheddar), and firm fruits like apples. Avoid shredding very soft, wet ingredients (like ripe tomatoes, cooked pasta, or soft berries) as these will clog the disc holes and produce uneven results. Some heavy-duty discs are rated for frozen ingredients like frozen butter or frozen cauliflower, but always check your disc’s manufacturer guidelines before attempting to shred frozen items.
Are shredding discs dishwasher safe?
Most stainless steel shredding discs are dishwasher safe, but you should always check your manufacturer’s guidelines first, as some discs with plastic components or decorative coatings may be damaged by high heat or harsh dishwasher detergents. For hand washing, use warm, soapy water and a soft brush to clean the disc, avoiding abrasive scrubbers that can dull the blades. Always dry the disc thoroughly before storing to prevent rust.
Can I shred frozen ingredients with a shredding disc?
Standard shredding discs are not designed for fully frozen ingredients, as hard frozen pieces can dull or damage the sharp blades, and may cause the motor to strain. However, some heavy-duty, commercial-grade shredding discs are rated for partially frozen items, like frozen butter for pastry dough or frozen cauliflower for low-carb recipes. Always check your disc’s manufacturer specifications before attempting to shred frozen foods, and cut frozen ingredients into 1-inch chunks to reduce strain on the motor.
Conclusion
A high-quality shredding disc is one of the simplest, most impactful upgrades you can make to your kitchen workflow, cutting hours of tedious grating work down to minutes with consistent, uniform results. By choosing the right disc type for your cooking habits, ensuring compatibility with your food processor, and following proper use and maintenance guidelines, you’ll enjoy years of faster, easier prep with less mess and hand fatigue. Whether you’re batch-prepping meals for your family, hosting dinner parties, or just looking to streamline nightly cooking, a shredding disc delivers instant efficiency gains that make every prep session faster and more enjoyable. If you’re ready to upgrade your toolkit, start by checking your food processor’s model number to confirm compatible disc options, and invest in a high-quality laser-cut stainless steel model for the best long-term performance. For more kitchen tool guides, time-saving hacks, and cooking tips, explore the rest of the PlugChef blog to make every meal prep session a breeze.

I’m Abby Lu, a passionate home cook who loves simplifying everyday meals. At PlugChef.com, I share product reviews and cooking guides to help you find the best tools for your kitchen.
Related posts:
 How to Make a Fruit Basket for a Gift: Easy DIY Guide
 Do You Need a Basket? Essential Guide for Air Fryers
 Gray Kitchen With Stainless Steel Appliances: Modern Elegance
 Appliance Play Food Kitchen Toys: Ignite Imaginative Play
 How Long Do Beauty Blenders Last: Expert Tips Unveiled
 Philips Kitchen Appliances Compact Pasta And Noodle Maker: Effortless Homemade Pasta

