
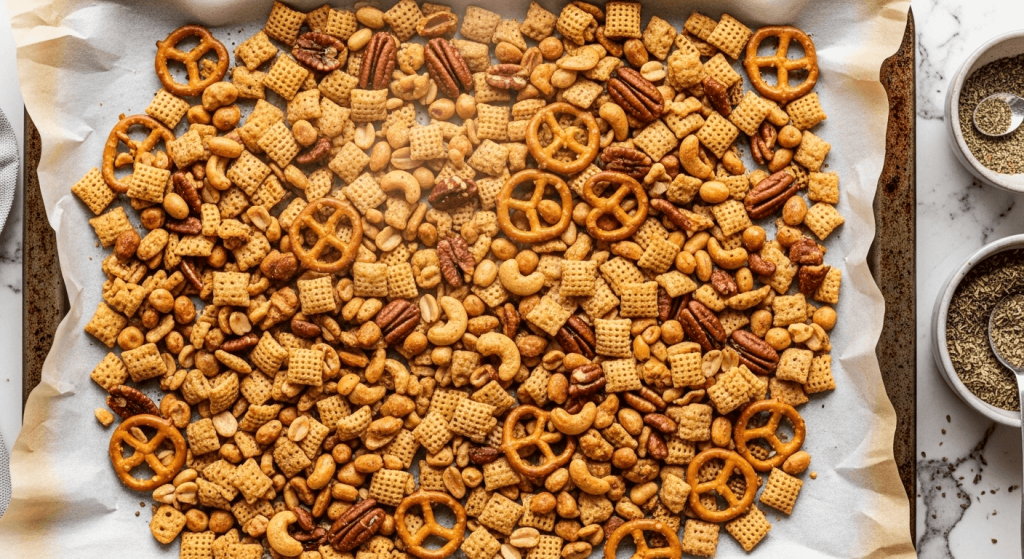
Looking for a snack that’s crunchy, full of flavor, and perfect for any occasion? You’re about to discover a savory Chex Mix recipe made right in your oven that will satisfy your cravings and impress your friends.
This easy-to-make treat combines the perfect blend of spices and textures to keep you coming back for more. Keep reading, and you’ll learn how to create a homemade snack that’s far better than anything store-bought—your taste buds will thank you!

Credit: oursliceofhome.com
Ingredients For Savory Chex Mix
Gathering the right ingredients is the first step to making your Savory Chex Mix truly unforgettable. The balance between crunchy cereals, flavorful spices, and tasty mix-ins defines the snack’s character. Knowing what to choose can make your oven-baked Chex Mix a hit every time.
Choosing The Right Cereals
Start with a mix of cereals that offer different textures and flavors. Rice Chex and Corn Chex provide a light crunch, while Wheat Chex adds a hearty, nutty taste. Using a combination keeps every bite interesting and satisfying.
Consider how the cereals will hold up in the oven. You want ones that stay crisp and don’t get soggy. Have you experimented with adding Mini Wheat or even Cheerios for a fun twist?
Spices And Seasonings
The right seasoning blend turns a simple mix into a savory masterpiece. Classic choices include garlic powder, onion powder, smoked paprika, and a touch of cayenne for heat. These create layers of flavor that make you want to reach for more.
Salt is essential, but balance it carefully to avoid overpowering the other spices. Don’t forget freshly ground black pepper to add a subtle kick. How bold do you like your spice level in snacks?
Additional Mix-ins
Adding extra ingredients can elevate your Chex Mix beyond the ordinary. Nuts like almonds, pecans, or cashews introduce a rich, buttery crunch. Pretzels or bagel chips bring a salty, crispy element that contrasts nicely with the cereals.
Think about including seeds like pumpkin or sunflower for unexpected texture and nutrition. These little additions not only add flavor but make your snack feel special. What unique mix-ins have you tried that surprised you with their taste?
Preparing The Oven
Preparing your oven correctly is key to making the perfect savory Chex Mix. It ensures even cooking and brings out the best flavors in every crunchy bite. Taking a moment to get your oven settings and bakeware right can save you from unevenly toasted snacks and wasted ingredients.
Setting The Temperature
Preheat your oven to the exact temperature the recipe calls for—usually around 250°F to 300°F for Chex Mix. This low and slow heat helps the mix toast evenly without burning the spices or nuts.
Have you ever tried to speed up the process by turning the heat higher? It almost always leads to burnt edges and raw centers. Patience here really pays off.
Using The Right Bakeware
Choose a large, rimmed baking sheet to spread your Chex Mix in a thin, even layer. Metal pans work best because they conduct heat evenly and help the mix toast uniformly.
Nonstick surfaces might seem convenient, but they can sometimes cause your mix to steam instead of crisp up. If you only have glass or ceramic, keep a close eye on the mix to avoid sogginess.
Mixing The Ingredients
Combine the Chex cereals with nuts and pretzels in a large bowl. Pour melted butter and seasoning over the mix, stirring well to coat evenly.
Mixing the ingredients for a savory Chex Mix is a simple process. It’s a fun and interactive way to create a tasty snack. All it takes is a few steps to bring everything together.Combining Cereals And Nuts
Start by pouring your chosen cereals into a large mixing bowl. Chex cereals are a great choice for this mix. Aim for a combination of rice, corn, and wheat Chex. Add pretzels and a handful of mixed nuts to the bowl. These add a delightful crunch to your mix.Adding Seasoning Blend
Next, prepare the seasoning blend. Melt some butter in a small saucepan. Stir in Worcestershire sauce, garlic powder, onion powder, and salt. Pour this flavorful mixture over the cereals and nuts. The seasoning adds a savory kick.Ensuring Even Coating
Gently toss the mix with a large spoon. Ensure every piece gets coated in the seasoning. Spread the mix onto a baking sheet in a single layer. This step is important for even baking. Bake in a preheated oven, stirring occasionally. This helps in achieving a perfect, crispy texture.Baking The Chex Mix
Baking your Chex Mix is where all the flavors come together and the magic happens. This step is crucial to get that perfect crunchy texture and toasting without burning the mix. Paying close attention to timing and temperature can make a huge difference in the final taste and crunch.
Timing And Temperature Tips
Set your oven to 250°F (120°C) to ensure gentle, even baking. High heat might burn the mix before it crisps up, leaving you with bitter pieces.
Plan to bake the mix for about 45 minutes. This slow bake allows the seasoning to stick well and the ingredients to toast evenly.
Are you tempted to crank up the heat to save time? Resist that urge. Lower temperature with longer baking yields a better crunch and more balanced flavor.
Stirring During Baking
Stirring the Chex Mix every 15 minutes is essential. It prevents burning on the edges and helps spread the seasoning evenly.
I once skipped stirring and ended up with half the batch burnt, half underdone—what a disappointment! Trust me, a quick stir makes a big difference.
Use a large spoon or spatula to gently turn the mix, making sure every piece gets equal heat exposure. This simple step keeps your snack perfectly crispy and flavorful.
Cooling And Storing
After baking your Savory Chex Mix in the oven, the cooling and storing steps are just as important as the seasoning. Proper cooling ensures the mix stays crunchy without getting soggy. Storing it right keeps the flavors fresh and ready for snacking anytime.
Cooling Techniques
Spread the Chex Mix out on a large baking sheet or parchment paper. This allows the heat to escape quickly and prevents clumping.
Let it cool at room temperature, ideally for about 20 to 30 minutes. Avoid covering it while warm, as trapped steam can soften the mix.
Have you noticed how warm snacks lose their crispness fast? Cooling completely before storing is the key to keeping that perfect crunch.
Best Storage Practices
Use an airtight container to store your cooled Chex Mix. This stops moisture from creeping in and ruining the texture.
Keep the container in a cool, dry place, like your pantry. Avoid storing near heat sources or sunlight, which can speed up staleness.
If you want to keep it fresh longer, consider resealable bags with the air squeezed out. This method works great for portion control too.
Have you tried freezing your Chex Mix? It’s an option that can extend shelf life for several weeks while maintaining flavor and crunch.
:max_bytes(150000):strip_icc()/233047-soccer-chex-mix-DDMFS-Beauty-4x3-1b0ef2788756460a8b01524ff7892c4e.jpg)
Credit: www.allrecipes.com
Variations To Try
Exploring different flavors can make your savory Chex Mix even more exciting. Simple changes create new taste experiences. These variations are easy to try and fun to share.
Experiment with spices, cheeses, or a blend of sweet and salty. Each option brings a unique twist to your oven-baked snack. Pick one or mix them up for variety.
Spicy Twist
Add heat with chili powder, cayenne pepper, or hot sauce. A pinch of smoked paprika gives a smoky flavor. Toss with red pepper flakes for a bold kick. These spices warm up the mix and make it lively. Perfect for those who love a little fire.
Cheesy Flavors
Use powdered cheese like cheddar or parmesan for a rich taste. Sprinkle grated cheese before baking for a crispy coating. Mix in cheese-flavored crackers to boost the cheesy vibe. This version is creamy and satisfying. Great for cheese lovers wanting more depth.
Sweet And Savory Combo
Combine brown sugar or honey with your spices. Add a handful of nuts or dried fruit for texture. A dash of cinnamon enhances the sweet notes. This mix balances salty and sweet perfectly. Ideal for a snack with a little surprise.
Serving Suggestions
Serving Savory Chex Mix fresh from the oven makes any gathering lively. This crunchy snack fits many occasions. It’s easy to share and loved by all ages.
Perfect for casual or formal events, it pairs well with other snacks and drinks. Try different ways to serve it to add excitement to your table.
Party Snack Ideas
- Fill small bowls around the party area for easy grabbing.
- Mix with nuts and pretzels for a bigger snack platter.
- Use colorful paper cones for a fun, portable treat.
- Top with a sprinkle of extra herbs or cheese for extra flavor.
- Combine with fresh veggies and dip for a balanced snack table.
Pairing With Drinks
- Pairs well with light beers and lagers to balance flavors.
- Try with sparkling water or lemon soda for a refreshing twist.
- Offers a salty contrast to sweet cocktails like a mojito.
- Works with iced tea or lemonade for family-friendly gatherings.
- Enjoy with red or white wine for a more elegant snack option.

Credit: jessiesfoodfaithandfamily.com
Frequently Asked Questions
What Ingredients Are Needed For Savory Chex Mix?
Savory Chex Mix requires Chex cereals, pretzels, nuts, butter, Worcestershire sauce, garlic powder, onion powder, and seasoning salt. These ingredients combine for a flavorful, crunchy snack. Adjust spices to your taste for a perfect homemade mix.
How Long Should I Bake Chex Mix In The Oven?
Bake Chex Mix at 250°F (120°C) for 45 minutes. Stir every 15 minutes to ensure even coating and crispiness. This slow baking process enhances flavor and texture without burning the mix.
Can I Customize The Seasoning In Chex Mix?
Yes, you can customize seasoning by adding your favorite spices. Try chili powder, smoked paprika, or ranch seasoning for unique flavors. Adjust salt and spice levels to suit your taste preferences.
How Should I Store Homemade Chex Mix?
Store Chex Mix in an airtight container at room temperature. It stays fresh and crunchy for up to two weeks. Avoid moisture to maintain its crisp texture and flavor.
Conclusion
This Savory Chex Mix recipe bakes quickly and tastes great. It is perfect for snacks, parties, or anytime you want something crunchy. You can change the spices to fit your taste. Everyone will enjoy this easy, flavorful treat. Try it once, and it may become your favorite snack.
Simple ingredients and oven baking make it a winner. Give your snack time a tasty upgrade today.

Hi, I’m Daniel Brooks—a food lover and kitchen gear enthusiast. I enjoy testing cookware, utensils, and gadgets to see what really works in everyday cooking. At PlugChef.com, I share honest reviews, comparisons, and simple guides to help you choose the best tools for a safer, smarter, and more enjoyable kitchen.
Related posts:
 What Type of Cooking Utensils are Safe: Expert Picks
 What Innovations Could Blenders Make: Unleashing Future Tech
 Smart Strategies to Organize a Small Kitchen: Maximize Space
 How to Organize a Kitchen Cabinet: Expert Tips & Tricks
 How to Organize Kitchen Drawers: Expert Tips and Tricks
 How to Organize a Corner Kitchen Cupboard: Expert Tips

