
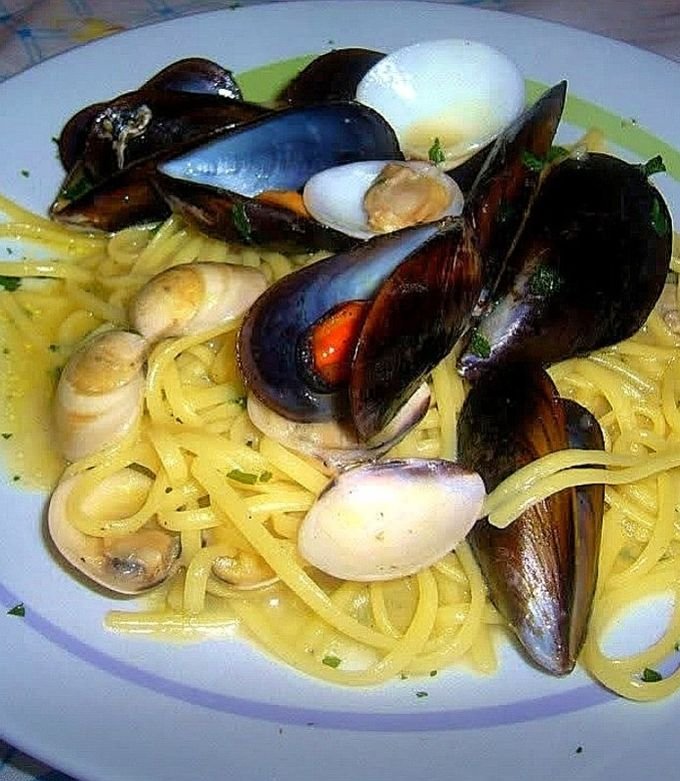
If you love seafood and simple, satisfying meals, linguine with clams and mussels is a dish you need to try. Imagine tender pasta wrapped in a rich, garlicky sauce, bursting with the fresh flavors of the sea.
This recipe is not only delicious but also quick to prepare, making it perfect for any night you want to impress yourself or your guests. Keep reading, and you’ll discover how easy it is to bring a taste of the ocean straight to your table.
Your next favorite meal is just a few steps away!
Ingredients For Seafood Linguine
Creating the perfect seafood linguine starts with choosing the right ingredients. Each component plays a key role in flavor and texture. Freshness and quality matter the most for clams and mussels. The pasta and pantry items bring balance. Herbs and seasonings add the final touch of aroma and taste.
Fresh Clams And Mussels Selection
Pick live clams and mussels for the best taste. They should be tightly closed or close when tapped. Avoid any with cracked shells or strong smells. Rinse them well under cold water to remove sand and grit. Fresh shellfish give the dish a natural ocean flavor.
Pasta And Pantry Staples
Use linguine pasta that cooks to a firm texture. Olive oil provides a rich base for the sauce. Garlic adds a sharp, fragrant flavor that pairs well with seafood. White wine brings acidity and depth. Keep chicken or vegetable broth handy for extra sauce richness. Salt and black pepper are essential for seasoning.
Herbs And Seasonings
Fresh parsley brightens the dish with a mild, peppery taste. Red pepper flakes offer a gentle heat without overpowering. Lemon zest or juice adds a fresh, tangy note. Bay leaves can enhance the sauce with subtle earthiness. Use these herbs carefully to complement, not mask, the seafood flavor.
Preparing The Shellfish
Preparing shellfish like clams and mussels is a crucial step that can make or break your linguine dish. Handling them properly ensures safety and enhances the natural flavors. Let’s dive into how you can clean, check, and open these shellfish with confidence.
Cleaning Clams And Mussels
Start by rinsing the clams and mussels under cold running water to remove surface dirt. Use a stiff brush to scrub their shells gently but thoroughly. This removes any sand or debris stuck on the outside, which can ruin the texture of your dish.
Soak the shellfish in a bowl of cold water with a handful of salt for about 20 minutes. This encourages them to spit out any sand or grit inside their shells. You’ll notice some grit settling at the bottom—discard this water and rinse the shellfish again before cooking.
Checking For Freshness
Freshness is key to safe and tasty shellfish. Tap any open clams or mussels lightly; if they close up, they are still alive and safe to eat. If they remain open or have cracked shells, it’s best to throw them away.
Smell is also a good indicator. Fresh shellfish should smell like the ocean—briny and clean—not fishy or sour. Trust your senses, because cooking with bad shellfish can spoil the whole meal.
Opening Techniques
Opening clams and mussels requires a bit of care. Use a shucking knife or a small, sturdy knife to pry open the shells. Insert the knife at the hinge and twist gently until the shell pops open.
For mussels, steam them briefly until they open naturally—this also helps release their juices, adding flavor to your linguine sauce. Discard any shellfish that don’t open after cooking, as they may be unsafe to eat.
Have you ever tried opening clams or mussels yourself? It’s easier than you think, and it adds a satisfying touch to your cooking experience. Plus, fresh shellfish smell and taste far better than pre-opened ones from the store.
Cooking The Pasta Perfectly
Cook linguine until tender but firm to the bite for the best texture. Drain and toss quickly with clams, mussels, and sauce to blend flavors well.
Cooking the perfect pasta is an art that enhances the overall experience of any dish. When making Linguine with Clams and Mussels, cooking the pasta just right is crucial. This not only ensures the best texture but also complements the flavors of the clams and mussels beautifully. Whether you’re a seasoned cook or a beginner, mastering these pasta-cooking techniques will elevate your culinary game.
Choosing The Right Linguine
The choice of linguine can impact the final dish significantly. Opt for high-quality, durum wheat semolina linguine. It holds up better to cooking and absorbs the sauce more effectively. Consider the thickness of the pasta. Thinner linguine cooks faster but may not offer the same satisfying bite as a slightly thicker version. Your personal preference can guide you here.
Boiling Tips
Start with a large pot of water—at least 4 quarts for every pound of pasta. This allows the pasta to move freely, preventing it from sticking together. Add a generous amount of salt to the boiling water. This is your chance to season the pasta from within, enhancing its flavor. Stir the pasta immediately after adding it to the boiling water. This ensures that each strand remains separate.
Al Dente Texture
The term “al dente” translates to “to the tooth,” meaning the pasta should offer a slight resistance when bitten. This is key for linguine with clams and mussels, as it balances the dish’s texture. Test the pasta a minute or two before the package instructions suggest. Pasta continues to cook even after draining due to residual heat. Ask yourself: How do you prefer the texture? Adjust the cooking time to match your taste, keeping in mind the sauce will add moisture. Cooking pasta perfectly is a skill that pays off in countless meals. With these tips, you can enjoy linguine that is always cooked to perfection, enhancing your favorite seafood dish.

Credit: tiffycooks.com
Making The Sauce
Making the sauce for linguine with clams and mussels sets the foundation for the entire dish. It’s where flavors come alive and meld together to complement the briny seafood perfectly. Crafting the sauce with care lets you control the balance between richness and freshness, making every bite memorable.
Sautéing Garlic And Onions
Start by gently sautéing finely chopped garlic and onions in olive oil. Keep the heat medium-low to avoid burning the garlic, which can turn bitter quickly. You want the onions soft and translucent, releasing their sweetness to create a mellow base.
Have you noticed how the aroma of garlic and onions fills the kitchen? It’s an early sign that you’re building layers of flavor that will elevate your sauce.
Adding White Wine And Broth
Pour in a good splash of dry white wine to deglaze the pan, scraping up any bits stuck to the bottom. The wine adds acidity and depth, balancing the sweetness from the sautéed vegetables. Let it simmer for a minute or two to burn off the alcohol.
Next, add clam broth or seafood stock to deepen the oceanic flavor. If you don’t have broth, a mix of water and a little fish sauce can work. This step ensures your sauce isn’t just tasty but authentic, enhancing the natural taste of the shellfish.
Incorporating Herbs And Spices
Add fresh herbs like parsley or thyme towards the end of cooking to keep their bright, fresh notes alive. A pinch of red pepper flakes can bring a subtle heat without overpowering the dish. Salt and freshly ground black pepper should be adjusted carefully—you want to enhance but not mask the seafood’s flavor.
Think about which herbs you enjoy most and experiment a little. Do you prefer the earthiness of thyme or the brightness of parsley? Your choice here personalizes the dish, making it truly yours.
Combining Pasta And Seafood
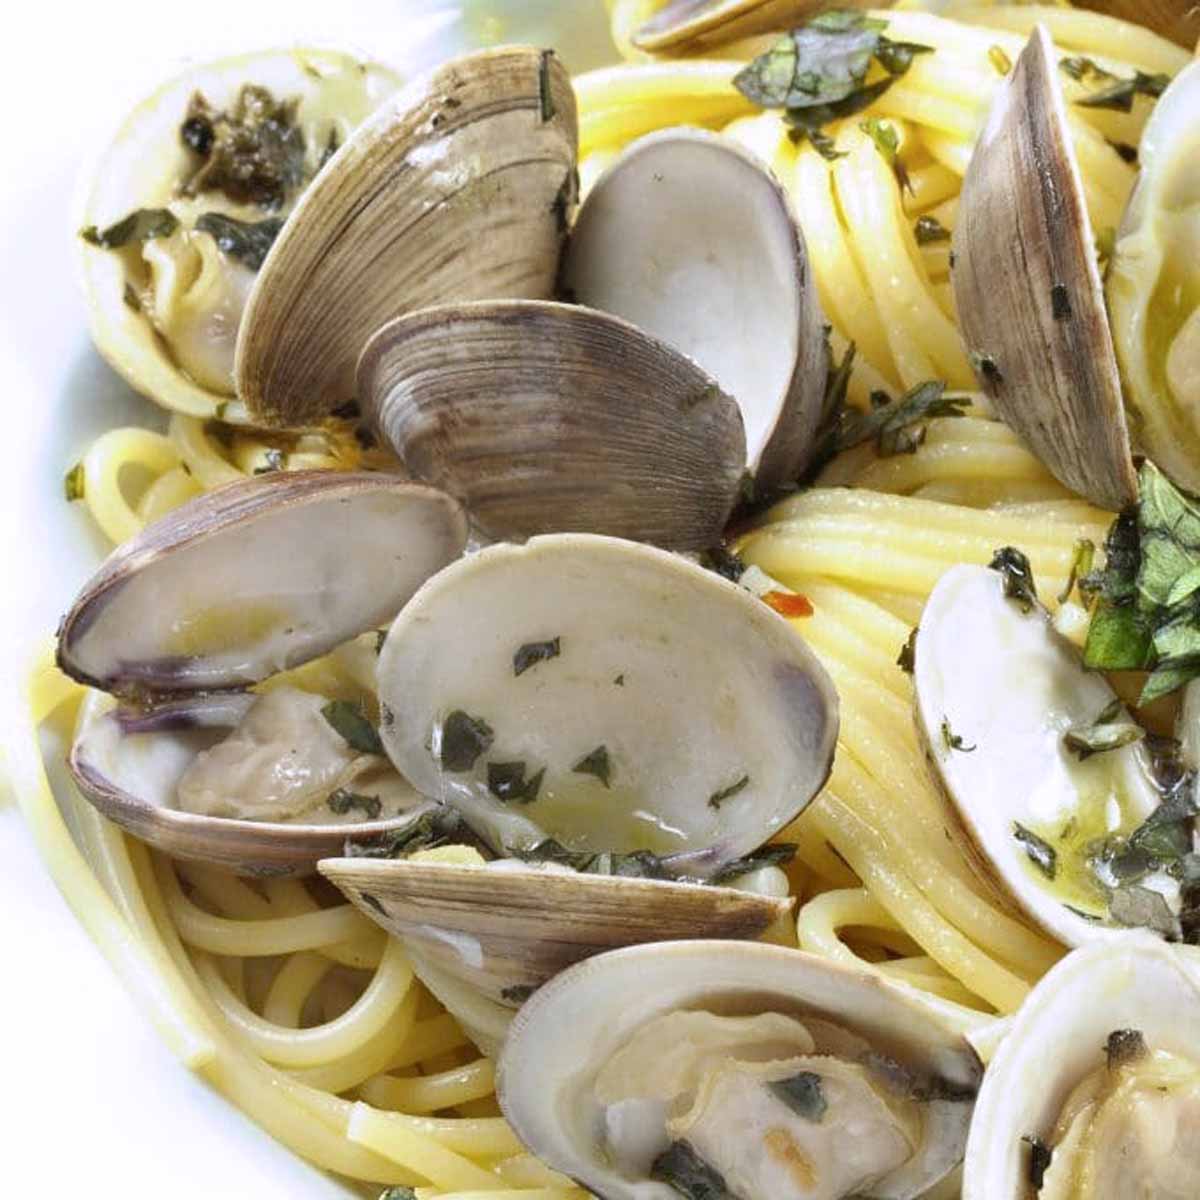
Combining pasta and seafood creates a dish full of rich textures and fresh flavors. The soft linguine pairs beautifully with the tender clams and mussels. This blend highlights the natural taste of the sea alongside the comforting bite of pasta.
Seafood brings a briny, slightly sweet flavor. Pasta offers a neutral base that lets these tastes shine. The sauce ties everything together, making each bite satisfying and balanced.
Mixing Shellfish With Sauce
Start by cooking clams and mussels until they open. Their juices add depth to the sauce. Use garlic, white wine, and olive oil for a light, flavorful base. Stir the shellfish gently to coat them well. This step infuses the sauce with ocean freshness.
Tossing With Linguine
Drain the linguine but keep some pasta water. Toss the pasta with the shellfish and sauce in a large pan. The pasta water helps the sauce cling to the linguine. Toss gently to avoid breaking the shellfish. This step unites all ingredients in perfect harmony.
Balancing Flavors
Season with salt, pepper, and a squeeze of lemon juice. The lemon brightens the dish and cuts through richness. Fresh parsley adds a hint of earthiness. Taste often to keep flavors balanced. The goal is a dish that is light, fresh, and full of flavor.
Credit: www.askchefdennis.com
Serving Suggestions
Serving linguine with clams and mussels is more than just plating pasta and seafood. How you finish the dish and what you serve alongside it can elevate the entire meal experience. Thoughtful garnishes, the right wine, and complementary sides will enhance every bite and bring out the best flavors.
Garnishes And Finishing Touches
A sprinkle of fresh parsley adds a burst of color and a mild herbal note that brightens the dish. Try adding a zest of lemon right before serving; the citrus oils lift the seafood’s natural sweetness.
Consider a drizzle of good quality extra virgin olive oil to add richness without overpowering the flavors. If you enjoy a bit of heat, a pinch of red pepper flakes on top creates a subtle kick that plays well with the briny clams and mussels.
Pairing With Wine
White wines with crisp acidity work wonders with this seafood pasta. A chilled Sauvignon Blanc or Pinot Grigio balances the saltiness and complements the garlic and herbs.
If you prefer red, go for a light-bodied option like a Pinot Noir, which won’t overwhelm the delicate flavors. Ever tried a sparkling wine? Its bubbles can cleanse your palate between bites, making each forkful feel fresh.
Side Dishes To Complement
Serve a simple green salad dressed with lemon vinaigrette to add freshness and crunch. Garlic bread is a classic choice—perfect for soaking up the flavorful sauce.
Roasted vegetables like asparagus or cherry tomatoes can bring a sweet and smoky contrast. How about a bowl of steamed baby potatoes tossed with herbs? They add heartiness without stealing the spotlight.
Tips For Success
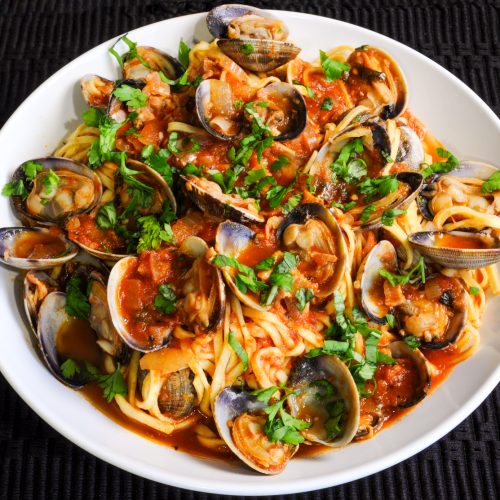
Getting linguine with clams and mussels just right can feel tricky, but a few smart tips can make your dish stand out every time. Paying close attention to cooking times, storage, and how you tweak the recipe lets you enjoy restaurant-quality seafood pasta at home. Ready to cook smarter, not harder?
Avoiding Overcooking
Seafood cooks fast, and overcooked clams and mussels turn rubbery and lose their delicate flavor.
Watch the shells closely—once they open, the seafood is ready. Any that stay closed after cooking should be discarded to avoid unpleasant bites.
Try removing the pot from heat as soon as the shells open and toss the seafood gently with the pasta to finish cooking from residual heat. This small step keeps your seafood tender and juicy.
Handling Leftovers
Leftovers can be a lifesaver, but seafood needs careful storage to stay fresh and safe to eat.
- Cool your leftovers quickly and store them in an airtight container.
- Keep them in the refrigerator and consume within 1-2 days.
- Avoid reheating seafood multiple times; reheat only once until steaming hot.
Have you ever been disappointed by leftover seafood that turned tough or bland? Proper handling can prevent that and keep your meal enjoyable the next day.
Customizing The Recipe
Your taste is unique—don’t hesitate to tweak the basics to suit your preferences.
- Add a pinch of red pepper flakes for a subtle heat kick.
- Swap linguine for spaghetti or fettuccine if that’s what you have on hand.
- Fresh herbs like parsley or basil can brighten up the dish.
- Try finishing with a squeeze of lemon juice for extra zing.
What’s your favorite way to make this dish your own? Experimenting with small changes can lead you to a version you’ll crave again and again.
Credit: fortheloveofcooking.net
Frequently Asked Questions
What Type Of Clams And Mussels Are Best For Linguine?
Fresh, medium-sized clams and mussels work best. Choose varieties like littleneck clams and blue mussels for optimal flavor and texture.
How Do You Clean Clams And Mussels Properly?
Soak them in cold salted water for 20 minutes. Scrub shells with a brush and discard any open or cracked ones.
Can I Use Canned Clams Instead Of Fresh?
Yes, canned clams are a convenient alternative. Add them toward the end of cooking to avoid overcooking and preserve flavor.
What Wine Pairs Well With Linguine And Shellfish?
A crisp white wine like Pinot Grigio or Sauvignon Blanc complements the seafood’s briny flavors perfectly.
Conclusion
Linguine with clams and mussels offers a tasty and simple meal. The fresh seafood and pasta mix well for a satisfying dish. You can enjoy this recipe any night of the week. It brings a bit of the sea right to your plate.
Try it once, and you might want to make it often. Cooking this dish helps you learn new flavors and skills. It’s a great way to enjoy healthy, homemade food. Give it a go and enjoy a classic Italian taste!

Hi, I’m Daniel Brooks—a food lover and kitchen gear enthusiast. I enjoy testing cookware, utensils, and gadgets to see what really works in everyday cooking. At PlugChef.com, I share honest reviews, comparisons, and simple guides to help you choose the best tools for a safer, smarter, and more enjoyable kitchen.
Related posts:
 What Type of Cooking Utensils are Safe: Expert Picks
 What Innovations Could Blenders Make: Unleashing Future Tech
 Smart Strategies to Organize a Small Kitchen: Maximize Space
 How to Organize a Kitchen Cabinet: Expert Tips & Tricks
 How to Organize Kitchen Drawers: Expert Tips and Tricks
 How to Organize a Corner Kitchen Cupboard: Expert Tips

