
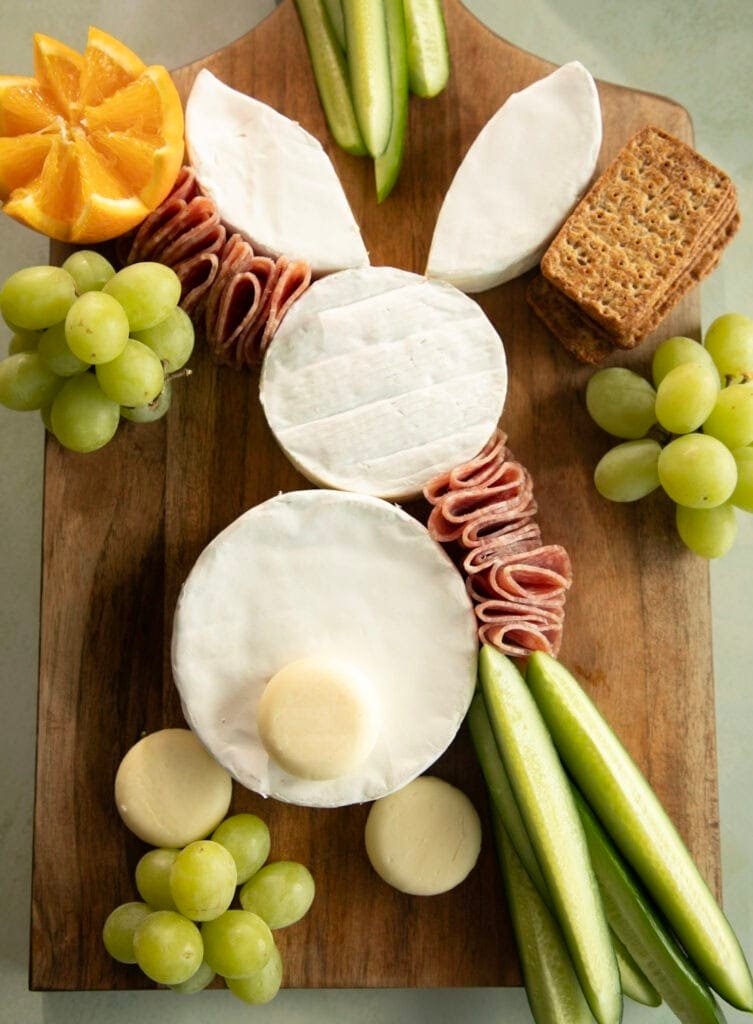
Brie, a beloved soft-ripened cheese from France’s Île-de-France region, is a staple of almost every elegant cheese board setup. But cutting it incorrectly leads to squished, uneven slices, leaked paste, and wasted cheese—plus a messy board that’s unappealing to guests. As a cheese subject to FDA cheese safety guidelines for safe handling, properly cut and stored brie minimizes foodborne illness risk while maximizing its signature buttery, earthy flavor. This guide shares tested, expert-backed steps to cut brie perfectly every time, no prior experience required.
What Is Brie, and Why Cutting It Correctly Elevates Your Charcuterie Board
Brie is a protected AOC (Appellation d’Origine Contrôlée) cheese, meaning only cheese produced in a specific region of France using traditional methods can be labeled true brie. It features a white, fuzzy bloomy rind and a pale, creamy paste that ranges from firm and buttery in young brie to soft, oozing, and earthy in well-aged varieties.
Cutting brie correctly does more than make your board look polished: it ensures even portion sizes for guests, prevents the soft paste from leaking onto other board items, and makes it easy to pick up slices without crumbling or making a mess. Properly cut brie also ripens evenly on the board, so every bite has the same balanced flavor profile.
Essential Tools for Cutting Brie (No Fancy Gadgets Required)
You don’t need a professional cheese kit to cut brie perfectly—most tools you already have in your kitchen will work. The right tools make a dramatic difference in cut quality, so avoid common pitfalls like using dull blades or glass cutting boards that can damage your cheese and tools.
- Sharp thin-bladed knife: A 6-8 inch chef’s knife or dedicated cheese knife works best. Thin blades make clean cuts without tearing the rind or squishing the soft paste, while dull blades crush the cheese and create messy, uneven slices. Serrated bread knives are not recommended, as their teeth tear the delicate rind.
- Stable cutting board: Opt for a sturdy wooden or plastic board, or a handmade butcher block option for extra durability and rustic style. Avoid glass boards, as they dull knife blades quickly and can cause the soft brie to slide while cutting.
- Stainless steel cheese wire (optional): For very ripe, oozing brie that is too soft to cut with a knife, a cheese wire makes clean, mess-free slices with minimal pressure. Look for wires with wooden or plastic handles for better tension control.
- Offset spatula or cheese plane (optional): A thin offset spatula makes it easy to transfer delicate slices to your board without breaking, while a cheese plane creates ultra-thin, elegant slices for formal gatherings.
Step-by-Step Guide to Cutting Brie for Charcuterie Boards
Follow these steps to cut perfectly portioned brie that looks as good as it tastes on your board. Adjust steps based on your brie’s ripeness for best results.
Prep: Chill Brie for Perfect Cuts
Chilling brie before cutting is the most important step to avoid squished, messy slices. The exact chill time depends on the ripeness of your cheese:
- Young, firm brie: Chill for 15-20 minutes to firm up the paste slightly without making the rind brittle.
- Medium-ripe brie (slight give when pressed): Chill for 30 minutes for optimal cutting texture.
- Very ripe, oozing brie: Chill for 45-60 minutes to firm up the soft paste enough to hold its shape when sliced.
In practice, most home hosts skip this step or only chill brie for 10 minutes, leading to squished slices and leaked paste—chilling for the full recommended time makes a dramatic difference in cut quality with no extra effort.
Method 1: Classic Wedge Cuts (For Individual Servings)
This is the most common, traditional cut for charcuterie boards, ideal for casual gatherings where guests will serve themselves. Each wedge is the perfect size for a single bite paired with a cracker or piece of bread.
- Place your chilled brie wheel on a stable cutting surface, rind side up.
- Use your sharp thin-bladed knife to cut the wheel in half vertically, slicing straight through the center from the top rind to the bottom rind.
- Cut each half into 4-6 even wedges, depending on the size of your wheel (a standard 8oz brie yields 8 wedges, while a 12oz wheel yields 10-12).
- Slice each wedge into 1/2 to 3/4 inch thick pieces, leaving the rind attached to the end of each slice to hold it together.
A common mistake here is cutting wedges too thick, which makes them hard to eat in one bite and overwhelms other flavors on the board. Stick to the 1/2 to 3/4 inch thickness for balanced, guest-friendly portions.
Method 2: Half-Moon Slices (For Larger Boards)
For larger gatherings or formal charcuterie spreads, half-moon slices are easier to arrange and scoop with crackers, and they look more polished when fanned out on the board.
- Place your chilled brie wheel on your cutting board, and slice it in half horizontally (parallel to the board, so you have two flat, round half-wheels).
- Slice each half-wheel into 1/4 to 1/2 inch thick slices, leaving the rind attached to each piece.
- Arrange the slices overlapping slightly in a fan shape on your board for an elegant, professional look.
This method works best for younger, firmer brie, as very ripe brie may be too soft to hold its shape when sliced horizontally. If your brie is very oozing, stick to the classic wedge cut for better results.
Transfer Slices to Your Board Without Breaking
Once cut, transfer brie slices to your charcuterie board carefully to avoid breaking or smearing the soft paste. Use a thin offset spatula or cheese wire to lift each slice, placing it rind-side down first so the creamy paste doesn’t stick to the board surface. Leave 1/2 inch of space between brie slices and other soft cheeses or wet ingredients (like fruit preserves) to prevent smearing.
 This visual guide shows ideal brie slice sizing, rind placement, and pairing arrangement for balanced bites.
Credit: cabotcreamery.com
This visual guide shows ideal brie slice sizing, rind placement, and pairing arrangement for balanced bites.
Credit: cabotcreamery.com
Pro Tips for Picture-Perfect Brie Every Time
Follow these expert tips to take your brie cutting and board assembly to the next level:
- Adjust thickness for ripeness: Young, firm brie can be cut up to 1 inch thick for heartier, more substantial bites, while very ripe, oozing brie should be cut to 1/4 inch thickness to prevent leakage onto the board.
- Don’t over-chill the rind: If you chill brie for more than 45 minutes, the rind can become brittle and crack when sliced. If you notice the rind is getting too firm, let the brie sit at room temperature for 5-10 minutes before cutting to soften it slightly.
- Rind etiquette: The brie rind is fully edible and adds earthy, mushroomy flavor, but some guests may be hesitant to eat it. Trim only the top 1/8 inch of the rind with small kitchen shears if needed, but leave the sides attached to hold the wedge together.
- Match slice size to your accompaniments: Cut brie slices to roughly the same size as your crackers or bread slices, so each bite has a balanced cheese-to-cracker ratio without overflowing.
- Follow portion standards: Professional cheesemongers follow portion standards set by the American Cheese Society for charcuterie service, recommending 1-2 ounces of cheese per guest. For brie, this translates to 2-3 wedge slices per person, so adjust your cutting quantity accordingly.
- Arrange with intention: Place brie slices near complementary pairings like honey, jam, or apple slices to make it easy for guests to build balanced bites.
 Rind-attached brie wedges hold their shape for easy guest serving, even when paired with wet ingredients like fruit preserves.
Credit: www.youtube.com
Rind-attached brie wedges hold their shape for easy guest serving, even when paired with wet ingredients like fruit preserves.
Credit: www.youtube.com
Common Brie Cutting Mistakes (And How to Avoid Them)
Even experienced hosts run into these common brie cutting issues—here’s how to fix them:
- Mistake: Using a dull knife: Dull blades crush the soft paste, tear the rind, and create uneven, messy slices. Fix: Sharpen your knife before cutting, or use a cheese wire for very ripe brie.
- Mistake: Cutting brie when it’s fully room temperature: At room temperature, very ripe brie can be too soft to hold its shape, leading to squished, leaking slices. Fix: Chill brie for 30-60 minutes before cutting, depending on ripeness.
- Mistake: Removing the entire rind: The rind holds the brie slice together, so removing it entirely leads to slices that fall apart when guests try to pick them up. Fix: Leave the rind attached, only trimming excess if guests prefer.
- Mistake: Cutting slices too thick: Slices over 1 inch thick are hard to eat in one bite and can overwhelm other flavors on the board. Fix: Stick to 1/2 to 3/4 inch thickness for most applications, or 1/4 inch for very ripe brie.
- Mistake: Arranging slices too close to wet ingredients: Placing brie right next to fruit preserves, honey, or juicy fruits leads to smearing and messy board cleanup. Fix: Leave 1/2 inch of space between brie and wet accompaniments, or place wet ingredients in small ramekins on the board.
Storing Leftover Cut Brie Safely
If you have leftover cut brie after your event, proper storage will keep it fresh for up to 5 days:
- Wrap the sliced brie tightly in plastic wrap or beeswax wrap, or store it in an airtight container lined with parchment paper to prevent sticking.
- Place it in the coldest part of your fridge (not the door, where temperatures fluctuate) for up to 5 days.
- Before serving leftovers, let the brie sit at room temperature for 20-30 minutes to restore its creamy texture.
Avoid freezing cut brie, as the freezing process breaks down the creamy paste, leading to a grainy, watery texture when thawed. After storing your board, clean it thoroughly to avoid cross-contamination; if you notice any mold growth on a wooden board, our guide to safe mold removal for wood boards will help you sanitize it without damage.
Frequently Asked Questions
How do you properly cut brie for a charcuterie board?
Properly cut brie starts with chilling it for 30-45 minutes to firm up the paste, then slicing it into 1/2 to 3/4 inch thick wedges or half-moon slices with the rind left attached. This ensures even portion sizes, prevents the soft paste from leaking, and makes it easy for guests to pick up without a mess.
What knife is best for slicing brie cheese?
A sharp, thin-bladed 6-8 inch chef’s knife or dedicated cheese knife works best, as it makes clean cuts without tearing the rind or squishing the soft paste. For very ripe, oozing brie, a stainless steel cheese wire produces even, mess-free slices.
Should brie be served cold or room temperature?
Brie should be served at 68-72°F (20-22°C) for 20-30 minutes before serving to bring out its full buttery, earthy flavor. Cutting it while slightly chilled (as outlined above) makes slicing easier, then let the slices come to room temperature on the board before guests arrive.
How thick should brie slices be on a board?
For most applications, 1/2 to 3/4 inch thick slices are ideal: thick enough to hold their shape, but thin enough to eat in one bite alongside crackers or bread. Thinner 1/4 inch slices work best for very ripe, oozing brie to prevent leakage.
Can you cut brie ahead of time for a party?
Yes, you can cut brie 1-2 days in advance. Store the sliced brie in an airtight container in the fridge, separated by parchment paper to prevent sticking. Let it come to room temperature for 20 minutes before arranging on the board. Note that very ripe brie may ooze slightly when stored pre-cut, so it’s best used within 24 hours for optimal texture.
Do you need to remove the brie rind before serving?
No, the white bloomy rind of brie is fully edible and adds earthy, mushroomy flavor that complements the creamy paste. If you or your guests are hesitant about the texture, you can trim only the top 1/8 inch of the rind with a small knife, but leave the sides attached to hold the wedge together.
Final Tips for a Stunning Charcuterie Board
Cutting brie correctly is one of the simplest ways to elevate your charcuterie board, no advanced hosting skills required. By chilling brie before slicing, using the right tools, and avoiding common mistakes, you’ll get even, mess-free slices that look as good as they taste. Pair your perfectly cut brie with complementary items like crisp fruit, nuts, and crusty bread for a balanced spread that your guests will love. Arrange your cut brie alongside other cheeses and accompaniments to build a complete charcuterie spread that caters to all tastes.
Ready to host your best gathering yet? Pair your brie board with easy, make-ahead slow-cooker vegetarian sides that free you up to enjoy time with your guests instead of staying in the kitchen. For even more hosting inspiration, pair your brie with perfectly sliced orange pieces for a bright, fresh flavor contrast, or add goat cheese prep for charcuterie to your spread for a tangy, creamy addition. After your event, tackle post-party cleanup fast with our guide to removing tough cheese stains from your serving board.

I’m Abby Lu, a passionate home cook who loves simplifying everyday meals. At PlugChef.com, I share product reviews and cooking guides to help you find the best tools for your kitchen.
Related posts:
 How to Cut Smoked Gouda for Charcuterie Board: Expert Tips
 How to Cut Gouda for a Charcuterie Board: Expert Tips & Tricks
 Pull Down Under Cabinet Spice Rack: Maximize Your Space
 Navy Bean And Ham Recipes: Delicious Comfort Food Ideas
 Cherry Pistachio Chocolate Ice Cream: Irresistible Summer Delight
 How to Freeze Bacon Strips: Easy Tips for Freshness & Flavor

