
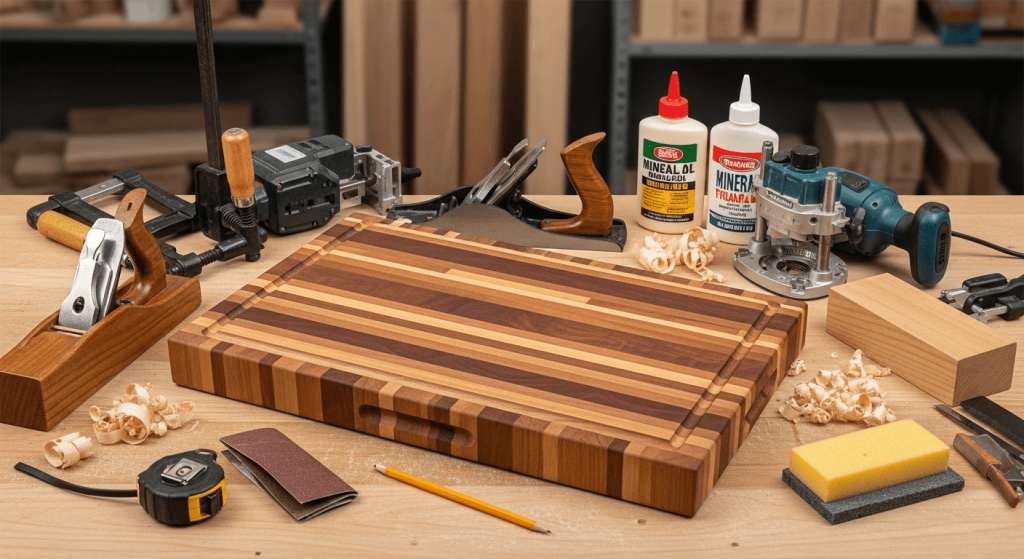
A sturdy, custom butcher block cutting board is one of the most rewarding beginner DIY projects for home cooks. Unlike cheap plastic or composite boards that scratch, warp, and harbor bacteria, a well-built hardwood board lasts for decades, is gentle on knife edges, and can be cut to exact dimensions to fit your kitchen layout. Best of all, you don’t need professional woodworking experience or expensive tools to build one. This step-by-step guide walks you through every part of the process, from selecting the right wood to sealing and maintaining your finished board, with pro tips to avoid common mistakes that trip up new DIYers.
What Is a Butcher Block Cutting Board (and Which Type Is Best for DIY Beginners?)
Butcher block cutting boards are made by gluing together narrow strips of hardwood to create a thick, durable surface. There are two primary construction styles to choose for your project:
- Edge-grain: The most beginner-friendly option, made by gluing wood strips edge-to-edge so the grain runs parallel to the board surface. It’s affordable, easy to build with basic tools, and holds up well to daily use.
- End-grain: Made by standing wood strips on their end to create a checkerboard pattern. It’s far more gentle on knives and self-healing for small cuts, but requires precise cutting and more glue, making it better for intermediate DIYers.
For your first project, an edge-grain board is the best choice: it’s fast to build, forgiving of minor measurement errors, and still far more durable than store-bought alternatives.
Materials & Tools You’ll Need
Gather all supplies before starting to avoid mid-project trips to the hardware store. The list below covers everything needed for a standard 12” x 18” edge-grain butcher block board, sized for most home kitchens:
| Category | Supplies | Notes |
|---|---|---|
| Materials | 8-10 linear feet of untreated hardwood (hard maple, black walnut, or cherry) | Avoid softwoods like pine, which dent easily and harbor bacteria; skip oak unless you plan to seal it thoroughly, as its open grain traps food particles |
| Food-grade PVA wood glue | Avoid craft glue, which is not water-resistant and will fail over time | |
| USP-grade mineral oil or beeswax wood conditioner | USP grade is additive-free and safe for food contact; avoid “mineral oil” sold at beauty supply stores, which may contain fragrances | |
| Tools | Circular saw or table saw with a sharp wood-cutting blade | A straight edge guide will help you make clean, even cuts if you’re using a circular saw |
| 4-6 bar clamps or F-clamps (6” or longer) | Enough to clamp the board every 6-8 inches along its length | |
| Sandpaper in 80-grit, 120-grit, and 220-grit | Attach to a sanding block or random orbital sander for even results | |
| Safety gear (safety goggles, dust mask, work gloves) | Essential for protecting yourself while cutting and sanding | |
| Tack cloth or damp rag | For wiping away dust and excess glue |
If you don’t have a table saw, you can have the lumber yard rip the wood strips to your desired width for a small fee, which saves time and ensures perfectly even edges.
Pre-Work: Choosing the Right Wood & Prepping Your Workspace
Before you cut a single piece of wood, pick a flat, stable work surface with plenty of room to maneuver your saw and clamps. Cover the surface with a drop cloth or old sheet to protect it from glue and sawdust. If your workspace is tight, a compact kitchen tables with storage works well as a temporary workbench, giving you a sturdy surface and extra space to store tools.
For wood selection, stick to dense, closed-grain hardwoods for the longest lifespan and easiest maintenance:
- Hard maple: The most popular choice for butcher blocks, pale in color, extremely durable, and resistant to staining.
- Black walnut: Dark, rich tone, slightly softer than maple but still durable, ideal if you want a rustic, premium look.
- Cherry: Warm reddish tone that darkens with age, mid-range hardness, and easy to work with for beginners.
Avoid any wood treated with stains, sealants, or pesticides, as these can leach into food. If you’re sourcing wood from a lumber yard, ask for food-grade, untreated hardwood specifically.
Step 1: Cut & Dry Fit Your Wood Strips
First, decide on your final board dimensions. For a standard 12” x 18” board, you’ll need to cut your hardwood into strips 18” long (the length of the board) and 1.5” wide (the width of each strip). A common mistake new DIYers make is cutting strips to the final width of the board, which results in a much smaller finished product—remember, you’ll be gluing the strips side-by-side, so the total width of the board is the sum of all your strip widths.
Use a saw with a straight edge guide to make clean, straight cuts, then arrange the strips side-by-side on your work surface in a dry fit (no glue) to check for gaps or warped edges. Alternate the grain direction of each strip as you arrange them: this cross-grain construction prevents the board from warping over time as it expands and contracts with humidity changes. If you notice gaps between strips, lightly sand the edges of the warped piece until it fits flush with its neighbors.
Step 2: Glue & Clamp the Strips
Once you’re happy with the dry fit, it’s time to glue the strips together. Apply a thin, even layer of PVA wood glue to the long edge of each strip, avoiding overapplication—excess glue will squeeze out between strips and create hard bumps that are difficult to sand flat later.
Press the strips together firmly, wiping away any squeezed-out glue immediately with a damp cloth before it dries. Place cauls (flat pieces of scrap wood) on the top and bottom of the glued strips to distribute clamp pressure evenly and prevent the board from bowing. Clamp the board every 6-8 inches along its length, tightening each clamp gradually to avoid warping the strips.
Let the clamps sit for 30 minutes for initial set, then 24 hours for full cure before moving to the next step. Rushing this step is the most common cause of weak, separated boards, so don’t skip the full drying time.
 Gather all tools and materials before starting your project to avoid interruptions mid-build.
Image: DIY kitchen tools
Gather all tools and materials before starting your project to avoid interruptions mid-build.
Image: DIY kitchen tools
Step 3: Trim & Square the Board Edges
After the glue is fully cured, remove the clamps and check the edges of the board. You’ll likely have uneven overhangs from the glue squeeze-out and minor misalignment of the strips. Use a circular saw or miter saw to trim the ends of the board so they are perfectly square, then use a hand planer or 80-grit sandpaper attached to a flat sanding block to flatten the top and bottom surfaces until they are completely even. If you don’t have a planer, sanding with a flat block ensures you don’t sand away more material from one side than the other, which would cause the board to warp.
Step 4: Sand the Board to a Smooth Finish
Start sanding with 80-grit paper to remove saw marks, glue residue, and any remaining unevenness. Always sand with the grain of the wood to avoid creating cross-grain scratches that are hard to remove later. Once the surface is smooth, move to 120-grit paper to erase fine scratches, then finish with 220-grit paper for a silky-smooth, splinter-free surface.
Wipe away all dust with a tack cloth or damp rag between each grit change to avoid scratching the wood with coarse particles. A common mistake here is rounding over the edges of the board while sanding—keep the edges sharp and square for a professional, long-lasting finish.
Step 5: Seal & Condition the Board
A food-safe finish protects the wood from water, stains, and bacterial growth, and keeps the board from drying out and cracking. For beginner projects, USP-grade mineral oil is the easiest, most affordable option: it’s non-toxic, requires no drying time, and penetrates deep into the wood for lasting protection.
Pour a generous amount of mineral oil onto the board surface, then use a clean lint-free cloth to spread it evenly across the entire board, including the edges and ends. Let the oil soak in for 2-3 hours, then wipe off any excess with a dry cloth. Apply 2-3 total coats, letting each soak in fully before applying the next. For extra water resistance, you can finish with a thin coat of food-safe beeswax conditioner, which creates a protective barrier on the surface.
For official guidance on safe cutting board care to avoid bacterial cross-contamination, refer to USDA food safety recommendations for cutting boards. Never use polyurethane, varnish, or other non-food-safe finishes on a board that will contact food, as these can leach harmful chemicals into meals. As noted in University of Minnesota Extension's guide to homemade cutting boards, properly maintained hardwood boards can last for decades with regular oiling, far outlasting cheap plastic alternatives. If you’re unsure about oiling different wood types, our guide to proper oiling techniques for wooden boards walks through step-by-step instructions for maple, walnut, and other popular hardwoods.
 Clamped glued strips should sit flush with no gaps before moving to the trimming step.
Image: Making a butcher block
Clamped glued strips should sit flush with no gaps before moving to the trimming step.
Image: Making a butcher block
Why Build a DIY Butcher Block Cutting Board?
Store-bought hardwood butcher blocks often cost $100 or more for a standard 12” x 18” size, while you can build your own for $30-$50 in materials, depending on the wood you choose. Beyond cost savings, a DIY board offers full customization: you can cut it to fit odd kitchen spaces, add a juice groove or built-in handles, or mix wood tones for a unique, personalized look. Unlike soft plastic boards that need replacing every few years, a well-cared-for hardwood board will develop a rich patina over time, making it a functional heirloom piece for your kitchen.
If you’re planning other kitchen upgrades alongside your cutting board project, consider budget kitchen cabinet upgrades to refresh your space for a fraction of the cost of a full remodel.
 A fully conditioned butcher block board has a subtle sheen and water-resistant surface.
Image: Craft butcher block
A fully conditioned butcher block board has a subtle sheen and water-resistant surface.
Image: Craft butcher block
Essential Safety Tips for Your DIY Project
Woodworking involves basic risks, but following these guidelines will keep your project safe:
- Always wear safety goggles and a dust mask while cutting and sanding to protect your eyes and lungs from sawdust and debris.
- Use push blocks when operating a table saw to avoid kickback and keep your hands away from the blade.
- Work in a well-ventilated area when applying oil or conditioner, and keep finishes away from children and pets.
- Never use pressure-treated, stained, or sealed wood for a food-contact board, as these contain toxic chemicals.
- For added visibility in your workspace, install energy-efficient under-cabinet LED lights to reduce shadows while cutting and sanding, lowering your risk of accidental cuts.
- If you need power for your saw in a tight workspace, use under-cabinet power strips to keep cords organized and out of tripping range.
Frequently Asked Questions
Can I use softwood like pine to make a butcher block board?
No. Softwoods are too porous, dent easily, and harbor bacteria that can contaminate food. Stick to dense, closed-grain hardwoods like maple, walnut, or cherry for a safe, durable board.
How long does it take to build a butcher block board?
The actual build time is 2-3 hours, but you’ll need to factor in 24 hours for the glue to fully cure, and 2-3 hours for oil to soak in between coats. Total project time is roughly 1.5 to 2 days, depending on how many oil coats you apply.
Can I make a butcher block board with a circular saw instead of a table saw?
Yes. Use a straight edge guide clamped to your workpiece to ensure straight, even cuts, and a sharp wood-cutting blade to avoid splintering. You can also have the lumber yard rip the strips to your desired width for a small fee if you don’t own a saw.
How often do I need to reoil my DIY butcher block board?
Reapply mineral oil every 1-2 months, or whenever the board looks dry or dull. If you use the board daily for heavy-duty tasks like carving meat, you may need to oil it as often as once a month.
Can I add a juice groove or handle to my DIY board?
Yes! After trimming and sanding the board, use a router to cut a juice groove around the edge of the board to catch liquids, or drill and countersink holes to add leather or wooden handles. Just make sure any added hardware is food-safe and securely attached. If you’re looking for ways to organize your new board and other kitchen tools, best kitchen drawer organizers for utensils keep your kitchen functional and clutter-free.
Maintaining Your Butcher Block Board for Years of Use
To keep your board in top condition, follow these simple care rules:
- Hand wash only with mild soap and warm water; never put it in the dishwasher, as extreme heat and prolonged water exposure will cause the wood to warp and crack.
- Dry the board immediately after washing with a clean towel, and store it upright in a cool, dry spot away from direct sunlight and excess moisture. For storage ideas that protect your board from damage, check out smart under-sink storage ideas to keep it out of the way of kitchen splashes.
- If your board ever develops lingering odors from onions, garlic, or raw meat, our guide to removing stubborn odors from wood boards has simple, food-safe fixes to refresh it.
- Resand the board lightly with 220-grit sandpaper once a year to remove surface scratches, then reapply 1-2 coats of mineral oil to restore its protective barrier.
Conclusion
Building your own butcher block cutting board is a simple, low-cost project that delivers a high-quality, custom kitchen tool you’ll use for years. With basic tools, a few hours of work, and the guidance above, you’ll have a durable, beautiful board that outperforms cheap store-bought alternatives. Whether you’re a beginner DIYer or an experienced woodworker, this project is a great way to build your skills and add a personal touch to your kitchen. For more easy DIY projects to upgrade your home, browse our full library of guides.

Hi, I’m Daniel Brooks—a food lover and kitchen gear enthusiast. I enjoy testing cookware, utensils, and gadgets to see what really works in everyday cooking. At PlugChef.com, I share honest reviews, comparisons, and simple guides to help you choose the best tools for a safer, smarter, and more enjoyable kitchen.
Related posts:
 Eco-Friendly Kitchen Ideas to Reduce Waste and Save Energy
 How to Get Rid of Oils from Kitchen Counter Organically: Eco-Friendly Tips
 How to Grow Organic Kitchen Garden: Expert Tips
 Best Eco-Friendly Kitchen Cookware for Healthy Cooking
 How to Cut PCB Circuit Board: Easy Steps for Precise Results
 Top 10 Best Non-Toxic Cooking Utensils – Safe & Durable Choices for Healthy Homes

