
Perfectly cut strawberries are the small, high-impact detail that takes a charcuterie board from casual snack to showstopping spread. Whether you’re prepping for a game day gathering, baby shower, or date night at home, uneven, mushy, or leaking strawberries can throw off the entire balance of your board — but nailing the cut is far easier than you think. This guide shares tested, no-fuss techniques for prepping, cutting, and arranging strawberries to keep them fresh, visually striking, and perfectly paired with every item on your board.
Why Strawberries Belong on Every Charcuterie Board
Strawberries are one of the most versatile fruits for charcuterie, and for good reason:
- Flavor balance: Their bright, natural sweetness cuts through salty cured meats like prosciutto and salami, and pairs seamlessly with tangy cheeses like goat cheese and brie.
- Visual pop: Their vivid red color creates high contrast against pale cheeses, brown meats, and neutral crackers, making the board look intentionally curated rather than haphazard.
- Texture contrast: Their juicy, firm flesh adds a refreshing crunch alternative to soft cheeses and crunchy nuts, without getting mushy or leaking juice if cut and prepped correctly.
- Universal appeal: Unlike more adventurous fruits like figs or pomegranate seeds, strawberries are a crowd-pleaser for both kids and adults, making them a safe addition for any guest list. When cut properly, strawberries also hold their shape for hours without bleeding juice all over your board, a common issue with underripe or improperly prepped berries.
Essential Tools for Clean, Even Cuts (No Special Equipment Needed)
You don’t need fancy gadgets to cut perfect strawberries for your board — just these basic, food-safe tools:
- A sharp 3-inch paring knife: Dull blades mash delicate strawberry flesh, leading to uneven cuts and mushy texture, and increase your risk of accidental slips. A sharp knife glides through the fruit cleanly with minimal pressure.
- A stable cutting board: Opt for a non-slip plastic or end-grain wood board; avoid glass, which dulls knife blades quickly. If your board slides on the counter, place a non-slip kitchen mat underneath for extra stability while you work.
- A small scrap or compost bowl: Toss hulls and tops here to keep your workspace tidy.
- Paper towels: For thorough drying, which prevents sogginess and helps berries hold their shape on the board.
- Optional: A dedicated strawberry huller: This small, inexpensive tool removes the bitter white core and leafy top in one twist, reducing prep time and minimizing waste compared to using a knife. Safety note: Always use the claw grip when cutting — tuck your fingertips under your knuckles, with your knuckles resting against the side of the blade — to avoid nicks. When not in use, store your paring knife in a protective sheath to prevent accidental cuts, especially in busy kitchen spaces. A serrated knife is not recommended for this task, as its teeth tear the soft strawberry flesh instead of cutting it cleanly.
Step-by-Step Prep and Cutting Guide
Follow these steps to get uniform, fresh-tasting strawberries every time, no advanced knife skills required.
Pre-Cut Prep: Washing and Hulling Correctly
Proper prep before cutting makes all the difference in texture and flavor:
- Rinse hulled strawberries under cold running water for 10–15 seconds. Avoid soaking berries in a bowl, as they will absorb excess water and become mushy. Official USDA produce safety guidelines confirm this rinsing method effectively removes surface dirt and bacteria without damaging delicate fruit flesh.
- Hull each berry: Insert the tip of your knife or huller at the top of the strawberry, twist gently to remove the leafy green top and the tough, bitter white core underneath. Skipping this step is one of the most common mistakes home hosts make — the core is inedible and adds an unpleasant tough texture to every bite.
- Pat berries completely dry with paper towels, using a gentle dabbing motion instead of rubbing, which can damage the soft outer flesh. Dry berries hold their shape far better on the board and won’t release excess water that soggy out other items.
3 Popular Strawberry Cuts for Charcuterie Boards
Choose the cut that matches your board’s style and the other items you’re serving:
1. Uniform ¼-Inch Rounds (Best for Easy Bites and Layering)
This is the most versatile cut for most charcuterie boards:
- Place a hulled strawberry on its side on your cutting board.
- Cut top to bottom into even ¼-inch thick slices.
- Use case: Perfect for tucking between cheese slices, layering on top of soft spreads like goat cheese, or pairing with square crackers for easy, no-mess bites. The round shape also shows off the strawberry’s seed pattern for a decorative touch.
- Pro tip: For perfectly uniform slices, use a mandoline with a hand guard, but only if you’re comfortable working with sharp tools; hand-cut slices are just as effective for casual home boards.
2. Halves (Ideal for Large, Juicy Berries)
This low-effort cut works best for extra-large, firm strawberries:
- Cut a hulled strawberry in half lengthwise (for very large berries, you can cut crosswise into quarters for smaller, bite-sized pieces).
- Use case: Perfect for pairing with creamy, spreadable cheeses like brie or camembert — guests can dip the cut side of the strawberry directly into the cheese or a drizzle of honey for a sweet-savory bite.
- Pro tip: Cut lengthwise instead of crosswise for larger berries, so the flat cut side rests stably on the board and doesn’t roll off when guests reach for it.
3. Decorative Fans (For Elevated, Focal Point Arrangements)
This fan shape adds a high-end touch to special occasion boards with minimal extra work:
- Place a hulled strawberry on its side, stem end facing away from you.
- Make 4–5 thin vertical cuts, stopping ¼-inch from the stem end so the berry stays fully intact.
- Gently press the slices apart to fan them out.
- Use case: Use as a centerpiece for the board, or tuck next to cured meats like prosciutto for a bright pop of color that draws the eye.
- Pro tip: Only use the firmest, largest strawberries for this cut, as softer berries will fall apart when spread.
 This simple fan technique elevates any charcuterie board with minimal effort
Credit: thecurlyspoonblog.com
This simple fan technique elevates any charcuterie board with minimal effort
Credit: thecurlyspoonblog.com
Pro Tips to Avoid Soggy, Mushy Strawberries
Cut strawberries are at their best when served immediately, but these hacks will keep them fresh if you need to prep ahead:
- Whole, hulled strawberries can be prepped 1–2 days in advance: store them in an airtight container lined with a dry paper towel in the coldest part of your fridge (not the door, which experiences temperature fluctuations that speed up spoilage). Proper strawberry storage guidance from the University of Minnesota Extension confirms that the paper towel absorbs excess moisture to keep berries firm for up to 48 hours.
- Cut strawberries should be prepared no more than 2 hours before serving. Once cut, their flesh breaks down quickly and releases juice that will make your board soggy and dilute the flavor of other items.
- If you’re prepping berries for a board that won’t be served for a few hours, toss cut strawberries in a tiny splash of lemon juice to preserve their bright red color and add a subtle tang. Avoid overdoing it, as too much acid will overpower their natural sweetness.
- Never use frozen strawberries for a charcuterie board: freezing alters their cellular structure, causing them to release excess liquid when thawed that will ruin the texture of your entire board.
Arranging Strawberries for a Stunning, Functional Board
How you arrange your strawberries is just as important as how you cut them for a polished, professional look:
- Balance colors by placing bright red strawberries next to pale cheeses like goat cheese, burrata, or brie for high visual contrast.
- Tuck small rounds into gaps between crackers, nuts, and cured meats to fill empty space without overcrowding the board. Overcrowding makes it hard for guests to pick items without knocking others over.
- Use decorative fans as a centerpiece to draw the eye, or place them at the four corners of the board for a balanced look.
- For added flavor, serve strawberries with a small ramekin of balsamic glaze, honey, or creamy bean dip for dipping.
- If you’re using a porous wooden board, place a small piece of parchment paper under strawberries to prevent red juice from staining the wood long-term.
Strawberries pair seamlessly with creamy, tangy cheeses like havarti, goat cheese, and brie for a balanced sweet-savory bite that works with every charcuterie spread.
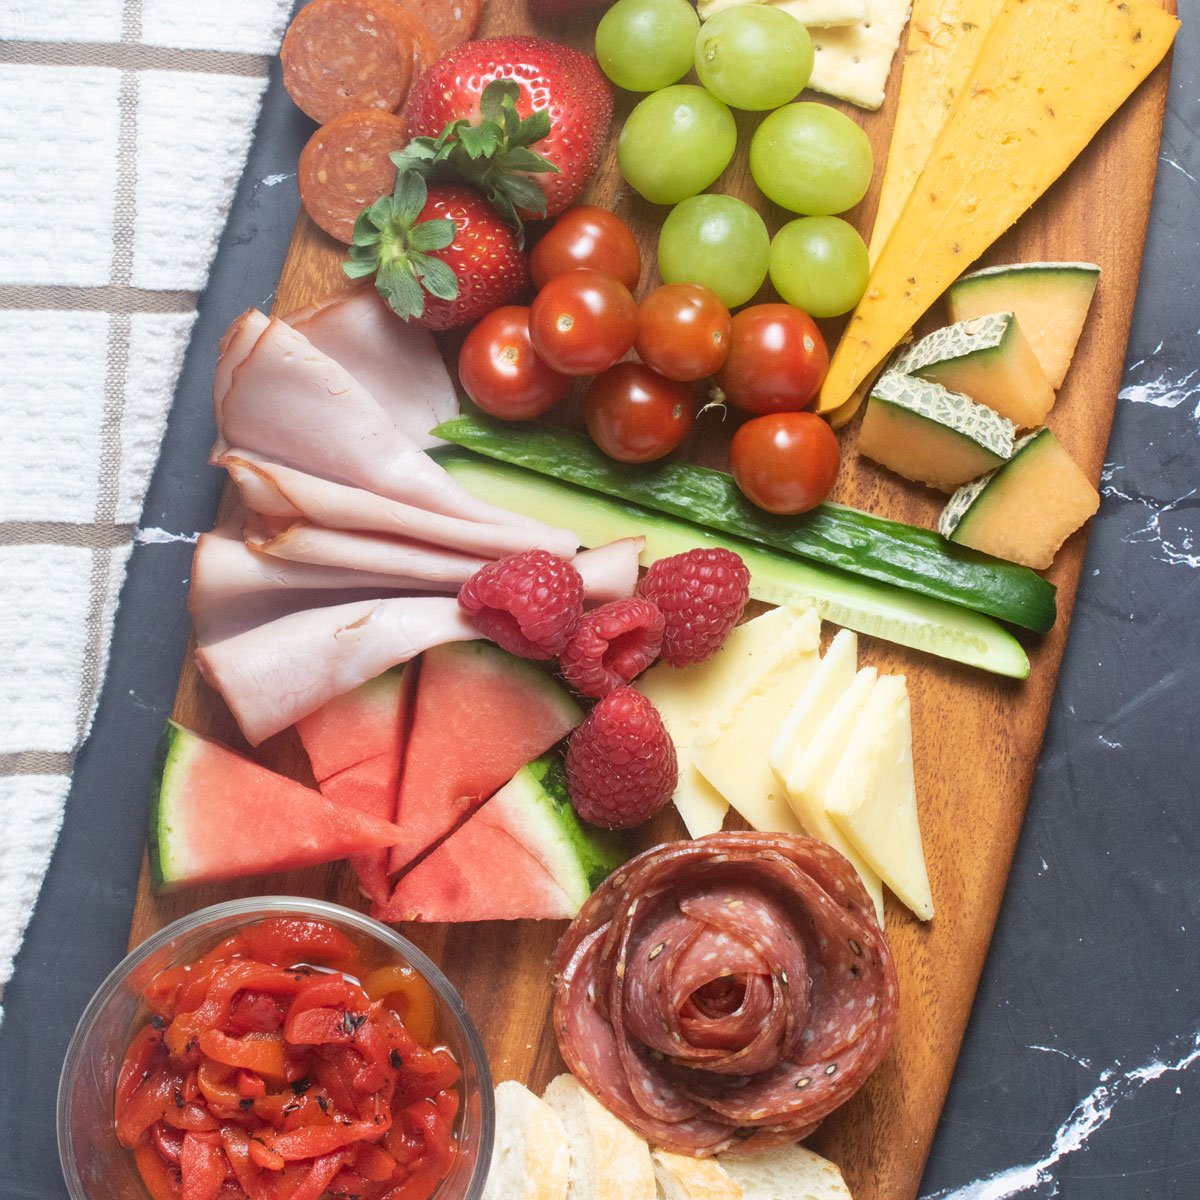 Strawberries add bright color and sweet contrast to balanced charcuterie spreads
Credit: www.binkysculinarycarnival.com
Strawberries add bright color and sweet contrast to balanced charcuterie spreads
Credit: www.binkysculinarycarnival.com
Quick Strawberry Fun Facts for Your Next Gathering
Impress your guests with these fun, little-known facts about the star of your board:
- Strawberries are the only common fruit with their edible seeds (called achenes) on the outside of the flesh, unlike true berries which have seeds enclosed inside.
- One cup of sliced strawberries provides 149% of the daily recommended vitamin C intake, more than a medium orange.
- Strawberries are members of the rose family, making them botanical cousins to apples, pears, and even roses.
- Despite their name, strawberries are not true berries; they are classified as aggregate accessory fruits, as their flesh is derived from the flower’s receptacle rather than the ovary.
Frequently Asked Questions
How do I prepare strawberries for a charcuterie board?
Hull the berries to remove the bitter white core and leafy top, rinse under cold running water, pat completely dry, then cut into your desired shape right before assembling the board for the best texture.
What is the best way to slice strawberries for a charcuterie board?
For most boards, uniform ¼-inch rounds are ideal, as they are easy to pick up, pair with almost any cheese or cured meat, and hold their shape without releasing excess juice. Use halves for larger berries, and fans for decorative focal points.
Should I remove strawberry stems before cutting?
Yes, always hull strawberries (remove the stem and bitter white core) before cutting, as the core is tough and tasteless, and the stem is inedible. Hulling also creates a flat base that makes cutting more stable.
How can I make strawberries look nicer on my charcuterie board?
Cut them into uniform shapes, arrange them in small clusters rather than scattering them randomly, and pair them with contrasting colors like pale goat cheese or dark cured meats to make their bright red color pop.
Can I cut strawberries ahead of time for a charcuterie board?
Whole, hulled strawberries can be prepped 1–2 days in advance and stored in an airtight container in the fridge. Cut strawberries should be prepared no more than 2 hours before serving, as they will release juice and become soggy if stored cut for longer.
Can I use frozen strawberries for a charcuterie board?
No, frozen strawberries release excess liquid when thawed, which will make your board soggy and dilute the flavors of other items. Stick to fresh, firm strawberries for the best results.
Conclusion
Cutting strawberries for a charcuterie board is a simple skill that makes a huge difference in the look and taste of your spread. By prepping them correctly, choosing the right cut for your board’s style, and arranging them with intention, you’ll avoid the common pitfalls of mushy, leaking, or uneven berries that can ruin an otherwise perfect spread. These tips work for everything from casual weeknight snack boards to formal party spreads, and your guests will rave about the bright, fresh touch the strawberries add. For more charcuterie board prep hacks, recipes, and kitchen tool recommendations, browse our full blog library for guides to elevate every hosting spread.

I’m Abby Lu, a passionate home cook who loves simplifying everyday meals. At PlugChef.com, I share product reviews and cooking guides to help you find the best tools for your kitchen.
Related posts:
 How to Make a Fruit Basket for a Gift: Easy DIY Guide
 Do You Need a Basket? Essential Guide for Air Fryers
 How to Adjust Syrup Dispenser Pressure: Expert Tips
 Kitchen Cabinets With Black Appliances: Trendy Design Tips
 White Kitchen And Stainless Steel Appliances: A Perfect Duo
 Kitchen Colors With White Cabinets And White Appliances: Vibrant Ideas

