
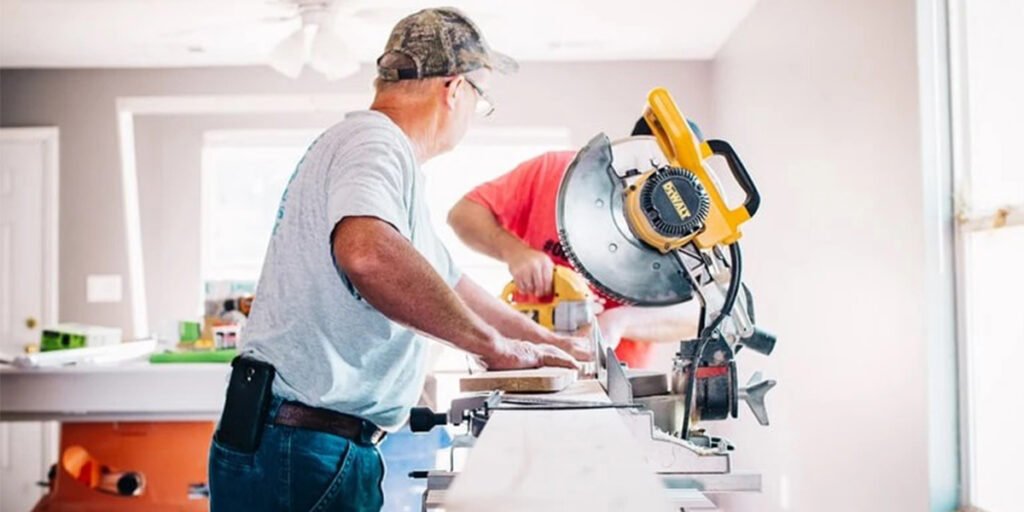
Permabase is a premium cement backer board made from a dense cement core reinforced with a polymer-modified mesh layer. It’s designed as a tile underlayment for high-moisture and high-traffic areas where standard drywall or plywood fails, including bathroom showers, kitchen floors, and exterior walls under siding. Unlike drywall, it won’t warp, swell, rot, or grow mold when exposed to water, making it the industry standard for wet area installations.
Proper cuts are non-negotiable for a successful Permabase installation. Crooked, ragged, or poorly fitted cuts lead to tile lippage (uneven tile edges), gaps that let water seep behind the tile, and premature failure of your installation. The good news? Cutting Permabase is far simpler than it looks, even for first-time DIYers, as long as you have the right tools and follow a few key techniques. In practice, most DIYers find the score-and-snap method sufficient for 90% of straight cuts, and only need power saws for complex notches or curved edges.
Its water and mold resistance make it a go-to for high-moisture areas like bathrooms and kitchens, where easy-care floor coverings are a practical finishing touch. For full industry-standard installation guidelines for cement backer board, refer to the Tile Council of North America’s official resources, which set the global benchmark for tile and setting material performance.
What You’ll Need to Cut Permabase Cement Board
Having the right tools on hand before you start will save you time, reduce waste, and ensure clean, accurate cuts. We’ve broken the required tools into categories for easy reference:
Measuring & Marking Tools
- 25-foot tape measure (for full board length measurements)
- Carpenter’s pencil (markings won’t smudge on Permabase’s smooth finished face)
- 4-foot aluminum straightedge or level (acts as a rigid guide for scoring, prevents crooked cuts)
- Straightedge clamps (to secure the guide in place while scoring; optional but highly recommended for accuracy)
Safety Gear
- N95 or higher-rated respirator (cement board dust contains crystalline silica, a serious respiratory hazard)
- Safety glasses with side shields (protects eyes from flying dust and small chips)
- Cut-resistant work gloves (prevents cuts from sharp board edges and broken blades)
- Long sleeves and long pants (protects skin from dust and abrasions)
Cutting Tools
- Heavy-duty retractable utility knife with 18mm replacement blades (for score-and-snap cuts)
- Carbide-grit or diamond-tipped jigsaw blade (for curves, notches, and complex cutouts)
- Diamond-tipped circular saw blade (for fast, straight cuts on multiple boards)
Finishing Tools
- 80-grit sandpaper or sanding block (to smooth rough cut edges)
- Utility knife (to deburr sharp mesh edges after cutting)
Step-by-Step Guide to Cutting Permabase Cement Board
Permabase can be cut with two primary methods, each suited to different cut types. We’ve outlined both below, with detailed steps to avoid common errors.
Method 1: Score-and-Snap (Best for Straight, Full-Length Cuts)
This is the easiest, most dust-free method for cutting straight lines, and it requires no power tools. It works for both full-length board cuts and shorter straight sections.
- Measure and mark your cut line: Use a tape measure and carpenter’s pencil to mark the exact cut line on the smooth, finished face of the board (the rough mesh-coated back will make pencil lines hard to see, leading to inaccurate cuts). Double-check your measurements to avoid waste.
- Clamp your straightedge in place: Lay the 4-foot aluminum straightedge along your marked line, and secure it with straightedge clamps to prevent shifting while you score. A moving guide is the most common cause of crooked cuts.
- Score the board: Hold the utility knife at a 45-degree angle to the board, apply firm, even pressure, and run the blade along the straightedge 3 to 4 times. You want a deep, consistent score line that cuts through both the cement layer and the embedded mesh. A dull blade will require extra pressure and produce ragged scores, so replace the blade after every 2 to 3 boards.
- Snap the board along the score line: Lift the board so the scored line is aligned with the edge of a workbench or sawhorse, then apply quick, even downward pressure on the overhanging side. The board will snap cleanly along the scored line. Common mistake: Don’t try to snap the board by bending it while it’s lying flat on the ground, as this can cause uneven breaks or injury.
- Smooth the cut edge: Use 80-grit sandpaper or a utility knife to remove any burrs, rough mesh, or sharp edges from the cut side of the board.
Method 2: Saw Cutting (Best for Curves, Notches, and Thick Cuts)
Use this method for curved cutouts (like for shower benches or rounded edges), notches around pipes and outlets, or when you need to cut multiple boards quickly.
- Mark your cut line: Use a carpenter’s pencil to mark the exact path of your cut on the smooth face of the board. For curved cuts, trace the shape with a compass or pre-made template for accuracy.
- Set up your saw: For a jigsaw, install a carbide-grit or diamond-tipped blade designed for masonry or cement board. Standard wood blades will dull within a few cuts and produce chipped edges. Set the jigsaw to a slow, steady speed to avoid overheating the blade. For a circular saw, set the blade depth to 1/8 inch deeper than the thickness of the Permabase (most boards are 1/4” or 1/2” thick) to avoid cutting into the subfloor or wall behind the board.
- Cut along the line: Turn on the saw and let it reach full speed before contacting the board. Cut slowly along your marked line, letting the blade do the work—don’t force the saw, as this causes chipping and premature blade wear. For notches around pipes or outlets, drill a starter hole at the corner of the notch, then cut along the marked lines with the jigsaw.
- Finish the edge: Sand any rough spots or burrs with 80-grit sandpaper for a clean, smooth edge.
Critical Safety Tips for Cutting Cement Board
Cutting cement board generates fine, respirable dust that poses serious health risks if inhaled. Follow these guidelines to stay safe on the job:
- Always wear respiratory protection: Permabase contains crystalline silica, a regulated respiratory hazard outlined in OSHA’s silica safety standards for construction workers and DIYers alike. Use an N95 or higher-rated respirator, and cut outdoors or in a well-ventilated area with fans pulling dust away from your breathing zone if indoor cutting is unavoidable.
- Wear eye and skin protection: Safety glasses with side shields protect against flying dust and small chips, while cut-resistant gloves and long sleeves prevent cuts from sharp board edges and broken blades. Always prioritize personal protective equipment for any home improvement task, just as you would when childproofing high-risk areas around the house.
- Use stable work surfaces: Always cut on a sturdy workbench or sawhorse to prevent the board from shifting while you score or cut. Never cut cement board while it’s resting on the floor or an unstable surface.
- Unplug power tools when changing blades: Always disconnect power tools from the outlet before installing or removing blades to avoid accidental startup.
- Minimize dust exposure: If possible, use the score-and-snap method instead of power saws to eliminate dust entirely. For saw cuts, attach a shop vac to the saw’s dust port to capture dust at the source.
Pro Tips for Perfect, Professional-Grade Cuts Every Time
These expert tricks will help you avoid common errors and get flawless cuts, even if you’ve never worked with cement board before:
- Use a fresh utility knife blade for every scoring session: dull blades require extra pressure, lead to uneven scores, and increase the risk of the blade slipping and causing injury.
- Test fit your cut before installation: hold the cut board up to the installation area to confirm it fits perfectly around outlets, pipes, or corners before attaching it, to avoid rework.
- For small notches around pipes or outlets, score the outline of the notch with a utility knife first, then snap the small waste pieces out by hand—no saw needed for notches smaller than 2 inches.
- Cut Permabase with the smooth face up: this prevents the rough mesh back from catching on your straightedge or saw base plate, leading to more accurate cuts.
- If you’re cutting multiple boards to the same length, clamp a straightedge across all boards at once to score them in a single pass, saving time and ensuring consistent cuts. Once your tile is set over the Permabase, a heat-resistant handle aid makes serving hot dishes from the kitchen counter safe and easy.
Common Mistakes to Avoid When Cutting Permabase
Even experienced DIYers run into these issues, so keep them in mind to save time and materials:
- Using a dull utility knife: this leads to ragged score lines, uneven snaps, and extra sanding work. Replace blades frequently.
- Skipping safety gear: even short cutting sessions generate hazardous silica dust, so never skip your respirator and eye protection.
- Forcing power saws: pushing a jigsaw or circular saw too fast causes chipped edges, premature blade wear, and increases the risk of kickback. Let the blade cut at its own pace.
- Marking the rough mesh side of the board: pencil lines are hard to see on the textured back, leading to inaccurate cuts. Always mark the smooth face.
- Cutting on an unstable surface: a shifting board will produce crooked cuts that won’t fit properly during installation, leading to gaps and wasted material.
Common Use Cases for Permabase Cement Board
Permabase is engineered for environments where moisture and durability are top priorities. Common applications include:
| Use Case | Why Permabase Works |
|---|---|
| Bathroom shower walls | Mold and water-resistant, won’t swell or rot with constant moisture exposure |
| Kitchen tile floors | Dimensionally stable, provides a flat, rigid base to prevent tile lippage |
| Bathroom and kitchen backsplashes | Easy to cut for outlet and fixture notches, holds up to humid conditions |
| Exterior walls under siding | Withstands weather and temperature fluctuations without warping |
| Shower pans and wet rooms | Fully water-resistant, no risk of water damage to the subfloor below |
For exterior cement board projects, pair your durable wall surface with slip-resistant outdoor rugs for patio or entryway areas.
Frequently Asked Questions
What’s the easiest way to cut Permabase cement board for beginners?
The score-and-snap method is the easiest for beginners, as it requires minimal tools and no power equipment. Just use a sharp utility knife, a straightedge, and firm, even pressure to score the board 3 to 4 times before snapping it along the line.
Can I use a regular utility knife to cut Permabase?
Yes, as long as it has a sharp, heavy-duty 18mm blade. Avoid small craft knives, as they lack the durability to score through the cement and mesh layers cleanly.
Do I need to wear a respirator when cutting Permabase?
Absolutely. Permabase contains crystalline silica, which is a serious respiratory hazard when inhaled as dust. Use an N95 or higher-rated respirator, and cut in a well-ventilated area to minimize exposure.
What blade should I use for a circular saw to cut Permabase?
Use a diamond-tipped or carbide-grit blade designed for cement or masonry. Standard wood blades will dull within a few cuts and produce rough, chipped edges.
Can I cut Permabase without creating dust?
While some dust is unavoidable when cutting cement board with power tools, you can minimize it by using the score-and-snap method instead, which produces no dust at all. Cutting outdoors also eliminates indoor dust buildup, and attaching a shop vac to power saws captures dust at the source.
Final Thoughts and Next Steps
Cutting Permabase cement board doesn’t have to be intimidating. With the right tools, basic safety precautions, and the step-by-step techniques outlined above, you can get clean, accurate cuts that will make your tile installation look professional and last for decades. The score-and-snap method is ideal for most straight cuts, while saw cutting is perfect for complex shapes and notches. Always prioritize safety due to the silica content of the board, and follow the pro tips to avoid common, time-consuming mistakes.
With these steps, you’ll get clean, precise cuts every time, ensuring your tile installation stays level, watertight, and durable for decades. For more expert DIY guides and product picks to simplify your next home project, including time-saving kitchen gadgets to speed up your renovation, browse our full blog library.
 Score the board 3-4 times with firm, even pressure for a clean snap line
Image source: insulationgo.co.uk
Score the board 3-4 times with firm, even pressure for a clean snap line
Image source: insulationgo.co.uk
 Properly cut and installed Permabase provides a durable, water-resistant base for tile
Image source: insulationgo.co.uk
Properly cut and installed Permabase provides a durable, water-resistant base for tile
Image source: insulationgo.co.uk
Frequently Asked Questions
What’s the easiest cutting method for first-time DIYers?
The score-and-snap method is the most beginner-friendly, as it requires only a sharp utility knife, straightedge, and firm, even pressure to score the board 3 to 4 times before snapping it along the line. It produces zero dust and requires no power tools, making it low-risk for new users who are still getting familiar with cement board.
Can I use a regular wood saw blade to cut Permabase?
No, standard wood blades will dull within a few cuts and produce ragged, chipped edges that will cause tile lippage. Always use a carbide-grit or diamond-tipped blade designed for masonry or cement board, as these are engineered to cut through the dense cement core and embedded polymer mesh without premature wear.
Do I need to wear a respirator for short cutting jobs?
Yes. Even brief cutting sessions generate respirable crystalline silica dust, which can cause long-term respiratory damage with repeated exposure. Always wear an N95 or higher-rated respirator, even for cuts that take less than 5 minutes, and cut in a well-ventilated area to minimize inhalation risk.
How do I get a perfectly smooth cut edge?
After cutting, use 80-grit sandpaper or a utility knife to deburr any rough mesh or sharp cement along the cut edge. For the cleanest results, score the board deeply with a fresh utility knife blade before snapping, as a shallow score line will leave a ragged edge that requires extra sanding and can interfere with tile adhesion.
Can I cut Permabase board without creating a mess?
The score-and-snap method produces no dust at all, making it the cleanest cutting option for indoor projects. If you must use a power saw, attach a shop vac to the saw’s dust port to capture dust at the source, and cut outdoors or in a well-ventilated area with fans pulling dust away from your workspace to avoid indoor buildup.
Final Thoughts
Cutting Permabase cement board is a simple, accessible DIY skill that lays the groundwork for a durable, professional-grade tile installation that will last for decades. By using the score-and-snap method for straight cuts to eliminate dust, and a diamond-tipped saw for complex notches and curves, you can achieve clean, accurate edges that prevent tile lippage and water intrusion behind your tile. Always prioritize safety by wearing a respirator, eye protection, and cut-resistant gloves, and take the time to measure and mark accurately to avoid costly material waste. With these techniques, your Permabase underlayment will provide a stable, water-resistant foundation for any high-moisture or high-traffic area in your home, from bathroom showers to kitchen floors and exterior wall sheathing.
For more expert DIY guides, product reviews, and home improvement tips to tackle your next project with confidence, explore our full blog library for actionable, trusted advice.
Happy building!

I’m Abby Lu, a passionate home cook who loves simplifying everyday meals. At PlugChef.com, I share product reviews and cooking guides to help you find the best tools for your kitchen.
Related posts:
 How Long Do Grapes Last: Ultimate Freshness Guide Revealed
 Sweet Chili Sauce Meatballs Recipe: Irresistible Flavor Boost
 Can I Bake in Pyrex: Ultimate Guide to Safe Oven Cooking
 Recipes Using Frozen Salmon Fillets: Easy, Delicious, and Quick Ideas
 Low Carb Make Ahead Meals: Easy, Tasty, and Time-Saving Recipes
 Beef And Broccoli With Noodles: Easy, Delicious Dinner Recipe

