
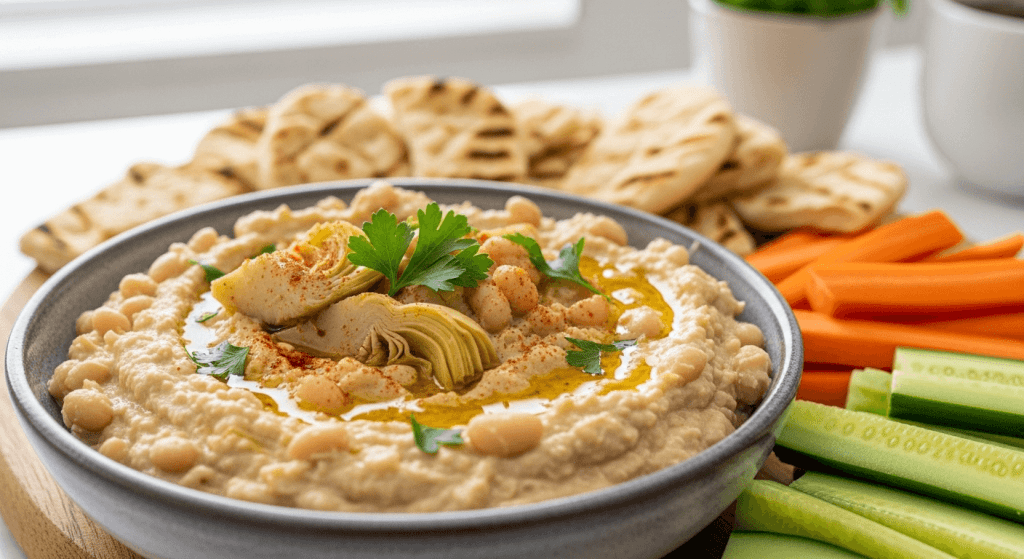
If you’re on the hunt for a plant-based dip that rivals its dairy-heavy counterparts in creaminess and flavor, but packs a serious nutritional punch, this vegan artichoke white bean dip is about to become your kitchen staple. Perfect for game day spreads, weeknight veggie snacks, potluck gatherings, or even as a quick sandwich and wrap spread, it comes together in 10 minutes of active prep time with pantry staples you likely already have on hand. Unlike store-bought vegan dips loaded with preservatives and fillers, this version relies on simple, whole ingredients to deliver bold, balanced flavor without processed additives, and it fits seamlessly into vegan, gluten-free, and low-sodium diets.
Core Ingredients & Pro Tips for Success
Getting the right components is the key to avoiding a watery, bland dip, and small tweaks to ingredient quality will drastically improve your final result. We’ve broken down each core ingredient below, plus pro tips to avoid common pitfalls, and swap options for dietary needs.
Main Ingredients
| Ingredient | Pro Tip for Best Results |
|---|---|
| Artichoke hearts (canned or jarred) | Jarred artichokes have brighter, more vibrant flavor than canned, but either works. Drain thoroughly and pat dry with a paper towel to remove excess brine that would make your dip runny. |
| White beans (cannellini or great northern) | Rinse thoroughly under cold water to remove canning liquid and excess sodium. Pat dry before blending to avoid a watery texture. Canned beans work perfectly for this quick recipe, no pre-cooking required. |
| Fresh garlic | 2-3 cloves add a bright, pungent kick. For a milder, sweeter flavor, swap for 1 head of roasted garlic (roast at 400°F for 30 minutes, then squeeze out the cloves). |
| Fresh lemon juice | 1-2 tbsp adds bright tang that cuts through the richness of the beans. Use freshly squeezed for the best flavor, not bottled, to get that bright, tangy lemon juice cut that balances the rich beans. |
| Extra virgin olive oil | 2-3 tbsp creates a silky, creamy texture and rounds out sharp flavors. Use a high-quality oil for the best results, as its flavor will shine through. |
| Salt and black pepper | Season gradually, as canned beans vary widely in sodium content. Taste before adding extra salt to avoid over-seasoning, using freshly ground salt and pepper for the best flavor. |
Optional Add-Ins for Custom Flavor
This recipe is endlessly adaptable to your taste preferences. Add any of the following for extra depth:
- 2 tbsp nutritional yeast for a savory, cheesy umami boost (great for people missing dairy flavor)
- ¼ cup chopped fresh herbs (parsley, dill, or basil) for bright, herby freshness
- ½ tsp red pepper flakes or 1 minced chipotle in adobo for a spicy kick
- 1 tsp smoked paprika for a subtle smoky, bacon-adjacent flavor without meat
- 2 tbsp vegan parmesan, toasted pine nuts, or a sprinkle of za’atar for garnish
Mix and match add-ins to find your perfect flavor, whether you’re serving it alongside a savory party snack staple like homemade chex mix or as a standalone appetizer.
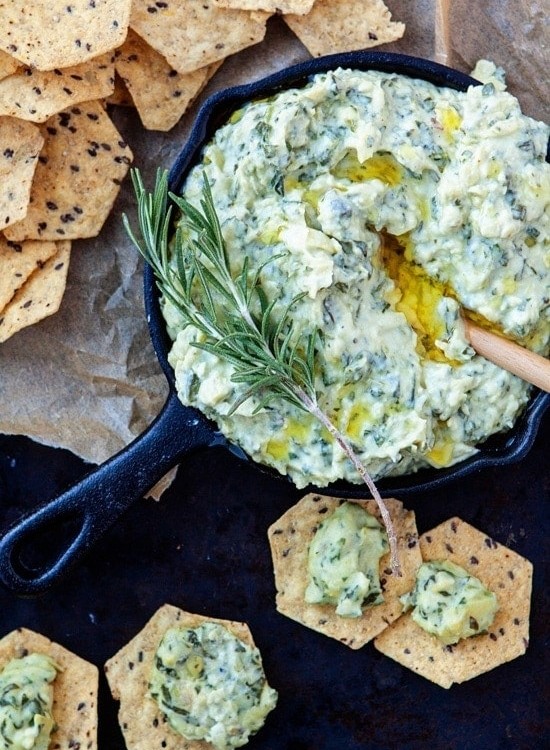 This dip comes together in 10 minutes of active prep time for quick, healthy snacking.
Step-by-Step Instructions for Perfect Creaminess
The difference between a gluey, bland dip and a silky, flavorful one comes down to small, intentional prep and blending steps. Follow this process to get consistent results every time.
Prep Work First
Start by draining your artichoke hearts and white beans, then rinse both thoroughly under cold water. Pat them completely dry with a clean kitchen towel or paper towels — excess moisture is the most common cause of runny dip. Roughly chop the artichokes into 1-inch pieces to ensure they blend evenly without turning to mush. If you’re using roasted garlic instead of raw, peel and chop it now as well. Measuring all ingredients out before you start blending (a quick mise en place) will make the process fast and stress-free.
Blending for Silky Texture
Add your prepped artichokes, white beans, garlic, lemon juice, olive oil, and a pinch of black pepper to a food processor or high-powered blender. Pulse the mixture 4-5 times first to break down large pieces, then blend on low speed for 15-20 seconds, scraping down the sides as needed. A common mistake many home cooks make is running the blender at full speed for too long, which breaks down bean starch into a gluey, pasty texture — short bursts of blending keep the dip light and creamy. If you don’t have a food processor, a high-powered immersion blender works perfectly, or you can mash the beans with a potato masher for an intentionally chunky, rustic texture.
Flavor & Texture Adjustments
Taste the dip after the first blend, then adjust to your preference:
- Too thick? Add 1 tsp of water, aquafaba (the liquid from canned beans), or extra olive oil at a time, blending briefly after each addition.
- Too thin? Stir in 1 tbsp of drained, rinsed white beans or a pinch of white bean flour to thicken it.
- Needs more brightness? Add an extra ½ tsp of lemon juice at a time.
- Needs more depth? Add a pinch of smoked paprika or a dash of tamari for umami. For the best flavor, let the dip rest in the refrigerator for 15 minutes before serving to let the flavors meld.
 Fresh parsley and a drizzle of olive oil add bright color and herby flavor to the finished dip.
Nutritional Benefits & Dietary Fit
This dip is far more than a tasty snack — it’s a nutrient-dense option that fits seamlessly into a variety of eating patterns. Per the USDA nutrient data for legumes and vegetables, a 1-cup serving of cooked cannellini beans provides approximately 15 grams of plant-based protein and 11 grams of dietary fiber, while artichokes rank among the highest-fiber vegetables per serving, with significant amounts of vitamin C, vitamin K, and magnesium to support immune function and bone health. The combination of fiber and plant-based protein makes this dip incredibly filling, which can help curb overeating of less nutritious snacks. It’s also naturally low in saturated fat and free of cholesterol, making it a heart-healthy alternative to traditional cream-based dips that rely on dairy or heavy cream. For people following vegan, vegetarian, gluten-free, or low-sodium diets, this dip is a safe, satisfying option as long as you use no-salt-added beans and gluten-free dippers. Note that artichokes and white beans are high in FODMAPs, so people with IBS may want to stick to small ¼-cup servings to avoid digestive discomfort.
Serving Ideas for Every Occasion
While this dip is delicious on its own, the right pairings and presentation can elevate it from a quick snack to a showstopping party appetizer.
Best Dipper Pairings
Skip the standard salted chips for these more interesting, complementary options:
- Fresh veggie sticks: celery, bell pepper strips, baby carrots, jicama, or endive leaves for a crisp, fresh contrast
- Warm, toasted baguette slices or pita wedges for a soft, chewy bite
- Seeded crackers or rice cakes for extra crunch
- Roasted potato wedges for a hearty, savory pairing (perfect as a side for elegant dinner party side dishes)
Creative Non-Dipper Uses
This dip works as far more than just a dip:
- Spread it on sandwiches or wraps in place of mayo or hummus for a creamy, savory boost
- Swirl it into pasta for a quick, dairy-free creamy sauce
- Use it as a base for vegan pizza, topped with roasted veggies and spicy crowd-pleaser dip crumbles for extra heat
- Dollop it on grain bowls for a protein-rich topping
- This dip is perfect for quick, satisfying after-school or work snacks when you need something filling in minutes.
Presentation Tips
To make your dip look as good as it tastes:
- Serve it in a shallow rustic ceramic bowl or a hollowed-out sourdough loaf for a rustic, inviting look
- Garnish with a drizzle of high-quality extra virgin olive oil, a sprinkle of smoked paprika, fresh parsley, and a few whole artichoke hearts
- Set out small bowls of extra toppings (toasted pine nuts, sun-dried tomatoes, olives) so guests can customize their bites
- For a casual, communal feel, set the dip on a rustic wooden serving board surrounded by dippers.
 Serve this dip as a party appetizer, weeknight snack, or sandwich spread for any occasion.
Storage & Reheating Guidelines
Proper storage will keep your dip fresh and flavorful for days, and it freezes beautifully for meal prep.
Refrigeration
Store leftover dip in an airtight glass container (plastic can absorb odors and stain) in the coldest part of your fridge for up to 5 days. For best results, press a small piece of parchment paper directly onto the surface of the dip before sealing the lid to prevent oxidation and browning. Stir well before serving, as it may separate slightly in the fridge.
Freezing & Reheating
This dip freezes perfectly for up to 3 months. Portion it into ½-cup servings in freezer-safe containers, leaving ½ inch of space at the top for expansion. Thaw overnight in the refrigerator before using. To reheat, warm gently over low heat on the stovetop, stirring constantly to avoid scorching, or microwave in 30-second bursts, stirring between each. If the dip thickens too much when reheating, stir in 1 tsp of water or olive oil at a time to reach your desired consistency. Per FDA food safety storage guidelines, never leave perishable dips at room temperature for more than 2 hours, as this creates ideal conditions for bacterial growth.
Flavor Variations to Try
This recipe is a blank canvas for flavor experimentation. Try these tested variations to switch up your dip routine:
Herb & Spice Blends
- Lemon Dill: Add 2 tbsp of chopped fresh dill and 1 tsp of lemon zest for a bright, tangy flavor perfect for spring gatherings
- Smoky Chipotle: Add 1 minced chipotle in adobo, 1 tsp cumin, and a pinch of brown sugar for a smoky, slightly sweet kick
- Mediterranean: Add 1 tsp dried oregano, ½ tsp garlic powder, and 2 tbsp chopped kalamata olives for a savory, briny flavor If you’re using whole spices, grind them fresh with a precise manual spice mill to release their full flavor without bitterness.
Bean & Veggie Swaps
- Swap cannellini beans for chickpeas for a more hummus-like texture, or great northern beans for a milder, creamier base
- Add ½ cup of sautéed, thoroughly drained spinach for a creamy spinach artichoke dip variation
- Stir in ¼ cup of chopped sun-dried tomatoes or roasted red peppers for a sweet, tangy, colorful twist
- For a Mexican-inspired version, swap white beans for black beans, add 1 tsp cumin, ¼ cup chopped cilantro, and a squeeze of lime
Frequently Asked Questions
Can I make this dip without a food processor?
Yes! A high-powered immersion blender works perfectly for this recipe, or you can mash the beans with a potato masher for an intentionally chunky, rustic texture. The dip will still be flavorful, just not as silky smooth.
Why is my dip watery?
The most common causes are undrained or unpat-dried artichokes and beans, over-blending, or adding too much liquid when adjusting texture. To fix a runny dip, stir in 1 tbsp of drained, rinsed white beans or a pinch of white bean flour to thicken it.
Can I use frozen artichokes?
Yes, but you must thaw them completely and squeeze out all excess moisture before using, otherwise they will release water into the dip and make it runny.
Is this dip freezer-friendly?
Absolutely! It freezes well for up to 3 months. Thaw it in the refrigerator overnight and stir well before serving; you may need to add a splash of water to thin it back to your desired consistency.
Is this dip suitable for meal prep?
Yes, portion it into single-serve containers with pre-cut veggie sticks for a ready-to-eat, healthy snack that stays fresh for up to 5 days in the refrigerator.
Final Thoughts
This vegan artichoke white bean dip checks every box for a go-to plant-based recipe: it’s creamy enough to satisfy even the most serious creamy dip cravings, packed with fiber and plant-based protein to keep you full between meals, and endlessly customizable to match your taste preferences. Whether you’re serving it at a summer barbecue, packing it for a work lunch, or grabbing it as a quick after-school snack, it’s a low-effort, high-reward option that works for every diet. It’s also a great alternative to decadent cheese dip alternatives for guests who avoid dairy. Batch a double batch this weekend to keep on hand for busy weeks, and don’t be afraid to experiment with the variations above to make it your own. It’s perfect for everything from casual weeknight snacks to potluck gatherings and game day spreads.

Related posts:
 How to Make a Fruit Basket for a Gift: Easy DIY Guide
 Do You Need a Basket? Essential Guide for Air Fryers
 How to Dispose of Small Kitchen Appliances: Easy & Eco-Friendly Tips
 Kitchen White Cabinets Stainless Appliances: Timeless Elegance
 How to Hide Appliances in a Kitchen: Clever Design Tips
 Where to Sell Old Kitchen Appliances: Top Platforms Revealed

