
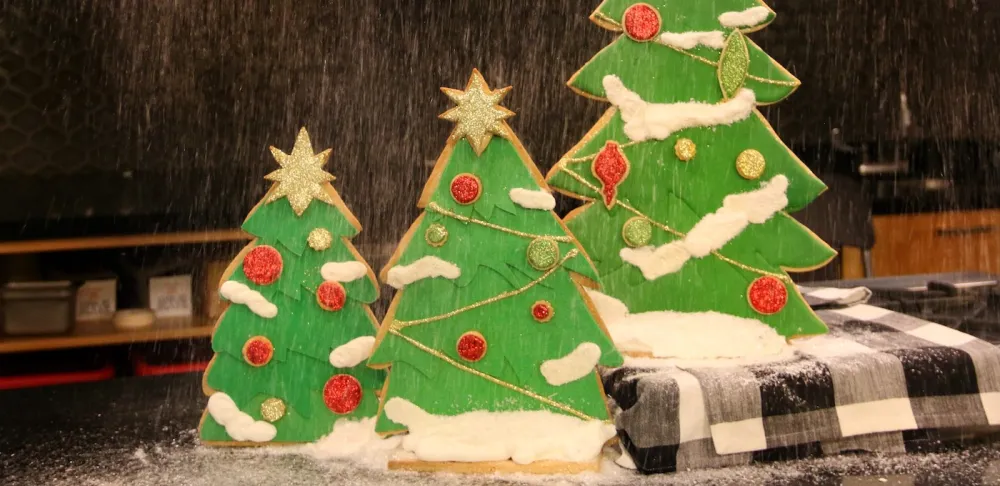
The scent of warm sugar and spices drifting from the oven, the crunch of a perfectly crisp cookie edge, the joy of watching kids (or adults!) turn plain dough into festive, decorated trees — Christmas tree cut out cookies are the quintessential holiday baking tradition for a reason. Far more versatile than their simple appearance suggests, these treats work for beginner bakers, cookie swap contributors, family crafting sessions, and even last-minute holiday gifts. Whether you’re looking for a classic buttery sugar cookie recipe, a spiced gingerbread variation, or dietary-friendly options for guests with gluten or vegan needs, this guide covers every tip, trick, and creative idea you need to make 2026’s batch the best yet. We’ve tested dozens of dough formulas and decorating methods for holiday bake sales and family gatherings over the past decade, so you can skip the trial and error and get straight to the fun part.
Choosing the Perfect Dough for Uniform, Tasty Cookies
The foundation of great Christmas tree cut out cookies is a dough that holds its shape during baking, tastes delicious, and is easy to work with. The right formula will give you crisp edges, even browning, and a texture that holds up to decorating without cracking. Below are the most popular dough options, plus pro tips for dietary needs.
Classic Sugar Cookie Dough
Sugar cookie dough is the go-to choice for cut out cookies for good reason: it’s smooth, buttery, and holds intricate shapes with ease. A no-spread formula (made with creamed butter and sugar, not melted butter) is key to preventing lopsided trees, and chilling the dough for at least 1 hour (2 hours is ideal for optimal results, per University of Minnesota Extension's cut-out cookie best practices guide) firms up the fat so cookies bake evenly without spreading. This dough browns lightly for a soft, tender crumb, and its neutral flavor makes it the perfect canvas for any decorating style.
Spiced Gingerbread Dough
For a warm, festive twist, gingerbread dough adds cozy holiday spice to your tree cookies. Its firmer, denser texture holds even the thinnest, most intricate cutter shapes without distortion, making it ideal for detailed designs. The blend of ginger, cinnamon, cloves, and molasses fills your kitchen with a signature holiday aroma, and it pairs beautifully with cream cheese or white royal icing for a balanced flavor. If you love extra spice, add a pinch of black pepper or allspice for a subtle kick.
Dietary Restriction-Friendly Options
No one has to miss out on holiday cookie fun: gluten-free and vegan dough formulas work just as well for cutouts with a few adjustments. For gluten-free cookies, use a high-quality 1:1 gluten-free flour blend with added xanthan gum (avoid single-flour blends like straight rice flour, which can be crumbly and fragile) and chill the dough for an extra 30 minutes to improve structure. For vegan cookies, swap dairy butter for vegan butter or solid coconut oil, use a flax egg (1 tbsp ground flaxseed + 3 tbsp water) instead of a regular egg, and use plant-based milk if needed. Both options hold shapes well when chilled properly, and taste nearly identical to traditional dough.
Foolproof Shaping Techniques for Perfect Christmas Trees
Uniform, crisp shapes make your cookies look professional and bake evenly, no advanced baking skills required. These pro tips, tested for holiday bake sales and family crafting sessions, will help you avoid common shaping pitfalls.
Using Cookie Cutters for Consistent Shapes
Thin metal cookie cutters are far better than thick plastic for clean, sharp edges that slice through dough without dragging. Press the cutter straight down firmly without twisting — twisting stretches the dough, leading to lopsided trees that bake unevenly. If your dough sticks to the cutter, dust it lightly with flour or cornstarch before each cut to keep shapes crisp. A common mistake I see bakers make is lifting the cutter at an angle, which pulls and distorts the dough; instead, lift straight up gently to release the cutout. If you don’t have a dedicated tree cutter, use a triangle cutter paired with a small round cutter for a trunk, or a mini tree cutter for tiny accent cookies.
Custom Hand-Cutting for Unique Designs
For one-of-a-kind trees, hand-cutting lets you customize size, shape, and detail to match your vision. Use a small, sharp paring knife or craft blade to carve your tree outline directly on rolled-out dough, or print a template, trace it onto parchment paper, and place it on top of the dough to cut around for consistent custom shapes (think slim modern pine trees, wide rustic firs, or trees with cut-out star details). Practice on a small piece of scrap dough first to get a feel for the blade angle and pressure, and chill the dough for 10 minutes if it gets warm and sticky while you work.
Pro Tips for Even, Uniform Shapes
Consistent thickness is the secret to evenly baked cookies:
- Roll dough to an even 1/4 to 1/2 inch thickness using rolling pin guides or ruler marks on your work surface.
- Cut shapes as close together as possible to minimize dough waste, but leave 1 inch of space between each cutout to avoid merging as they bake.
- Use a thin metal dough scraper to lift cut cookies from the work surface instead of your fingers, which can stretch and distort the edges.
- If dough softens while you’re cutting a large batch, pop it back in the refrigerator for 10 minutes to firm up before continuing.
Use a kitchen cleaning brush with handle to brush excess flour off rolled-out dough and your work surface for clean, unmarked cookie edges.
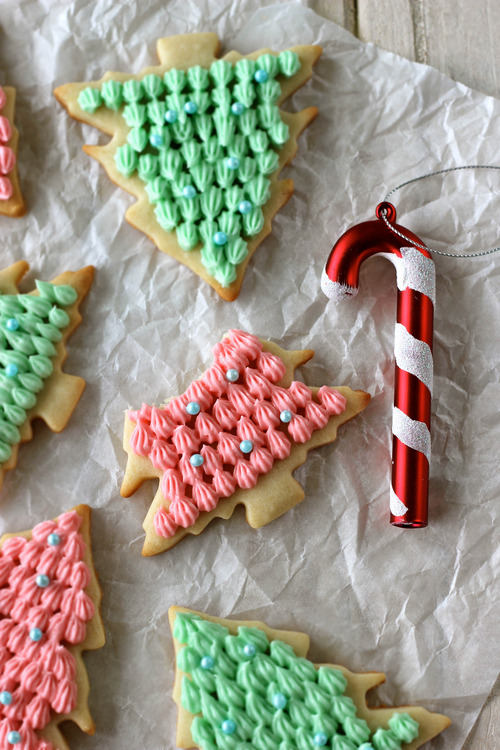 Finished Christmas tree sugar cookies with vibrant green royal icing and festive sprinkles, ready for a holiday party.
Credit: damndelicious.net
Finished Christmas tree sugar cookies with vibrant green royal icing and festive sprinkles, ready for a holiday party.
Credit: damndelicious.net
Festive Decorating Ideas for Every Skill Level
Decorating is the most fun part of making Christmas tree cut out cookies, and you don’t need advanced piping skills to make beautiful, festive treats. These ideas work for beginners, kids, and experienced decorators alike.
Icing and Piping Basics
Royal icing is the gold standard for cut out cookies because it dries hard, making cookies perfect for stacking, gifting, and transporting. To make flood icing (the smooth, base layer for most designs), mix powdered sugar, meringue powder, and water to a consistency similar to corn syrup: lift a spoonful of icing, and it should smooth out into a flat surface within 10 seconds. Use a piping bag fitted with a small round tip to outline your tree shape first, let the outline dry for 15 minutes, then fill the inside with flood icing for a crisp, professional finish. You don’t have to stick to classic green: try white icing for a snow-covered tree, red for a whimsical twist, or even ombre green for a gradient effect.
No-Icing Decor Options for Beginners and Kids
If icing feels too intimidating, or you’re decorating with young children who might eat the icing before it dries, there are plenty of easy, mess-free options. Toss warm baked cookies in cinnamon sugar for a rustic, snickerdoodle-style treat, or use colored sugar, sprinkles, and edible glitter for sparkle and texture. Edible markers are perfect for drawing small details like snowflakes, names, or faces on trees, and they require no drying time. For a super simple option, brush cookies with melted white chocolate and sprinkle with crushed peppermint for a minty, festive finish.
Candy, Chocolate, and Edible Accent Ideas
Small candies and edible accents turn plain trees into festive masterpieces with minimal effort. Use mini M&Ms or red and green candy-coated chocolates as ornaments, mini candy canes cut into small pieces for garland, and gold dragées or nonpareils as tiny lights. Drizzle melted dark or white chocolate over iced cookies for an elegant finish, or dip half the cookie edge in crushed candy canes for a crunchy, minty contrast. For a rustic look, press chopped toasted pecans or pretzel sticks into the base of the tree to act as a trunk.
For a rustic holiday serving look, arrange decorated cookies on a hand-engraved cutting board for a personalized touch at family gatherings.
Creative Flavor Twists to Elevate Your Cookies
The classic buttery sugar and spiced gingerbread flavors are delicious, but small add-ins can take your cookies to the next level and make them stand out at holiday parties and cookie swaps.
Spices and Extract Add-Ins
Add warm depth to your dough with 1/2 tsp of ground cinnamon, nutmeg, or cardamom per 2 cups of flour — these spices complement the buttery base without overpowering it. For a unique twist, add 1/4 tsp of peppermint extract for a minty holiday flavor, or 1/2 tsp of almond extract for a subtle nutty note that pairs perfectly with almond-flavored icing. A pinch of ground cloves adds extra warmth to gingerbread dough for a deeper, more complex spice profile.
Nut and Fruit Inclusions
Chopped toasted pecans, walnuts, or pistachios add a satisfying crunch and rich, nutty flavor to your cookies. Dried cranberries, cherries, or apricots add bursts of tart, natural sweetness and vibrant color. Mix these add-ins into the dough just before rolling, or sprinkle them on top of iced cookies for extra texture. Be sure to chop nuts and dried fruit into small, uniform pieces to avoid pulling the dough apart when cutting shapes.
Drizzle and Dip Finishes
A simple drizzle or dip adds extra flavor and visual appeal to finished cookies. Melt white or dark chocolate and drizzle it over iced trees for an elegant finish, or dip the bottom third of the cookie in melted chocolate and then in crushed peppermint or sprinkles for a festive, crunchy edge. For a non-chocolate option, brush cookies with a light maple glaze (made with maple syrup, powdered sugar, and a splash of milk) and sprinkle with sea salt for a sweet-salty contrast.
Baking, Cooling, and Storage for Long-Lasting Freshness
Proper baking and storage techniques will ensure your cookies stay fresh, flavorful, and beautiful from the first batch to the last.
Perfect Baking Times and Temperature
Most Christmas tree cut out cookies bake best at 350°F (175°C), with a bake time of 8 to 12 minutes depending on dough thickness. For 1/4 inch thick dough, bake for 8 to 10 minutes; for 1/2 inch thick dough, bake for 10 to 12 minutes. Your cookies are done when the edges are just set and lightly golden, and the centers look slightly underbaked — they will firm up fully as they cool. A common mistake is overbaking, which leads to dry, crumbly cookies; if you prefer soft cookies, pull them at the 8-minute mark. For even browning, rotate your baking sheet halfway through cooking if your oven has hot spots, and always use an oven thermometer to confirm your oven’s temperature, as many home ovens run 10-25°F hotter or cooler than their dial indicates.
Proper Cooling and Handling
Let cookies cool on the baking sheet for 5 minutes immediately after removing them from the oven — this brief rest lets them firm up enough to handle without breaking. Transfer them carefully to a wire cooling rack using a thin, wide spatula to avoid cracking crisp edges. Never cool cookies directly on the baking sheet for the full cooling time, as residual heat will overbake them and make them too crisp (if you want soft cookies) or soggy (if you want crisp decorating cookies).
Short-Term and Long-Term Storage Tips
Store undecorated or decorated cookies in an airtight container at room temperature, away from direct sunlight or heat sources, for 7 to 10 days. If stacking cookies, separate layers with parchment paper to avoid sticking or damage to decorations. For longer storage, freeze unbaked dough balls for up to 3 months, or baked undecorated cookies for up to 6 months. Decorated cookies with royal icing can be frozen for up to 2 months; thaw them at room temperature inside their airtight container to avoid condensation that can make icing sticky. If cookies get soft in storage, pop them in a 300°F oven for 2 to 3 minutes to crisp them up before serving or decorating. For food safety, follow USDA FSIS guidance for homemade baked goods when storing and gifting cookies to avoid spoilage.
After baking, a kitchen cleaning scrub brush makes quick work of stuck-on icing and sugar residue on mixing bowls and piping bags.
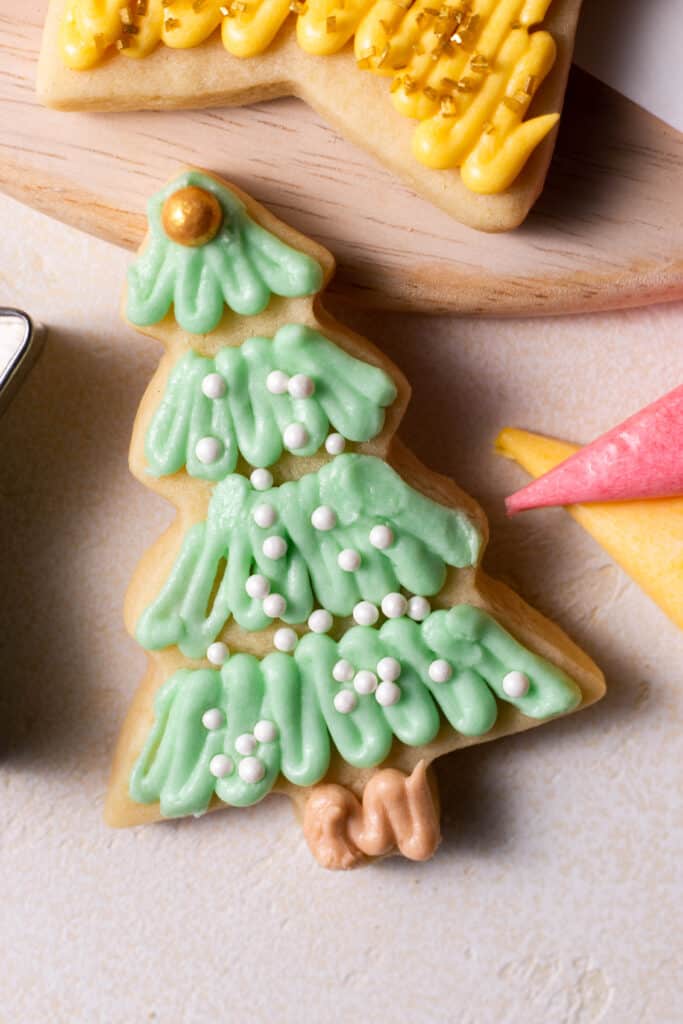 Unfrosted Christmas tree cut out cookies cooling on a wire rack after baking, with crisp edges and uniform shapes.
Credit: sarahsdayoff.com
Unfrosted Christmas tree cut out cookies cooling on a wire rack after baking, with crisp edges and uniform shapes.
Credit: sarahsdayoff.com
Troubleshooting Common Christmas Tree Cut Out Cookie Problems
Even experienced bakers run into issues from time to time. These quick fixes will help you salvage your batch and avoid the same problem next time:
- Dough spreads too much while baking: This is almost always caused by under-chilled dough or an oven that’s too hot. Chill your dough for a full 2 hours before cutting, and use an oven thermometer to confirm your temperature is accurate.
- Edges are ragged or distorted: Twisting the cookie cutter while cutting, or using warm, soft dough, leads to uneven edges. Press cutters straight down without twisting, and chill dough for 10 minutes if it gets sticky while cutting.
- Royal icing won’t dry hard: Icing that’s too thin, or high humidity in your kitchen, will prevent icing from setting. Add more powdered sugar to thicken flood icing, or add 1 tsp of meringue powder per cup of icing to help it harden. If you’re baking in a humid climate, use a dehumidifier in your kitchen while decorating.
- Cookies stick to the cookie cutter: Dust your cutter with flour or cornstarch before each cut, and chill dough for 30 minutes if it’s overly sticky.
- Sprinkles or candy slide off after icing dries: Wait 15 to 30 minutes for flood icing to set completely before adding toppings; if you add toppings too early, they will sink or slide off as the icing dries.
- Cookies are crumbly or fall apart when handling: This is usually a sign of overbaking, or dough that’s too dry. Reduce bake time by 1-2 minutes, or add 1 tsp of cornstarch to your dry ingredients to improve structure.
Fun Holiday Activities and Gift Ideas
Christmas tree cut out cookies are perfect for more than just eating — they’re a great way to make holiday memories with family and friends.
Kids' Decorating Parties and Stations
Hosting a decorating party is a low-stress, fun activity for kids and adults alike. Set up a DIY station with pre-baked tree cookies, icing in squeeze bottles (easier for little hands to use than piping bags), and small bowls of sprinkles, candy, and edible glitter. Cover the table with wax paper for easy cleanup, and have wet wipes on hand for sticky fingers. For extra fun, host a contest for the most creative tree design, with small prizes like holiday stickers or candy canes for winners. Keep curious toddlers safe during baking sessions by installing childproof cabinet locks no drilling on lower kitchen cabinets to block access to hot pans and sharp cookie cutters.
Cookie Exchange and Gift Packaging Tips
Christmas tree cookies are perfect for cookie exchanges and neighbor gifts. For cookie exchanges, package 4 to 6 cookies in small cellophane bags or decorative boxes tied with holiday ribbon, and add a small tag noting any allergens (nuts, gluten, dairy) for recipients. For a more elevated gift, pair your cookies with a small jar of homemade hot cocoa mix or a cut round cheese for charcuterie board for a gourmet holiday basket that’s perfect for friends, neighbors, and teachers. Let kids decorate gift tags with drawings or stickers for a personal, heartfelt touch.
 Rolled sugar cookie dough being cut into Christmas tree shapes with a metal cookie cutter, ready for baking.
Credit: anoregoncottage.com
Rolled sugar cookie dough being cut into Christmas tree shapes with a metal cookie cutter, ready for baking.
Credit: anoregoncottage.com
Frequently Asked Questions
What ingredients do I need for Christmas tree cut out cookies?
Basic ingredients include all-purpose flour, granulated sugar, unsalted butter, eggs, vanilla extract, baking powder, and a pinch of salt. For green icing, use green gel food coloring (avoid liquid food coloring, which can thin icing too much). Optional add-ins include spices, extracts, nuts, dried fruit, and decorative sprinkles or candy. For gluten-free dough, use a 1:1 gluten-free flour blend with xanthan gum; for vegan dough, use vegan butter, a flax egg, and plant-based milk.
How do I make soft Christmas tree cut out cookies?
Use room-temperature butter (not melted) when creaming with sugar, and pull cookies from the oven when the edges are just set and the centers look slightly underbaked — they will firm up as they cool. Adding 1 tsp of cornstarch to your dry ingredients also boosts softness. Store soft cookies in an airtight container with a small piece of bread to retain moisture for up to 7 days.
Can I decorate Christmas tree cookies without royal icing?
Yes! There are plenty of no-icing decorating options: toss warm cookies in cinnamon sugar for a rustic treat, use colored sugar, sprinkles, and edible glitter for sparkle, or use edible markers to draw details like snowflakes or names. Melted chocolate drizzled over the top is another easy, delicious option that requires no piping skills.
How long do Christmas tree cut out cookies stay fresh?
Undecorated or decorated cookies (with non-perishable toppings) stored in an airtight container at room temperature will stay fresh for 7 to 10 days. For longer storage, freeze unbaked dough balls for up to 3 months, baked undecorated cookies for up to 6 months, and decorated royal icing cookies for up to 2 months. Always thaw frozen cookies at room temperature in their airtight container to avoid condensation that can make cookies soggy.
Why do my Christmas tree cut out cookies spread while baking?
Spreading is almost always caused by under-chilled dough or an oven that runs too hot. Chill your dough for at least 2 hours before cutting, and use an oven thermometer to confirm your oven’s temperature is accurate. Avoid over-creaming your butter and sugar, as this adds too much air to the dough and causes spreading.
Conclusion
Christmas tree cut out cookies are far more than just a holiday treat — they’re a canvas for creativity, a catalyst for family bonding, and a small, sweet way to spread cheer to everyone around you. From choosing the right dough to nailing your decorating technique, the tips in this guide will help you avoid common pitfalls and make cookies that look as good as they taste. This holiday season, skip the store-bought options and make a batch of your own: whether you’re hosting a decorating party, making gifts for neighbors, or just enjoying a warm cookie with a cup of cocoa by the fire, these festive treats are sure to become a cherished part of your traditions. Ready to get baking? Grab your cookie cutters, chill your dough, and have fun experimenting with flavors and designs — your 2026 holiday spread will be all the brighter for it.

I’m Abby Lu, a passionate home cook who loves simplifying everyday meals. At PlugChef.com, I share product reviews and cooking guides to help you find the best tools for your kitchen.
Related posts:
 What Oil to Use on Cutting Board: Best Options Revealed
 Is Teak Wood Good for Cooking Utensils: Discover Benefits
 How to Cut Skirt Board for Stair: Expert Tips & Techniques
 Can I Put Wood Cutting Board in Dishwasher? Essential Tips
 First Aid Kit Supplies Refills: Essential Items You Must Restock
 10 Person First Aid Kit: Essential Gear for Emergencies

