
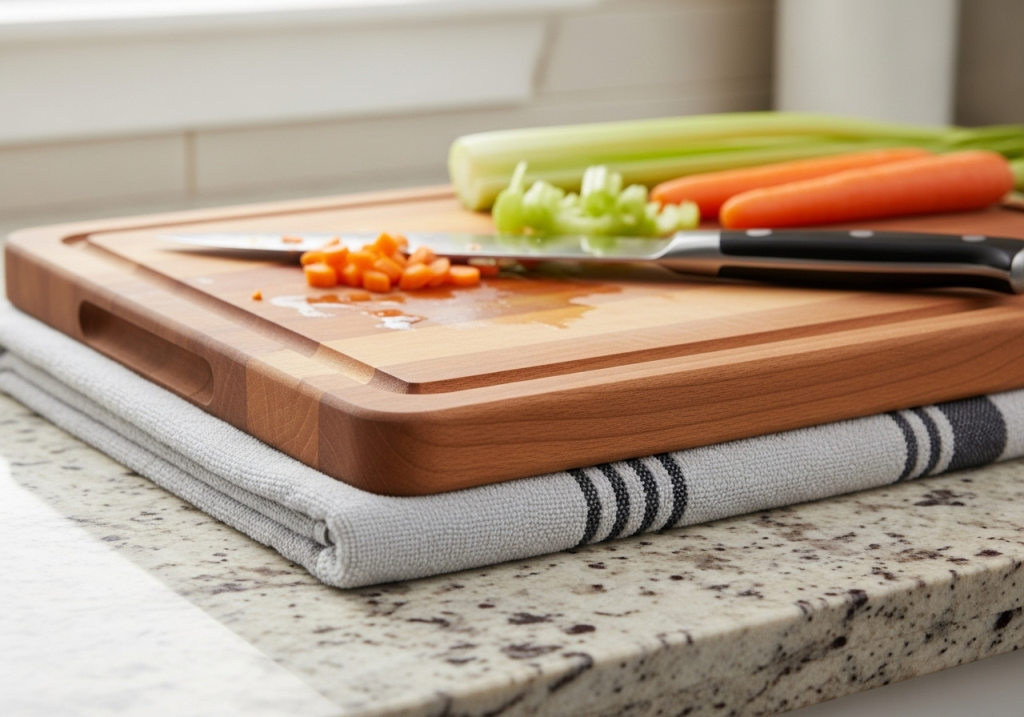
A wobbly cutting board is more than a minor kitchen annoyance—it’s a top cause of preventable lacerations during food prep, a fast track to dulling your favorite chef’s knife, and a recipe for cross-contamination if you’re chasing a sliding board mid-chop. Stabilizing your cutting board takes less than 2 minutes, requires no special tools, and drastically improves both safety and prep efficiency. Whether you’re using a heavy hardwood board or a lightweight plastic option, these expert-tested tips will keep your board firmly in place for every chop, slice, and dice. According to FDA kitchen safety guidelines, unsteady cutting surfaces are a leading source of minor kitchen injuries, most of which are easily avoidable with simple stabilization methods.
Why Cutting Board Stabilization Is Critical for Safety and Performance
A slipping board creates three core risks for home cooks: first, sudden shifts cause knife slips that lead to finger and hand lacerations, the most common kitchen injury reported in emergency rooms. Second, bracing a wobbly board while cutting puts uneven, excessive pressure on your knife edge, dulling it 2-3 times faster than cutting on a stable surface. Third, a sliding board often leads to dropped ingredients, increasing cross-contamination risk between raw proteins and produce. Stabilization is especially important for households with young children, elderly cooks, or anyone with limited mobility, as a sudden board shift can cause falls as well as cuts. Even heavy, thick boards can slip on smooth, wet countertops, so no board is immune to the risk of movement during use.
The benefits of a stable cutting surface are immediate and long-lasting:
- Reduced laceration risk from sudden board shifts
- Extended knife lifespan from consistent, even cutting pressure
- Faster, more precise prep with no need to pause and reposition a sliding board
- Lower cross-contamination risk from dropped ingredients
6 Proven Methods to Stabilize Any Cutting Board
These methods are ranked by effectiveness and ease of use, with options for every board type and counter surface. For extra slippery setups, combining two methods will eliminate almost all risk of movement.
1. Non-Slip Rubber or Silicone Mats
The most reliable daily stabilization solution for all board types, non-slip mats are made from textured rubber or silicone that grips both the counter and the bottom of your board. Look for models with a raised texture on both sides for maximum friction, or options with small suction cups on the bottom for extra hold on smooth surfaces. They’re easy to wipe clean, come in standard sizes that fit most boards, and cost as little as $5. For a low-cost alternative, cut a piece of non-adhesive rubber shelf liner to size to use as an underlay.
2. Damp Towel or Paper Towel Underlay
A classic, no-cost method that works for almost every setup: wring out a dish towel or paper towel until it is barely damp (not dripping), then place it under the cutting board. The moisture increases friction between the towel fibers, counter, and board surface, creating a tight grip that prevents slipping. This method is ideal for wooden boards, as the minimal moisture won’t damage the wood if the towel is properly wrung out. Avoid over-wetting the towel, as excess water can seep into porous wood and cause swelling, warping, or mold growth.
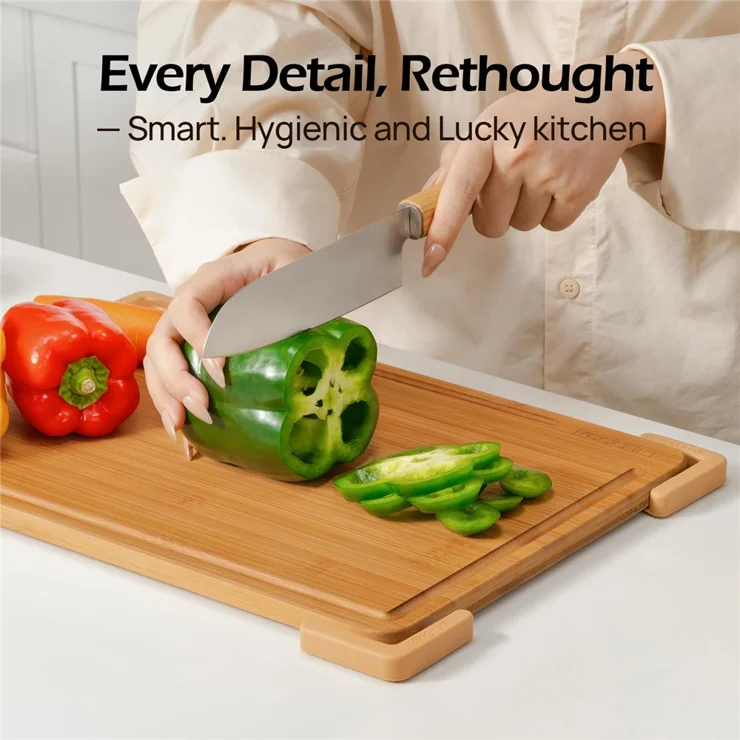
3. Board-Mounted Silicone Feet
Many modern cutting boards come pre-installed with 4-6 small silicone feet placed at the corners and center of the underside to eliminate wobble. If your board doesn’t have them, you can buy adhesive silicone foot pads separately for $3-$8. To install, wipe the bottom of the board with rubbing alcohol to remove dust and grease, then press the feet firmly into place. These feet work on almost all counter surfaces, require no extra underlays, and are easy to replace when they wear out.
4. Suction Cup Stabilizers
Suction cup stabilizers are the best option for very smooth, non-porous countertops like quartz, granite, or stainless steel. To use, wipe both the counter and the suction cup dry, then press the stabilizer firmly against the counter for 10-15 seconds to create a vacuum seal. Some heavy-duty models have a locking mechanism for extra hold, making them ideal for carving large cuts of meat. Note that suction cups will not adhere to textured surfaces like tile, butcher block, or matte-finish countertops, and will fail if the counter gets wet, so they’re best reserved for smooth, dry surfaces.
5. Double-Sided Tape (Temporary Use Only)
For temporary setups like outdoor cookouts or pop-up kitchen stations, double-sided carpet tape can hold a board in place on almost any surface. Apply strips to the underside of the board, then press it firmly to the counter. This is a semi-permanent solution, however: the tape will leave sticky residue on both the board and counter when removed, so it’s not recommended for long-term indoor use.
6. Combined Grip Methods for Extra Slippery Surfaces
For glass, bamboo, or very smooth countertops where a single method isn’t enough, combine two stabilization tactics for double grip. For example, place a non-slip mat on the counter, add a lightly damp towel between the mat and counter, then set your board on top. This eliminates almost all risk of movement, even during heavy, forceful chopping.
How Cutting Board Material Impacts Stabilization Needs
The material of your cutting board directly affects how much stabilization it needs, as well as the best method to use:
- Hardwood (maple, walnut, teak): Natural weight makes these boards the most stable out of the box, with end-grain boards being even heavier and less prone to wobble than edge-grain options. Their porous surfaces can get slippery when wet, however, so a damp towel or non-slip mat is still recommended for smooth counters. Regular proper teak board cleaning to preserve grip removes food residue that reduces friction between the board and counter.
- Bamboo: Denser and harder than most hardwoods, bamboo boards are more slippery when wet and can dull knives faster. They’re also prone to warping if exposed to excess moisture, so always use a non-slip underlay and avoid soaking them in water.
- Plastic (polypropylene, polyethylene): Lightweight plastic boards are the most prone to slipping, so look for models with textured undersides or built-in non-slip feet. They’re easy to sanitize for raw meat prep, but warp easily if put in the dishwasher, which creates a wobble that no underlay can fix. Pair them with a non-slip mat for secure, slip-resistant use during all prep.
- Glass or stone: While easy to sanitize, these materials are extremely slippery, even with grip pads, and will dull your knife edge almost instantly with regular use. They’re only recommended for serving, not cutting; if you do use one for prep, a heavy-duty suction cup stabilizer is required.
- Composite (wood fiber + resin): Mid-weight composite boards often have a naturally textured underside that provides some grip, but still benefit from a lightly damp towel for extra security on smooth counters. They’re a low-maintenance, stable option for everyday use.
For optimal stability, opt for boards at the recommended thickness for stable use (at least 1 inch for hardwood, 0.75 inches for plastic/composite) to minimize wobble from chopping force.
Long-Term Maintenance to Preserve Board Stability
Even the best stabilization methods will fail if your board or grip aids are poorly maintained. Follow these tips to keep your setup stable for years:
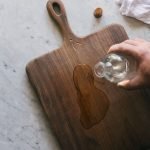
- Wood board care: Oil wooden boards every 4-6 weeks with food-grade mineral oil to prevent drying, cracking, and warping—all of which create uneven surfaces that cause wobble even with grip aids. Wipe off excess oil after 15 minutes to avoid a sticky surface that attracts dirt and reduces grip. For routine care to maintain flatness, follow our guide to food-safe oiling to maintain flatness.
- Clean all board undersides regularly: Wipe the bottom of your board after each use to remove food residue, grease, and dust that reduce friction against your counter. For plastic and composite boards, avoid abrasive scrubbers that can smooth out the textured underside over time, eliminating natural grip. If your board has stubborn built-up grime that reduces grip, a gentle scrub with baking soda and water will restore the textured surface.
- Inspect grip aids monthly: Silicone feet, non-slip mats, and suction cups wear out over time. Replace them if you notice cracking, loss of suction, or smooth spots that no longer grip the counter or board.
- Replace warped boards: If your board rocks when placed on a flat surface, no amount of stabilization will fix the uneven surface. Replace warped boards immediately to avoid injury and knife damage.
Common Stabilization Mistakes to Avoid
Even experienced cooks make these errors that reduce the effectiveness of their stabilization setup:
- Over-wetting underlays: Excess water seeps into porous wooden boards, causing swelling, warping, and mold growth. Always wring towels out until they are barely damp.
- Using greasy rags as underlays: Cooking oil or leftover grease on a towel transfers to your counter and board, creating a slippery surface and attracting harmful bacteria.
- Assuming board weight is enough: Even thick, heavy wooden boards can slip on wet or smooth counters, so always use a grip aid for heavy prep like carving meat or breaking down whole vegetables.
- Using suction cups on textured surfaces: Suction cups only create a seal on perfectly smooth, non-porous surfaces. They will fail immediately on tile, butcher block, or matte-finish countertops, so stick to non-slip mats for those surfaces.
Frequently Asked Questions
How do rubber or silicone feet stabilize a cutting board?
Rubber or silicone feet create high-friction contact between the board’s underside and your counter. Their textured surface grips both the board and counter, absorbs minor vibrations from chopping, and eliminates the tiny shifts that cause slipping. They work on both smooth and slightly textured surfaces, and should be replaced every 6-12 months as the silicone wears down.
Why is a damp cloth better than a dry one for an underlay?
Water increases the coefficient of friction between the towel fibers and both the counter and board surfaces, creating a tighter grip than a dry cloth. The key is to wring it out completely so it’s barely damp—excess moisture can damage wooden boards and leave water spots on counters.
Can I use shelf liner as a cutting board underlay?
Yes, non-adhesive rubber shelf liner is an excellent, low-cost alternative to dedicated non-slip mats. Look for a textured, non-slip variety, and cut it to size to fit under your board. Avoid adhesive shelf liner, as it will leave residue on your counter and board.
Do suction cup stabilizers work on all countertops?
No, suction cups only create a seal on perfectly smooth, non-porous surfaces like quartz, granite, or stainless steel. They will not adhere to textured tile, butcher block, or matte-finish countertops, so use a non-slip mat instead for those surfaces.
Does board thickness affect its stability?
Absolutely. Thicker boards (1.5 inches or more for hardwood, 1 inch for plastic/composite) have more mass, which reduces wobble from chopping force, and their weight presses down more firmly on the counter for natural grip. Thin, flimsy boards (under 0.75 inches) will almost always slip, no matter what underlay you use, regardless of material.
Can I stabilize a glass cutting board for regular use?
While possible with a heavy-duty suction cup stabilizer, glass boards are not recommended for regular cutting, as their slippery surface and hard material dull knives rapidly and pose a high laceration risk if they slip. Use glass boards only for serving, not prep.
Conclusion
Stabilizing your cutting board is a low-effort, high-reward habit that prevents injuries, extends the life of your knives and board, and makes food prep faster and more precise. You don’t need expensive tools to get a secure grip—most methods use items you already have in your kitchen, from dish towels to silicone baking mats. For more tips to keep your kitchen safe and efficient, check out our guide to streamlining kitchen cabinet storage for pots and pans to make prep faster and more organized.
 A non-slip underlay is the most reliable daily stabilization method for all board types.
Image source: www.tvcmall.com
A non-slip underlay is the most reliable daily stabilization method for all board types.
Image source: www.tvcmall.com
 Pre-installed or add-on silicone feet eliminate wobble without extra underlays.
Image source: www.amazon.com
Pre-installed or add-on silicone feet eliminate wobble without extra underlays.
Image source: www.amazon.com
A non-slip underlay is the most reliable daily stabilization method for all board types.
Image source: www.tvcmall.com
2. Damp Towel or Paper Towel Underlay
A classic, no-cost method that works for almost every setup: wring out a dish towel or paper towel until it is barely damp (not dripping), then place it under the cutting board. The moisture increases friction between the towel fibers, counter, and board surface, creating a tight grip that prevents slipping. This method is ideal for wooden boards, as the minimal moisture won’t damage the wood if the towel is properly wrung out. Avoid over-wetting the towel, as excess water can seep into porous wood and cause swelling, warping, or mold growth.
3. Board-Mounted Silicone Feet
Many modern cutting boards come pre-installed with 4-6 small silicone feet placed at the corners and center of the underside to eliminate wobble. If your board doesn’t have them, you can buy adhesive silicone foot pads separately for $3-$8. To install, wipe the bottom of the board with rubbing alcohol to remove dust and grease, then press the feet firmly into place. These feet work on almost all counter surfaces, require no extra underlays, and are easy to replace when they wear out.
Pre-installed or add-on silicone feet eliminate wobble without extra underlays.
Image source: www.amazon.com
4. Suction Cup Stabilizers
Suction cup stabilizers are the best option for very smooth, non-porous countertops like quartz, granite, or stainless steel. To use, wipe both the counter and the suction cup dry, then press the stabilizer firmly against the counter for 10-15 seconds to create a vacuum seal. Some heavy-duty models have a locking mechanism for extra hold, making them ideal for carving large cuts of meat. Note that suction cups will not adhere to textured surfaces like tile, butcher block, or matte-finish countertops, and will fail if the counter gets wet, so they’re best reserved for smooth, dry surfaces.
5. Double-Sided Tape (Temporary Use Only)
For temporary setups like outdoor cookouts or pop-up kitchen stations, double-sided carpet tape can hold a board in place on almost any surface. Apply strips to the underside of the board, then press it firmly to the counter. This is a semi-permanent solution, however: the tape will leave sticky residue on both the board and counter when removed, so it’s not recommended for long-term indoor use.
6. Combined Grip Methods for Extra Slippery Surfaces
For glass, bamboo, or very smooth countertops where a single method isn’t enough, combine two stabilization tactics for double grip. For example, place a non-slip mat on the counter, add a lightly damp towel between the mat and counter, then set your board on top. This eliminates almost all risk of movement, even during heavy, forceful chopping.
How Cutting Board Material Impacts Stabilization Needs
The material of your cutting board directly affects how much stabilization it needs, as well as the best method to use:
- Hardwood (maple, walnut, teak): Natural weight makes these boards the most stable out of the box, with end-grain boards being even heavier and less prone to wobble than edge-grain options. Their porous surfaces can get slippery when wet, however, so a damp towel or non-slip mat is still recommended for smooth counters. Regular proper teak board cleaning to preserve grip removes food residue that reduces friction between the board and counter.
- Bamboo: Denser and harder than most hardwoods, bamboo boards are more slippery when wet and can dull knives faster. They’re also prone to warping if exposed to excess moisture, so always use a non-slip underlay and avoid soaking them in water.
- Plastic (polypropylene, polyethylene): Lightweight plastic boards are the most prone to slipping, so look for models with textured undersides or built-in non-slip feet. They’re easy to sanitize for raw meat prep, but warp easily if put in the dishwasher, which creates a wobble that no underlay can fix. Pair them with a non-slip mat for secure, slip-resistant use during all prep.
- Glass or stone: While easy to sanitize, these materials are extremely slippery, even with grip pads, and will dull your knife edge almost instantly with regular use. They’re only recommended for serving, not cutting; if you do use one for prep, a heavy-duty suction cup stabilizer is required.
- Composite (wood fiber + resin): Mid-weight composite boards often have a naturally textured underside that provides some grip, but still benefit from a lightly damp towel for extra security on smooth counters. They’re a low-maintenance, stable option for everyday use.
For optimal stability, opt for boards at the recommended thickness for stable use (at least 1 inch for hardwood, 0.75 inches for plastic/composite) to minimize wobble from chopping force.
Long-Term Maintenance to Preserve Board Stability
Even the best stabilization methods will fail if your board or grip aids are poorly maintained. Follow these tips to keep your setup stable for years:
- Wood board care: Oil wooden boards every 4-6 weeks with food-grade mineral oil to prevent drying, cracking, and warping—all of which create uneven surfaces that cause wobble even with grip aids. Wipe off excess oil after 15 minutes to avoid a sticky surface that attracts dirt and reduces grip. For routine care to maintain flatness, follow our guide to food-safe oiling to maintain flatness.
- Clean all board undersides regularly: Wipe the bottom of your board after each use to remove food residue, grease, and dust that reduce friction against your counter. For plastic and composite boards, avoid abrasive scrubbers that can smooth out the textured underside over time, eliminating natural grip. If your board has stubborn built-up grime that reduces grip, a gentle scrub with baking soda and water will restore the textured surface.
- Inspect grip aids monthly: Silicone feet, non-slip mats, and suction cups wear out over time. Replace them if you notice cracking, loss of suction, or smooth spots that no longer grip the counter or board.
- Replace warped boards: If your board rocks when placed on a flat surface, no amount of stabilization will fix the uneven surface. Replace warped boards immediately to avoid injury and knife damage.
Common Stabilization Mistakes to Avoid
Even experienced cooks make these errors that reduce the effectiveness of their stabilization setup:
- Over-wetting underlays: Excess water seeps into porous wooden boards, causing swelling, warping, and mold growth. Always wring towels out until they are barely damp.
- Using greasy rags as underlays: Cooking oil or leftover grease on a towel transfers to your counter and board, creating a slippery surface and attracting harmful bacteria.
- Assuming board weight is enough: Even thick, heavy wooden boards can slip on wet or smooth counters, so always use a grip aid for heavy prep like carving meat or breaking down whole vegetables.
- Using suction cups on textured surfaces: Suction cups only create a seal on perfectly smooth, non-porous surfaces. They will fail immediately on tile, butcher block, or matte-finish countertops, so stick to non-slip mats for those surfaces.
Frequently Asked Questions
How do rubber or silicone feet stabilize a cutting board?
Rubber or silicone feet create high-friction contact between the board’s underside and your counter. Their textured surface grips both the board and counter, absorbs minor vibrations from chopping, and eliminates the tiny shifts that cause slipping. They work on both smooth and slightly textured surfaces, and should be replaced every 6-12 months as the silicone wears down.
Why is a damp cloth better than a dry one for an underlay?
Water increases the coefficient of friction between the towel fibers and both the counter and board surfaces, creating a tighter grip than a dry cloth. The key is to wring it out completely so it’s barely damp—excess moisture can damage wooden boards and leave water spots on counters.
Can I use shelf liner as a cutting board underlay?
Yes, non-adhesive rubber shelf liner is an excellent, low-cost alternative to dedicated non-slip mats. Look for a textured, non-slip variety, and cut it to size to fit under your board. Avoid adhesive shelf liner, as it will leave residue on your counter and board.
Do suction cup stabilizers work on all countertops?
No, suction cups only create a seal on perfectly smooth, non-porous surfaces like quartz, granite, or stainless steel. They will not adhere to textured tile, butcher block, or matte-finish countertops, so use a non-slip mat instead for those surfaces.
Does board thickness affect its stability?
Absolutely. Thicker boards (1.5 inches or more for hardwood, 1 inch for plastic/composite) have more mass, which reduces wobble from chopping force, and their weight presses down more firmly on the counter for natural grip. Thin, flimsy boards (under 0.75 inches) will almost always slip, no matter what underlay you use, regardless of material.
Can I stabilize a glass cutting board for regular use?
While possible with a heavy-duty suction cup stabilizer, glass boards are not recommended for regular cutting, as their slippery surface and hard material dull knives rapidly and pose a high laceration risk if they slip. Use glass boards only for serving, not prep.
Conclusion
Stabilizing your cutting board is a low-effort, high-reward habit that prevents injuries, extends the life of your knives and board, and makes food prep faster and more precise. You don’t need expensive tools to get a secure grip—most methods use items you already have in your kitchen, from dish towels to silicone baking mats. For more tips to keep your kitchen safe and efficient, check out our guide to streamlining kitchen cabinet storage for pots and pans to make prep faster and more organized.

I’m Abby Lu, a passionate home cook who loves simplifying everyday meals. At PlugChef.com, I share product reviews and cooking guides to help you find the best tools for your kitchen.
Related posts:
 7 Steps in Cleaning the Kitchen: Ultimate Guide for a Sparkling Space
 What Type of Cooking Utensils are Safe: Expert Picks
 Safest Cooking Utensils: Top Non-Toxic Wooden & Silicone Sets Reviewed
 How to Clean Teak Cutting Board: Easy Steps for Lasting Shine
 How Many Coats of Mineral Oil on Cutting Board: Expert Guide
 Best Chef Knife Set for Precision and Durability in Every Kitchen

