
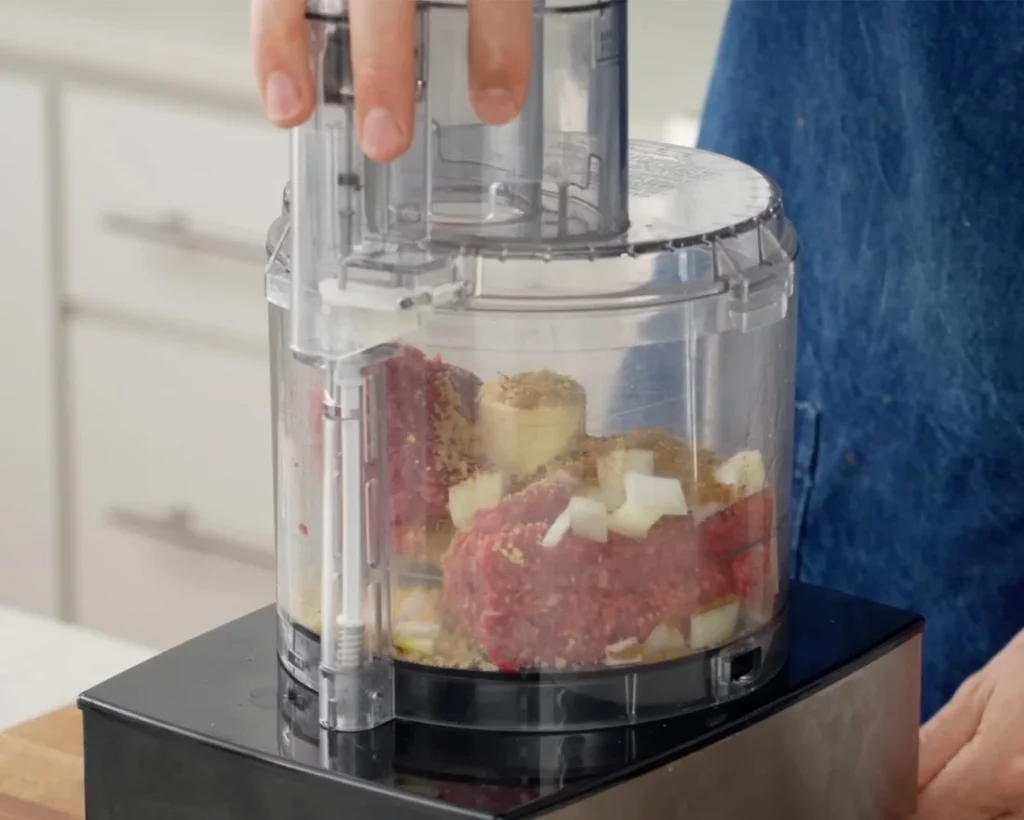
Are you tired of the hassle and mess that comes with grinding your own beef? Using a food processor to prepare ground beef can save you time and give you full control over the texture and freshness of your meat.
Whether you want to make juicy burgers, flavorful meatballs, or a hearty sauce, mastering this simple technique will change the way you cook. Keep reading to discover how easy it is to turn whole cuts of beef into perfectly ground meat right in your kitchen.
Your next meal is about to get a whole lot better.
Benefits Of Using A Food Processor For Ground Beef
Using a food processor for ground beef offers several advantages that can enhance your cooking experience. It streamlines the preparation process, allowing you to focus more on cooking and less on labor. You gain better control over the texture and quality of the meat, which can impact the final taste of your dishes.
Time-saving Preparation
Grinding beef in a food processor is much faster than using a traditional meat grinder or buying pre-ground meat. It only takes a few pulses to turn chunks of meat into perfectly ground beef. This quick process frees up your time, especially when you’re preparing meals for a busy week.
Have you noticed how pre-packaged ground beef often contains fillers or excess fat? By using your food processor, you avoid those additives and get exactly what you want. This not only saves time but can improve the healthiness of your meals.
Consistent Texture
One of the biggest benefits is the ability to control the texture of your ground beef. Whether you want it finely ground for tacos or coarser for burgers, a food processor lets you adjust easily. This consistency can be difficult to achieve with store-bought ground beef.
Try pulsing the meat in short bursts rather than blending continuously. This technique prevents over-processing and helps maintain the ideal texture for your recipe. Have you ever been disappointed by unevenly ground meat? A food processor solves that problem.
Control Over Meat Quality
When you grind your own beef, you choose the cut and quality of meat. This means you can pick leaner cuts for healthier meals or fattier ones for richer flavor. You also avoid the uncertainty of pre-packaged ground beef, which sometimes contains less desirable parts.
By handling the meat yourself, you know exactly what goes into your food. This control can make a noticeable difference in taste and nutrition. How often do you think about the source and quality of your ground beef before cooking?

Credit: birdzofafeather.ca
Choosing The Right Cuts For Ground Beef
Choosing the right cuts for ground beef sets the foundation for a delicious meal. The quality and type of meat you select directly affect the texture, flavor, and juiciness of your dish. Understanding which cuts work best can turn a simple recipe into a standout meal that everyone will enjoy.
Best Cuts For Juicy Results
Chuck is a popular choice because it naturally contains the right amount of fat, usually around 15-20%, which helps keep the meat juicy and flavorful. Brisket adds a rich, beefy taste but can be a bit fattier, so balance it with leaner cuts if you prefer less grease. Round is leaner and works well when you want a healthier option without sacrificing too much texture.
Have you ever noticed how some homemade burgers taste more tender? That’s often because they use a mix of chuck and brisket. Try combining these cuts in your food processor to create a perfect balance of flavor and moisture.
Balancing Fat Content
Fat content is crucial. Too little fat, and your ground beef becomes dry and crumbly. Too much, and it can be greasy and heavy. Aim for a fat ratio between 15% to 20% for most recipes to get that ideal mouthfeel.
If you want to control fat precisely, mix different cuts yourself. For instance, combine 70% lean round with 30% chuck. This approach lets you customize fat levels based on what you’re cooking, whether it’s tacos, meatballs, or burgers.
Tips For Freshness And Flavor
Always start with fresh cuts of meat. Look for beef that is bright red and smells clean. Avoid meat that looks dull or has a strong odor, as freshness affects taste and safety.
Grinding your own beef in a food processor means you can add herbs, spices, or even a splash of broth right before processing. This keeps flavors vibrant and evenly distributed. How often do you add seasonings before grinding, rather than after? Trying this can make a noticeable difference.
Step-by-step Guide To Grinding Beef At Home
Grinding beef at home using a food processor is quick and simple. Cut the meat into small pieces, pulse gently, and watch fresh ground beef form. This method saves money and lets you control the quality of your meat.
Grinding your own beef at home can enhance your culinary creations. Freshly ground beef offers better flavor and control over fat content. This step-by-step guide will help you achieve perfect ground beef using a food processor.Preparing The Meat
Cut the beef into small cubes. Smaller pieces grind more evenly. Remove excess fat and gristle to improve texture. Pat the cubes dry to avoid clogging the food processor. Cold meat is easier to grind. Chill the cubes in the freezer for 15 minutes.Using The Food Processor Safely
Ensure the food processor is clean and dry. Attach the blade securely. Add a handful of meat cubes to the processor. Do not overfill. Secure the lid before operating the machine. Use the pulse function to control the grind. This prevents over-processing.Achieving The Perfect Grind
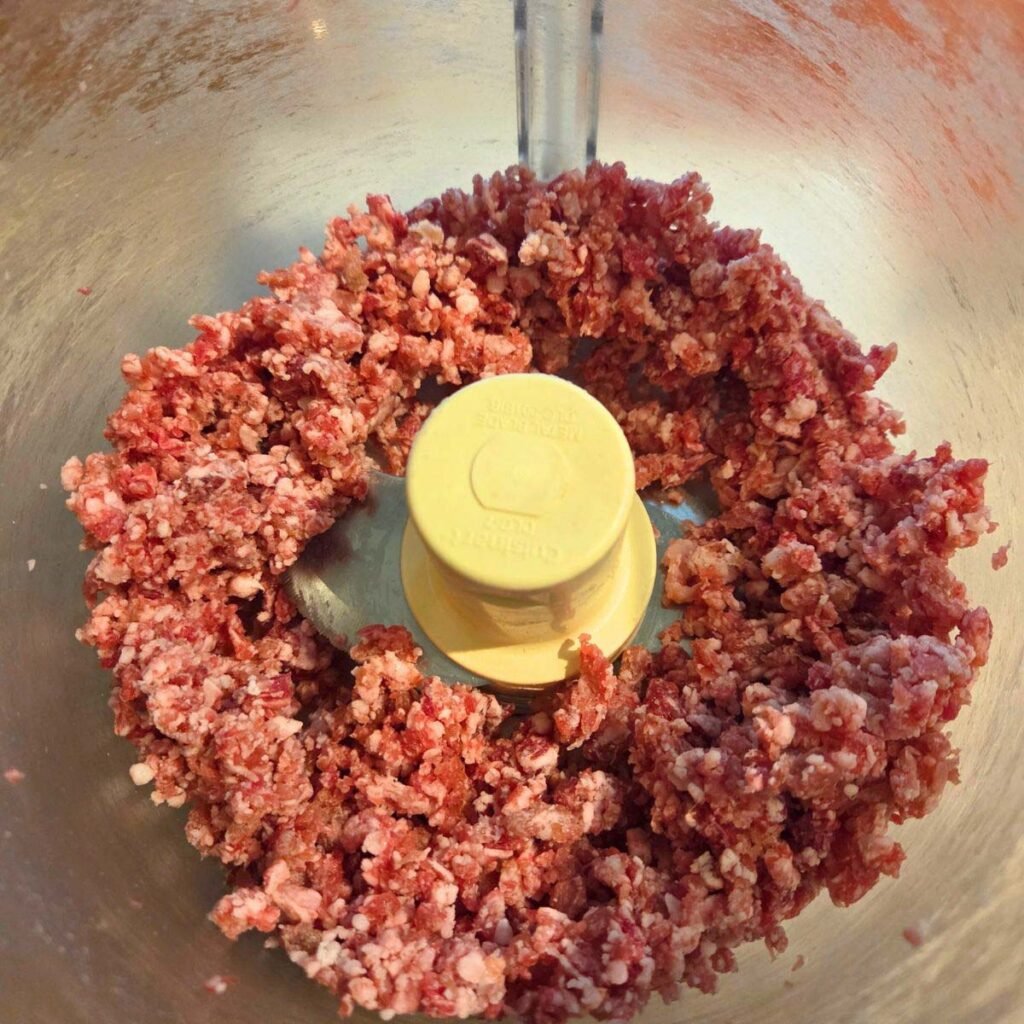
Check the grind consistency frequently. Aim for a coarse texture. Avoid a paste-like consistency. If needed, pulse a few more times. Transfer the ground beef to a bowl. Use immediately or store in the refrigerator. For the best flavor, use within two days.Quick And Juicy Ground Beef Recipes
Using a food processor to prepare ground beef transforms your cooking experience. It saves time and ensures the meat stays juicy and tender in every bite. These quick and juicy ground beef recipes will make your meals flavorful and satisfying, whether you’re cooking for family or friends.
Classic Beef Burgers
Start by pulsing beef chunks in your food processor until coarsely ground. This gives you control over the texture, making the burgers juicier than store-bought ground beef. Mix in salt, pepper, and your favorite seasonings, then shape patties gently to avoid compacting the meat.
Cook the burgers on a hot grill or skillet to get a nice crust while keeping the inside tender. Do you prefer a slightly pink center or fully cooked? Adjust your cooking time accordingly for the perfect burger every time.
Savory Meatballs
Grinding beef in your food processor lets you combine it with onions, garlic, and herbs evenly. Add breadcrumbs and an egg to bind everything together without overmixing. This prevents dense meatballs and keeps them soft and juicy.
Brown the meatballs in a pan before finishing them in your sauce. This locks in moisture and adds a rich flavor. How do you like to serve your meatballs—over pasta, in a sandwich, or as a party appetizer?
Hearty Beef Tacos
Use your food processor to quickly grind beef and mix in taco seasoning for a bold flavor. The fine grind helps the meat cook evenly and soak up spices better. Sauté the beef until browned, then add diced onions and peppers for extra texture.
Serve with warm tortillas and your favorite toppings like avocado, salsa, and cheese. What’s your go-to taco topping that makes every bite unforgettable?
Flavor Enhancements And Seasoning Tips
Enhancing the flavor of ground beef in a food processor makes your dishes taste richer and more delicious. Simple seasoning tricks can change the whole meal. Fresh herbs, spices, and the right balance of salt and acid work well together. Mixing vegetables and fillers also adds texture and flavor. These tips help create tasty and well-seasoned ground beef every time.
Herbs And Spices For Depth
Use fresh or dried herbs to add a fresh aroma. Parsley, thyme, and oregano work great with beef. Spices like garlic powder, paprika, and black pepper add warmth and boldness.
- Fresh herbs give a bright, natural flavor.
- Dried spices deliver deep, intense notes.
- Combine mild and strong spices for balance.
Experiment with cumin or chili flakes for a spicy touch. Keep the amounts moderate to avoid overpowering the beef.
Incorporating Vegetables And Fillers
Adding finely chopped vegetables improves moisture and taste. Onions, bell peppers, and mushrooms are popular choices. These also add natural sweetness and umami to the mix.
- Grated carrots or zucchini add subtle sweetness.
- Breadcrumbs or oats help bind the meat and soak up juices.
- Use vegetables to boost nutrition and texture.
Process the veggies finely so they blend well with the beef. This keeps the texture smooth and consistent.
Balancing Salt And Acidity
Salt enhances all flavors in ground beef. Use it carefully to avoid oversalting. A pinch of salt brings out the meat’s natural taste.
Acidity brightens the flavor and cuts through richness. Vinegar or lemon juice works well in small amounts.
- Start with a small amount of salt and taste as you go.
- Use lemon juice or a splash of vinegar to add brightness.
- Acid balances fat and creates a more complex flavor.
Mix salt and acid gently into the ground beef for even seasoning.
Credit: momsdinner.net
Storing And Handling Ground Beef Safely
Handling ground beef safely is essential for health and taste. Proper storage and careful handling stop bacteria from growing. This keeps your meals fresh and safe to eat. Follow simple steps for storing, avoiding contamination, and reheating ground beef.
Proper Refrigeration And Freezing
Store ground beef in the coldest part of the fridge. Keep it at or below 40°F (4°C). Use ground beef within 1 to 2 days for best quality.
For longer storage, freeze ground beef. Wrap it tightly in plastic wrap or use airtight containers. Label packages with the date. Frozen ground beef lasts up to 3 to 4 months.
Avoiding Cross-contamination
Use separate cutting boards and utensils for raw meat. Wash hands thoroughly after touching raw ground beef. Clean surfaces with hot, soapy water.
Store ground beef away from ready-to-eat foods. Prevent juices from dripping on other items in the fridge.
Reheating Tips For Juicy Results
Reheat ground beef slowly over low heat. Stir often to heat evenly. Avoid overheating to keep the meat juicy.
Use a food thermometer to check temperature. Ground beef should reach 160°F (71°C) before serving. This ensures safety without drying out the meat.

Credit: littlesproutslearning.co
Frequently Asked Questions
How To Grind Beef Using A Food Processor?
Cut beef into small chunks and chill them. Pulse in the food processor briefly until coarsely ground. Avoid overprocessing to keep good texture. Chill meat before and after grinding for safety and freshness.
What Cuts Of Beef Work Best For Food Processors?
Chuck, sirloin, and brisket are ideal for grinding. These cuts balance fat and flavor well. Choose beef with about 15-20% fat for juicy results. Lean cuts may produce dry ground beef.
How To Prevent Over-processing Ground Beef In A Food Processor?
Pulse the meat in short bursts. Check texture frequently to avoid mushiness. Stop processing once meat looks crumbly and evenly ground. Over-processing can make beef paste-like and affect cooking quality.
Is Homemade Ground Beef Safe To Eat?
Yes, if you follow food safety guidelines. Use fresh, chilled meat and clean equipment. Cook ground beef to an internal temperature of 160°F (71°C). Proper handling prevents bacterial contamination.
Conclusion
Using a food processor for ground beef saves time and effort. It lets you control the meat’s texture easily. You can prepare fresh ground beef right at home. This method keeps the meat clean and fresh. It also helps mix spices evenly.
Try it next time for quick meal prep. Simple, fast, and effective. A great way to cook with confidence.

I’m Abby Lu, a passionate home cook who loves simplifying everyday meals. At PlugChef.com, I share product reviews and cooking guides to help you find the best tools for your kitchen.
Related posts:
 What Type of Cooking Utensils are Safe: Expert Picks
 What Innovations Could Blenders Make: Unleashing Future Tech
 Smart Strategies to Organize a Small Kitchen: Maximize Space
 How to Organize a Kitchen Cabinet: Expert Tips & Tricks
 How to Organize Kitchen Drawers: Expert Tips and Tricks
 How to Organize a Corner Kitchen Cupboard: Expert Tips

