
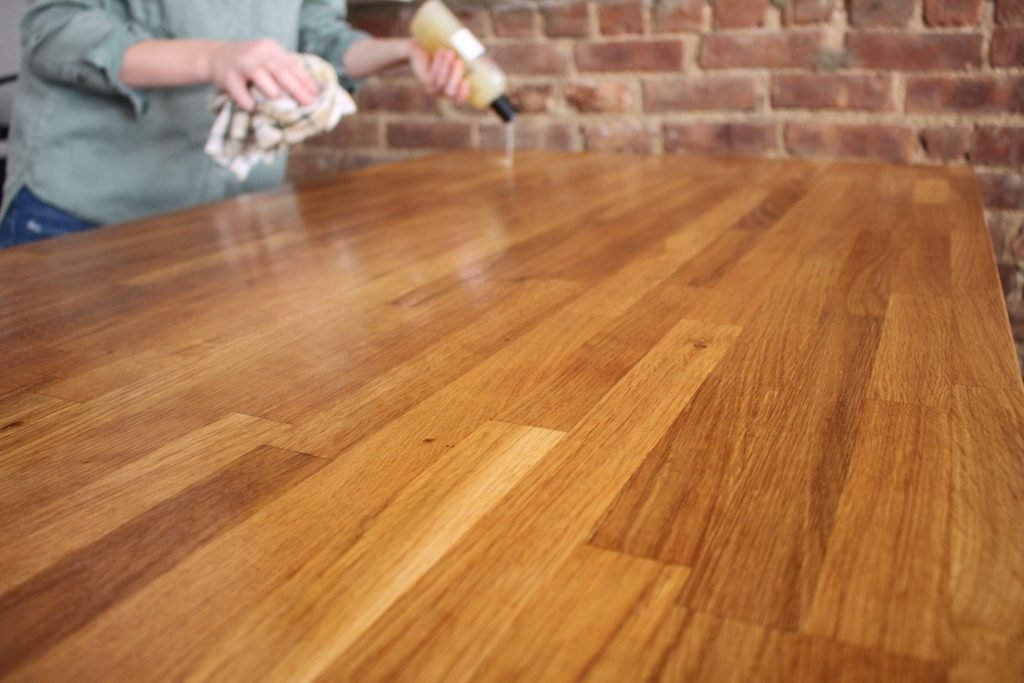
Your butcher block is one of the hardest-working surfaces in your kitchen: it’s where you chop vegetables, assemble charcuterie boards, roll out dough, and share meals with loved ones. Unlike disposable plastic cutting boards, a quality butcher block is a long-term investment that can last 20+ years with proper care—yet most homeowners ruin theirs within a few years by using the wrong products or skipping critical prep steps. Knowing how to oil butcher block surfaces correctly is the single most important thing you can do to prevent warping, cracking, staining, and bacterial growth, while keeping its warm, natural glow intact. This 2026 expert guide walks you through every step, from choosing the right oil to restoring heavily damaged blocks, with actionable tips that work for new and vintage wood surfaces alike.
According to USDA food safety standards for food contact surfaces, unsealed or poorly maintained wood surfaces can harbor harmful bacteria like E. coli and Salmonella, making regular oiling a critical food safety step, not just a cosmetic one USDA food safety standards for food contact surfaces.
Why Regular Oiling Is Non-Negotiable for Butcher Block Longevity
Wood is a naturally porous material, meaning it absorbs moisture, food acids, and odors from everything placed on its surface. Without regular oiling, the wood dries out, shrinks, and forms deep cracks and fissures where bacteria and mold can thrive. Even small spills left unaddressed can cause permanent staining, while prolonged exposure to water from washing leads to warping that makes the surface uneven and unsafe for cutting. A properly oiled block forms a protective barrier that repels moisture, resists staining, and keeps the wood fibers flexible, preventing the damage that leads to costly replacements.
Choosing the Right Oil for Your Butcher Block
Not all oils are safe or effective for wood surfaces that come into contact with food. The right product will penetrate the wood fibers, create a water-resistant barrier, and never go rancid or leave harmful residues.
Food-Safe Oils That Actually Work
Only use 100% food-safe oils that are FDA-approved for direct food contact. The most reliable options for butcher blocks include:
- Food-grade mineral oil: The most popular, affordable, and low-maintenance option. It’s colorless, odorless, inert, and won’t go rancid, making it ideal for most home cooks. Look for USP-grade mineral oil, which is pharmaceutical-grade and free of additives.
- Walnut oil: A natural, nut-derived oil that darkens wood slightly for a richer, warmer tone. It’s food-safe and absorbs quickly, but avoid it if you have nut allergies.
- Fractionated coconut oil: Refined coconut oil with the fatty acids removed, so it stays liquid at room temperature and won’t solidify or go rancid like unrefined coconut oil.
- Pure beeswax or beeswax-mineral oil blends: Beeswax creates a hard, water-resistant topcoat when mixed with mineral oil, ideal for high-use blocks or end-grain surfaces that absorb more moisture. Pre-blended butcher block conditioners that combine mineral oil and beeswax are widely available for convenience.
Oils and Finishes to Avoid at All Costs
Many common household oils will damage your butcher block over time and even make it unsafe for food prep. Steer clear of:
- Vegetable oils (canola, soybean, corn), olive oil, unrefined coconut oil, and nut oils (unless specifically labeled food-safe for wood use): These oxidize quickly, turn rancid, leave sticky residues, and attract bacteria. They can also transfer off-flavors to food.
- Raw flaxseed or linseed oil: While these are drying oils that harden when exposed to air, they are not food-safe unless specially formulated for wood use, and can cause allergic reactions in some users.
- Polyurethane, varnish, or other film-forming finishes: These create a hard, sealed top layer that chips easily when cut on, exposing raw wood and harboring bacteria in the cracks. They are also not food-safe once scratched.
Why Food-Grade Mineral Oil Is the Top Pick for Most Users
Mineral oil is the gold standard for butcher block care for good reason: it’s inert, so it won’t react with food or break down over time, it’s completely odorless and colorless so it won’t alter the taste or appearance of your food, and it’s affordable and easy to find at most grocery stores or hardware stores. It’s also safe for users with nut or gluten allergies, making it the most versatile option for most households.
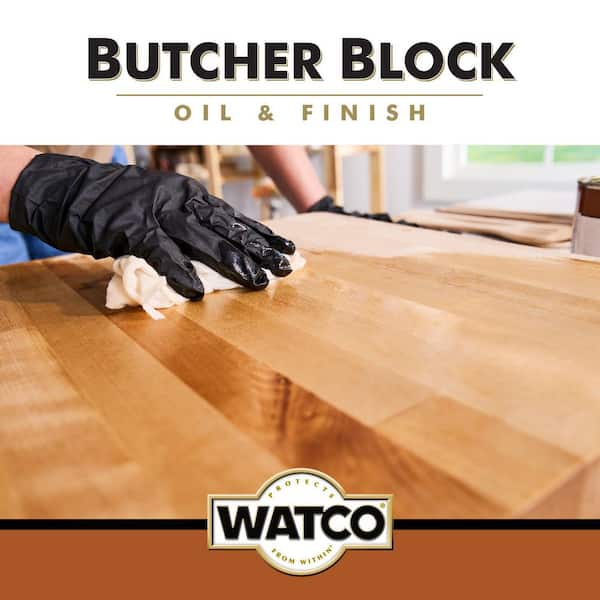 Pre-blended food-grade mineral oil is the most low-maintenance option for regular butcher block care.
Credit: www.homedepot.com
Pre-blended food-grade mineral oil is the most low-maintenance option for regular butcher block care.
Credit: www.homedepot.com
Prepping Your Butcher Block Before Oiling (Skip This and Your Oil Won’t Last)
Oiling a dirty, damp, or rough surface is a waste of time and product: the oil won’t penetrate the wood, and any trapped debris or moisture will cause mold growth under the finish. Follow these prep steps to ensure your oil absorbs evenly and lasts for months.
Deep Clean the Surface First
Wipe the entire block with a cloth dipped in warm water and mild dish soap to lift grease, food residue, and surface dirt. Scrub gently with a dedicated heavy-duty scrub brush to lift stuck-on food particles without scratching the wood heavy-duty scrub brush. Avoid soaking the block in water, as prolonged exposure causes warping. Dry immediately with a clean, dry towel, and let it air dry for 30 minutes to ensure no moisture is trapped in the wood fibers. For light surface stains, make a paste of baking soda and water, scrub with a stiff scrub brush, then rinse and dry stiff scrub brush.
Sand Rough Spots and Old Finish
If your block has scratches, rough patches, or a peeling factory-applied sealant, sand the entire surface with 120-grit sandpaper to remove damaged material, then switch to 220-grit sandpaper for a smooth, even finish. Always sand with the direction of the wood grain to avoid cross-scratches. If you’re planning custom engraved cutting boards, sand the surface smoothly first to avoid chipping during the engraving process custom engraved cutting boards. Wipe away all sanding dust with a tack cloth or dry microfiber towel before moving on.
Remove Deep Stains and Odors
For stubborn organic stains from coffee, wine, or tomato sauce, make a paste of coarse salt and fresh lemon juice, scrub with a soft cloth, let sit for 15 minutes, then rinse and dry. For mold or mildew, mix 1 part white vinegar with 2 parts water, scrub the affected area, rinse thoroughly, and dry completely. For lingering odors, sprinkle baking soda over the surface, let sit overnight, then wipe off with a dry cloth.
Step-by-Step Application for a Lasting, Streak-Free Shine
Once your block is fully prepped, application only takes 10–15 minutes, but following the right steps ensures the oil penetrates deeply and cures to a smooth, non-sticky finish.
Tools and Supplies You’ll Need
- 100% food-grade mineral oil or pre-blended butcher block conditioner
- 2–3 lint-free microfiber cloths (paper towels can leave lint on the surface)
- 220-grit sandpaper (optional, for minor touch-ups)
- Rubber gloves (optional, for sensitive skin)
- Soft-bristled applicator brush (optional, for end grain and corners) soft-bristled applicator brush
Exact Application Steps (No Guesswork)
- Double-check that the block is 100% dry: any leftover moisture will cause the oil to bead up and fail to absorb.
- Pour 2–3 tablespoons of oil directly onto the wood surface (use more for large or end-grain blocks, which absorb more oil).
- Spread the oil in a thin, even layer with a lint-free cloth, rubbing with the direction of the wood grain. Cover all surfaces, including edges, corners, and end grain (the exposed ends of wood planks absorb oil 2–3x faster than flat surfaces, so apply a little extra oil here).
- Let the oil soak for 20–30 minutes for the first coat. If the wood looks dry after 15 minutes, add a small amount of extra oil. A common mistake many homeowners make is wiping off excess oil too soon, leading to a gummy, dust-attracting surface that requires sanding to fix.
- Wipe off all excess oil with a clean, dry lint-free cloth. This step is non-negotiable: leftover oil will stay sticky, attract dust, and turn rancid over time.
- Let the block cure for a full 24 hours before using it for food prep. For new, very dry, or restored blocks, repeat 2–3 total coats, waiting 24 hours between each application for best results.
Pro Tips for Better Absorption and Shine
- Warm the oil to room temperature (never hot) before application to help it penetrate wood fibers faster.
- Use a soft-bristled brush to work oil into end grain and hard-to-reach corners where cloths can’t reach.
- Work in a well-ventilated area to avoid inhaling oil fumes.
- Never use a heat gun, hair dryer, or direct sunlight to speed up drying: this can cause the wood to warp or the oil to congeal unevenly.
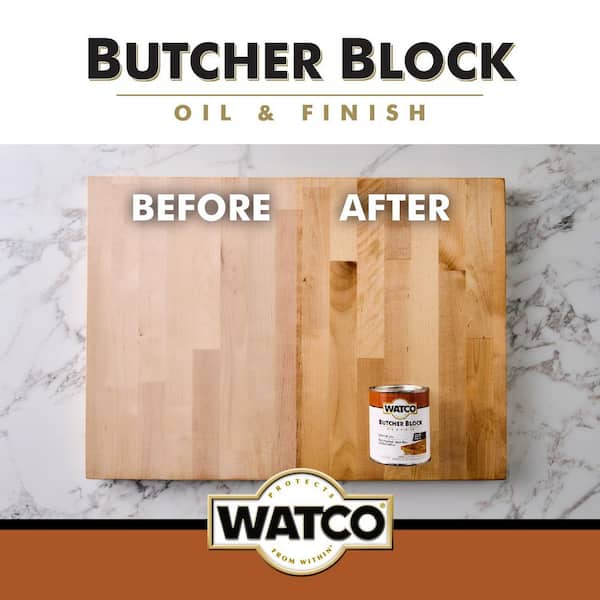 Pre-formulated butcher block oil combines mineral oil and beeswax for extra durability and shine.
Credit: www.homedepot.com
Pre-formulated butcher block oil combines mineral oil and beeswax for extra durability and shine.
Credit: www.homedepot.com
Maintaining Your Butcher Block for Years of Use
Oiling is not a one-time task: a simple maintenance routine will keep your block in top condition for decades, saving you the cost of replacement.
Establish a Regular Oiling Schedule
For average home use (3–5 meals per week), oil your block every 3–4 weeks. For high-use blocks used daily or in commercial settings, oil every 1–2 weeks. For new blocks, apply 2–3 coats in the first month to build up a strong protective layer. Do a quick water test to check if your block needs oil: sprinkle a few drops of water on the surface. If the water beads up, the finish is still intact. If the water soaks into the wood within 10 seconds, it’s time to apply another coat.
Daily and Weekly Care Between Oilings
Wipe up spills immediately, especially acidic ones like citrus juice, vinegar, or tomato sauce, to prevent permanent staining. Clean the block after each use with warm water and mild dish soap, using a standard dish brush for stuck-on debris, then rinse and dry thoroughly with a clean towel standard dish brush. Never put the block in the dishwasher or soak it in water: prolonged moisture exposure causes warping and cracking. Avoid cutting frozen foods directly on the block, as this dulls knives and creates deep gouges that are hard to repair.
Common Butcher Block Care Mistakes to Avoid
- Don’t use vegetable, olive, or unrefined nut oils: they go rancid quickly and leave sticky residues.
- Avoid harsh abrasive cleaners, steel wool, or scouring pads: these scratch the surface and remove the protective oil finish.
- Never skip wiping off excess oil after application: leftover oil turns gummy and attracts dust.
- Don’t apply oil to a damp block: trapped moisture will cause the oil to bubble and not absorb.
- Avoid cutting raw meat directly on the block if possible: if you do, sanitize it with a 1:3 vinegar-to-water solution after cleaning to kill bacteria.
 A properly oiled butcher block has a uniform, water-resistant finish that highlights the wood's natural grain.
Credit: food52.com
A properly oiled butcher block has a uniform, water-resistant finish that highlights the wood's natural grain.
Credit: food52.com
Restoring Old, Dried-Out, or Damaged Butcher Blocks
You don’t need to replace a neglected butcher block: most dry, stained, or lightly damaged blocks can be restored to like-new condition with a few simple steps.
When to Restore vs. Replace
Restoration is a cost-effective option for blocks with minor to moderate damage: dry, dull surfaces, light stains, small scratches, or shallow cracks. If your block has severe warping (more than 1/4 inch of unevenness), deep cracks that go all the way through the wood, or mold growth that penetrates deep into the wood fibers, it’s time to replace it, as these issues can’t be fully fixed and may pose food safety risks.
Deep Restoration Steps
- Deep clean: Remove all grease, stains, and debris as outlined in the prep section above.
- Sand the surface: Use 80-grit sandpaper to remove old, damaged finish and level out deep scratches, then progress to 120-grit and finally 220-grit sandpaper for a smooth, even finish. Sand with the grain, and wipe away all dust with a tack cloth.
- Apply oil: Follow the step-by-step application process above, applying 3–4 total coats of food-grade mineral oil, waiting 24 hours between each coat. For extra durability, finish with a thin coat of food-grade beeswax: melt beeswax gently in a double boiler (do not overheat, as it can become flammable), mix with equal parts mineral oil, apply with a cloth, let sit for 30 minutes, then wipe off all excess.
- Fill deep damage: For cracks or gouges deeper than 1/8 inch, use a food-safe wood filler or beeswax to fill the gap before sanding. Press the filler into the crack, smooth with a putty knife, let dry completely, then sand flush with the rest of the surface.
Frequently Asked Questions
Can I use coconut oil on my butcher block?
Yes, but only refined, fractionated coconut oil. Unrefined coconut oil has a low smoke point and can go rancid over time, leaving a sticky residue and off-flavors on food. Fractionated coconut oil is stable, food-safe, and absorbs well into wood, making it a good alternative for people who prefer a non-mineral oil option.
How do I know when my butcher block needs oil?
Do a water test: sprinkle a few drops of water on the surface. If the water beads up, your block is adequately oiled. If the water soaks into the wood within 10 seconds, it’s time to apply another coat. You may also notice the wood looks dull, dry, or has light-colored patches where the finish has worn away from heavy use.
Is it safe to use a butcher block right after oiling?
Yes, as long as you’re using 100% food-grade mineral oil or another food-safe oil, and you’ve wiped off all excess oil and let it cure for 24 hours. Any excess oil left on the surface will be sticky and may transfer to food, so always wipe thoroughly after application.
Can I oil my butcher block too much?
Yes. Over-oiling leads to a sticky, gummy surface that attracts dust and debris. Stick to the recommended 2–3 coats for new or restored blocks, and 1–2 coats for regular maintenance, always wiping off all excess oil after each application.
Final Expert Tips for a Flawless Finish
A well-maintained butcher block is one of the most versatile, long-lasting tools in your kitchen, and proper oiling only takes a few minutes of work every few weeks. Always test new oil products on a small, inconspicuous area of the block first to ensure it doesn’t alter the wood tone. Store your mineral oil in a cool, dark place to prevent it from breaking down over time. For end-grain blocks (made from the cut ends of wood planks), increase oiling frequency by 50%, as they absorb moisture much faster than edge-grain blocks. If you notice deep gouges or scratches that can’t be sanded out, fill them with food-safe beeswax before oiling to prevent moisture from seeping into the wood.
For more in-depth kitchen maintenance and food prep guides, browse our full library of expert kitchen resources expert kitchen resources.

I’m Abby Lu, a passionate home cook who loves simplifying everyday meals. At PlugChef.com, I share product reviews and cooking guides to help you find the best tools for your kitchen.
Related posts:
 Kitchen Sink Mats at Target: Enhance Your Kitchen Space
 Pinks Rose Print under Sink Mat: Elevate Your Kitchen Decor
 Oxo Good Grips Silicone Sink Mat: Ultimate Protection
 3 Shelf Hanging Closet Organizer: Maximize Your Space
 Do It Yourself Pantry Organizers: Transform Your Space
 How to Organize a Pantry With Wire Shelves: Expert Tips

