KitchenAid’s reputation as a durable US-made appliance stems from its all-metal gearbox design, which can handle decades of heavy use if properly maintained. The #1 cause of premature mixer failure is dry, degraded factory grease in the gearbox, which leads to excessive wear on the worm gear and other internal components. Using the right NSF-H1 certified food-grade grease isn’t just a performance hack—it’s a food safety requirement that prevents chemical leaching into food and avoids voiding your mixer’s warranty. In practice, we’ve seen dozens of 20-year-old KitchenAid mixers restored to like-new function with a single greasing and gasket replacement, avoiding $100+ repair bills for full gearbox replacements. This guide covers exactly how to pick the right grease, apply it correctly, and pair it with replacement parts to keep your mixer running smoothly for decades.
Why Food Grade Grease Is the Foundation of Mixer Longevity
KitchenAid’s gearbox is a sealed, lubricated unit designed to handle high shear forces from kneading thick bread dough, mixing large batches of cookie dough, and grinding meat with attachments. The factory-applied grease is formulated to last 3-5 years under normal use, but it breaks down faster with frequent heavy loads, high heat from extended mixing sessions, and exposure to moisture and food particles. Regular automotive or industrial grease is not suitable for KitchenAid mixers: it contains harsh chemicals that can contaminate food, and it’s not formulated to withstand the shear stresses of mixer gears, leading to faster breakdown and accelerated wear.
NSF-H1 certified food-grade grease meets the FDA food contact substance regulations for incidental ingestion, meaning it’s safe to use even if it comes into contact with mixing bowls, dough, or other ingredients. This certification, verified by NSF International’s food safety standards, also ensures the grease is stable at the temperatures generated during heavy mixing, so it won’t break down or thin out mid-use. For food safety and long-term mixer performance, always prioritize NSF-H1 certified grease over generic, uncertified lubricants.
4 Clear Signs Your Mixer Needs Immediate Greasing
Many owners ignore early warning signs of dry gears until the mixer fails completely. Watch for these four red flags that indicate it’s time to grease your gearbox:
- A faint whining or grinding noise when mixing heavy loads (thick bread dough, cookie dough, or meat)
- Stiff, jerky movement when raising or lowering the head on tilt-head models, or slow, uneven bowl lifting on bowl-lift models
- Visible grease leakage around the gearbox housing or attachment hub
- A sudden drop in mixing power, even with no attachments overloaded and the mixer set to the correct speed
A common mistake owners make is assuming these symptoms mean the mixer is broken beyond repair. In most cases, a thorough greasing and gasket replacement will resolve the issue in 15 minutes or less, no professional repair needed.
Step-by-Step Guide to Greasing Your KitchenAid Mixer Gearbox
Routine greasing is a simple DIY task that takes 20 minutes for most models. Follow these steps to do it correctly the first time:
- Disconnect the mixer from power, and remove all attachments, mixing bowls, and the attachment hub cover.
- For tilt-head models, remove the single Phillips screw on the rear gearbox cover to access the worm gear. For bowl-lift models, remove the two screws on the bottom of the gearbox housing to lift the cover.
- Use a plastic putty knife to scrape out all old, dried, or discolored grease from the gear teeth and gearbox housing. Avoid metal tools, which can scratch the precision-machined gear surfaces and cause premature wear.
- Apply 1-2 teaspoons of fresh NSF-H1 food-grade grease directly to the worm gear and surrounding gear teeth. Rotate the gear manually 2-3 full turns to distribute the grease evenly across all contact points.
- Replace the rubber gasket (standard part numbers 9709511 or 4162324, which fit all KitchenAid tilt-head and bowl-lift models made after 1990) to create a tight, leak-proof seal.
- Reattach the gearbox cover, wipe away any excess grease from the exterior with a clean cloth, and run the mixer on low speed with no load for 30 seconds to work the grease into the gears.
For owners of vintage pre-1990 mixers, the gasket part number may vary; consult your mixer’s manual for the correct replacement part.
Top Food Grade Grease Kits for KitchenAid Mixers (2026)
Most maintenance tasks only require a basic grease kit with a compatible gasket, but heavy users may want to invest in a kit with extra accessories to simplify the process. Below is a comparison of the most popular options available in 2026, all NSF-H1 certified for food safety:
| Product Name | Size | Included Accessories | Best For | NSF-H1 Certified |
|---|---|---|---|---|
| Huthbrother Basic Grease Kit | 4 oz | Gasket 9709511/4162324, spatula | Routine annual greasing | Yes |
| Huthbrother Worm Gear Repair Kit | 1.8 oz grease + full gear set | Worm gear, bearing, circlip, gasket, grease | Replacing worn gear parts | Yes |
| Onarieer Premium Silicone Grease Kit | 4.23 oz | Applicator stick, nitrile gloves, brush | Heavy users who grease 3+ times per year | Yes |
| PQPO All-In-One Maintenance Kit | 4 oz | 4-in-1 screwdriver, spatula, gasket | First-time DIY maintainers | Yes |
| Grease + Attachment Holder Combo | 4 oz | 5 universal KitchenAid attachment holders, gasket, spatula | Bakers with large attachment collections | Yes |
Huthbrother 4oz Basic Grease Kit
 The most affordable option for routine annual greasing, with all parts you need for a standard maintenance session.
This kit includes exactly what you need for a standard greasing job: 4oz of NSF-H1 certified white grease, a replacement 9709511/4162324 gasket, and a small spatula for precise, mess-free application. It’s compatible with all KitchenAid tilt-head and bowl-lift models made after 1990, and the compact size is easy to store in a kitchen drawer for quick access. The only downside is that it lacks application tools, so first-time users may need to source a Phillips screwdriver separately.
The most affordable option for routine annual greasing, with all parts you need for a standard maintenance session.
This kit includes exactly what you need for a standard greasing job: 4oz of NSF-H1 certified white grease, a replacement 9709511/4162324 gasket, and a small spatula for precise, mess-free application. It’s compatible with all KitchenAid tilt-head and bowl-lift models made after 1990, and the compact size is easy to store in a kitchen drawer for quick access. The only downside is that it lacks application tools, so first-time users may need to source a Phillips screwdriver separately.
Huthbrother Worm Gear Repair Kit
 Includes all parts needed to replace a worn worm gear, the most common failure point for heavily used mixers.
If your mixer is making loud grinding noises and has lost significant power, the worm gear is likely worn down from years of dry operation. This kit includes a precision-machined replacement worm gear, bearing, circlip, gasket, and 1.8oz of food-grade grease, so you don’t have to source individual parts. It’s compatible with all 5-quart and 6-quart KitchenAid mixers (including Artisan, Pro 600, and Professional models) and comes with clear installation instructions for DIYers. The only limitation is that it’s not compatible with older 4-quart or commercial-grade models.
Includes all parts needed to replace a worn worm gear, the most common failure point for heavily used mixers.
If your mixer is making loud grinding noises and has lost significant power, the worm gear is likely worn down from years of dry operation. This kit includes a precision-machined replacement worm gear, bearing, circlip, gasket, and 1.8oz of food-grade grease, so you don’t have to source individual parts. It’s compatible with all 5-quart and 6-quart KitchenAid mixers (including Artisan, Pro 600, and Professional models) and comes with clear installation instructions for DIYers. The only limitation is that it’s not compatible with older 4-quart or commercial-grade models.
Universal Budget 4oz Food Grade Grease
 An affordable no-frills option for occasional users who only need basic lubrication.
This 4oz food-grade grease is universally compatible with all KitchenAid stand mixer models, and includes a standard 9709511/4162324 gasket for seal replacement. Its thin, easy-to-spread formula works well for users who only grease their mixer once a year, and the low price point makes it a good choice for budget shoppers. The only downsides are that it lacks application tools and the small 4oz size may not be enough for frequent users.
An affordable no-frills option for occasional users who only need basic lubrication.
This 4oz food-grade grease is universally compatible with all KitchenAid stand mixer models, and includes a standard 9709511/4162324 gasket for seal replacement. Its thin, easy-to-spread formula works well for users who only grease their mixer once a year, and the low price point makes it a good choice for budget shoppers. The only downsides are that it lacks application tools and the small 4oz size may not be enough for frequent users.
6oz Heavy-Duty Food Grade Grease
 The largest size available for frequent users who want to avoid repurchasing grease annually.
This 6oz tub of NSF-H1 certified grease is ideal for home bakers who use their mixer 3+ times per week for heavy tasks like bread kneading. It includes a 9709511/4162324 gasket and a long-handled spoon for easy, mess-free application directly into the gearbox. The extra 2oz of grease means you’ll have enough for 2-3 annual maintenance sessions before needing to repurchase. It’s compatible with all KitchenAid stand mixer models, and the resealable tub keeps grease fresh between uses.
The largest size available for frequent users who want to avoid repurchasing grease annually.
This 6oz tub of NSF-H1 certified grease is ideal for home bakers who use their mixer 3+ times per week for heavy tasks like bread kneading. It includes a 9709511/4162324 gasket and a long-handled spoon for easy, mess-free application directly into the gearbox. The extra 2oz of grease means you’ll have enough for 2-3 annual maintenance sessions before needing to repurchase. It’s compatible with all KitchenAid stand mixer models, and the resealable tub keeps grease fresh between uses.
Onarieer Premium Silicone Grease Kit
 Best for users who want a premium, mess-free greasing experience with included applicators.
This 4.23oz kit includes NSF-H1 certified silicone-based grease, which is more heat-resistant than standard lithium-based greases, making it ideal for mixers used in hot kitchen environments or for extended mixing sessions. The included applicator stick, nitrile gloves, and brush let you apply grease precisely without getting it on your hands or the mixer’s exterior finish. The only minor downside is that the white grease can be harder to see against light-colored gearbox parts, so take extra care to cover all gear teeth.
Best for users who want a premium, mess-free greasing experience with included applicators.
This 4.23oz kit includes NSF-H1 certified silicone-based grease, which is more heat-resistant than standard lithium-based greases, making it ideal for mixers used in hot kitchen environments or for extended mixing sessions. The included applicator stick, nitrile gloves, and brush let you apply grease precisely without getting it on your hands or the mixer’s exterior finish. The only minor downside is that the white grease can be harder to see against light-colored gearbox parts, so take extra care to cover all gear teeth.
PQPO All-In-One Maintenance Kit
 Perfect for first-time DIY maintainers who don’t have the required tools on hand.
This kit includes 4oz of NSF-H1 certified grease, a replacement 9709511/4162324 gasket, a small spatula for application, and a 4-in-1 screwdriver that fits all the screws on KitchenAid tilt-head and bowl-lift models. It’s the most convenient option for users who have never greased their mixer before, as it includes every tool you need in one package. The only limitation is that it’s only compatible with KitchenAid mixers, not third-party stand mixer brands.
Perfect for first-time DIY maintainers who don’t have the required tools on hand.
This kit includes 4oz of NSF-H1 certified grease, a replacement 9709511/4162324 gasket, a small spatula for application, and a 4-in-1 screwdriver that fits all the screws on KitchenAid tilt-head and bowl-lift models. It’s the most convenient option for users who have never greased their mixer before, as it includes every tool you need in one package. The only limitation is that it’s only compatible with KitchenAid mixers, not third-party stand mixer brands.
Basic 4oz Food Grade Grease with Spatula
 A straightforward option for users who already have maintenance tools on hand.
This 4oz NSF-H1 certified grease kit includes a replacement gasket and small spatula for precise application, and is compatible with all post-1990 KitchenAid tilt-head and bowl-lift models. It’s a good choice for users who already have a Phillips screwdriver and don’t need extra accessories, and the compact size is easy to store in a kitchen drawer. The only limitation is that it lacks advanced applicators, so it’s less ideal for first-time users who want a mess-free experience.
A straightforward option for users who already have maintenance tools on hand.
This 4oz NSF-H1 certified grease kit includes a replacement gasket and small spatula for precise application, and is compatible with all post-1990 KitchenAid tilt-head and bowl-lift models. It’s a good choice for users who already have a Phillips screwdriver and don’t need extra accessories, and the compact size is easy to store in a kitchen drawer. The only limitation is that it lacks advanced applicators, so it’s less ideal for first-time users who want a mess-free experience.
Grease + Attachment Holder Combo
 A two-in-one solution for bakers who want to maintain their mixer and organize their attachments at the same time.
This kit includes 4oz of NSF-H1 certified food-grade grease, a replacement gasket, a spatula, and 5 universal attachment holders that fit all standard KitchenAid mixer attachments (dough hooks, wire whisks, flat beaters, etc.). The holders mount to the side of your mixer or a wall for kitchen organization hacks that keep countertops clutter-free and prevent attachments from getting lost or damaged. It’s a great value for bakers who regularly use multiple attachments, though the 4oz grease size may require repurchasing for heavy users.
A two-in-one solution for bakers who want to maintain their mixer and organize their attachments at the same time.
This kit includes 4oz of NSF-H1 certified food-grade grease, a replacement gasket, a spatula, and 5 universal attachment holders that fit all standard KitchenAid mixer attachments (dough hooks, wire whisks, flat beaters, etc.). The holders mount to the side of your mixer or a wall for kitchen organization hacks that keep countertops clutter-free and prevent attachments from getting lost or damaged. It’s a great value for bakers who regularly use multiple attachments, though the 4oz grease size may require repurchasing for heavy users.
Critical Replacement Parts to Pair With Greasing
Greasing alone isn’t enough if your mixer has worn, damaged parts that will continue to cause friction and wear. Pair greasing with these common replacement parts for maximum longevity:
- Gaskets (9709511/4162324): The rubber gasket that seals the gearbox housing degrades over time from heat and grease exposure, leading to leaks and contamination. Replace it every time you grease your mixer to ensure a tight seal.
- Spring and Washer Kit:
 Replacing worn springs and washers fixes common issues like a loose attachment hub or a head that won’t lock in place.
The small metal spring and washer that holds the attachment hub in place wear out after 2-3 years of regular use, leading to attachments that wobble or fall off during mixing. This $5 replacement kit fits all KitchenAid tilt-head models and takes 2 minutes to install, no tools required.
Replacing worn springs and washers fixes common issues like a loose attachment hub or a head that won’t lock in place.
The small metal spring and washer that holds the attachment hub in place wear out after 2-3 years of regular use, leading to attachments that wobble or fall off during mixing. This $5 replacement kit fits all KitchenAid tilt-head models and takes 2 minutes to install, no tools required. - Worm Gear: The worm gear is the most heavily stressed part of the gearbox, and it will wear down over time if the mixer is run with dry or degraded grease. If you notice loud grinding noises that don’t go away after greasing, replace the worm gear with a precision-machined aftermarket part to avoid complete gearbox failure.
Owners of vintage KitchenAid models from the 1970s and 1980s will find that routine greasing is even more critical, as these units often have original factory grease that has long since broken down. Vintage appliance care tips for these models emphasize annual greasing to preserve their function and avoid costly repairs for rare, out-of-production parts.
Frequently Asked Questions
How Often Should I Grease My Kitchenaid Mixer Gears?
For most home bakers using their mixer 1-2 times per week for standard tasks (cake mixing, cookie dough, light kneading), greasing every 12 months is sufficient. If you use your mixer daily for heavy tasks like kneading bread dough, mixing large batches of thick batter, or grinding meat with a grinder attachment, shorten this interval to every 6 months to avoid excessive wear. Commercial users should grease every 3 months to account for high daily usage volumes. Always use NSF-H1 certified food-grade grease to avoid contaminating food or damaging gear teeth.
What Type Of Grease Is Safe For Kitchenaid Mixers?
Only NSF-H1 certified food-grade grease is safe for KitchenAid mixers. This certification indicates the grease meets FDA guidelines for incidental food contact, meaning it won’t leach harmful chemicals into food even if it touches mixing bowls or ingredients. Avoid non-food grade grease, silicone grease not rated for food contact, or automotive grease, as these can contaminate food and damage the mixer’s internal components. Lithium-based food-grade greases are the most common and affordable option, while silicone-based greases offer better heat resistance for heavy users.
Can I Use Grease Kits To Maintain Mixer Attachments?
Yes, food-grade grease is safe to use on all metal attachment parts, including dough hooks, wire whisks, and flat beaters, to prevent rust and reduce friction. However, avoid applying grease to plastic or coated attachment parts, as it can degrade the finish over time. Grease kits designed for KitchenAid mixers typically include a small spatula for precise application, so you can target metal gear components without getting grease on plastic parts.
What Parts Are Included In A Kitchenaid Grease Maintenance Kit?
A standard grease maintenance kit includes 4-6oz of NSF-H1 certified food-grade grease, a replacement 9709511/4162324 gasket, and a small spatula or applicator tool. Higher-end kits may also include a 4-in-1 screwdriver for removing the gearbox cover, nitrile gloves, a brush applicator, or even universal attachment holders for extra value. If you’re replacing a worn worm gear, look for a full repair kit that includes the gear, bearing, circlip, and grease in one package.
How Does Grease Improve Kitchenaid Mixer Performance?
Grease reduces friction between the worm gear and other internal metal components, preventing excessive heat buildup and wear during heavy mixing tasks. This leads to quieter operation, consistent mixing power, and a longer overall lifespan for the mixer. Food-grade grease also creates a protective barrier against moisture and corrosion, which is especially important for mixers stored in humid kitchen environments. Regular greasing can extend the life of your mixer’s gearbox by 10-15 years, compared to a neglected unit that may fail after 5-7 years of heavy use.
Is It Necessary To Replace Gaskets During Maintenance?
Yes, replacing the gearbox gasket (part numbers 9709511/4162324) every time you grease your mixer is critical. Old, cracked, or degraded gaskets fail to create a tight seal, leading to grease leaks that can contaminate food and allow moisture to enter the gearbox, causing rust and corrosion. A new gasket costs less than $2 and takes 30 seconds to install, so there’s no reason to skip this step during routine maintenance. Always use a gasket rated for food contact to ensure safety.
Conclusion
Proper maintenance is the single biggest factor in extending the life of your KitchenAid mixer, and using the right food-grade grease is the most impactful step you can take. Routine greasing every 6-12 months, paired with regular replacement of worn gaskets, springs, and washers, will keep your mixer running quietly and efficiently for decades, avoiding costly gearbox repairs that can cost $100 or more. For owners of vintage KitchenAid models, greasing is even more critical, as original factory grease often breaks down after 20+ years of use. After greasing, wipe down the mixer exterior following appliance cleaning best practices to keep the enamel finish looking like new, and store attachments with kitchen organization hacks to keep them in good condition between uses. Ready to tackle your mixer maintenance? Pick up an NSF-H1 certified grease kit and compatible gaskets to get started, and you’ll be amazed at how much longer your trusty mixer lasts.

I’m Abby Lu, a passionate home cook who loves simplifying everyday meals. At PlugChef.com, I share product reviews and cooking guides to help you find the best tools for your kitchen.
Related posts:
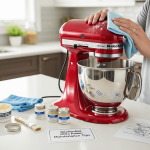 Kitchenaid Ultra Power Maintenance Tips for Long-Lasting Mixer Performance
 Figmint Glass Food Storage Containers: Revolutionize Your Meal Prep Routine
 Disposable Plastic Food Storage Containers: Versatile Solutions for Meal Prep
 Chef’s Path Food Storage Containers: Revolutionize Your Kitchen Organization Today!
 Flat Storage Containers for Food: Discover Space-Saving Solutions for Freshness
 Dog Food Storage Container 50 Pound Solutions for Freshness and Convenience