
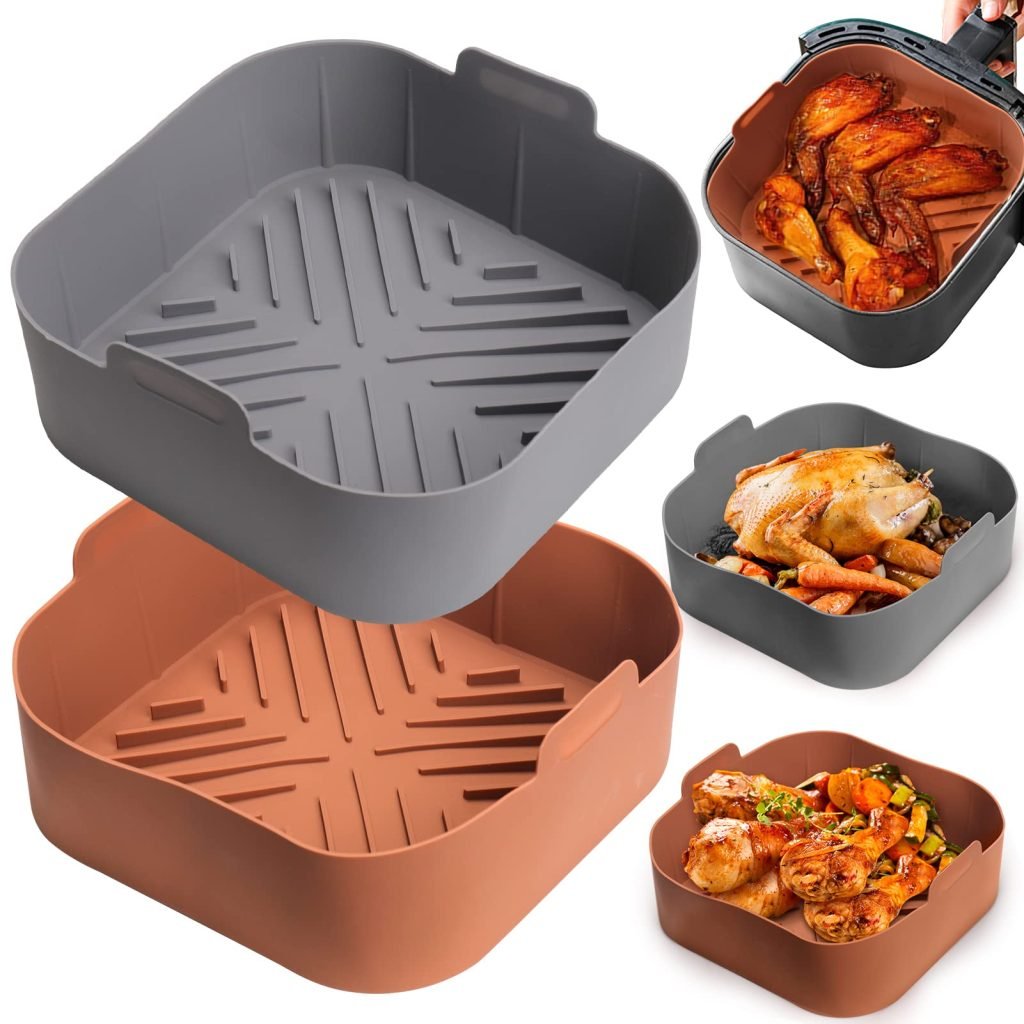
Silicone baskets are a popular accessory that can simplify cooking and cleanup in air fryers—if you use them correctly. This guide explains what silicone baskets are, which models are safe, how to fit and use them for best results, cleaning and maintenance routines that extend their life, and practical troubleshooting. Read on for step-by-step instructions, real-world tips, and quick recipes you can try tonight.

Cooked fish fillets inside a silicone air fryer basket.
Credit: wafebrands.com
Quick overview: What a silicone basket does and when to use one
- Purpose: a flexible, non-stick insert that holds food and simplifies transfer, reduces sticking, and speeds cleanup.
- Best for: small items (fries, nuggets, cut vegetables, shrimp), delicate foods (fish, stuffed mushrooms), and single-layer batches.
- Trade-off: silicone is insulating compared with metal, so browning can be gentler; you may need to adjust timing or temperature slightly.
Is a silicone basket safe to use in an air fryer?
Yes—provided the product is food-grade silicone and rated for temperatures higher than your air fryer’s maximum. Check the manufacturer's temperature rating printed on the packaging or product listing before first use. For authoritative guidance on materials that contact food, consult the FDA guidance on food contact materials. Also follow basic food-safety cooking temperatures from official sources like the USDA when you cook meat or poultry.
Common-sense safety points:
- Do not place silicone in direct contact with an exposed heating coil or open flame.
- Avoid using torn or warped silicone—discard if damaged.
- Confirm dishwasher safety with the product manufacturer.
How to check compatibility with your air fryer (fit and sizing)
- Measure the interior: get the internal diameter and depth of your fryer basket or pan.
- Compare to product specs: silicone baskets list inner diameter and max depth—ensure at least ½ inch (12 mm) clearance around the top for airflow.
- Consider shape: some silicone baskets are round, others oval or rectangular—match shape to your fryer for stability.
- Test fit: before first use, place an empty silicone basket inside the fryer to ensure it sits flat and doesn’t touch the heating element.
A common mistake is assuming “one size fits all.” If the silicone basket flexes upward or cuts into the heating element when loaded, don’t use it.

Typical commercial silicone insert designed for basket-style air fryers.
Credit: www.amazon.com
Step‑by‑step: Using a silicone basket in your air fryer
- Inspect first: ensure the basket is clean, undamaged, and rated above your intended cooking temperature.
- Preheat (optional): preheating 2–5 minutes can reduce cooking time and help crisping.
- Light oil or spray (optional): a thin brush or spray of oil enhances browning for starchy foods—don’t flood the basket.
- Arrange food in a single layer: leave space between pieces for hot air to circulate—avoid overcrowding.
- Set temperature and time: use your recipe as a baseline. Expect small adjustments (see next section).
- Shake or turn halfway: remove the basket using oven mitts or tongs, shake or turn food for even browning, then continue cooking.
- Remove and rest: use tongs to lift the silicone basket from the fryer; let hot items sit a few minutes before serving.
Practical note: in practice, small items like fries benefit from being shaken at the 1/2‑way mark; delicate foods benefit more from careful turn-over with tongs.
Cooking performance: heat, time and airflow considerations
- Heat transfer: silicone is a poor conductor relative to metal. Expect gentler browning; if you prefer more crisp, increase the temperature by 5–15°F (3–8°C) or add 1–3 minutes—but always monitor the first few times.
- Airflow: good silicone basket designs have holes or mesh-like bottoms to allow airflow. Never block all ventilation—air fryers rely on convective flow.
- Crowding: overcrowded baskets lead to steaming rather than crisping. Cook in batches if needed.
- Rack use: if your air fryer has racks, you can stack silicone baskets only if airflow is not obstructed and the manufacturer allows it.
Example starting points (adjust by fryer model and food thickness):
- Frozen fries: 375–400°F (190–205°C), 12–20 minutes; shake halfway.
- Vegetables (bite-sized): 350–375°F (175–190°C), 8–15 minutes; stir once.
- Shrimp or small seafood: 350–400°F, 6–10 minutes.
- Breaded chicken nuggets: 370–390°F, 8–14 minutes; flip once.
Always follow internal temperature targets for proteins (refer to USDA guidance for safe doneness).
Cleaning, stain and odor removal (step-by-step)
Daily cleaning:
- Let the basket cool.
- Remove loose crumbs and rinse under warm water.
- Wash with warm water and dish soap using a soft sponge—no metal scouring pads.
- Rinse and air‑dry or towel dry.
Dishwasher: many silicone baskets are top-rack dishwasher safe—confirm manufacturer instructions.
Deep clean and odor removal:
- Soak 15–30 minutes in hot water with a few tablespoons of baking soda or a cup of white vinegar to cut grease and odors.
- For persistent staining, make a paste of baking soda and water, rub gently with a soft brush, rinse thoroughly.
- Avoid harsh chemicals and abrasive cleaners that can degrade silicone over time.
Inspect after cleaning for thinning, tears, or discolored spots—replace if the material looks compromised.
Longevity: when to replace your silicone basket
Replace the basket if you notice:
- Persistent grease that won’t wash away, deep cuts or tears, or warping that prevents a safe fit.
- Any change in texture where the silicone feels sticky, brittle, or crumbly.
How long it lasts depends on usage and cleaning habits; frequent high-heat cycles and abrasive cleaning shorten lifetime.
Common mistakes and troubleshooting
- Mistake: covering the entire fryer basket with silicone or parchment—this blocks airflow and produces soggy results. Solution: always use inserts with perforations or leave openings for circulation.
- Mistake: placing silicone too close to the heating element. Solution: measure and test fit; if the silicone touches coils when hot, don’t use it.
- Issue: food isn't browning. Solution: increase temp slightly, lightly brush oil, or transfer to a metal basket for the final few minutes for extra crisping.
- Issue: lingering odor. Solution: deep-scrub with vinegar or baking-soda soak, then air dry in sunlight.
Using a silicone basket with a Ninja air fryer (or similar brands)
Ninja and many other brands use a removable metal basket or drawer. Steps that usually work across models:
- Confirm model dimensions and internal clearance.
- Place the silicone basket inside the metal basket/drawer—do not replace the metal support unless the silicone is designed as a full replacement.
- If your Ninja model has a crisper plate or rack, ensure the silicone doesn’t interfere with locking or sensor functions.
- For multi-level units, check manufacturer guidance; stacking inserts can affect performance.
If you own a Ninja and are unsure, consult the appliance user manual before trying a new accessory.
Quick test recipe (try this tonight)
Try frozen fries as a controlled test to learn how your silicone basket behaves:
- Preheat air fryer to 380°F (195°C).
- Spread a single layer of frozen fries in the silicone basket (light spray of oil optional).
- Cook 10–14 minutes, shake at 6–8 minutes, then check crispness—add 1–3 minutes if needed.
Take notes: time to crisp, any sticking, and how much oil you used. That will guide future adjustments.
Call to action: pick a small test batch (fries or veggies) and run this recipe to learn your silicone basket’s timing and temperature.
Frequently Asked Questions
Q: Will silicone melt in an air fryer?
A: Food‑grade silicone rated for use above your air fryer’s maximum temperature will not melt. Check the product’s listed temperature rating and avoid direct contact with exposed heating elements.
Q: Can I use silicone in toaster ovens or under broilers?
A: Not unless the product specifies it. Broilers and exposed coils can exceed silicone ratings and produce direct heat that damages the insert.
Q: Is silicone dishwasher safe?
A: Many are, but always verify the manufacturer’s instructions. If in doubt, wash by hand to extend the lifespan.
Q: Does a silicone basket change cooking times?
A: Often slightly—it can insulate and slow crisping. Expect to adjust time or add a small temperature bump during initial use.
Q: Are there foods you shouldn’t cook in a silicone basket?
A: Avoid very heavy, high‑fat items that may leak and pool oil in ways that could create a safety hazard; avoid direct contact with very high heat sources.
Conclusion
Silicone baskets are a convenient accessory that can simplify handling and cleanup for many air-fryer foods—especially small, delicate, or single-layer batches. The keys to success: confirm food-grade temperature ratings, ensure a safe fit that preserves airflow, expect slight timing adjustments, and follow proper cleaning routines. Test with a simple recipe, tune your time/temperature, and you’ll know whether a silicone basket becomes a go-to tool in your kitchen.
If you’re ready to try one, start with a small, perforated silicone basket that matches your fryer dimensions and run the quick fry test above to dial in the settings. Happy air frying!

I’m Abby Lu, a passionate home cook who loves simplifying everyday meals. At PlugChef.com, I share product reviews and cooking guides to help you find the best tools for your kitchen.
Related posts:
 How to Make a Fruit Basket for a Gift: Easy DIY Guide
 Do You Need a Basket? Essential Guide for Air Fryers
 How to Choose Kitchen Appliances: Expert Tips Revealed
 Kitchen Cabinets With Black Stainless Steel Appliances: Modern Elegance
 White Kitchen Cabinets Stainless Steel Appliances: Timeless Elegance
 Top 10 Best Non-Toxic Cooking Utensils – Safe & Durable Choices for Healthy Homes

