

Peeling pumpkin skin can feel like a frustrating, time-consuming chore, especially if you’re working with a thick-skinned carving pumpkin or lack sharp kitchen tools. Many home cooks end up wasting precious flesh, struggling with slippery surfaces, or even nicking their fingers trying to force a peeler through tough outer layers. But with the right variety, tools, and technique, you can peel pumpkin quickly, safely, and with zero waste—leaving you with smooth, uniform flesh perfect for pies, soups, roasted sides, and more. This guide walks you through every step, from selecting the best pumpkin for cooking to storing peeled cubes for later use, with pro tips to make the process faster and easier every time. If you’re short on time or prepping large batches for canning or freezing, our guide to faster peeling shortcuts can cut your prep time in half.
 This image shows a cosmetic pumpkin peel, which is unrelated to culinary pumpkin skin removal.
Image source: medicismedicalspa.com
This image shows a cosmetic pumpkin peel, which is unrelated to culinary pumpkin skin removal.
Image source: medicismedicalspa.com
Choose the Right Pumpkin for Effortless Peeling
Selecting the right pumpkin is the single biggest factor in how easy your peeling process will be, and how good your final dish tastes. Not all pumpkins are built for cooking, and picking the wrong variety will lead to hours of frustrating peeling and bland, watery results.
Best Varieties for Cooking vs. Carving
For cooking, opt for small sugar pumpkins (also called pie pumpkins), which typically weigh 4-6 pounds and have thin, tender skin only 1/8 inch thick. Their dense, sweet flesh makes them ideal for pies, soups, and purees, and they peel in minutes with a standard vegetable peeler. If you’re working with a larger winter squash often grouped with pumpkins, butternut squash is another great option, with smooth, thin skin and nutty, sweet flesh that peels easily. Avoid giant field pumpkins meant for carving: these have tough, fibrous skin up to 1/4 inch thick and watery, bland flesh that’s not worth the effort of peeling. If you already have a carving pumpkin on hand, know that the peeling process will take longer and require a sharp chef’s knife instead of a peeler.
How to Pick a Fresh, Easy-to-Peel Pumpkin
Freshness has a huge impact on how easy a pumpkin is to peel and how good it tastes in recipes. Look for pumpkins with firm, unbroken skin, no soft spots, mold, or deep cuts (even small cracks let in bacteria that cause spoilage and make the flesh stringy). A firmly attached, green stem indicates the pumpkin was harvested recently and is still fresh, while a dry, brown stem that pulls away easily means it’s been stored for weeks and may have drier, tougher flesh. Lift the pumpkin to check its weight: it should feel heavy for its size, which signals dense, moist flesh rather than hollow, stringy insides. If you’re buying pumpkins for cooking, skip any sold as "carving pumpkins" and look for labels that say "sugar pumpkin," "pie pumpkin," or "culinary pumpkin" to ensure you’re getting a variety built for peeling and cooking.
 Use this diagram to identify the tough outer skin layer to remove during peeling.
Image source: realbalanced.com
Use this diagram to identify the tough outer skin layer to remove during peeling.
Image source: realbalanced.com
Essential Tools for Safe, Fast Peeling
Using the right tools cuts your peeling time in half and drastically reduces the risk of cuts and flesh waste. Avoid flimsy, cheap peelers that bend on tough skin, and always keep your knives sharp—dull blades slip easily and are far more dangerous than sharp ones.
Cutting Tools for Every Skin Thickness
- Sharp 8-inch chef’s knife: The best all-around tool for cutting pumpkins into wedges and peeling thick-skinned varieties. A sharp blade slices cleanly through skin without tearing flesh, and the length lets you make long, steady peeling strokes.
- Serrated Y-vegetable peeler: Perfect for thin-skinned sugar pumpkins, with a serrated edge that grips slippery skin and removes it in thin, even layers.
- Paring knife: Ideal for trimming small, hard-to-reach spots and removing leftover bits of skin after the main peeling is done.
Safety & Stability Gear to Prevent Injuries
- Cut-resistant gloves: These add a layer of protection for your non-dominant hand holding the pumpkin, and are especially helpful for people with limited hand strength or arthritis.
- Non-slip cutting board: Opt for a non-slip cutting board with rubber feet, or place a damp paper towel under your board to prevent it from sliding while you work with a sharp knife.
- Sturdy vegetable brush: For scrubbing dirt and debris off the pumpkin skin before peeling.
- Large, sturdy spoon: For scooping seeds and stringy pulp out of the pumpkin halves before cutting into wedges.
Prep Your Pumpkin for Mess-Free Peeling
Proper prep is the difference between a smooth, fast peeling process and a messy, frustrating one. Skip this step and you’ll be fighting slippery surfaces and uneven pieces the entire time.
Wash and Dry Thoroughly
Even if you’re using an organic pumpkin, scrub the entire surface with a vegetable brush under cool running water to remove dirt, debris, and surface pesticide residues, following USDA guidance for safe produce handling. Pat the pumpkin completely dry with a clean kitchen towel—any leftover moisture will make the skin slippery and increase your risk of cuts.
Cut into Stable, Manageable Wedges
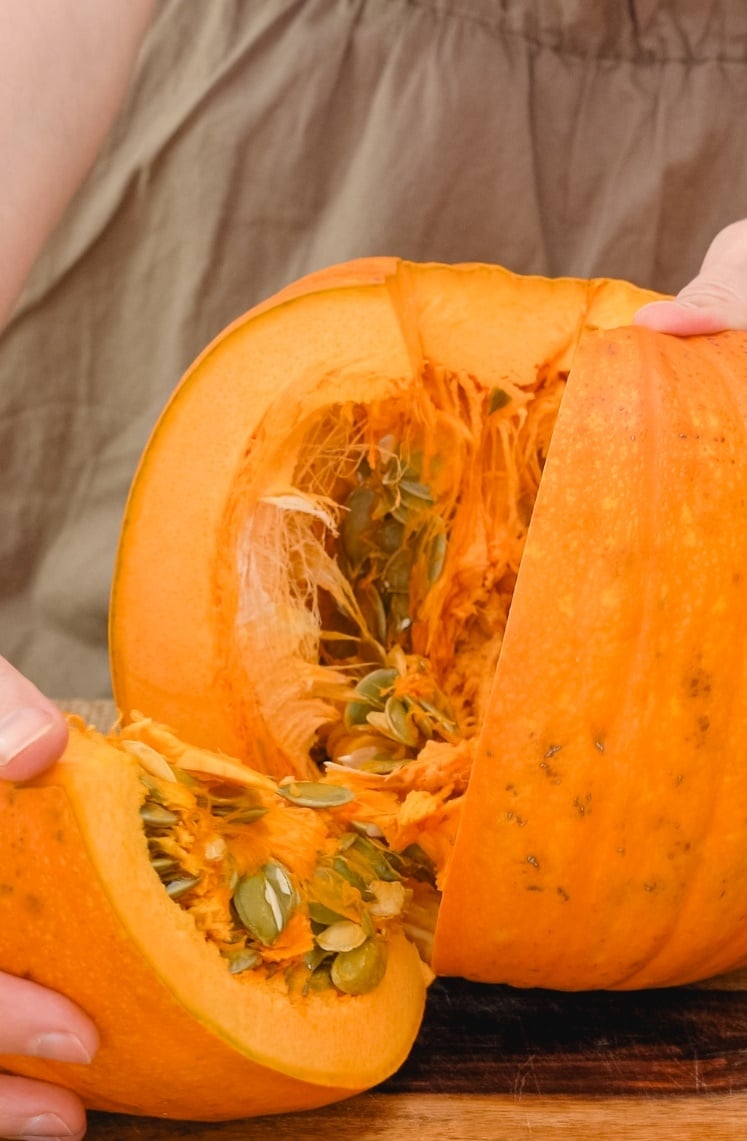
Cutting the pumpkin into small, flat pieces is non-negotiable for safe, easy peeling: trying to peel a whole, round pumpkin is almost impossible and will lead to wasted flesh and injury. Start by slicing off the stem end with your chef’s knife, then cut the pumpkin in half vertically (top to bottom, not horizontally) for stability. Use your sturdy spoon to scrape out all seeds and stringy pulp from the center, making sure to clean the walls of the flesh completely—leftover stringy bits will make peeling uneven and messy. Cut each half into 1-2 inch thick wedges, making sure each wedge has at least one flat side to rest on your cutting board. You don’t have to peel the entire pumpkin at once: store any unpeeled wedges (or the whole pumpkin, if you haven’t cut it yet) in a cool, dry place for up to 1 month, or in the fridge for 5-7 days if it’s already cut.
3 Proven Peeling Techniques for Perfect Results
Choose the technique that matches your pumpkin variety, skill level, and available tools for the best results.
1. Vegetable Peeler Method (Best for Thin-Skinned Pumpkins)
This is the safest, easiest method for small sugar pumpkins or butternut squash. Hold the pumpkin wedge flat-side down on your cutting board, with your non-dominant hand holding the end of the wedge (use a cut-resistant glove for extra safety). Peel in long, steady strokes away from your body, following the curve of the wedge to remove the skin in thin, even layers. For tough spots, go over them a second time with the peeler. In practice, this method takes 3-5 minutes per small pumpkin, with minimal flesh waste. It’s ideal for beginners or anyone who lacks confidence using a chef’s knife.
2. Chef's Knife Method (Best for Thick-Skinned Pumpkins)
For field pumpkins or large culinary pumpkins with tough skin, a chef’s knife is faster and more efficient than a peeler. Rest the pumpkin wedge flat-side down on your cutting board, holding it firmly with your non-dominant hand (keep your fingers curled under, never extended, to avoid cuts). Angle the knife so the blade is just under the skin, then slide it along the curve of the pumpkin to peel the skin off in long, continuous strips. Work slowly and don’t force the knife—let the sharp blade do the work. This method takes 2-3 minutes per wedge, but requires basic knife skills to avoid cutting into the flesh. Always cut away from your body, and keep your fingers clear of the blade’s path.
3. Microwave Softening Method (Best for Low-Effort Peeling)
If you’re struggling with very tough skin or have limited hand mobility, microwaving the pumpkin first will loosen the skin and reduce peeling effort by up to 70%. Place cut, unpeeled pumpkin wedges on a microwave-safe plate, and microwave on high for 2-3 minutes, until the skin is slightly warm to the touch and pulls away easily from the flesh. Let the wedges cool for 1-2 minutes to avoid burns, then peel with a peeler or your fingers. A common mistake here is microwaving for too long, which pre-cooks the flesh and makes it mushy. Stick to the 2-3 minute window, and only use this method if you plan to cook the pumpkin immediately after peeling.
 Follow this workflow to remove pumpkin skin quickly with minimal flesh waste.
Image source: www.splashsquad.com
Follow this workflow to remove pumpkin skin quickly with minimal flesh waste.
Image source: www.splashsquad.com
Pro Tips for Low-Waste, Flawless Peeling
These small, actionable tricks will save you time, reduce flesh waste, and make the process even easier:
- Peel with the natural grain: Pumpkin skin has a natural fiber direction—test it by scraping a small area with your fingernail, and peel in the direction the skin pulls away easiest. This removes larger, cleaner pieces and reduces the amount of flesh you accidentally cut off.
- Score tough skins first: For extra-thick skins, poke small holes in the skin with a fork before microwaving or peeling. This helps heat penetrate (if using the microwave method) and gives the peeler or knife a better grip.
- Don’t peel until you’re ready to cook: Peeled pumpkin dries out quickly in the fridge. Leave the skin on until you’re ready to use the pumpkin to keep it fresh for longer.
- Save the skins: Roasted pumpkin skins make a crunchy, nutrient-dense snack when tossed with olive oil and salt, or you can simmer them with vegetable scraps to make flavorful pumpkin stock.
- Use peeled pumpkin in a wide range of dishes: Beyond classic pies and soups, add peeled pumpkin cubes to vegetarian slow cooker recipes for a sweet, hearty twist, stir puree into chocolate bread pudding for a fall-inspired dessert, or toss roasted wedges into chicken salad with cucumbers for seasonal crunch. You can even add roasted pumpkin to ranch chicken sandwiches for a sweet-savory balance that pairs perfectly with spicy toppings.
Common Peeling Mistakes to Avoid
Even experienced cooks run into these avoidable errors that slow down the process and increase waste or injury risk:
- Using dull tools: Dull peelers and knives slip easily, tear the flesh, and increase your risk of cuts. Sharpen your chef’s knife before starting, and replace vegetable peelers that have become dull or bent.
- Peeling an uncut pumpkin: Trying to peel a whole, round pumpkin is almost impossible and will lead to wasted flesh. Always cut into flat wedges first for stability.
- Skipping the drying step: Wet pumpkin skin is extremely slippery, making it far more likely you’ll lose control of your knife or peeler. Always pat the pumpkin completely dry after washing.
- Over-microwaving the pumpkin: Microwaving for longer than 3 minutes will start to cook the flesh, making it mushy and hard to peel cleanly. Stick to the recommended time window, and let the pumpkin cool slightly before handling.
- Cutting against the grain: Peeling against the natural fiber direction of the skin causes jagged edges and wastes flesh. Always test the grain first and peel with the direction of least resistance.
Store Peeled Pumpkin for Maximum Freshness
Proper storage keeps peeled pumpkin fresh, flavorful, and safe to use for weeks or even months.
Short-Term Refrigeration
For pumpkin you’ll use within 3-5 days, cut peeled flesh into 1-2 inch cubes or slices, and store in an airtight container or zip-top bag with as much air removed as possible. Keep the container in the fridge at 40°F (4°C) or colder. Check the pumpkin daily for signs of spoilage, like soft spots, discoloration, or mold, and discard any pieces that smell off.
Long-Term Freezing
For pumpkin you’ll store for 2+ months, cut peeled flesh into cubes, and blanch in boiling water for 2 minutes to preserve texture and color. Drain, pat dry, and spread the cubes in a single layer on a baking sheet to freeze individually. Once solid, transfer the cubes to a freezer-safe bag or container, remove as much air as possible, and label with the date. Blanched frozen pumpkin lasts 6-8 months, and can be thawed in the fridge or added directly to soups, stews, and baked goods without thawing.
Storing Whole, Unpeeled Pumpkins
If you haven’t peeled your pumpkin yet, store it whole in a cool, dry, well-ventilated space (like a pantry or garage) at 50-55°F (10-13°C), away from direct sunlight and heat sources. A whole, uncut pumpkin will last up to 1 month this way. Cut but unpeeled pumpkin can be stored in the fridge in an airtight container for 5-7 days. Never leave peeled pumpkin at room temperature for more than 2 hours, per FDA food safety recommendations, to avoid harmful bacterial growth.
| Storage Method | Prep Needed | Storage Duration | Best Use Cases |
|---|---|---|---|
| Airtight container in the fridge (40°F/4°C) | Cut into 1-2 inch cubes or slices | 3-5 days | Soups, stews, roasted dishes, anything you'll cook within the week |
| Freezer-safe bag/container, blanched first | Blanch in boiling water for 2 minutes, cool, pat dry, freeze in a single layer then transfer to container | 6-8 months | Baking (pies, breads), smoothies, any recipe where you need pumpkin long-term |
| Vacuum-sealed, frozen | No blanching needed if you'll use within 2 months, blanch for longer storage | 8-12 months | Bulk meal prep, canning, long-term storage |
Frequently Asked Questions
How do I soften pumpkin skin for easy peeling?
You can use three low-effort methods: microwave cut wedges on high for 2-3 minutes, boil wedges in salted water for 2 minutes, or roast wedges at 350°F (175°C) for 10-15 minutes. All three methods loosen the skin from the flesh without cooking the pumpkin through. Let the pumpkin cool for 1-2 minutes before peeling to avoid burns.
What's the difference between peeling a sugar pumpkin vs a carving pumpkin?
Sugar (pie) pumpkins are small (4-6 lbs), have thin, tender skin, and dense, sweet flesh, making them very easy to peel with a standard vegetable peeler. Carving (field) pumpkins are 10+ lbs, have thick, fibrous skin, and watery, bland flesh—peeling these requires a sharp chef’s knife and more effort, and they’re not ideal for cooking.
Can I eat pumpkin skin?
Yes, pumpkin skin is completely edible when cooked. If you leave it on for roasted pumpkin wedges, it gets crispy and nutty when roasted with oil and salt. If you prefer smooth puree for pies or soups, peeling is the way to go.
Is it safer to peel pumpkin before or after cooking?
Peeling raw pumpkin is standard, but if you’re struggling with very tough skin, you can roast the whole pumpkin (cut in half, seeded) at 350°F (175°C) for 45-60 minutes until the flesh is tender, then scoop the soft flesh away from the skin with a spoon—no peeling required. This is a great low-effort alternative for people who find knife work difficult.
How do I avoid wasting pumpkin flesh when peeling?
Always use a sharp tool, peel with the natural grain of the skin, and make small, shallow cuts instead of digging deep into the flesh. For the last bits of skin that are hard to reach, use a small paring knife instead of a large peeler for more control.
Final Thoughts
Peeling pumpkin skin doesn’t have to be a dreaded fall chore. With the right pumpkin variety, sharp tools, and a technique that matches your skill level, you can remove the tough outer layer in minutes with minimal waste and zero risk of injury. Whether you’re prepping for a holiday pie, a weeknight soup, or a batch of roasted side dishes, perfectly peeled pumpkin will give you smoother texture and brighter, more concentrated flavor than pre-cubed store-bought options. If you’re new to working with fresh pumpkin, start with a small sugar pumpkin and the vegetable peeler method to build confidence—you’ll be prepping pumpkins like a pro in no time. Ready to put your skills to use? Check out our collection of easy pumpkin recipes for every meal of the day.

Hi, I’m Daniel Brooks—a food lover and kitchen gear enthusiast. I enjoy testing cookware, utensils, and gadgets to see what really works in everyday cooking. At PlugChef.com, I share honest reviews, comparisons, and simple guides to help you choose the best tools for a safer, smarter, and more enjoyable kitchen.
Related posts:
 How to Make a Fruit Basket for a Gift: Easy DIY Guide
 Cord Organizer for Kitchen Appliances: Tidy Up Effortlessly
 A Passive System-Dependent Recovery Process: Boost Appliance Lifespan
 Black Kitchen Cabinets With Black Appliances: Bold Elegance
 How to Clean Kitchen Sink Drain Naturally: Easy & Effective Tips
 Granite Sink Cleaner: The Best Way to Keep Your Sink Clean

