
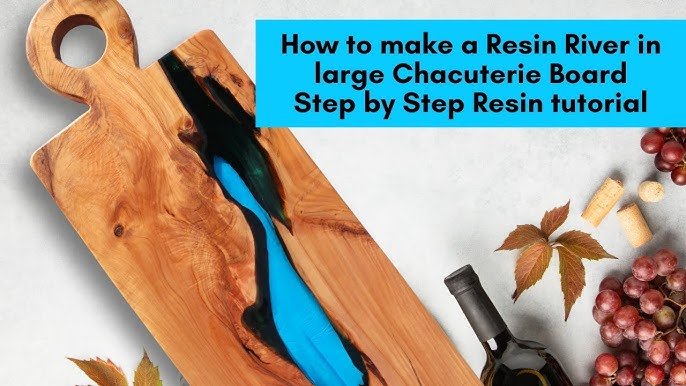
A stunning custom resin cutting board is easier to make than you think, even if you’ve never worked with epoxy resin before. This beginner-friendly DIY project results in a functional, one-of-a-kind kitchen essential you can use daily or gift to a friend for housewarmings, weddings, or holidays. Unlike cheap mass-produced boards, your custom design will feature unique colors, inclusions, or marbled patterns that match your kitchen aesthetic. This guide walks you through every step, from prepping your wood to sealing the finished board, with critical safety and food-compliance tips to avoid common beginner mistakes. We’ll cover exactly what materials you need, how to eliminate pesky air bubbles, and how to ensure your board is safe for food contact for years to come.
What You’ll Need (Plus Critical Non-Negotiable Safety Gear)
Skipping key materials or safety gear is the fastest way to ruin your project or expose yourself to harmful fumes. We’ve split this list into core project supplies and workspace safety essentials to make prep simple.
Core Materials
- 1.5–2 inch thick hardwood board (maple, walnut, or cherry work best; avoid softwoods like pine, which dent easily), pre-cut to your desired size (8×10 inches is ideal for first-time builders)
- FDA-compliant food-safe epoxy resin (check for explicit food-contact certification; never use uncertified craft resin)
- Graduated mixing cups, plastic or silicone stir sticks, and a plastic spreader
- 120-grit and 220-grit sandpaper, plus a tack cloth for dust removal
- Painter’s tape, clear silicone caulk, and a razor blade for cleaning up drips
- Food-safe finishing oil (mineral oil or a beeswax-mineral oil blend) and a lint-free cloth for application
Safety & Workspace Gear
- Nitrile gloves (latex is permeable to uncured resin and will not protect your skin)
- NIOSH-approved respirator with organic vapor cartridges (standard cloth masks do not filter epoxy fumes)
- Safety goggles to protect your eyes from splashes
- Drop cloth or plastic sheeting to protect floors from spills
- Heat gun or small butane torch for bubble removal
- Level to ensure your board cures evenly, and a cardboard box to cover it during curing to keep out dust Set up your work area on a stable, level surface, and lay down a washable non-slip kitchen rug to catch any resin spills and protect your floors.
Prep Your Wood for Perfect Resin Adhesion
Proper wood prep is the difference between a resin coating that stays bonded for years and one that peels off after a few months of use. Start by inspecting your wooden board for warps, cracks, or deep scratches — discard any damaged wood, as imperfections will show through the resin. Sand the entire surface and all edges with 120-grit sandpaper to create a rough, porous surface for the resin to grip; smooth, un-sanded wood will cause the resin to peel over time. Wipe the board thoroughly with a tack cloth to remove all sanding dust, as even tiny dust particles will create bumps in your final finish.
Next, apply painter’s tape to the bottom and side edges of the board, overhanging the top edge by 1/8 inch to catch excess resin drips. For extra leak protection, run a thin bead of clear silicone caulk along the tape edge and smooth it with your finger to create a watertight seal. If you want to add decorative inclusions (dried flowers, wood inlays, or food-safe glitter), arrange them on the wood surface now before pouring. A common beginner mistake here is skipping the sanding step to save time — this leads to costly peeling and a ruined board later.
Step 1: Mix Food-Safe Epoxy Resin Correctly
Always select epoxy resin certified as food-safe per FDA food contact substance regulations — cheap craft resin not rated for food use can leach harmful chemicals into food over time. Start by measuring the resin and hardener separately in a graduated mixing cup to follow the manufacturer’s exact ratio (most beginner-friendly resins use a 1:1 volume ratio, but always check the label for specifics). Pour both components into a clean mixing cup, then stir slowly and steadily for 2–3 minutes, scraping the sides and bottom of the cup frequently to ensure full incorporation. Do not whip or stir rapidly, as this introduces air bubbles that are nearly impossible to remove later.
Let the mixed resin sit for 1–2 minutes to allow trapped bubbles to rise to the surface before pouring. Only mix as much resin as you can pour in 10 minutes: epoxy has a limited "pot life" (the time it stays workable before curing), and mixing too much will lead to wasted, cured resin in your cup. If you want to add color, mix in a few drops of food-safe alcohol ink now, stirring gently to avoid creating extra bubbles. Standard cloth masks do not filter epoxy fumes, which can cause respiratory irritation; follow University of Minnesota Extension epoxy safety guidelines and use a NIOSH-approved respirator with organic vapor cartridges when working in enclosed or poorly ventilated spaces.
Step 2: Pour and Spread the Resin Evenly
Pour the mixed resin in a slow, steady stream over the center of the wooden board. Use a plastic spreader or clean stir stick to push the resin to the edges, ensuring an even coat across the entire surface. The ideal thickness for a cutting board is 1/8 to 1/4 inch: thinner than 1/8 inch will crack easily, while thicker than 1/4 inch will cure unevenly and take far longer to sand smooth. If you arranged inclusions earlier, gently press them into the resin with a toothpick to secure them, and pop any small bubbles around them with the toothpick tip. For a marbled effect, add a few more drops of ink and swirl gently with the toothpick — do not overmix, as this creates more bubbles.
Work quickly once you start pouring, as epoxy begins to cure within minutes.
 Slow, steady pouring helps avoid air bubbles and ensures even resin coverage across the wood surface.
Credit: popshopamerica.com
Slow, steady pouring helps avoid air bubbles and ensures even resin coverage across the wood surface.
Credit: popshopamerica.com
Step 3: Eliminate Bubbles Without Damaging Your Board
Air bubbles are the most common flaw in beginner resin projects, but they’re easy to avoid with the right technique. Use a heat gun or small butane torch held 6–8 inches above the resin surface, moving it in slow, even sweeps across the entire board to pop surface bubbles. Do not hold the heat source in one spot for more than 2 seconds, as this can scorch the resin, create discoloration, or even ignite flammable inclusions like dried flowers. For bubbles trapped under inclusions or in hard-to-reach corners, use a sharp toothpick to pop them individually. Keep an emergency fire blanket within arm’s reach when using a heat gun or torch, in case of accidental sparks.
Let the resin sit for 5 minutes after bubble removal to allow any remaining micro-bubbles to rise to the surface before moving to the curing step.
Step 4: Cure the Resin Properly for Durability
Once you’re happy with the bubble-free surface, cover the board with a cardboard box to protect it from dust, pet hair, and debris. Let it cure in a stable, level area at 70–80°F (21–27°C) for 72 hours for full hardness and food safety. Do not touch, move, or place any weight on the board during this time — even light pressure can cause dents or uneven curing. If your workspace is colder than 70°F, use a small space heater (kept at least 3 feet away from the board to avoid fire risk) to maintain temperature, as cold temperatures will prevent the resin from curing fully, leaving it tacky and prone to scratches and bacteria buildup. The initial tack-free cure takes 24 hours, but full structural cure (when the board is safe for food use) takes a full 72 hours.
Step 5: Sand, Seal, and Finish Your Cutting Board
After 72 hours, carefully remove the painter’s tape and silicone caulk. You will have a small, raised resin edge along the perimeter. Sand this edge flush with the wood surface using 120-grit sandpaper first, then move to 220-grit sandpaper to smooth the entire resin surface and remove any small imperfections or scratch marks. Wipe the entire board thoroughly with a tack cloth to remove all sanding dust.
Next, apply a food-safe finish: rub a generous amount of food-safe mineral oil or a beeswax-mineral oil blend all over the board, including the edges, using a lint-free cloth. Let the oil soak in for 2–3 hours, then wipe off any excess. Repeat this process 2–3 times for a water-resistant, durable finish that protects both the wood and resin. For added safety in the kitchen, pair your new board with child-safe cabinet locks to keep sharp cutting tools out of reach of young children. When prepping ingredients on your board, store your knives in a compact fixed blade sheath to keep blades sharp and prevent accidental cuts. Place your board on a kitchen anti-slip runner to keep it stable while you serve charcuterie or prep ingredients.
 This finished board features a blue marble resin inlay and natural wood edge, sealed with food-safe mineral oil.
Credit: popshopamerica.com
This finished board features a blue marble resin inlay and natural wood edge, sealed with food-safe mineral oil.
Credit: popshopamerica.com
Pro Tips for Flawless Results
These expert tips will help you avoid common mistakes and create a professional-looking board on your first try:
- Work in a well-ventilated, temperature-controlled space (70–80°F / 21–27°C) for optimal resin curing. Cold temperatures will cause the resin to stay tacky, while high heat will speed up curing and make it hard to work with.
- Always do a small test pour first if you’re new to working with epoxy, to get a feel for the working time and bubble removal process before committing to your full board.
- Wear old clothes that you don’t mind getting resin on — uncured epoxy is extremely difficult to remove from fabric.
- Keep pets and children out of the workspace entirely, both to avoid exposure to fumes and to prevent spills or accidents with heat guns.
- If you make a mistake with a resin pour, you can sand the cured resin down with 120-grit sandpaper and re-pour a thin layer to fix imperfections, no need to start over.
- For a glossy finish, buff the cured resin surface with a small amount of car polish on a soft cloth after the final oil coat.
Frequently Asked Questions
What materials do I need to make a resin cutting board?
You’ll need a 1.5–2 inch thick hardwood board (maple, walnut, or cherry work best), FDA-compliant food-safe epoxy resin, graduated mixing cups, plastic stir sticks, 120 and 220-grit sandpaper, tack cloth, painter’s tape, silicone caulk, food-safe mineral oil or beeswax finish, and full safety gear including nitrile gloves, a respirator with organic vapor cartridges, and safety goggles.
How long does it take to make a resin cutting board?
Active work time is 1–2 hours, but you’ll need to wait 72 hours for the resin to fully cure and harden before using the board for food. The finishing oil step adds an extra 2–3 hours of soak time, for a total project time of roughly 4 days from start to finished use.
Can I use any epoxy resin for a cutting board?
No — only use resin explicitly labeled as food-safe and compliant with FDA food contact substance regulations. Cheap craft epoxy or resin not rated for food use can leach toxic chemicals into food, especially when cut into with sharp knives. Always check the manufacturer’s specifications before purchasing.
How do I avoid bubbles in my resin cutting board?
Mix resin slowly and steadily to avoid whipping air into the mixture, let it sit for 1–2 minutes after mixing to let bubbles rise, pour slowly, and use a heat gun held 6–8 inches above the surface to pop bubbles in slow, even sweeps. Avoid holding the heat in one spot, which can scorch the resin.
Is a resin cutting board safe to use for food?
Yes, if you use FDA-compliant food-safe resin and seal it properly with food-safe mineral oil or beeswax. Avoid cutting directly on the resin surface with serrated knives, as this can scratch the resin and create hiding spots for bacteria. Hand wash only, do not place in the dishwasher.
Conclusion
Making a custom resin cutting board is a rewarding, approachable DIY project that results in a functional, beautiful piece you’ll use for years. By following food-safe guidelines, prepping your wood properly, and taking your time with each step, you’ll avoid the most common beginner mistakes and create a board that’s both sturdy and stunning. Whether you’re making it for your own kitchen or as a personalized gift for a friend, this project is a great way to build confidence with epoxy resin. For more beginner-friendly DIY kitchen projects, guides, and product recommendations, visit our full blog for inspiration.

I’m Abby Lu, a passionate home cook who loves simplifying everyday meals. At PlugChef.com, I share product reviews and cooking guides to help you find the best tools for your kitchen.
Related posts:
 How to Make a Fruit Basket for a Gift: Easy DIY Guide
 Do You Need a Basket? Essential Guide for Air Fryers
 How to Adjust Syrup Dispenser Pressure: Expert Tips
 Kitchen Cabinets With Black Appliances: Trendy Design Tips
 White Kitchen And Stainless Steel Appliances: A Perfect Duo
 Kitchen Colors With White Cabinets And White Appliances: Vibrant Ideas

