
Printed circuit boards (PCBs) are the backbone of nearly every modern electronic device, from Arduino hobbyist projects to vintage radio repairs and custom IoT builds. While most PCBs come pre-sized from manufacturers, DIYers and small-scale repair technicians often need to trim boards to fit tight enclosures, remove damaged sections after solder bridges or component failure, or modify prototype layouts. Cutting a PCB incorrectly can lead to cracked fiberglass substrate, lifted copper traces, or damaged mounted components—issues that are time-consuming and costly to fix. This guide walks you through the exact tools, safety protocols, and step-by-step techniques to get clean, precise cuts every time, no prior experience required.
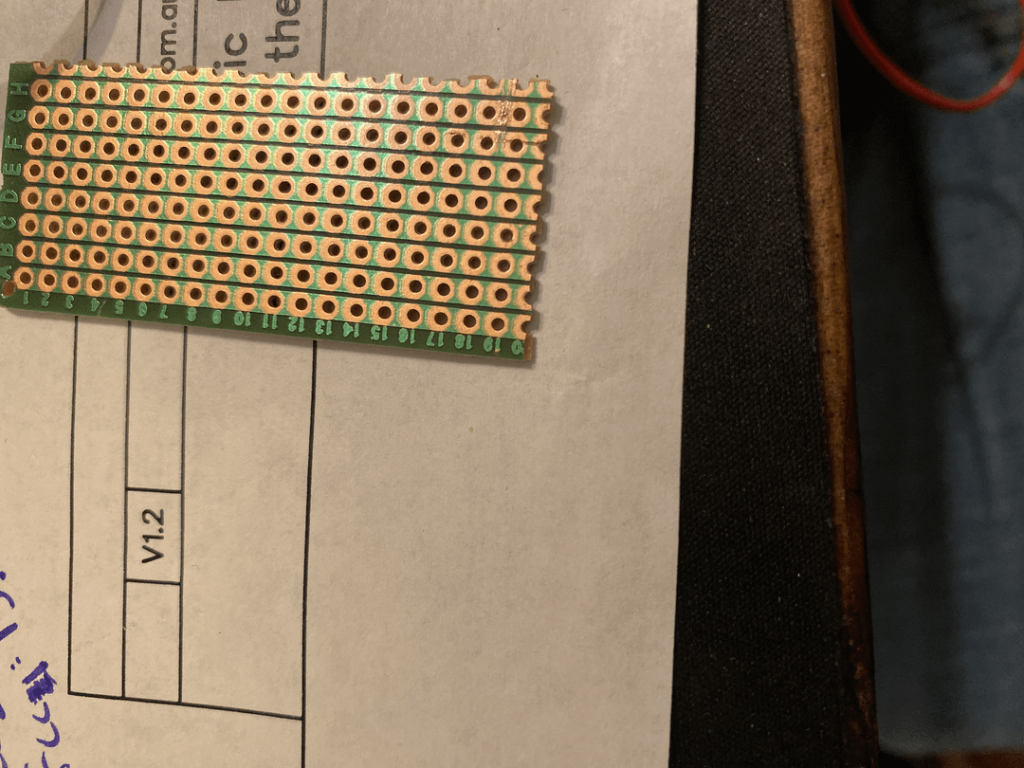
 A properly soldered test PCB is the final step after cutting and finishing your board edges.
Credit: www.globalwellpcba.com
A properly soldered test PCB is the final step after cutting and finishing your board edges.
Credit: www.globalwellpcba.com
What Is a PCB and When Do You Need to Cut One?
The most common DIY PCB is FR4, a rigid substrate made of woven fiberglass and epoxy resin, coated with thin copper traces that carry electrical signals between components. Standard hobbyist FR4 boards are 1.6mm thick, though thicker 2mm variants are common for high-power or industrial applications. Common use cases for cutting a PCB include:
- Trimming a full-size prototype board to fit a custom 3D-printed or laser-cut enclosure
- Removing a damaged section of a board after a failed component or solder short
- Modifying a vintage device’s board to fit upgraded components
- Splitting a large panel of identical PCBs for small-batch hobbyist projects Note that cutting through copper traces instead of bare substrate will break electrical connections, so careful planning of your cut line is critical to avoid damaging board functionality.
Safety Precautions You Can’t Skip
Before you pick up a cutting tool, prioritize these safety steps to avoid injury and board damage:
- Wear appropriate PPE: Safety glasses with side shields to block flying fiberglass splinters, and a NIOSH-approved N95 or higher respirator to filter fine fiberglass dust. FR4 PCB substrate produces irritant dust when cut, which can cause lung inflammation, eye irritation, and skin rashes if inhaled or touched. Per OSHA’s fiberglass dust safety guidelines, this level of protection is required for any cutting or sanding of PCB material.
- Work in a well-ventilated area: If possible, cut near a window or use a small fan to blow dust away from your face.
- Disconnect any power sources: Never cut a PCB with mounted, powered components, as this creates a major risk of short circuits or electric shock.
- Avoid cutting boards with leaded solder if possible: If you must cut a board with existing components, desolder them first to avoid inhaling lead fumes during cutting. A common mistake among new hobbyists is skipping respiratory protection, assuming PCB dust is harmless—even short-term exposure to fiberglass dust can cause chronic irritation. To avoid slipping on small debris while you cut, use a washable non-slip mat under your work area.
Tools You’ll Need for Clean, Precise Cuts
The right tools make the difference between a clean, professional cut and a splintered, damaged board. Avoid using dull utility knives, regular wood saws, or wire cutters, as these will crush the PCB substrate, lift copper traces, or leave rough, sharp edges. Stock your workspace with these tools:
- Measuring and marking: A precision steel ruler (6-inch or 12-inch) and a fine-tip permanent marker (pencil marks can smudge easily during cutting)
- Cutting tools (choose based on your project needs):
- Fine-tooth hacksaw (18 teeth per inch ideal): Best for straight cuts on 2mm or thicker PCBs
- PCB shear: Ideal for small, precise straight or curved cuts on thin boards
- Sharp utility knife: Perfect for scoring 1.6mm standard PCBs for a snap cut
- Rotary tool with diamond cutoff wheel: For intricate, curved, or irregular cuts
- Finishing tools: 220-grit sandpaper and a deburring tool to smooth rough edges
- Clamping: C-clamps or a bench vise with padded jaws to hold the board steady without cracking it Use a thick cutting mat or sacrificial board on your workbench to avoid scratching the surface; our guide to work surface protection tips will help you keep your workspace in top condition.
 Understanding PCB layout helps you avoid cutting through critical copper traces during modification.
Credit: www.electronicsandyou.com
Understanding PCB layout helps you avoid cutting through critical copper traces during modification.
Credit: www.electronicsandyou.com
Step-by-Step Guide to Cutting a PCB Board
Follow these steps to get clean, precise cuts without damaging your board or components:
Step 1: Measure and Mark Your Cut Line Accurately
The old adage "measure twice, cut once" is especially true for PCBs, where a 1mm error can mean your board won’t fit its enclosure or you’ll cut through a critical trace. Start by placing your PCB on a flat work surface, then use your ruler to measure your desired cut line. Mark the line clearly with a fine-tip permanent marker, using a straight edge as a guide for perfectly straight cuts. For curved cuts, use a compass or pre-cut stencil to mark your shape. Double-check that your cut line runs through bare substrate, not over copper traces or component footprints, to avoid damaging electrical connections.
Step 2: Secure the PCB to Prevent Movement
A moving board will cause uneven cuts, chipped edges, or even cracked substrate. Place your PCB on a sacrificial piece of scrap wood or thick cutting mat, then clamp it down firmly with C-clamps or a padded bench vise. Do not over-tighten the clamps: excessive pressure will crack the brittle FR4 substrate before you even start cutting. If you’re cutting a board with pre-mounted components, place a piece of thin cardboard over the components to protect them from damage during cutting.
Step 3: Choose the Right Cut Method for Your Board Thickness
Different PCB thicknesses require different cutting techniques to avoid damage:
- 1.6mm standard FR4 (most common hobbyist boards): Use a sharp utility knife to score along your marked line 3 to 4 times with moderate, even pressure. Place the scored line over the edge of a table or workbench, then apply quick, firm downward pressure to snap the board cleanly along the score line. This scoring-and-snapping method produces far cleaner edges than sawing thin stock, which often splinters the substrate. For reference, this same technique works well for other thin rigid panel materials, like the scoring-and-snapping method used for cement board siding.
- 2mm or thicker PCBs: Use a fine-tooth hacksaw or PCB shear to cut along your marked line. Cut slowly with even, gentle pressure—do not force the saw, as this will chip the edges or lift copper traces. A hacksaw with 18 teeth per inch works best for most PCB thicknesses.
- Intricate or curved cuts: Use a rotary tool with a diamond cutoff wheel. Keep the tool moving at a steady pace to avoid overheating the substrate, which can cause delamination (separation of the fiberglass layers).
Step 4: Finish the Edges for a Professional Result
Raw cut PCB edges are often sharp, splintered, and covered in fine dust that can interfere with later soldering. Start by sanding the rough edges with 220-grit sandpaper, moving in even strokes to smooth out splinters and uneven surfaces. Use a deburring tool to remove any remaining sharp edges, then wipe the cut edge with a lint-free cloth to remove all dust. If you plan to solder components to the cut edge, you can also apply a small amount of flux to the exposed copper to improve solder adhesion. These finishing steps align with IPC’s small-scale electronics modification standards to ensure your cut board remains structurally sound and free of debris that could cause short circuits.
Pro Tips for Precise, Damage-Free Cuts
- Always test your cut method on a scrap piece of PCB first to get a feel for the tool and adjust your pressure as needed.
- Use a straight edge or cutting guide when making straight cuts to ensure perfect alignment; even a 0.5mm deviation can make your board incompatible with its enclosure or component layout.
- Cut away from your body at all times to avoid injury from flying splinters or a slipping saw.
- Let the tool do the work: applying excessive force will chip the board and dull your blades faster. If you feel resistance while cutting, stop, reposition the blade, and resume cutting slowly.
- For boards with mounted components, desolder them before cutting to avoid heat damage from friction or accidental short circuits.
- Keep your work area organized: store small parts and tools in labeled containers to avoid losing components mid-project. For ideas on keeping your workspace tidy, check out our guide to secure tool storage solutions for small electronics supplies.
- Keep all cutting tools sharp by storing them in protective blade sheaths when not in use; dull blades are the top cause of splintered PCB edges and lifted copper traces.
Common Mistakes to Avoid
- Skipping safety gear: Even small amounts of fiberglass dust can cause irritation, and flying splinters can cause serious eye injuries. Never cut a PCB without safety glasses and a respirator.
- Over-tightening clamps: This is a common mistake for new hobbyists; excessive pressure cracks the brittle FR4 substrate before you even start cutting. Tighten clamps just enough to hold the board steady without deforming it.
- Using dull blades: Dull blades require more force to cut, which splinters the substrate and lifts copper traces. Replace hacksaw blades and utility knife blades as soon as they feel dull.
- Cutting without marking: Even experienced makers can misalign cuts without a clear guide. Always mark your cut line clearly before you start cutting.
- Skipping edge finishing: Rough, splintered edges can cause injury later, and loose fiberglass particles can interfere with soldering or cause short circuits if they get trapped between components.
- Cutting too quickly: Rushing the cut causes overheating, which delaminates the fiberglass layers and weakens the board. Cut slowly and steadily for the best results.
Frequently Asked Questions
How do I cut a PCB board safely at home?
Start by wearing NIOSH-approved safety glasses and an N95 respirator to protect against fiberglass dust and splinters. Secure your board firmly to a work surface, use a sharp tool appropriate for your board thickness, and cut slowly away from your body. Always work in a well-ventilated area, and never cut a powered board with mounted components.
What tools are best for cutting PCB boards?
The best tool depends on your project: for straight cuts on standard 1.6mm boards, a utility knife for scoring and snapping is fastest and cleanest. For thicker 2mm+ boards, a fine-tooth hacksaw or PCB shear works best. For intricate curved cuts, a rotary tool with a diamond cutoff wheel is the most versatile option. Avoid using wire cutters, regular wood saws, or dull blades, as these will damage the board.
Can I cut a PCB without damaging the circuits?
Yes, as long as you plan your cut line carefully to run through bare substrate, not over copper traces or component footprints. Score or cut along the marked line slowly and evenly to avoid chipping the substrate, which can lift adjacent traces. If you need to cut near traces, use a sharp utility knife to make a shallow score line first, then snap the board gently to avoid putting stress on the surrounding copper.
How do I make clean cuts on a PCB board?
For the cleanest edges, use the scoring-and-snapping method for 1.6mm boards: score the line 3-4 times with a sharp utility knife, then snap the board over the edge of a table. For thicker boards, use a fine-tooth hacksaw and cut slowly with even pressure. Always sand the edges with 220-grit sandpaper after cutting to remove splinters and rough spots.
Can I cut a PCB with mounted components?
It’s not recommended, as cutting can generate heat that damages sensitive components, or cause splinters that get trapped under parts. If you must cut a board with mounted components, desolder all parts first, or cover them with a piece of thick cardboard to protect them from debris and impact.
Do I need special tools for curved cuts?
For simple curves, a PCB shear works well for thin boards. For more intricate curved or irregular shapes, a rotary tool with a diamond cutoff wheel is the best option. Use a stencil or compass to mark your curve clearly before cutting, and keep the tool moving at a steady pace to avoid overheating the substrate.
Conclusion
Cutting a PCB board is a straightforward DIY skill when you have the right tools, follow safety protocols, and use the correct technique for your board thickness. The most important steps are measuring your cut line carefully, securing the board firmly to avoid movement, using a sharp tool appropriate for your substrate, and finishing edges to remove sharp splinters. With practice, you can get clean, precise cuts for all your electronics repair, prototype, and custom build projects. If you’re working on a new electronics build, make sure your work area is set up for safety: place a washable non-slip mat under your feet to avoid slipping on debris, and store your tools on secure wall-mounted racks when not in use to keep them organized and sharp.

I’m Abby Lu, a passionate home cook who loves simplifying everyday meals. At PlugChef.com, I share product reviews and cooking guides to help you find the best tools for your kitchen.
Related posts:
 How to Make a Fruit Basket for a Gift: Easy DIY Guide
 Do You Need a Basket? Essential Guide for Air Fryers
 How to Adjust Syrup Dispenser Pressure: Expert Tips
 Kitchen Cabinets With Black Appliances: Trendy Design Tips
 White Kitchen And Stainless Steel Appliances: A Perfect Duo
 Kitchen Colors With White Cabinets And White Appliances: Vibrant Ideas

