

Cement board siding (often referred to as fiber cement siding, with popular brands including HardieBoard) is a top choice for homeowners thanks to its 30+ year lifespan, Class A fire resistance, immunity to termite damage, and ability to withstand extreme weather, including high winds and heavy rain. But while the material is famously durable, cutting it incorrectly leads to chipped edges, moisture intrusion, cracked panels, and wasted material — all of which drive up project costs and ruin your finished look. This guide covers every step, tool, and pro tip you need to make clean, accurate cuts for a professional-grade installation, whether you’re tackling a full siding replacement or a small repair.
What You’ll Need: Tools and Materials
Having the right tools on hand before you start will save you time, reduce waste, and ensure clean cuts every time.
Required Tools
- 7-1/4 inch circular saw (for straight cuts) or jigsaw (for curves and notches)
- Carbide-tipped masonry blade with 4+ teeth per inch, rated specifically for cement board or fiber cement
- Measuring tape
- Chalk line (for marking long, straight cut lines)
- Carpenter’s pencil or permanent marker
- Straight edge guide (for circular saws to eliminate freehand wobble)
- P100 respirator (required per current silica safety rules, not a basic dust mask)
- Safety goggles
- Cut-resistant work gloves
- Ear protection
Optional Tools
- Jigsaw with fine-toothed carbide-grit blade (for curves, cutouts, and notches)
- Miter saw with carbide masonry blade (for consistent angled cuts on gable ends and roof transitions)
- Dust collection attachment or shop vac (to capture silica dust at the source)
- 80-grit aluminum oxide sandpaper or carbide sanding block (for smoothing rough edges)
- Utility knife (for scoring, trimming burrs, and small cutouts)
Critical Safety Precautions
Cement board contains crystalline silica, which can cause permanent, irreversible lung damage (silicosis) with prolonged exposure — per OSHA safety guidelines for silica exposure, a P100 respirator is required for all cutting work, not just a basic cloth or disposable dust mask. Always wear full PPE (respirator, goggles, gloves, ear protection) when cutting, and work in a well-ventilated area, ideally outdoors. If cutting indoors, seal off adjacent rooms with plastic sheeting to prevent dust from spreading through your home. Never remove safety guards from power tools, and always disconnect power when changing blades. Keep a emergency fire blanket within arm’s reach when working with power tools to address any accidental sparks or small fires quickly. For more on this, see our guide on how to cut hardie cement board.
Pre-Cut Prep: Measuring and Layout for Perfect Results
Accurate measuring is the foundation of a clean, professional installation. First, measure the full length of your siding run, accounting for a 1/8 inch expansion gap at each butt joint (where two pieces meet end-to-end) and a 1/4 inch gap at corners to allow for material movement in temperature extremes. For cuts around windows, doors, or vents, measure the rough opening, then add a 1/2 to 3/4 inch reveal (the exposed edge of the siding) for a uniform, finished look. Mark cut lines with a chalk line for long, straight runs to avoid wavy freehand marks, and mark the waste side of the cut line with a bold X to avoid cutting the wrong piece. Always double-check measurements before marking — the old adage “measure twice, cut once” is especially important with cement board, which is more expensive than standard wood siding to replace.
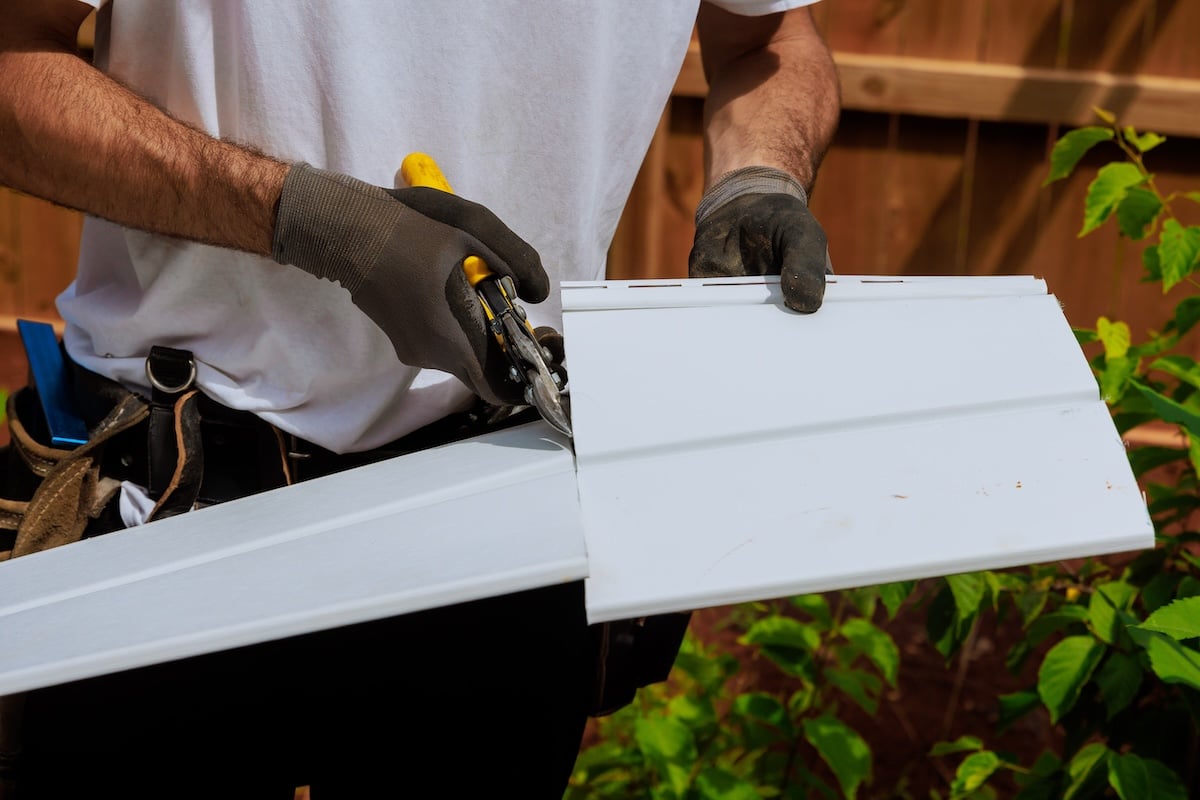 Score cement board siding with pliers for a clean, straight cut line before using a power saw.
Credit: bestexteriorsinc.com
Score cement board siding with pliers for a clean, straight cut line before using a power saw.
Credit: bestexteriorsinc.com
Step-by-Step Cutting Guide
Follow these steps for clean, accurate cuts every time, no prior experience required.
Step 1: Set Up Your Work Area
Lay a sacrificial 1/2 inch plywood sheet over a sturdy work surface like sawhorses to protect both your cement board and your saw base from damage. If working indoors, lay down an easy-to-clean floor protection mat under your work area to catch dust and reduce slip hazards. Secure the cement board to the plywood with clamps to prevent movement during cutting — a shifting board is the most common cause of uneven cuts and ruined material. For more on this, see our guide on how do i cut cement board.
Step 2: Prepare Your Saw
For circular saws, install the carbide-tipped masonry blade with the teeth pointing forward, and tighten the arbor nut securely with a wrench. Adjust the saw depth so the blade extends only 1/8 to 1/4 inch below the bottom of the cement board — this minimizes kickback, reduces dust blowout, and produces a cleaner cut. Attach your straight edge guide to the top of the board, aligned with your marked cut line, to eliminate freehand wobble. For jigsaws, install a fine-toothed carbide-grit blade designed for masonry materials.
Step 3: Make the Cut
Put on all PPE before powering on your saw. For straight cuts with a circular saw: start the saw and let it reach full speed before touching the blade to the board, then slowly push the saw forward along the straight edge guide, applying steady, even pressure — never force the saw, as this will dull the blade and create rough, chipped edges. If you feel the blade bogging down, ease off the pressure slightly. For curves or notches, use a jigsaw, moving at a slow, steady pace to avoid chipping the cement board. For multiple cuts of the same length, clamp a stop block to your work surface to speed up layout and ensure consistent sizing across all pieces. For more on this, see our guide on how to cut hardie board cement board.
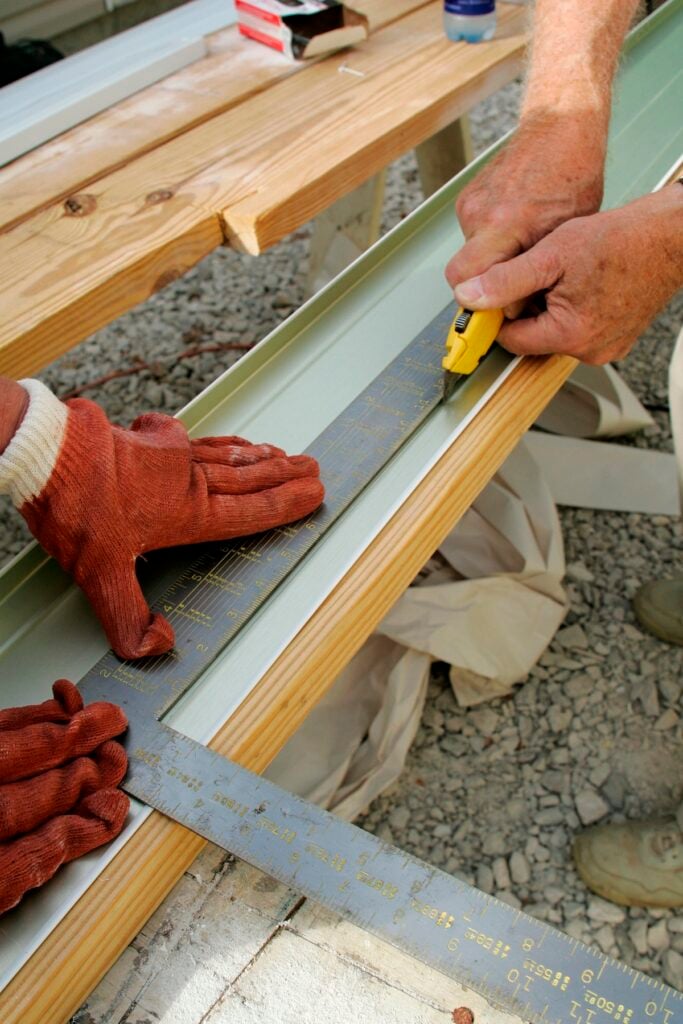 Proper measuring and guided circular saw cuts ensure straight, accurate edges for cement board siding installation.
Credit: bestexteriorsinc.com
Proper measuring and guided circular saw cuts ensure straight, accurate edges for cement board siding installation.
Credit: bestexteriorsinc.com
Step 4: Smooth and Inspect Edges
After cutting, inspect the edges for roughness, splinters, or burrs. Use 80-grit sandpaper or a carbide sanding block to smooth any rough spots, working in a single direction to avoid creating additional chips. For small burrs, a sharp utility knife or fixed-blade work knife works well for quick trimming. Run a straight edge along the cut edge to confirm it is perfectly straight — even a 1/16 inch deviation will create visible gaps in your finished siding. Store any sharp utility knives in protective blade covers when not in use to avoid accidental cuts.
Step 5: Seal Cut Edges (Critical for Longevity)
Cut cement board is porous and will absorb moisture if left unsealed, leading to swelling, cracking, and reduced lifespan. Apply a coat of latex primer or cement board sealant to all cut edges before installation, especially for pieces that will be installed near the ground or in damp climates. This simple step adds years to the life of your siding. For more on this, see our guide on how do you cut cement board.
Pro Tips for Flawless Cuts Every Time
- Cut with the decorative (finished) face up when using a circular saw to minimize chipping on the visible side of the siding.
- Cut with the decorative face down when using a jigsaw to avoid splintering the front surface.
- Test your saw settings and blade on a scrap piece of cement board before cutting your actual installation material — this eliminates costly mistakes on expensive siding panels.
- Use a dust shroud or shop vac attachment on your saw to capture up to 90% of silica dust at the source, making cleanup faster and reducing health risks.
- For long, straight cuts, have a second person hold the opposite end of the straight edge guide to prevent it from shifting mid-cut.
- If you need to make repeated angled cuts (for gable ends or roof transitions), a miter saw with a carbide masonry blade will save you hours of time and ensure consistent angles across all pieces.
- In practice, most DIYers find that a circular saw with a straight edge guide produces far more consistent results than freehand cutting, even for beginners.
Common Mistakes to Avoid
Even experienced DIYers run into these avoidable errors. Use the guide below to skip costly and time-consuming mistakes:
| Common Mistake | How to Avoid |
|---|---|
| Using a standard wood saw blade | Always use a carbide-tipped masonry blade rated for cement board — wood blades dull within minutes on cement and produce rough, chipped cuts. |
| Setting saw depth too deep | Adjust the blade so it extends only 1/8–1/4 inch below the board to reduce dust and kickback risk. A common mistake is setting the blade 1–2 inches deep, which creates excess mess and increases danger. |
| Freehand cutting without a guide | Use a straight edge guide for all straight cuts to eliminate wobble and ensure perfectly straight edges. |
| Forgetting expansion gaps | Leave a 1/8 inch gap at butt joints and 1/4 inch at corners to prevent buckling in hot or cold weather. |
| Skipping respiratory protection | Always wear a P100 respirator, not a basic dust mask, to avoid inhaling harmful crystalline silica dust. |
| Rushing cuts | Let the saw do the work — forcing the tool will dull the blade and create uneven edges. |
Why Proper Cuts Maximize Cement Board Siding Performance
Cement board siding’s core benefits — fire resistance, rot resistance, insect immunity, and 30+ year lifespan — only apply if the material is installed correctly. Rough, uneven cuts create gaps that allow moisture to seep behind siding, leading to rot, mold growth, and reduced structural integrity over time. Clean, accurate cuts ensure tight, sealed joints that keep your home protected and maintain its curb appeal for decades. Skipping edge sealing or using the wrong blade will negate many of the material’s built-in advantages, making proper cutting one of the most important steps in your siding project.
Frequently Asked Questions
What tools do I need to cut cement board siding?
At minimum, you’ll need a circular saw with a carbide-tipped masonry blade, measuring tape, chalk line, P100 respirator, safety goggles, and work gloves. For curves or notches, add a jigsaw with a fine-toothed carbide-grit blade to your toolkit.
How do I measure for cutting cement board siding?
Measure the length of the siding run, adding 1/8 inch for expansion gaps at butt joints. For cuts around openings, measure the rough opening, then add a 1/2 to 3/4 inch reveal for a professional finished look. Always mark the waste side of your cut line with an X to avoid cutting the wrong piece.
Can I cut cement board siding with a handsaw?
Yes, a crosscut handsaw with a carbide-grit edge will work for small, simple cuts, but it will take 3–4 times longer than a power saw and is more likely to produce uneven edges. It’s only recommended for small repairs if you don’t have access to power tools.
What blade is best for cutting cement board siding?
Always use a carbide-tipped masonry blade with 4 or more teeth per inch, specifically rated for cement board or fiber cement materials. Standard wood blades will dull quickly and produce rough, chipped cuts.
Do I need to seal cut edges of cement board siding?
Yes. Cut edges are porous and can absorb moisture, leading to swelling and rot over time. Apply a coat of latex primer or cement board sealant to all cut edges before installation, especially for pieces installed near the ground or in damp climates.
Conclusion
Cutting cement board siding doesn’t require professional experience — with the right tools, accurate measuring, and attention to safety, you can achieve clean, precise cuts that lead to a professional-looking, long-lasting installation. The most important rules to remember are to always use a carbide-tipped masonry blade, wear proper respiratory protection, leave expansion gaps between pieces, and seal all cut edges before installation. Following these steps will save you time, reduce material waste, and ensure your siding performs as intended for decades.
For more expert DIY guides to tackle your next home renovation project, browse our full tutorial library for step-by-step advice on everything from exterior updates to kitchen upgrades.

I’m Abby Lu, a passionate home cook who loves simplifying everyday meals. At PlugChef.com, I share product reviews and cooking guides to help you find the best tools for your kitchen.
Related posts:
 How to Make a Fruit Basket for a Gift: Easy DIY Guide
 Do You Need a Basket? Essential Guide for Air Fryers
 How to Adjust Syrup Dispenser Pressure: Expert Tips
 Kitchen Cabinets With Black Appliances: Trendy Design Tips
 White Kitchen And Stainless Steel Appliances: A Perfect Duo
 Kitchen Colors With White Cabinets And White Appliances: Vibrant Ideas

