
2-inch foam insulation board is a go-to choice for basement walls, rim joists, above-grade exterior sheathing, and even DIY projects like insulated workbenches or portable coolers. Made from extruded polystyrene (XPS), expanded polystyrene (EPS), or polyisocyanurate (polyiso), these rigid boards deliver high R-value per inch, moisture resistance, and easy installation—but only if cuts are precise. Gaps as small as 1/8 inch between boards create air leaks that reduce thermal performance, so clean, accurate cuts are critical for maximizing energy savings. Many DIYers assume cutting thick foam requires expensive specialty tools, but with basic equipment and a simple technique, you can get factory-quality straight, angled, and curved cuts with minimal waste and effort. This guide walks through proven, step-by-step methods for every cut type, plus pro tips to avoid common mistakes.
What Is 2-Inch Foam Insulation Board?
Before cutting, it helps to know which type of board you’re working with, as density and surface texture vary by material:
- Extruded Polystyrene (XPS): The most common 2-inch board for below-grade applications (basement walls, under slabs), XPS is dense, moisture-resistant, and has a smooth outer skin, typically sold in pink or blue. It requires sharper blades and more cutting passes than softer foam types.
- Expanded Polystyrene (EPS): Lightweight and affordable, EPS is used for above-grade sheathing and underlayment, with a white, textured surface. It cuts easily with minimal pressure, making it ideal for craft and DIY projects.
- Polyisocyanurate (Polyiso): The highest R-value per inch of the three types, polyiso is often foil-faced and used for exterior sheathing and roofs. It is slightly more flexible than XPS, and its laminated facing requires a sharp blade to avoid tearing.
Benefits of 2-Inch Foam Insulation
2-inch foam boards are a popular insulation choice for good reason:
- High thermal performance: 2-inch boards deliver R-values between 8 and 12, significantly reducing heating and cooling costs compared to uninsulated framing.
- Moisture resistance: XPS and closed-cell EPS are water-resistant, preventing mold growth behind basement walls and in damp crawl spaces.
- Lightweight and low-irritation: Unlike fiberglass batts, foam boards do not shed irritating fibers, making them safe to handle with minimal protective gear.
- Sound dampening: The dense structure of foam boards reduces sound transmission through walls and floors, a bonus for shared walls and home theaters.
- Versatility: Beyond wall insulation, 2-inch foam works for under-floor insulation, insulated cooler builds, and as a substrate for tile and flooring in moist areas.
Essential Tools for Clean, Precise Cuts
You don’t need expensive equipment to cut 2-inch foam board accurately. These tools will get the job done:
- Heavy-duty utility knife: Choose a retractable model with an 18mm or 25mm replaceable blade. Dull blades cause ragged edges, so replace the blade after 3–4 cuts for consistent results.
- Sturdy straight edge: A 48-inch aluminum carpenter’s square or metal straight edge works far better than a flimsy plastic ruler, as it will not bend when you apply pressure during cutting.
- Marking tool: Use a fine-tip carpenter’s pencil or permanent marker to mark cut lines; regular pencils smudge easily on foam surfaces.
- Cutting surface: A self-healing cutting mat (minimum 18×24 inches) or scrap 1/2-inch plywood protects your workbench from damage and dulls your blade less than harder surfaces like concrete or metal.
- Tape measure: A 25-foot locking tape measure ensures accurate measurements for long cuts along 4×8 foot foam sheets.
- Safety gear: Cut-resistant leather or nitrile-coated gloves, safety glasses with side shields, and a NIOSH-approved dust mask (for large projects) protect against cuts, eye irritation, and fine foam dust.
- Optional tools: A hot wire foam cutter for perfectly smooth edges, a fine-tooth hand saw for curved cuts, or an oscillating multi-tool with a foam cutting blade for tight spaces and notches.
For soft foam core board used in crafting and signage, the same utility knife and straight edge technique works for straight cuts; learn more in our guide to precision cuts for foam core.
Step-by-Step Guide to Straight Cuts
Follow these steps for clean, accurate straight cuts every time, no special tools required:
- Measure and mark accurately: Measure your cut line twice with a locking tape measure, then mark the line with a carpenter’s pencil or permanent marker on the smooth side of the board. For multiple identical cuts, snap a chalk line along your mark for perfect straightness. A common mistake is marking too close to the board edge, which causes the straight edge to overhang and shift during cutting.
- Prep your cutting surface: Place the foam board on your self-healing mat or plywood scrap, set on a stable workbench or sawhorses. If the board is curling from humidity, weigh down the corners with scrap wood to keep it flat during cutting. Always cut on a stable surface to avoid slips and uneven cuts.
- Align your straight edge: Place the metal straight edge directly over your marked line, with 1–2 inches of overhang past the end of the cut line to prevent shifting. For long cuts or multiple identical pieces, clamp the straight edge down to eliminate wobble. A common error is holding the straight edge by hand, which leads to uneven cuts as your hand tires.
- Score the foam (first pass): Hold your utility knife at a 30-degree angle, apply firm, even pressure along the straight edge, and make a shallow score line approximately 1/8 inch deep along the full length of your cut. Do not press hard enough to cut all the way through on the first pass, as this causes the blade to wander and create ragged edges. For dense XPS, run the score line 2–3 times before moving to the next step.
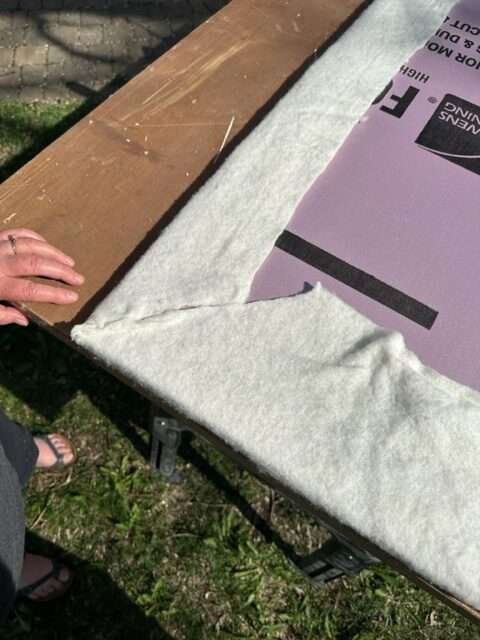
 Scoring a 2-inch XPS foam board with a utility knife and metal straight edge for a straight, clean cut
Credit: www.reddit.com
Scoring a 2-inch XPS foam board with a utility knife and metal straight edge for a straight, clean cut
Credit: www.reddit.com
- Deepen the cut (subsequent passes): Lift the straight edge slightly, then make additional passes along the score line, pressing a little harder each time, until you have cut 90% of the way through the 2-inch thickness. In practice, 3–4 total passes are sufficient for most XPS boards. Once the cut is nearly through, apply gentle downward pressure to the overhanging piece of foam to snap it cleanly along the score line—this avoids the need to cut all the way through, which saves blade life and produces a cleaner edge.
- Clean up the edge: If small ragged edges remain, run the utility knife lightly along the cut to trim them. For perfectly smooth edges, smooth the cut with a 120-grit sanding block. Always cut on a stable, durable surface to protect your workbench; a self-healing cutting mat or scrap plywood works best, and you can extend its lifespan with proper cutting mat care.
 A smooth, straight cut edge on 2-inch XPS foam board after using a multi-pass scoring and snapping technique
Credit: www.finehomebuilding.com
A smooth, straight cut edge on 2-inch XPS foam board after using a multi-pass scoring and snapping technique
Credit: www.finehomebuilding.com
Cutting Angled and Curved Cuts
Straight cuts are the most common, but many projects require angled or curved cuts for rim joists, around pipes, or for custom shapes:
Angled Cuts
For 45-degree miter cuts (common for rim joists and corner installations), use a hand miter box with a utility knife, or a circular saw with a fine-tooth blade (minimum 80 teeth per inch) for faster results. For steeper angles, a hot wire foam cutter produces the cleanest edges, as it melts through the foam without tearing. Always clamp the board securely before cutting angled pieces to avoid movement.
Curved Cuts
To cut curves, first mark the shape with a compass or stencil. For gentle curves in soft EPS, a serrated bread knife works surprisingly well. For tighter curves or dense XPS, use a fine-tooth jigsaw with a foam cutting blade, or an oscillating multi-tool with a foam blade. A sturdy metal straight edge eliminates guesswork for perfectly straight lines for all types of rigid sheet materials, as we cover in our guide to precision sheet material cutting.
Safety Best Practices
Cutting foam insulation is low-risk, but follow these guidelines to avoid injury and damage:
- Foam insulation is combustible, so keep it away from open flames, sparks, and hot wire cutters set to excessively high temperatures.
- Fine foam dust generated during cutting can irritate the respiratory tract, so always wear a NIOSH-approved dust mask for large projects, per OSHA guidance for insulation workers.
- Keep your fingers behind the straight edge at all times, and never reach over the blade while cutting.
- Never cut foam on a surface that can be damaged by the blade; always use a self-healing mat or plywood scrap.
- Dispose of foam scraps responsibly: do not burn foam, as it releases toxic fumes. Check with local recycling centers for rigid foam drop-off locations. For cuts around irregular openings or tight spaces where a straight edge won’t fit, the same scoring technique used for cutting cement backer board translates directly to foam insulation, making quick work of notches for pipes or electrical boxes.
Common Cutting Mistakes to Avoid
Even experienced DIYers run into these issues; avoid them for perfect results every time:
- Ragged, uneven edges: Caused by dull blades, rushing the cut, or skipping the shallow scoring pass. Fix: Replace your utility knife blade every 3–4 cuts, make multiple shallow passes instead of one deep rushed cut, and always use a sturdy straight edge.
- Wandering cut lines: Caused by holding the straight edge by hand or applying uneven pressure. Fix: Clamp the straight edge down for long cuts, and apply consistent pressure along the entire length of the blade.
- Wasted material from misaligned cuts: Caused by skipping the "measure twice" step. Fix: Measure your cut line from both ends of the board to confirm it is straight and accurate before cutting.
- Blade deflection on dense XPS: Caused by pressing too hard on the first pass. Fix: Use a shallow scoring pass first, then deepen gradually, or use a fine-tooth hand saw for very dense foam boards. If you prefer power tools for large projects, a circular saw with a fine-tooth blade works for straight cuts, using a technique similar to scoring large tile backer board. When installed with tight, precise cuts to eliminate air gaps, 2-inch extruded polystyrene (XPS) foam board delivers strong thermal performance, meeting U.S. Department of Energy recommendations for basement and rim joist insulation in most climate zones.
Frequently Asked Questions
What’s the easiest tool to cut 2-inch foam insulation board?
A sharp utility knife and metal straight edge work for most straight cuts, no special tools needed. For perfectly smooth edges, a hot wire foam cutter is the best option for DIYers, as it melts through the foam for a burr-free finish.
Can I cut 2-inch foam board with a circular saw?
Yes, but only with a fine-tooth blade (minimum 80 teeth per inch) to avoid ragged edges. Set the saw depth to 1/8 inch deeper than the foam thickness to prevent tearout, and cut slowly to avoid melting the foam, especially foil-faced polyiso. Wear a dust mask, as circular saws generate more fine foam dust than hand tools.
How do I get a perfectly smooth cut edge on foam board?
Use a hot wire foam cutter, or make multiple shallow passes with a sharp utility knife, then smooth the edge with 120-grit sandpaper. For mass production of identical pieces, a table saw with a dedicated foam cutting blade gives consistent, smooth results.
Will cutting foam board release harmful fumes?
Modern foam insulation boards (XPS, EPS, polyiso) do not release harmful fumes when cut with hand tools. If you use a hot wire cutter or power saw that generates heat, work in a well-ventilated area to avoid inhaling any minor off-gassing from heated foam.
How do I cut foam board around pipes or outlets?
Mark the outline of the pipe or outlet on the foam, then use a sharp utility knife or oscillating tool with a foam blade to cut out the shape. For round pipes, a hole saw designed for foam works well for clean, round cuts.
Conclusion
Mastering how to cut 2-inch foam insulation board precisely will save you money on material waste, improve your home’s energy efficiency, and make insulation installation far less frustrating. The key to clean cuts is using a sharp blade, a sturdy straight edge, and multiple shallow passes instead of one deep, rushed cut. When installed with tight, gap-free fits, 2-inch foam boards deliver maximum R-value, reducing your long-term energy costs and improving indoor comfort. Scrap foam pieces can also be repurposed for craft projects or dropped off at local recycling centers that accept rigid foam; for more sustainable home project ideas, check out our eco-friendly kitchen guides. For more DIY home improvement guides and tool tips, browse our full library of home project tutorials to tackle your next renovation with confidence.

I’m Abby Lu, a passionate home cook who loves simplifying everyday meals. At PlugChef.com, I share product reviews and cooking guides to help you find the best tools for your kitchen.
Related posts:
 Mccormick Spice Rack With Spices Included: Ultimate Flavor Boost
 Under Sink Mat With Holes for Pipes: Ultimate Protection
 How to Cook Pan Squash: Easy, Delicious Recipes to Try Today
 Yogurt Instead of Sour Cream: Healthy Swaps You’ll Love
 How to Store Wild Mushrooms: Essential Tips for Freshness
 Stewed Black Eyed Peas Recipe: Delicious, Easy & Nutritious Guide

