
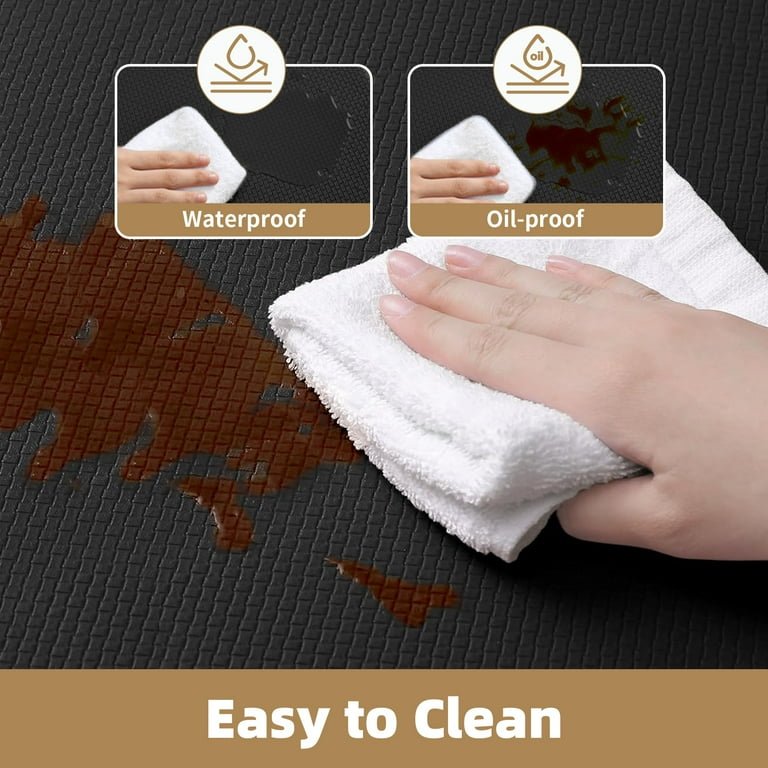
Your kitchen mat works hard every day, catching spills, crumbs, and dirt. But when was the last time you gave it a good clean?
A dirty kitchen mat can not only look unpleasant but also harbor bacteria and odors that affect your kitchen’s freshness. You might think cleaning it is a hassle, but with the right tips, it can be quick and easy. Keep reading to discover simple, effective ways to clean your kitchen mats and keep your cooking space fresh and inviting.
Choosing The Right Cleaning Method
Choosing the right cleaning method for your kitchen mats is crucial to maintain their appearance and durability. Not all mats respond well to the same cleaning techniques, so understanding the material and care instructions can save you time and frustration. Let’s look at how to identify the best approach based on what your mat is made of and how it’s designed.
Materials And Care Labels
Start by checking the care label on your kitchen mat. It often provides specific instructions that protect the fabric or rubber backing. Ignoring these details can lead to damage like fading, shrinking, or peeling.
Common materials include:
- Rubber:Usually requires gentle hand washing or spot cleaning to avoid cracking.
- Foam:Needs mild detergents and air drying to maintain cushioning.
- Fabric or microfiber:Often machine washable but avoid high heat in drying to prevent shrinking.
Have you ever thrown a mat in the washer only to find it misshapen afterward? That often happens because the care label was overlooked.
Types Of Kitchen Mats
Different types of mats serve different purposes, and this affects how you should clean them. For example, anti-fatigue mats are designed with layers and special materials to reduce strain.
| Type of Mat | Cleaning Considerations | Best Cleaning Method |
|---|---|---|
| Anti-fatigue mats | Thick foam layers, rubber base | Wipe with a damp cloth or gentle hand wash; avoid soaking |
| Rubber mats | Durable but can crack if harsh chemicals used | Use mild soap and water; air dry |
| Fabric mats | Absorbent, may hold odors | Machine wash on gentle cycle; air dry or tumble dry low |
| Microfiber mats | Soft, quick-drying | Machine wash; avoid fabric softeners |
Knowing your mat’s type helps you avoid mistakes. For example, I once washed a foam anti-fatigue mat in the machine, only to find it flattened and useless. That taught me to spot clean or hand wash thicker mats instead.
What kind of kitchen mat do you have? Understanding its unique needs can make cleaning easier and extend its life.
Preparing The Mats For Cleaning
Preparing kitchen mats for cleaning is an important first step. It removes loose dirt and debris that can make washing harder. Proper preparation helps keep the mats in good shape and cleans them better.
Shaking Off Debris
Take the mat outside. Hold it firmly and shake it well. This removes crumbs, dust, and small particles. You can also beat the mat against a hard surface. This helps loosen stubborn dirt trapped inside the fibers.
Vacuuming For Dust And Dirt
Use a vacuum cleaner to remove fine dust and dirt. Run the vacuum over both sides of the mat. This picks up particles that shaking missed. Vacuuming ensures the mat is as clean as possible before washing.
Hand Washing Kitchen Mats
Cleaning kitchen mats by hand keeps them fresh and safe. Use mild soap and warm water, then scrub gently to remove dirt. Rinse well and let the mat air dry completely before placing it back.
Cleaning kitchen mats by hand can extend their lifespan. Hand washing keeps them fresh and hygienic. It also allows you to focus on stubborn stains. Follow these simple steps to make your kitchen mats look new again.Selecting The Best Detergent
Choose a mild detergent for cleaning kitchen mats. Harsh chemicals can damage the mat’s material. Opt for a detergent that’s safe for fabrics. Check the label for instructions. A gentle detergent will protect colors and textures. This ensures your mats remain vibrant and durable.Scrubbing Techniques
Use a soft-bristled brush for scrubbing. This prevents damage to the mat’s surface. Apply the detergent evenly over the mat. Gently scrub in circular motions. Focus on areas with tough stains. Avoid using too much pressure. This method is effective yet gentle on the mat.Rinsing Thoroughly
Rinse the mat with clean water. Ensure all detergent is removed. Leftover soap can attract dirt. Use a hose or showerhead for a thorough rinse. Check for any remaining soap suds. Repeat rinsing if necessary. Proper rinsing keeps mats fresh and clean.
Credit: www.amazon.ca
Machine Washing Tips
Machine washing your kitchen mats can save you time and effort, but doing it right is crucial to maintain their durability and appearance. Choosing the proper settings and handling can prevent damage and ensure your mats come out fresh and clean. Let’s dive into some essential tips that will help you get the best results from your washing machine.
Setting The Right Cycle
Select a gentle or delicate cycle on your washing machine. This setting uses slower spin speeds and less agitation, which protects the mat’s backing and fibers from wearing out quickly.
Use cold or lukewarm water to avoid shrinking or fading the mat’s colors. Have you noticed how some mats get stiffer or rough after hot water washes? This simple change can keep them soft and flexible for longer.
Using Laundry Bags
Placing your kitchen mat inside a laundry bag before washing reduces friction with other clothes or the machine drum. This prevents fraying edges and protects any rubber or non-slip backing.
Make sure the bag is large enough so the mat isn’t tightly crumpled, allowing water and detergent to circulate freely. Have you ever found your mat tangled or misshapen after washing? Laundry bags can solve that problem effectively.
Drying Methods
Avoid putting your kitchen mat in the dryer. The heat can damage the rubber backing and cause the mat to shrink or warp.
Instead, air dry the mat flat or hang it over a railing. This keeps the shape intact and helps the mat dry evenly without curling or cracking.
If you’re in a hurry, placing it near a fan or in a well-ventilated area speeds up drying without risking damage. How often do you check that your mats are fully dry before putting them back in the kitchen? Moist mats can trap dirt and odors quickly.
Dealing With Stubborn Stains
Stubborn stains on kitchen mats can be frustrating and often resist quick fixes. These spots might come from dropped sauces, oil splashes, or even dried food particles. Tackling them effectively requires a bit more than just regular cleaning, but the good news is that you can handle these stains with simple, accessible ingredients and smart techniques.
Homemade Cleaning Solutions
You don’t need expensive cleaners to get those tough stains out of your kitchen mat. Common household items like baking soda, vinegar, and dish soap can work wonders.
- Baking soda paste:Mix baking soda with a little water to create a thick paste. Apply it directly to the stain and let it sit for 15-20 minutes before scrubbing gently with a soft brush.
- Vinegar spray:Combine equal parts white vinegar and water in a spray bottle. Spray the stain, let it soak for 10 minutes, then blot with a clean cloth.
- Dish soap mixture:Add a few drops of dish soap to warm water. Use a sponge to dab the solution onto the stain, then rinse thoroughly.
These ingredients are safe, eco-friendly, and often already in your kitchen. Have you ever tried mixing your own cleaner? You might be surprised how effective and budget-friendly it can be.
Stain Removal Tricks
Sometimes, the key to removing stubborn stains lies in the technique rather than the cleaning agent. Start by blotting the stain instead of rubbing it. Rubbing can push the stain deeper into the mat’s fibers.
- Use cold water first:Cold water prevents the stain from setting, especially with protein-based stains like eggs or dairy.
- Scrub gently:Use a soft-bristle brush or an old toothbrush to avoid damaging the mat while lifting the stain.
- Dry thoroughly:After cleaning, air dry your mat completely to prevent mold or mildew buildup.
One time, I tried scrubbing a coffee stain with hot water right away, and it only made it worse. Switching to cold water and gentle blotting saved the day. What’s your go-to trick for stubborn stains? Maybe it’s time to test a new approach.

Credit: www.vmathome.com
Drying And Maintaining Kitchen Mats
Drying and maintaining kitchen mats is essential to keep them fresh and long-lasting. Proper drying stops moisture buildup, which can cause damage. Regular care prevents dirt and smells from settling deep into the mat fibers. This section explains how to dry mats effectively and maintain them for daily use.
Air Drying Vs. Machine Drying
Air drying is gentle and safe for most kitchen mats. Hang the mat outside or in a well-ventilated room. Avoid direct sunlight for long periods, as it may fade colors or weaken fibers. Air drying keeps mats intact and prevents shrinkage.
Machine drying can be faster but may harm some materials. Check the mat’s care label before using a dryer. Use a low heat or delicate setting to avoid damage. Overheating can cause mats to lose shape or develop cracks.
Preventing Mold And Odors
Keep kitchen mats dry to stop mold growth. After cleaning, dry mats completely before placing them back on the floor. Store mats in a dry area if not in use for long periods.
Use baking soda to absorb odors. Sprinkle it on the mat, let it sit for 15 minutes, then vacuum or shake it off. Regularly clean mats to prevent dirt buildup, which leads to bad smells.
Regular Care For Longevity
Regular care keeps kitchen mats clean and lasting longer. Dirt and spills can wear mats out fast. Simple daily habits help maintain their quality and appearance. Taking time to care for your mats avoids costly replacements.
Daily Cleaning Habits
Start by shaking out your kitchen mat every day. This removes crumbs, dust, and small debris. Wipe the surface with a damp cloth to catch sticky spots. For tougher stains, use mild soap and water.
- Vacuum mats regularly to remove embedded dirt.
- Allow mats to dry completely to prevent mold.
- Rotate mats to distribute wear evenly.
Keeping mats dry and clean prevents odors and damage. These small steps extend their lifespan and keep your kitchen fresh.
When To Replace Kitchen Mats
Check your mat for signs of wear every few months. Look for thinning, tears, or stubborn stains that won’t come out. Mats that slip often or lose cushioning can cause accidents.
Replace mats if they:
- Have holes or large worn areas.
- Do not grip the floor well anymore.
- Smell bad despite cleaning.
Changing mats at the right time keeps your kitchen safe and comfortable. Fresh mats improve hygiene and support your feet better.

Credit: www.youtube.com
Frequently Asked Questions
How Often Should I Clean Kitchen Mats?
Clean kitchen mats at least once a week to remove dirt and bacteria. Frequent cleaning maintains hygiene and extends mat life.
What Is The Best Cleaning Method For Kitchen Mats?
Vacuum first, then scrub with warm soapy water. Rinse and air dry completely to prevent mold.
Can I Machine Wash Kitchen Mats?
Check the label first. Many fabric mats are machine washable on gentle cycles with mild detergent.
How Do I Remove Tough Stains From Kitchen Mats?
Use a baking soda paste or vinegar solution. Apply, scrub gently, rinse, and dry thoroughly for best results.
Conclusion
Cleaning kitchen mats keeps your cooking space fresh and safe. Regular washing removes dirt, spills, and germs easily. Dry mats fully to avoid mold and bad smells. Simple care extends the mat’s life and comfort. A clean mat helps prevent slips and stains too.
Keep your kitchen neat with these easy steps. Small efforts make a big difference every day. Your kitchen will look better and feel cleaner. Try these tips and enjoy a fresher home space.

Hi, I’m Daniel Brooks—a food lover and kitchen gear enthusiast. I enjoy testing cookware, utensils, and gadgets to see what really works in everyday cooking. At PlugChef.com, I share honest reviews, comparisons, and simple guides to help you choose the best tools for a safer, smarter, and more enjoyable kitchen.
Related posts:
 What Type of Cooking Utensils are Safe: Expert Picks
 What Innovations Could Blenders Make: Unleashing Future Tech
 Smart Strategies to Organize a Small Kitchen: Maximize Space
 How to Organize a Kitchen Cabinet: Expert Tips & Tricks
 How to Organize Kitchen Drawers: Expert Tips and Tricks
 How to Organize a Corner Kitchen Cupboard: Expert Tips

