

There’s no better way to elevate a casual game day spread, holiday appetizer platter, or last-minute weeknight snack than a batch of homemade hot pepper jelly dip. Unlike store-bought versions loaded with preservatives and muted, waxy textures, this recipe delivers a bright, balanced sweet-heat flavor in 30 minutes or less, with no fancy equipment or canning experience required. You can customize the heat level, sweetness, and add-ins to match any taste preference, making it a versatile staple for every kitchen. Below, you’ll find a detailed, tested recipe, pro tips for perfect texture, and creative ways to serve and adapt the dip for any occasion.
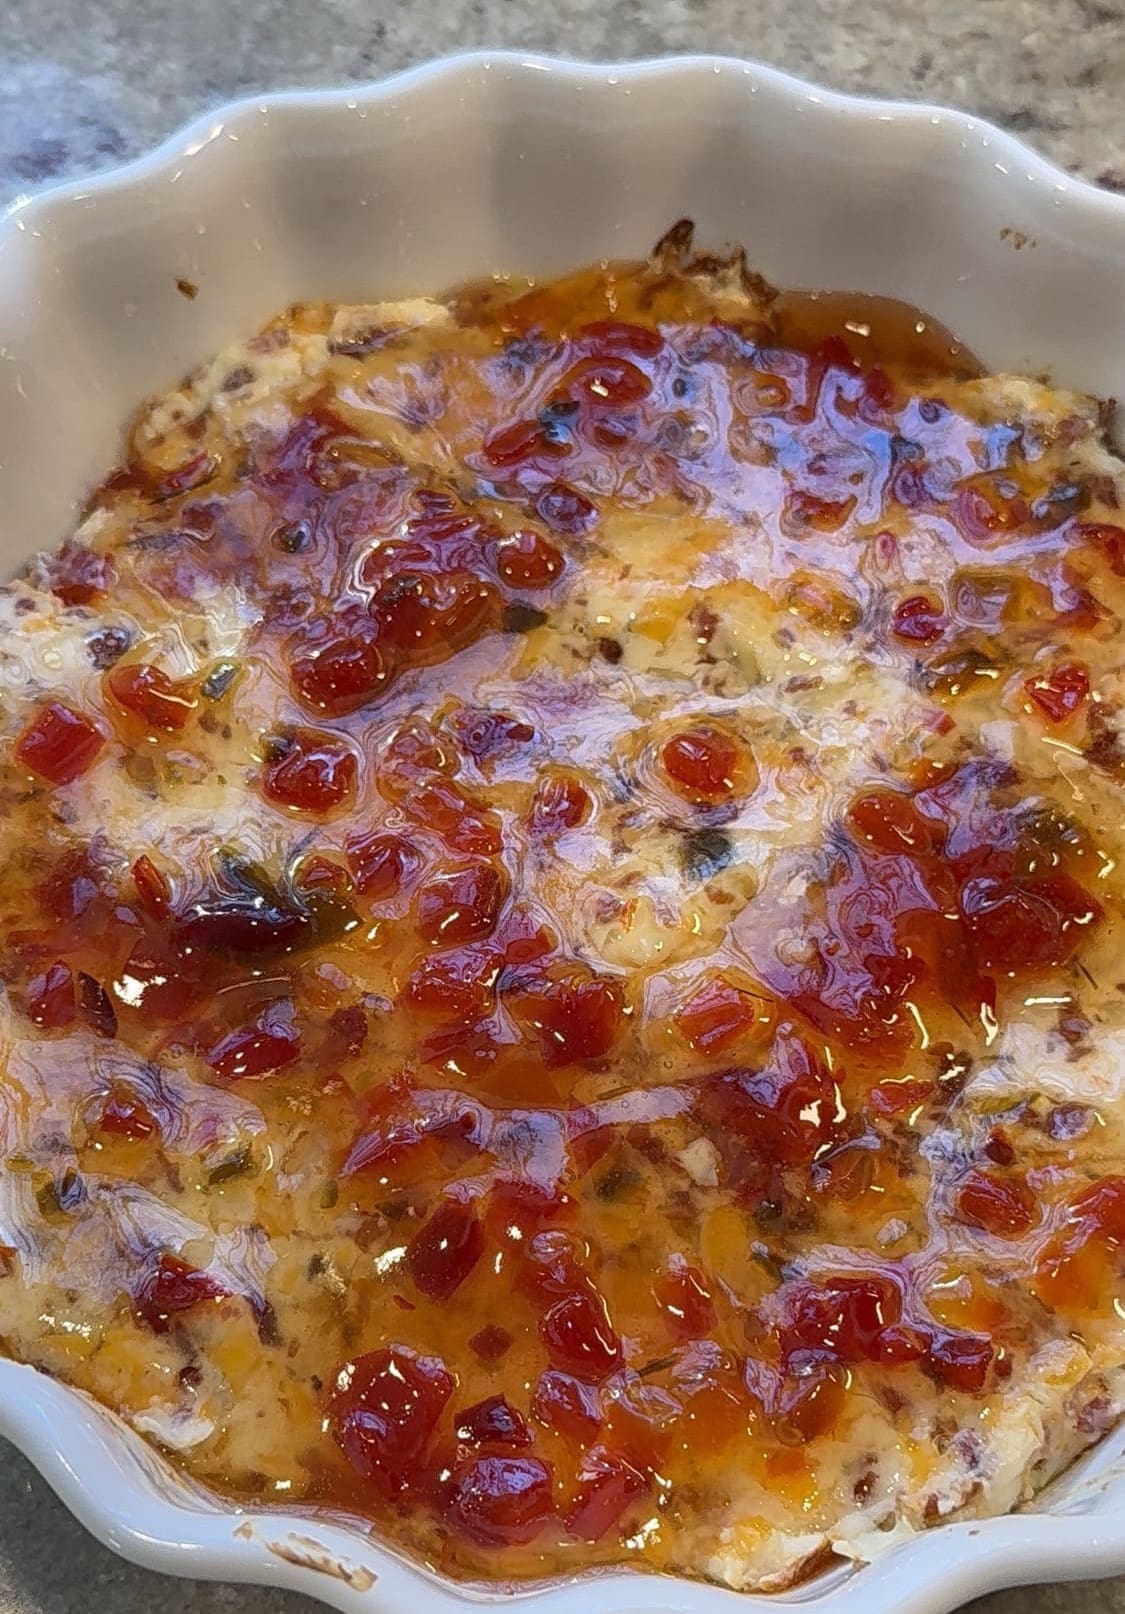 A vibrant, glossy hot pepper jelly dip ready for serving with crispy tortilla chips.
Credit: aldentediva.com
A vibrant, glossy hot pepper jelly dip ready for serving with crispy tortilla chips.
Credit: aldentediva.com
Why This Homemade Hot Pepper Jelly Dip Beats Store-Bought Every Time
Store-bought pepper jelly dips often rely on artificial preservatives, excessive added sugars, and low-quality peppers that lack fresh, vibrant heat. This homemade version uses fresh, peak-season peppers for bright, complex flavor, real fruit pectin for a smooth, glossy set, and lets you control every element of the taste profile to match your preferences. It’s also far more cost-effective for frequent entertainers: a single batch that yields 2 cups of dip costs roughly 60% less than premium store-bought versions, and you can easily scale the recipe up for crowds of any size. For home gardeners with extra pepper harvests or stone fruit on hand, this recipe is also a perfect way to use up surplus produce.
Core Ingredients (With Pro Tips for Each)
Each component of this recipe plays a specific role in balancing heat, sweetness, and texture, so small adjustments to ingredients will drastically change the final result. Below is a breakdown of what you’ll need, plus expert tips for choosing the best options.
Fresh Hot Peppers
The star of the dip, and the primary driver of its heat and fresh, vegetal flavor. Choose peppers based on your preferred Scoville Heat Unit (SHU) range:
- Mild (1,000–5,000 SHU): Jalapeños, poblanos, or anaheim peppers, ideal for kid-friendly batches or palates that prefer gentle heat
- Medium (5,000–30,000 SHU): Serranos or Fresno peppers, for a noticeable but balanced kick that pairs well with sweet jelly bases
- Hot (30,000+ SHU): Habaneros, scotch bonnets, or ghost peppers, for a bold, lingering heat that stands up to rich, creamy add-ins Pro tip: A common mistake is assuming all peppers of the same variety have identical heat levels — peppers grown in hotter, sunnier conditions often have 2–3x the SHU of those grown in cooler climates. Always taste a small piece of your chopped pepper before adding it to the batch to gauge its intensity. Wear food-safe gloves when handling hot peppers, and avoid touching your eyes or face during prep to avoid irritation.
Jelly & Sweetener Base
The sweet component balances the pepper’s heat and provides the glossy, spreadable texture. Opt for neutral or lightly fruity jelly varieties that won’t compete with the pepper flavor:
- Best store-bought options: Grape, apricot, peach, or red currant jelly, all of which have mild sweetness that complements pepper flavor without overpowering it
- Sweetener adjustments: If using unsweetened fruit puree or low-sugar jelly, add ¼ cup of granulated sugar, honey, or maple syrup to balance heat and help the pectin set properly. Brown sugar adds a subtle caramel note that pairs exceptionally well with habanero or scotch bonnet peppers. Pro tip: Avoid citrus-forward jellies (like orange or lime) unless you’re making a specific tropical variation, as their high acidity can throw off the sweet-spice balance of the base recipe.
Gelling Agent
Most hot pepper jelly recipes call for fruit pectin, a natural thickening agent derived from citrus fruits that creates a firm, spoonable set. You can use either regular or low-sugar pectin, but note that low-sugar pectin requires less added sugar to set properly — check package instructions for exact ratios to avoid a runny or gummy texture. If you don’t have pectin on hand, you can simmer the mixture with 1 cup of finely chopped, peeled apples (which are high in natural pectin) for 10 minutes to thicken it naturally, though this will add a subtle apple flavor to the dip. Pectin is recognized as a safe food additive by the Food and Drug Administration for home use, with no required restrictions for typical recipe amounts.
Optional Flavor Enhancers
These add-ins let you customize the dip to match your serving needs:
- 4 oz softened cream cheese, goat cheese, or vegan cream cheese per 2 cups of dip, for a creamy, cooling twist
- 1–2 cloves minced garlic, 1 teaspoon grated ginger, or 2 tablespoons finely diced red onion, for a savory depth
- 2 tablespoons chopped fresh cilantro, basil, or chives, for a bright, herbal note
- A pinch of kosher salt, smoked paprika, or crushed red pepper flakes, to amplify existing flavors
Step-by-Step Preparation (30 Minutes Total)
This recipe comes together quickly, but following each step carefully will ensure the perfect set and flavor balance.
Step 1: Prep the Peppers
Wash all fresh peppers thoroughly under cold running water, then remove stems, seeds, and white pith (if you prefer milder heat). Chop peppers into ¼-inch pieces for even distribution of heat and flavor. Always wear food-safe gloves during this step, and wash your cutting board and knife immediately after use to avoid transferring pepper oil to other foods. If you’re using multiple pepper varieties, chop them separately first to taste and adjust the heat ratio before combining. Prep your peppers on a personalized kitchen prep tool for a fun, custom touch to your cooking routine.
Step 2: Combine Base Ingredients
In a large, heavy-bottomed saucepan (to prevent scorching), combine your chosen jelly, granulated sugar, pectin, and any acidic add-ins (like lemon juice or apple cider vinegar). Stir thoroughly to dissolve the pectin and sugar completely — undissolved pectin will cause uneven gelling, leading to a lumpy texture. A common mistake is adding the peppers too early, which can cause the pectin to break down before the mixture thickens properly.
Step 3: Cook the Jelly Mixture
Bring the mixture to a rolling boil over medium heat, stirring constantly to prevent burning. Once boiling, add your chopped peppers and any optional savory add-ins (garlic, onion, etc.), then return to a rolling boil and cook for 1–2 minutes, stirring continuously. You’ll know the mixture is ready when it thickens slightly and coats the back of a spoon. Do not walk away from the stove during this step — sugar mixtures can scorch quickly, leading to a burnt, bitter flavor that can’t be fixed.
Step 4: Cool and Store
Remove the saucepan from heat and let the mixture cool for 5 minutes, stirring occasionally to prevent a skin from forming on top. Pour the warm jelly into clean, airtight glass jars or containers, leaving ¼ inch of headspace at the top if you plan to freeze it. Seal tightly and let cool completely to room temperature before transferring to the refrigerator to set fully (this takes 2–3 hours). For long-term storage, label containers with the date before freezing. Scrub out your saucepan with heavy-duty scrub brushes to remove sticky sugar residue easily after cooking.
Pro Tips for Perfect Texture & Flavor Every Time
Getting the texture and flavor balance right is easier than you think with these tested, experience-backed tips.
Avoid Runny or Gummy Texture
The most common issue home cooks face with pepper jelly dip is inconsistent set. To avoid this:
- Measure pectin and sugar exactly: Pectin relies on a precise sugar-to-acid ratio to gel properly, so deviating from the recipe amounts will throw off the set entirely
- Stir constantly while heating: Undissolved pectin or sugar crystals will create lumpy, uneven texture
- Test for doneness: Drop a small spoonful of the hot mixture onto a cold plate — if it wrinkles when you push it with your finger, it’s ready to cool If your dip is too runny after setting, you can reheat it and simmer for an extra 1–2 minutes to reduce excess liquid, then cool again.
Prevent Sugar Crystallization
Gritty, crystallized sugar is a common frustration with sweet jelly dips. To avoid this:
- Do not stir the mixture once it reaches a full rolling boil, as agitation encourages sugar crystals to form
- Add ½ teaspoon of cream of tartar or extra lemon juice per batch to break down sugar molecules and prevent crystallization
- Use refined white sugar instead of raw or turbinado sugar, which has higher molasses content that’s more prone to crystallizing
Adjust Heat & Sweetness to Taste
The best part of homemade dip is customizing it to your preference:
- For milder heat: Use poblano or anaheim peppers, remove all seeds and pith, and add an extra ¼ cup of jelly or sugar
- For extra heat: Leave the seeds and pith in hot peppers, or add a dash of hot sauce or crushed red pepper flakes after cooking
- For less sweetness: Use low-sugar pectin, reduce added sugar by 25%, and opt for tart jelly varieties like red currant or crabapple Store the sealed dip on a high fridge shelf, or use child-safe storage options for lower shelves to keep spicy treats out of reach of little ones.
Serving Ideas for Every Occasion
This versatile dip works for everything from casual weeknight snacks to formal party platters. Below are our top tested pairings:
| Pairing Type | Specific Options | Flavor Profile |
|---|---|---|
| Crunchy Snacks | Tortilla chips, pita chips, pretzel rods, celery, carrot sticks | Salty crunch balances sweet heat |
| Creamy Bases | Softened cream cheese, goat cheese, brie, whipped feta | Cool, rich cream tames spicy kick |
| Protein Pairings | Grilled chicken wings, pork tenderloin, smoked salmon, hard-boiled eggs | Savory proteins make the dip a meal component |
| Charcuterie Board Add-In | Sliced cured salami, prosciutto, aged cheddar, round cheese wedges | Elevates store-bought or homemade charcuterie spreads |
| Pair with uniform cheese slices for a polished party platter. |
As a Marinade or Glaze
The sweet-spicy balance of pepper jelly dip makes it an exceptional marinade for grilled meats. Brush it over chicken wings, pork chops, or salmon during the last 5 minutes of grilling to let the sugars caramelize into a glossy, flavorful crust. For a vegan option, use it as a glaze for roasted cauliflower or tofu.
In Sandwich & Wrap Spreads
Swap out mayo or mustard for a spoonful of pepper jelly dip in grilled cheese sandwiches, turkey wraps, or burgers for a sweet, spicy kick. It pairs especially well with sharp cheddar or pepper jack cheese.
As a Salad Dressing Base
Thin the dip with a splash of olive oil and apple cider vinegar to create a quick, zesty salad dressing that works perfectly with bitter greens like arugula or kale. Scrub carrots and celery with produce scrub brushes to remove dirt before slicing for serving.
 Cream cheese swirled into spicy jelly dip creates a cool, creamy contrast for crackers.
Credit: nodashofgluten.com
Cream cheese swirled into spicy jelly dip creates a cool, creamy contrast for crackers.
Credit: nodashofgluten.com
Easy Custom Variations to Try
Once you master the base recipe, try these tested variations to switch up the flavor profile:
Creamy Pepper Jelly Dip
For a spreadable, party-ready dip, mix 4 oz of softened full-fat cream cheese per 2 cups of finished pepper jelly dip until smooth. Top with chopped chives or a sprinkle of crushed red pepper for extra visual appeal. This version works perfectly as a cracker spread or veggie dip, and stays fresh in the refrigerator for 5–7 days.
Tropical Pepper Jelly Dip
Add ½ cup of finely diced pineapple or mango to the jelly mixture during the last minute of cooking for a bright, tropical twist. This pairs especially well with habanero peppers for a sweet, fruity heat that’s perfect for summer cookouts.
Smoked Pepper Jelly Dip
Use 1 teaspoon of smoked paprika or a splash of liquid smoke in the mixture, and swap in 2–3 minced chipotle peppers in adobo for a deep, smoky flavor that’s perfect for pairing with grilled meats or loaded nachos.
Vegan Pepper Jelly Dip
Use 1 teaspoon of agar-agar instead of pectin as a gelling agent, and swap honey for maple syrup. Mix with vegan cream cheese for a fully plant-based version that’s just as creamy and flavorful as the dairy-based original.
Storage & Shelf Life Guidelines
Proper storage is key to keeping your pepper jelly dip fresh and safe to eat. Follow these guidelines to avoid spoilage and maintain optimal flavor:
Refrigeration
Store the dip in an airtight glass container in the coldest part of your refrigerator (usually the back of the middle shelf, not the door, where temperatures fluctuate). For dips with added cream cheese, consume within 5–7 days. For plain jelly dip (no dairy add-ins), it will stay fresh for 2–3 weeks. Always check for signs of spoilage before serving: mold growth, off smells, or fizzy bubbles are all signs the dip has gone bad and should be discarded. For official home food storage guidance, refer to USDA food safety recommendations.
Freezing
Plain pepper jelly dip (no dairy) freezes exceptionally well for up to 3 months. Use freezer-safe glass jars or heavy-duty freezer bags, leaving ¼ inch of headspace at the top to allow for expansion during freezing. Thaw the dip in the refrigerator overnight, then stir thoroughly to restore its smooth, glossy texture. Avoid thawing at room temperature, as this can cause the pectin to break down and create a runny consistency.
Shelf-Stable Canning (Optional)
If you want to make large batches for gifts or long-term storage, you can process sealed jelly jars in a boiling water bath for 10 minutes to make them shelf-stable for up to 1 year. Follow USDA canning guidelines for safe processing to avoid botulism risk.
 Sealed mason jars keep homemade pepper jelly dip fresh in the refrigerator for up to 3 weeks.
Credit: thermocookery.com
Sealed mason jars keep homemade pepper jelly dip fresh in the refrigerator for up to 3 weeks.
Credit: thermocookery.com
Frequently Asked Questions
Can I use pre-made jelly instead of making the jelly base from scratch?
Absolutely. Store-bought grape, apricot, or peach jelly works perfectly for this recipe, and cuts down on prep time by 10 minutes. Just be sure to choose a variety with no added artificial flavors or preservatives for the best flavor.
What’s the best way to adjust the heat level for a crowd with mixed preferences?
For a crowd-friendly mild version, use only poblano peppers, remove all seeds and pith, and add an extra ¼ cup of jelly to mellow the heat. For spice lovers, leave the seeds in serrano or habanero peppers, or add a dash of hot sauce to the finished dip. You can also make a half-batch mild and half-batch hot to cater to all preferences.
Is this dip safe for people with dietary restrictions?
The base recipe is gluten-free, vegan (if you use maple syrup instead of honey and agar-agar instead of pectin), and nut-free. If you add dairy (cream cheese, goat cheese), it’s suitable for vegetarians but not vegans. Always label the dip with ingredients if serving to guests with allergies.
Can I make this dip ahead of time for a party?
Yes! The dip actually tastes better after the flavors have had time to meld, so you can make it 1–3 days in advance and store it in the refrigerator. Give it a good stir before serving to restore its smooth texture.
My pepper jelly dip turned out too runny — can I fix it?
Yes. Reheat the dip over medium heat, stirring constantly, and simmer for an extra 1–2 minutes to reduce excess liquid. If it’s still runny, mix 1 teaspoon of cornstarch with 1 tablespoon of cold water to make a slurry, then stir it into the hot dip and simmer for 1 more minute until thickened.
Can I can this dip for long-term shelf storage?
Yes, as long as you follow safe canning guidelines. Process sealed jelly jars in a boiling water bath for 10 minutes, and adjust processing time if you live at high altitude (add 5 minutes for altitudes between 1,001–6,000 feet, 10 minutes for 6,001+ feet). Always follow USDA canning safety rules to avoid foodborne illness risk.
Conclusion
This hot pepper jelly dip recipe is the ultimate crowd-pleasing appetizer that comes together in 30 minutes or less, with no fancy equipment or cooking experience required. Its perfect balance of sweet, spicy, and bright flavor makes it versatile enough for game days, holiday parties, casual weeknight snacks, and even charcuterie board spreads. With endless customization options for heat level, sweetness, and add-ins, you can tailor it to match any taste preference, from mild kid-friendly versions to bold, habanero-packed batches for spice lovers.
Don’t wait for your next gathering to try this recipe — whip up a batch today for a quick, flavorful snack that’s guaranteed to disappear fast. Tag us in your homemade dip creations on social media — we’d love to see how you customize it!

I’m Abby Lu, a passionate home cook who loves simplifying everyday meals. At PlugChef.com, I share product reviews and cooking guides to help you find the best tools for your kitchen.
Related posts:
 3 Shelf Hanging Closet Organizer: Maximize Your Space
 Do It Yourself Pantry Organizers: Transform Your Space
 How to Organize a Pantry With Wire Shelves: Expert Tips
 How to Organize Snacks in Pantry: Smart Tips
 How to Clean Drains Outside: Easy Steps for a Clog-Free Yard
 Baking Soda Uses Beyond Cooking: The Ultimate Multi-Purpose Guide

