
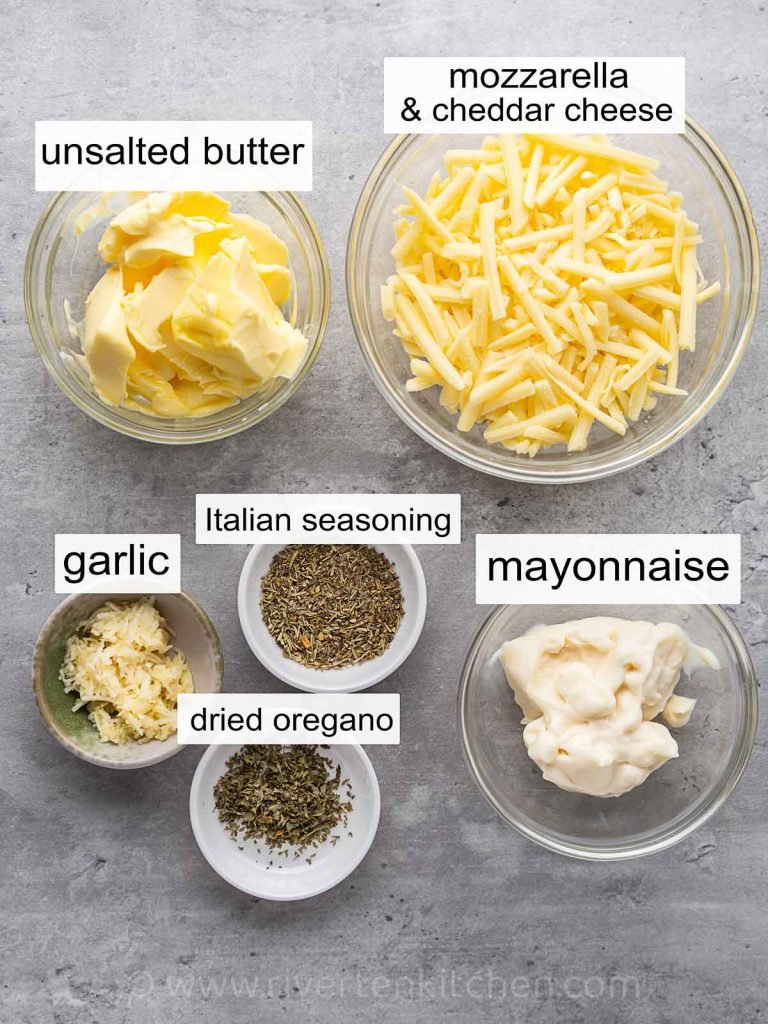
If you’ve ever pulled a batch of butter-based garlic bread out of the oven only to find burnt, bitter edges and a soft, soggy middle, this mayonnaise twist is about to change your life. Far from a substitute for butter, mayo acts as a secret weapon for garlic bread: its high fat content caramelizes evenly for a crisp, golden crust, while its creamy emulsion keeps the bread inside soft and moist, no burnt spots required. Ready in just 20 minutes with minimal prep, this recipe is perfect for weeknight pasta dinners, game day snacks, or as a crowd-pleasing appetizer for your next gathering. We’ll walk you through every step, plus pro tips, variations, and fixes for common mishaps to guarantee perfect results every time.
Why Mayonnaise Works Better Than Butter For Garlic Bread
Traditional butter-based garlic bread is delicious, but it comes with consistent frustrations: butter has a low smoke point, so it burns easily on the edges before the bread inside is fully toasted, and it often leaks out of the bread while baking, leaving soggy, unseasoned spots. Mayonnaise eliminates both of these problems. Its emulsified fat and oil content has a higher smoke point, so it caramelizes evenly across the entire surface of the bread without burning. At the same time, the creamy, stable emulsion stays spread evenly on the bread, so every bite has consistent garlic flavor, and the inside of the bread stays soft and moist even as the edges turn perfectly crisp. In practice, this hack cuts down on baking guesswork and produces far more consistent results than traditional butter recipes, even for novice bakers.
Ingredients
The right ingredients make all the difference for this recipe, with small swaps that can drastically change the final texture and flavor.
Bread Selection
The foundation of great garlic bread is a sturdy, crusty loaf that can hold up to spreading and baking without turning soggy. A classic French baguette is the top choice: its crisp outer crust and soft, airy crumb create a satisfying contrast between crunchy edges and chewy interior. Ciabatta works for a heartier, chewier bite, while day-old sourdough adds a subtle tang that pairs beautifully with garlic. Avoid soft, pre-sliced sandwich bread, as its high moisture content will turn mushy when baked. For pull-apart garlic bread, use a small round loaf and slice it crosswise into 1-inch thick pieces, leaving the slices connected at the bottom. If using fresh bread, slice it 30 minutes before baking and leave it out on the counter to dry slightly; stale bread crisps far better than soft, fresh loaves.
Mayonnaise Options
Full-fat regular mayonnaise is the best choice for crisp, flavorful results, as its high oil content caramelizes perfectly in the oven. If you prefer a lighter option, reduced-fat mayo works, though it may produce a slightly less crisp crust. For a flavor boost, swap regular mayo for garlic-infused mayo, herb mayo, or even olive oil mayo for extra crispiness. Vegan mayo works as a direct substitute for dairy-free or vegan diets, with no change to texture or baking time. Avoid using low-fat or fat-free mayo, as it contains too much water and will make the bread soggy.
Flavor Builders
For the garlic spread, you’ll need:
- ½ cup full-fat mayonnaise
- 4 large fresh garlic cloves, finely minced (avoid pre-minced jarred garlic, which is watery and has a dull, preserved flavor)
- 2 tbsp finely chopped fresh parsley
- 1 tsp garlic powder (for a deeper, more rounded garlic flavor)
- ½ tsp fine sea salt
- ¼ tsp freshly ground black pepper
- ¼ cup grated parmesan cheese (optional, for a cheesy, umami boost)
- Pinch of red pepper flakes (optional, for heat)
- 1 tsp fresh lemon juice (optional, to brighten the flavors and cut through richness)
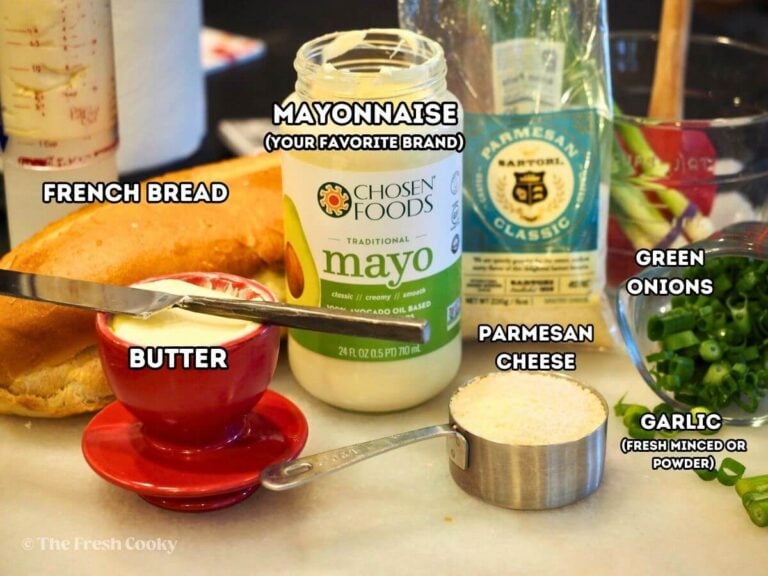 Fresh ingredients prepped and ready to mix for the garlic spread
Image source: www.thefreshcooky.com
Fresh ingredients prepped and ready to mix for the garlic spread
Image source: www.thefreshcooky.com
Step-By-Step Instructions
This recipe comes together in three simple steps, with no special equipment required.
Make The Garlic Spread
In a small bowl, combine the minced garlic, mayonnaise, parsley, garlic powder, salt, pepper, and any optional add-ins (parmesan, red pepper flakes, lemon juice). Stir gently to combine—overmixing can make the spread runny, which leads to soggy bread. Let the spread sit for 10 minutes at room temperature to let the garlic and herb flavors meld. In practice, this resting step makes a noticeable difference in the depth of flavor, so don’t skip it.
Prep The Bread
Preheat your oven to 400°F (200°C) and position the rack in the middle of the oven for even heat circulation. If using a whole baguette, slice it lengthwise or crosswise into ½ to 1-inch thick pieces, depending on how hearty you want your bites. For pull-apart bread, slice crosswise into 1-inch pieces, leaving the bottom crust intact to hold the loaf together. Before spreading, pat the bread lightly with a paper towel if it feels damp to remove excess moisture.
Assemble And Bake
Using a butter knife or the back of a spoon, spread the garlic mixture generously over the cut sides of the bread, making sure to cover every nook and cranny for even flavor in every bite. If making pull-apart bread, spread the mixture between the slices as well as on top. Place the bread on a baking sheet lined with parchment paper or aluminum foil for easy cleanup. Bake for 10 to 12 minutes, until the edges are crisp and golden and the mayo topping is lightly caramelized. For extra crispiness, switch the oven to broil for the last 1 to 2 minutes, watching closely to avoid burning.
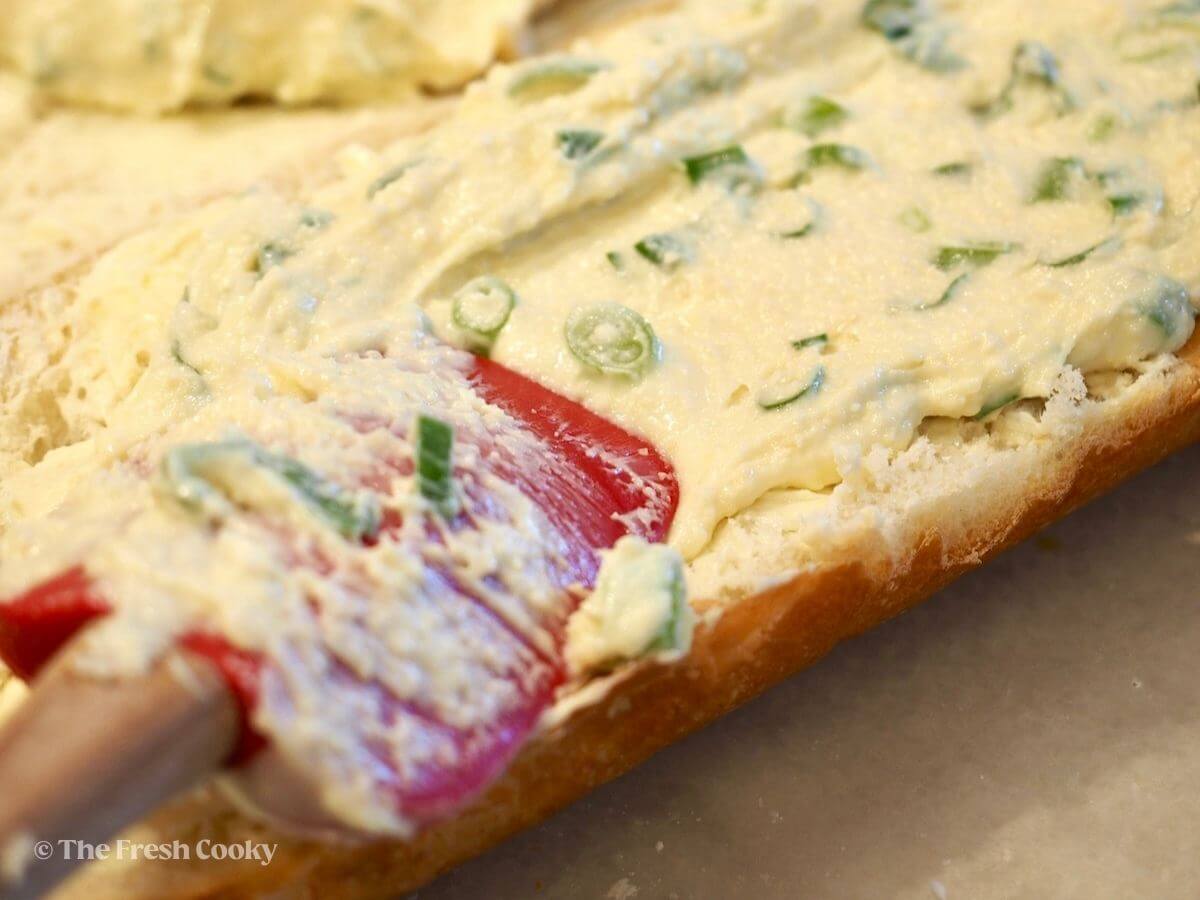 Evenly spreading the mixture ensures every bite is packed with flavor
Image source: www.thefreshcooky.com
Evenly spreading the mixture ensures every bite is packed with flavor
Image source: www.thefreshcooky.com
Pro Tips For Perfect Results
These tested, experience-backed tips will take your garlic bread from good to restaurant-quality every time:
- Toast the bread slices for 2 minutes at 375°F before spreading the mayo mixture for extra crispiness, especially if using fresh, soft bread.
- Mix a pinch of garlic powder into the spread along with fresh garlic for a deeper, more balanced garlic flavor that avoids the sharp, raw bite of fresh garlic alone.
- If you don’t have an oven, make this recipe in a skillet over medium heat: place the bread spread-side up in a non-stick pan, cover with a lid, and cook for 5 to 7 minutes until the topping is warm and the edges are crisp, flipping halfway if desired.
- Let the baked garlic bread cool on a wire rack for 2 minutes before serving; this lets steam escape so the crust stays crisp instead of turning soggy from trapped moisture.
- Before you start mixing, give your cutting board a quick scrub with a Bathroom And Kitchen Cleaning Brush to lift stubborn garlic residue and avoid cross-contamination with other ingredients.
Serving Ideas & Pairings
This garlic bread is incredibly versatile, working as a side dish, appetizer, or even a light meal on its own:
- Serve alongside tomato-based pasta dishes, lasagna, or baked ziti for a classic Italian-inspired meal. The creamy garlic topping cuts through the richness of cheesy pasta sauces perfectly.
- Pair with hearty soups like creamy tomato bisque, minestrone, or clam chowder for a comforting cold-weather meal.
- Add to a charcuterie board alongside cured meats, aged cheeses, olives, and fresh fruit for an easy, shareable appetizer. Use a Dish Washing Brush With Handle to quickly wash serving platters after your gathering.
- Serve with grilled meats, BBQ, or seafood like shrimp scampi for a savory, flavor-packed side.
- Cut into bite-sized pieces and serve with marinara or ranch dip for a party snack.
For garnishes, sprinkle fresh parsley, grated parmesan, crushed red pepper flakes, or a drizzle of balsamic glaze over the top just before serving for an extra pop of flavor and color.
Variations To Try
Customize this recipe to match your taste preferences or dietary needs with these simple swaps:
- Cheesy: Sprinkle ½ cup of shredded mozzarella, cheddar, or a mix of Italian cheeses over the spread before baking. The mayo helps the cheese melt evenly and stick to the bread. For a restaurant-style finish, add the cheese during the last 2 minutes of baking so it bubbles without burning.
- Spicy: Mix 1 tsp of hot sauce, 1 finely chopped jalapeño, or ½ tsp of cayenne pepper into the mayo spread for a creamy, spicy kick. Smoked paprika adds a deep, smoky heat that pairs perfectly with grilled dishes.
- Vegan: Use vegan mayonnaise and nutritional yeast instead of parmesan for a dairy-free version that’s just as flavorful.
- Gluten-free: Use your favorite gluten-free baguette, and follow the same baking instructions for a crispy, gluten-free treat.
- Herb-loaded: Mix 2 tbsp of chopped fresh basil, oregano, or rosemary into the spread for an herby, aromatic twist.
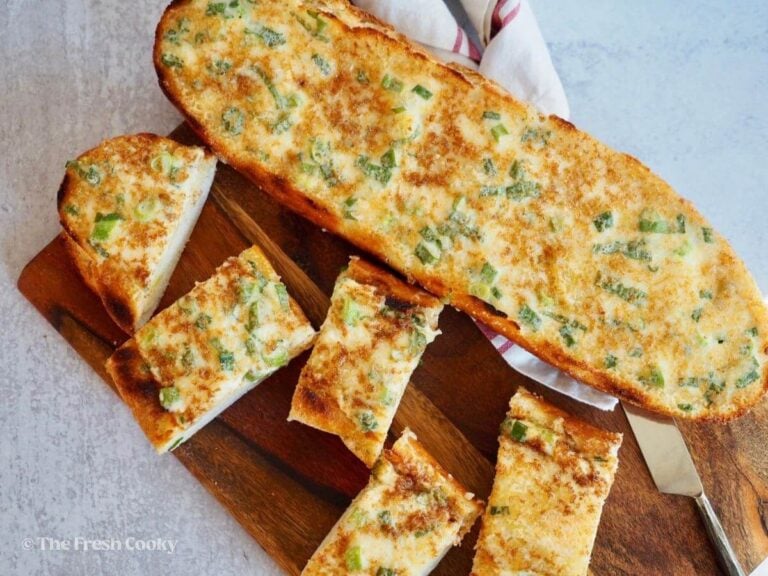 Topped with parmesan and fresh herbs for a restaurant-quality finish
Image source: www.thefreshcooky.com
Topped with parmesan and fresh herbs for a restaurant-quality finish
Image source: www.thefreshcooky.com
Storage & Reheating
Because this recipe uses mayonnaise, proper storage is key to keeping it fresh and safe to eat. Let the garlic bread cool completely to room temperature before storing it—warm bread traps steam, which makes the crust soggy and encourages bacterial growth. Wrap leftover bread tightly in aluminum foil or store it in an airtight container in the refrigerator for up to 3 days. If you need to store it at room temperature, keep it in a bread box or paper bag for no more than 24 hours, especially in warm climates. If you have young children in the home, store leftover garlic bread in a locked cabinet using Child Proof Drawer Locks No Screws to keep snacks out of reach without drilling into your kitchen surfaces.
To reheat, avoid the microwave at all costs: it will make the bread chewy and the mayo greasy. Instead, preheat your oven to 350°F (175°C), wrap the bread loosely in foil, and bake for 8 to 10 minutes until warm and crisp. For a quicker option, use a toaster oven set to 350°F for 5 to 7 minutes, or reheat individual slices in a non-stick skillet over low heat for 2 to 3 minutes per side, covered with a lid to warm the topping through.
Troubleshooting Common Issues
Even with the best instructions, mishaps can happen. Here’s how to fix the most common problems:
- Soggy bread: This is usually caused by using fresh, undried bread, spreading too much mayo mixture, or baking at too low a temperature. Fix it by patting bread dry before spreading, using a thin layer of spread, and increasing your oven temperature by 25°F. You can also broil the bread for the last 1 to 2 minutes to crisp up the edges.
- Burnt topping, soft middle: This happens when the oven is too hot or the bread is placed too close to the heating element. Fix it by moving the rack to the middle of the oven, lowering the temperature by 25°F, and covering the bread loosely with aluminum foil if it’s browning too fast before the inside is crisp.
- Separated spread: If your mayo and garlic mixture looks oily or curdled, you likely overmixed it or used mayo that was too warm. Fix it by stirring gently, and chill the mayo for 10 minutes before mixing if your kitchen is hot. The spread will re-emulsify when baked.
- No crispiness: Thick bread slices, overbaking, or not letting the bread cool before storing can all lead to soft, chewy bread. Fix it by slicing bread ½ to 1 inch thick, baking for only 10 to 12 minutes, and letting it cool on a wire rack before serving or storing.
Frequently Asked Questions
What makes mayonnaise better than butter for garlic bread?
Mayonnaise outperforms butter for garlic bread for two key reasons: its higher smoke point prevents burnt, bitter edges, and its emulsified fat and water content caramelizes evenly to create a crisp, golden crust while keeping the bread inside soft and moist. Unlike butter, which leaks out of the bread while baking, mayo stays evenly spread, so every bite has consistent garlic flavor. Because this recipe uses mayonnaise, which contains raw eggs, follow USDA safe food handling guidelines for mayonnaise-based dishes to keep your spread fresh and safe to eat, especially if serving to young children, pregnant people, or those with compromised immune systems.
Can I use flavored mayonnaise in this recipe?
Absolutely. Garlic mayo, herb mayo, chipotle mayo, or even olive oil mayo all work beautifully, and can reduce the need for extra spices or herbs in the recipe. For a spicy kick, mix chipotle mayo with a pinch of cayenne, or for a herby twist, use basil or rosemary-infused mayo. Vegan mayo works as a direct substitute for dairy-free diets.
How long should I bake garlic bread with mayonnaise?
Bake at 400°F (200°C) for 10 to 12 minutes, until the edges are crisp and golden and the mayo topping is lightly caramelized. If using a convection oven, reduce the temperature to 375°F (190°C) to avoid burning, as convection heat circulates more evenly and cooks faster. For consistent results, follow University of Minnesota Extension’s baking temperature best practices to adjust for your oven’s unique heat distribution.
Is garlic bread with mayonnaise healthier than butter-based garlic bread?
Mayonnaise contains unsaturated fats from plant oils, which can be a heart-healthier alternative to butter’s high saturated fat content when used in moderation. That said, both butter and mayo are calorie-dense, so portion control is key if you’re watching your intake. For a lighter option, use reduced-fat mayo or swap half the mayo for Greek yogurt for extra protein and fewer calories.
Can I make this recipe ahead of time?
Yes, you can assemble the garlic bread up to 24 hours in advance. Spread the mayo mixture on the bread, wrap it tightly in plastic wrap, and store it in the refrigerator. When you’re ready to serve, bake as directed, adding 2 to 3 minutes to the baking time since the bread will be cold. For meal prep, clean up quickly after assembling with a Professional Kitchen Cleaning Brush, which cuts through baked-on mayo and garlic bits on non-stick baking sheets without scratching the coating. If you’re prepping ingredients ahead of time, a quick scrub with a Kitchen Cleaning Scrub Brush is perfect for removing dirt and papery skin from fresh garlic bulbs before peeling.
Final Thoughts
This garlic bread recipe with mayonnaise is the ultimate hack for crispy, flavorful garlic bread that comes together in 20 minutes flat, no special skills required. Whether you’re serving it alongside weeknight pasta, a cozy bowl of soup, or as a party appetizer, the creamy, garlicky spread and perfectly crisp texture will have everyone asking for the recipe. The best part? It’s endlessly customizable to match your taste preferences, from cheesy to spicy to herb-loaded. If you’re prepping multiple batches for a gathering, store individual portions in airtight containers and keep them in a cool, dry pantry secured with Kitchen Safety Locks For Kids to prevent little ones from grabbing snacks without supervision. Ready to test this game-changing twist? Whip up a batch tonight, and let us know how your first turn out in the comments below!

I’m Abby Lu, a passionate home cook who loves simplifying everyday meals. At PlugChef.com, I share product reviews and cooking guides to help you find the best tools for your kitchen.
Related posts:
 How to Make a Fruit Basket for a Gift: Easy DIY Guide
 Do You Need a Basket? Essential Guide for Air Fryers
 How to Adjust Syrup Dispenser Pressure: Expert Tips
 Appliance Play Food Kitchen Toys: Ignite Imaginative Play
 How Long Do Beauty Blenders Last: Expert Tips Unveiled
 Philips Kitchen Appliances Compact Pasta And Noodle Maker: Effortless Homemade Pasta

