
Craving a rich, flavorful meal that melts in your mouth but doesn’t take hours to cook? You’re in the right place.
This Easy Birria Recipe for the Instant Pot brings you the authentic taste of traditional birria without the long wait. Imagine juicy, tender meat infused with bold spices, ready in a fraction of the time. Whether you’re cooking for family, friends, or just yourself, this recipe will make your taste buds dance and have everyone asking for seconds.
Keep reading—your new favorite meal is just a few steps away.
Ingredients For Instant Pot Birria
Preparing birria in an Instant Pot is simple with the right ingredients. Each component builds rich, bold flavors. Knowing what to gather ensures a delicious meal every time.
Ingredients fall into three main groups: meat, spices and herbs, and additional items. Choose carefully to capture the authentic taste of birria.
Meat Selection
- Beef chuck roast – tender and flavorful
- Short ribs – adds richness and depth
- Goat meat – traditional choice for birria
- Mix of beef and goat – for balanced taste
Spices And Herbs
- Dried guajillo chilies – mild heat and sweetness
- Dried ancho chilies – smoky flavor
- Cumin – warm and earthy
- Oregano – herbal and slightly bitter
- Bay leaves – subtle aroma
- Black pepper – sharp spice
- Garlic – pungent and savory
Additional Ingredients
- Onions – add sweetness and depth
- Tomatoes – contribute acidity and color
- Vinegar – brightens and tenderizes meat
- Beef broth or water – for cooking liquid
- Salt – enhances all flavors
Credit: girlcarnivore.com
Preparing The Meat
Preparing the meat is a crucial step in making delicious birria in your Instant Pot. The way you handle the meat before cooking can dramatically affect the final taste and texture. Paying attention to trimming and marinating ensures every bite is rich and flavorful.
Trimming And Cutting
Start by selecting the right cut of meat, like beef chuck or short ribs. Trim off any large chunks of fat, but don’t remove all of it—some fat adds great flavor and tenderness. Cut the meat into large chunks that will fit comfortably in your Instant Pot and allow even cooking.
Have you noticed how uneven pieces take longer to cook? Keeping your cuts uniform helps the meat cook evenly and become perfectly tender. Avoid cutting the meat too small; you want it to shred nicely after cooking, not dry out.
Marinating Tips
Marinating is your chance to infuse the meat with deep, bold flavors. Use a mix of dried chilies, garlic, cumin, and vinegar for that authentic birria taste. Let the meat soak in the marinade for at least 2 hours—overnight is even better if you have the time.
Don’t just dump the marinade and forget it. Turn the meat occasionally to ensure every piece absorbs those spices. Have you tried adding a splash of orange juice or a pinch of cinnamon? These small tweaks can bring unexpected layers of flavor to your birria.
Making The Birria Sauce
Birria sauce blends dried chilies, spices, and broth to create rich, deep flavors. Cooking it in an Instant Pot saves time and enhances taste. The sauce becomes tender, perfect for dipping or serving with meat.
Making the birria sauce is an essential step in creating a delicious dish. The sauce infuses the meat with rich flavors and spices. It brings the traditional taste of birria to your table. This guide will walk you through the process.
Toasting Spices
Begin by gathering your spices. Common choices include cumin seeds, cloves, and cinnamon sticks. Heat a pan over medium heat. Add the spices to the hot pan. Toast them until they release a fragrant aroma. This should take about 2-3 minutes. Stir them occasionally to prevent burning. Toasting enhances the flavors of the spices.
Blending The Sauce
Transfer the toasted spices to a blender. Add dried chilies, garlic, and tomatoes. Pour in a cup of beef broth. Blend until the mixture is smooth. Ensure there are no lumps. Strain the blended sauce through a fine sieve. This removes any solid bits. The strained sauce should be velvety and rich. Now, your birria sauce is ready. Use it to marinate the meat in your Instant Pot.
Credit: blog.redstickspice.com
Cooking Birria In The Instant Pot
Cooking Birria in the Instant Pot takes the traditional slow-cooked stew and transforms it into a quick, flavorful meal you can enjoy any day of the week. The Instant Pot seals in all the rich spices and tender meat, cutting down hours of simmering to less than an hour. This method keeps the birria juicy and packed with depth, making it perfect for busy cooks who don’t want to sacrifice taste.
Setting Pressure And Time
To get the best results, set your Instant Pot to high pressure. This setting helps break down the meat fibers quickly, making the birria tender and juicy. Typically, cooking for about 45 minutes under high pressure does the trick, but the exact time can vary depending on the cut of meat you use.
After the cooking cycle ends, allow the pressure to release naturally for at least 15 minutes. This step lets the juices redistribute throughout the meat, enhancing flavor and moisture. If you rush the release, you might end up with tougher meat or hot splatters—definitely not what you want.
Safety Tips
- Always check the sealing ring:A worn or misplaced ring can cause steam leaks, preventing proper pressure build-up.
- Don’t overfill the pot:Keep the contents below the max fill line to avoid clogging the pressure release valve.
- Be cautious with the steam release:Use a long-handled utensil to switch the valve and keep your face and hands away from the steam.
- Use the right cuts of meat:Tougher cuts like chuck roast or brisket work best for pressure cooking birria, ensuring tenderness without drying out.
Have you ever noticed how skipping these safety steps can turn a simple recipe into a kitchen disaster? Paying attention to these details not only keeps you safe but also guarantees your birria comes out perfectly every time.
Serving Suggestions
Serving birria made in the Instant Pot offers many tasty options. This rich and flavorful dish shines best with the right pairings. Simple ideas can make your meal memorable and satisfying.
Tacos And Consommé
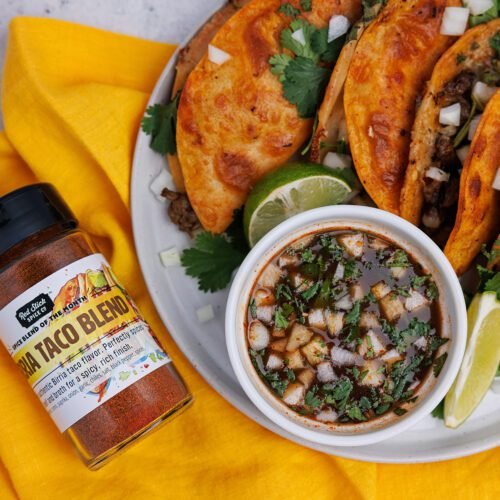
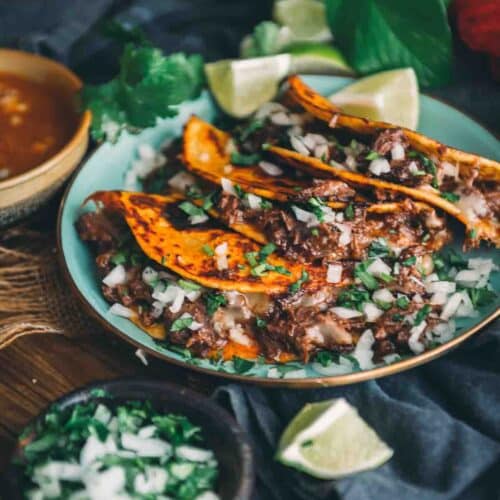
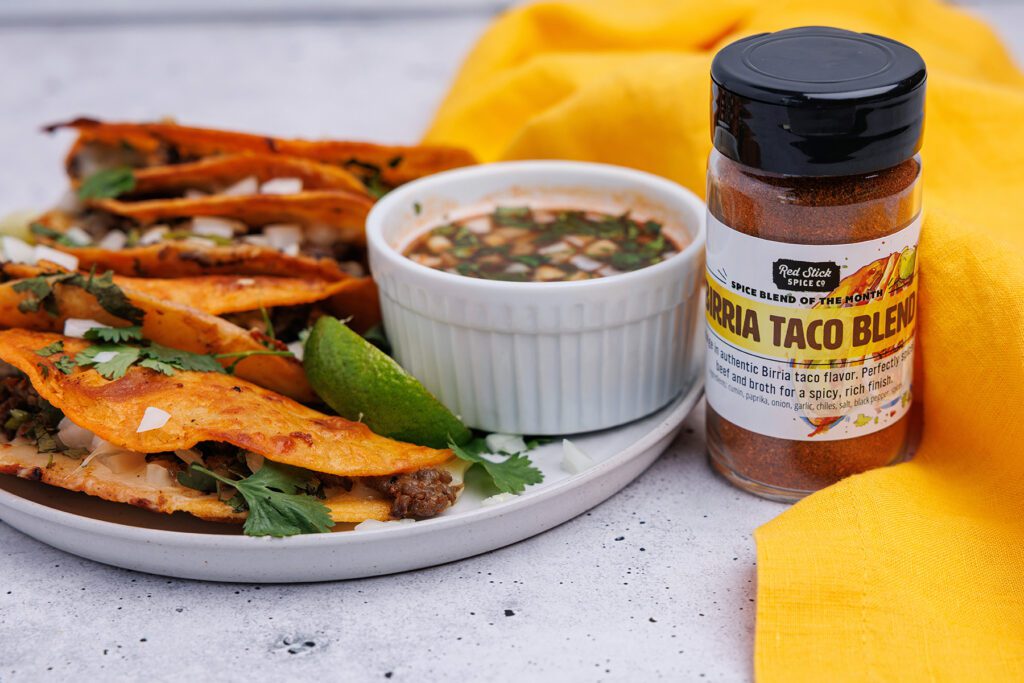
Serve birria as soft tacos using warm corn tortillas. Add chopped onions, fresh cilantro, and a squeeze of lime. Dip each taco in the hot consommé for extra flavor. The consommé is a spicy, savory broth that complements the meat perfectly. It adds moisture and a warm, comforting touch. This combination is traditional and always a crowd-pleaser.
Side Dishes To Pair
- Mexican rice or Spanish rice adds a mild, fragrant base.
- Refried beans provide a creamy, hearty side.
- Grilled corn with a little chili powder and lime brightens the plate.
- Fresh avocado slices or guacamole balance the spices.
- A simple cabbage slaw adds crunch and freshness.
- Pico de gallo offers a zesty, fresh contrast.
Tips For Authentic Flavor
Getting the authentic flavor in your Easy Birria Recipe made in the Instant Pot depends on a few key details. These tips focus on ingredient choices and spice adjustments that will make your birria taste like it’s straight from a traditional Mexican kitchen. Paying attention to these can transform your dish from good to unforgettable.
Using Traditional Ingredients
Start with dried chiles like guajillo and ancho to create the base of your birria sauce. These chiles bring a deep, smoky flavor that fresh peppers simply can’t match. Soaking and blending them properly releases their full potential.
Don’t skip out on spices such as cinnamon sticks, cloves, and bay leaves. These add warm, aromatic notes that balance the heat and richness.
Using fresh garlic and onion instead of powder makes a big difference too. Their natural oils and sharpness enhance the overall depth of flavor.
Adjusting Spice Levels
Your taste buds are the best guide here. Some like birria fiery hot, while others prefer a milder touch. Start with moderate amounts of chili powder and fresh jalapeños, then taste as you go.
If you want to control the heat without losing flavor, remove the seeds from your chiles before blending. This cuts down on the spice but keeps the complex chile flavor intact.
Adding a splash of vinegar or lime juice at the end can brighten the dish and balance the spices. Have you tried tweaking acidity to tweak the flavor? It can make a surprising difference.
Storing And Reheating Leftovers
Storing and reheating leftovers is important for enjoying your Easy Birria Recipe made in the Instant Pot. Proper storage keeps the flavors fresh and prevents food waste. Reheating the birria correctly brings back its rich taste and tender texture.
Follow simple steps to store and reheat your birria safely. This helps keep the meat juicy and the sauce flavorful for your next meal.
Refrigeration Guidelines
- Cool birria to room temperature before storing.
- Use airtight containers to keep the birria fresh.
- Store birria in the refrigerator for up to 4 days.
- Label containers with the date for easy tracking.
- Keep the sauce and meat together to maintain flavor.
Best Reheating Methods
- Reheat birria on the stove over low heat.
- Add a splash of water or broth to keep it moist.
- Cover the pot to trap steam and heat evenly.
- Alternatively, use a microwave-safe dish with a cover.
- Heat in short bursts, stirring in between to avoid dryness.
- Check the temperature to ensure it is hot throughout.

Credit: iamafoodblog.com
Frequently Asked Questions
What Is The Best Meat For Birria In Instant Pot?
The best meat for Birria in an Instant Pot is beef chuck roast. It becomes tender and flavorful when pressure cooked. You can also use goat or lamb for traditional Birria variations. Beef chuck offers a rich taste and cooks evenly under pressure.
How Long Does Birria Take To Cook In Instant Pot?
Birria typically takes about 45 minutes to cook in an Instant Pot. This includes the time to build pressure and natural release. This method is much faster than traditional slow cooking, making it perfect for a quick yet delicious meal.
Can I Use Dried Chilies For Birria Sauce?
Yes, dried chilies like guajillo and ancho are essential for authentic Birria sauce. They add depth and smoky flavor. Rehydrate them before blending with spices to create a rich, vibrant sauce perfect for your Instant Pot recipe.
How To Serve Birria Tacos After Instant Pot Cooking?
Serve Birria tacos with warm corn tortillas, chopped onions, cilantro, and lime. Dip the tacos in the rich consommé broth for extra flavor. Add cheese or avocado for a delicious twist. This enhances the traditional Birria taco experience perfectly.
Conclusion
This Easy Birria Recipe for the Instant Pot saves time and effort. It brings rich, bold flavors right to your table. You can enjoy tender meat and spicy broth in one pot. Perfect for family dinners or casual gatherings. Try it once, and you’ll want to make it again.
Simple ingredients and quick cooking make it a great choice. This recipe proves homemade birria can be easy and delicious. Enjoy the taste of traditional Mexican cuisine at home today.

Hi, I’m Daniel Brooks—a food lover and kitchen gear enthusiast. I enjoy testing cookware, utensils, and gadgets to see what really works in everyday cooking. At PlugChef.com, I share honest reviews, comparisons, and simple guides to help you choose the best tools for a safer, smarter, and more enjoyable kitchen.
Related posts:
 What Type of Cooking Utensils are Safe: Expert Picks
 What Innovations Could Blenders Make: Unleashing Future Tech
 Smart Strategies to Organize a Small Kitchen: Maximize Space
 How to Organize a Kitchen Cabinet: Expert Tips & Tricks
 How to Organize Kitchen Drawers: Expert Tips and Tricks
 How to Organize a Corner Kitchen Cupboard: Expert Tips

