
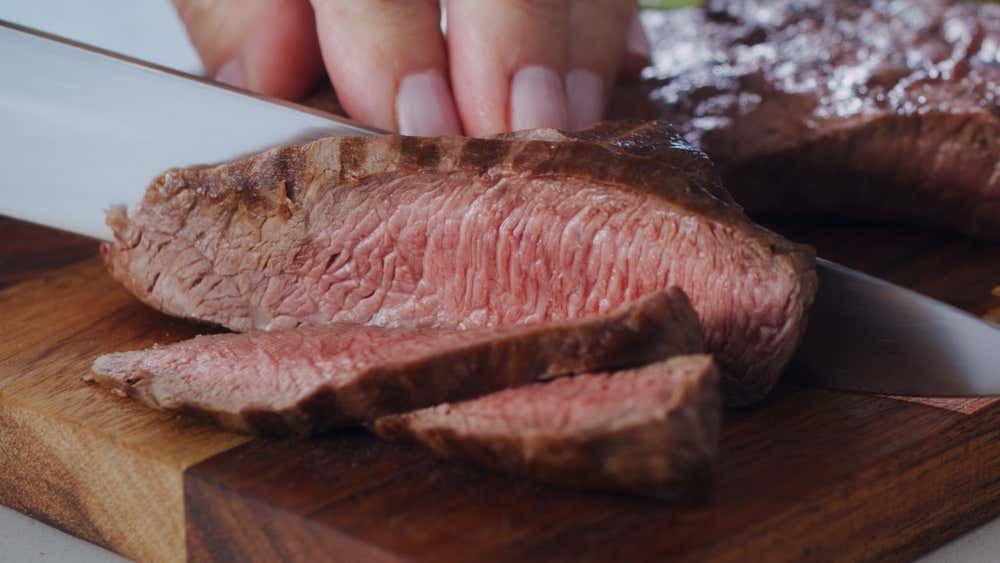
When it comes to preparing beef, how you cut it can make all the difference in taste and tenderness. If you’ve ever struggled with tough, chewy meat, the problem might be how you’re slicing it.
Cutting beef with the grain can change your cooking game completely, making every bite easier to chew and more flavorful. You’ll discover simple tips to master this technique and enjoy delicious, perfectly tender beef every time. Ready to transform your meals?
Let’s dive in.
Grain In Beef Explained
Understanding the grain in beef is key to cutting it properly. The grain shows the direction of muscle fibers. Cutting beef with the grain or against it affects the meat’s texture and tenderness. Knowing what grain is helps you prepare tastier, more tender beef.
What Is Meat Grain
The grain is the pattern of muscle fibers in the meat. These fibers run in one direction, like lines on the beef. You can see the grain as long, thin strands. The grain shows how the muscles were used before the animal was butchered. Different cuts of beef have different grain patterns.
Why Grain Matters For Tenderness
Cutting beef against the grain makes the meat easier to chew. It breaks the muscle fibers into shorter pieces. Shorter fibers mean less work for your teeth. Cutting with the grain leaves long fibers, making the meat tougher. Tender beef feels soft and easy to bite. Properly cutting against the grain improves the eating experience.
Identifying The Grain
Identifying the grain in beef is a skill that makes a huge difference in how tender and flavorful your meat turns out. The grain refers to the direction of the muscle fibers, and cutting against it breaks those fibers down, making the meat easier to chew. Before you can cut properly, you need to find the grain, which isn’t always obvious.
Visual Clues On Different Cuts
Look closely at the surface of your beef. The grain usually appears as lines or streaks running in one direction. On cuts like flank steak, these lines are very distinct and easy to spot.
Some cuts, like ribeye or tenderloin, have a more subtle grain that may run diagonally or curve. You might notice the grain changing direction in different parts of the cut. Pay attention to these shifts to avoid cutting into the fibers incorrectly.
Have you ever struggled to find the grain on a thick roast? Try slicing a small piece first and observe the muscle fibers inside. This gives a better idea of the grain’s direction before tackling the whole cut.
Using Touch To Find The Grain
Don’t rely only on your eyes. Run your fingers gently over the meat’s surface. The grain often feels like tiny ridges or lines under your touch. This tactile approach can be especially helpful with cuts that look uniform.
If the surface feels smooth, press a little deeper or slice a thin piece to check inside. The muscle fibers inside will be more obvious when you feel the texture. This method saved me many times when the grain was tricky to spot visually.
Next time you prepare beef, try combining your sight and touch to identify the grain. It’s a simple step that improves your slicing technique and makes every bite more enjoyable. Have you noticed how this small detail changes the taste and texture?
Cutting Techniques
Cutting beef correctly affects both flavor and texture. Different techniques produce different results. Understanding these methods helps make meals better. Proper cutting requires knowing the muscle fiber direction and desired tenderness.
Cutting With The Grain: When And Why
Cutting with the grain means slicing along muscle fibers. This keeps fibers long and intact. It works well for tougher cuts that need chewing. The meat holds together better and feels chewier. Some recipes or dishes require this style for texture. It also looks neat on the plate.
Cutting Against The Grain For Tenderness
Cutting against the grain means slicing across muscle fibers. This shortens the fibers and makes meat easier to chew. It helps make tough beef more tender. Most recipes suggest this for grilling or frying. It improves the eating experience by softening each bite.

Credit: www.reddit.com
Tools For Clean Cuts
Cutting beef with the grain requires the right tools for clean, precise slices. Using proper equipment makes the task easier and improves the meat’s texture. Sharp knives and well-maintained blades help avoid tearing or crushing the fibers. This keeps the beef tender and enjoyable to eat.
Choosing The Right Knife
A long, thin knife works best for cutting beef with the grain. Look for a blade that is sharp and flexible. A boning knife or a carving knife often fits this need. The handle should feel comfortable and provide a good grip. This helps control the cut and keeps your hand steady.
Maintaining Sharpness
Sharp knives make cleaner cuts and reduce effort. Regularly sharpen your knife using a whetstone or knife sharpener. Honing the blade before each use keeps it in top shape. Avoid cutting on hard surfaces like glass or stone. Use wooden or plastic cutting boards to protect the blade.
Cooking Impact
Cutting beef with the grain greatly changes how the meat cooks. The grain means the direction of the muscle fibers. Cooking meat along or across these fibers changes its texture and taste. Understanding this helps you cook beef that is tender and flavorful.
How Grain Direction Affects Cooking
Meat fibers shrink when heated. Cutting with the grain keeps fibers long. This makes the beef tougher and chewier. Cutting against the grain breaks fibers into shorter pieces. It makes the beef easier to bite and more tender.
Heat also moves differently through the meat. Cooking along the grain can cause uneven cooking. The dense fibers slow heat inside. Cutting across the grain allows heat to spread better. This helps the meat cook evenly and stay juicy.
Tips For Tender Results
- Slice beef against the grain for softer bites.
- Use a sharp knife to cut cleanly through fibers.
- Marinate meat to help break down tough fibers.
- Cook at moderate temperatures to avoid drying out.
- Rest meat after cooking to keep juices inside.
Common Mistakes To Avoid
Cutting beef with the grain is a skill that can greatly affect the texture and tenderness of your meat. However, many people stumble over common mistakes that make the process harder and the results less satisfying. Avoiding these errors will help you enjoy every bite of your beef and impress anyone at your table.
Misreading The Grain
Have you ever struggled to slice beef smoothly, only to end up with tough, chewy pieces? Often, this happens because the grain was misread. The grain is the direction of the muscle fibers, and cutting against it makes the meat easier to chew.
Take a moment to closely examine the beef before you start cutting. The fibers usually run in one direction, like lines on a piece of wood. If you slice parallel to these lines instead of across them, the meat will feel stringy and hard.
Try flipping the cut or repositioning the beef if you’re unsure. Sometimes, the grain changes direction in different parts of the same cut. Noticing these shifts can save you a lot of frustration and improve your meal’s texture.
Using Dull Knives
Have you noticed how a dull knife makes cutting beef a struggle? It’s not just frustrating—it can ruin your beef’s texture. A sharp knife slices cleanly through the muscle fibers, while a dull one tears and crushes them.
Keeping your knives sharp is essential. It means less effort for you and better results on your plate. If you don’t have a sharpening tool, consider investing in one or having your knives professionally sharpened regularly.
Also, a sharp knife helps you maintain control, reducing the risk of accidents. Think about how much easier your cooking will be when your knife glides through the beef effortlessly. Isn’t that worth a quick sharpening session?
Expert Tips And Tricks
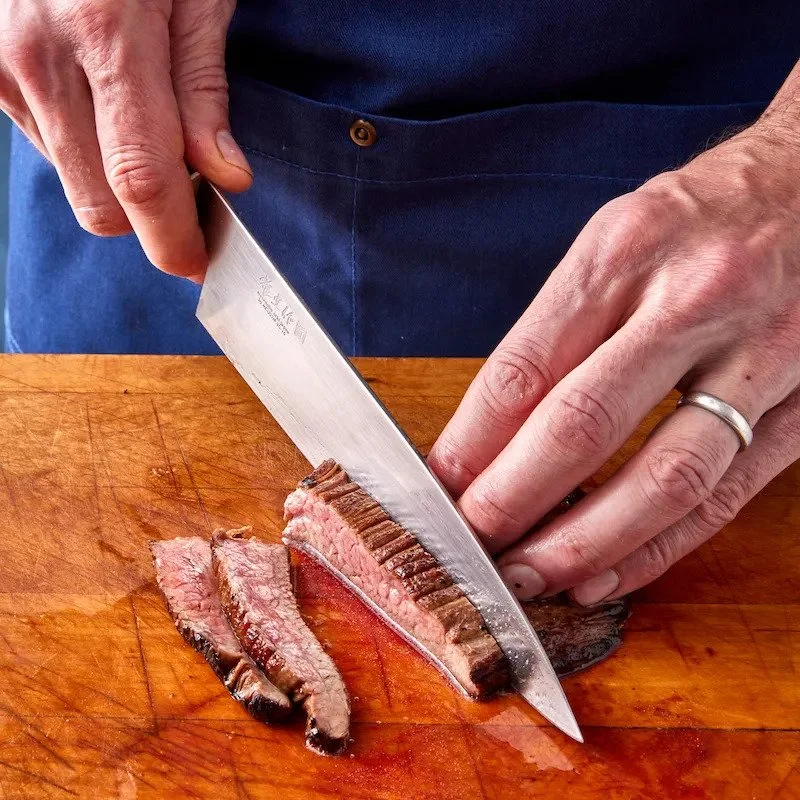
Cut beef across the grain to make it tender and easy to chew. Notice the muscle lines and slice perpendicular to them for the best results. This simple trick helps keep the meat juicy and flavorful.
Cutting beef with the grain is an art that can elevate your culinary skills to a new level. Mastering this technique not only enhances the texture and flavor of your dish but also ensures a more enjoyable eating experience. Here are some expert tips and tricks to help you perfect this skill.Resting Meat Before Slicing
Resting your beef before slicing is crucial. It allows the juices to redistribute, ensuring each bite is juicy and flavorful. Have you ever sliced into a steak too soon and watched the juices run out? Give your meat at least 10 minutes to rest for smaller cuts and up to 20 minutes for larger ones. This might seem like an eternity when you’re hungry, but the results are worth the wait. Consider using this time to prepare a quick side dish or set the table.Slicing Thin Vs Thick
The thickness of your slices can dramatically change your dining experience. Thin slices, around a quarter-inch, are perfect for dishes like stir-fry where you want the beef to cook quickly. This method also works well for sandwiches where tenderness is key. On the other hand, thicker slices, about half an inch, are ideal for showcasing the beef’s flavor and texture. Imagine biting into a thick, juicy piece of roast beef—it’s a delight. Decide based on your dish and personal preference, and you’ll never go wrong.
Credit: steakrevolution.com
Credit: blog.blueapron.com
Frequently Asked Questions
What Does Cutting Beef With The Grain Mean?
Cutting beef with the grain means slicing parallel to muscle fibers. It results in longer fibers, making meat chewier and tougher to eat.
Why Should I Avoid Cutting Beef With The Grain?
Avoid cutting with the grain because it leads to tough, stringy meat. Cutting against the grain shortens fibers, making beef tender and easier to chew.
How Do I Identify The Grain In Beef?
Look for visible muscle fiber lines running across the meat. The grain runs in one direction; cut perpendicular to these lines for tenderness.
Can Cutting With The Grain Affect Cooking Time?
Yes, cutting with the grain may make beef tougher, needing longer cooking. Cutting against the grain helps meat cook evenly and stay tender.
Conclusion
Cutting beef with the grain affects how tender the meat feels. Slicing against the grain makes it easier to chew. This simple tip improves your cooking and eating experience. Remember to check the direction of the fibers before cutting. Small changes like this can make a big difference.
Try it next time you prepare beef. Enjoy softer, tastier meat every time you cook.

Hi, I’m Daniel Brooks—a food lover and kitchen gear enthusiast. I enjoy testing cookware, utensils, and gadgets to see what really works in everyday cooking. At PlugChef.com, I share honest reviews, comparisons, and simple guides to help you choose the best tools for a safer, smarter, and more enjoyable kitchen.
Related posts:
 What Type of Cooking Utensils are Safe: Expert Picks
 What Innovations Could Blenders Make: Unleashing Future Tech
 Smart Strategies to Organize a Small Kitchen: Maximize Space
 How to Organize a Kitchen Cabinet: Expert Tips & Tricks
 How to Organize Kitchen Drawers: Expert Tips and Tricks
 How to Organize a Corner Kitchen Cupboard: Expert Tips

