
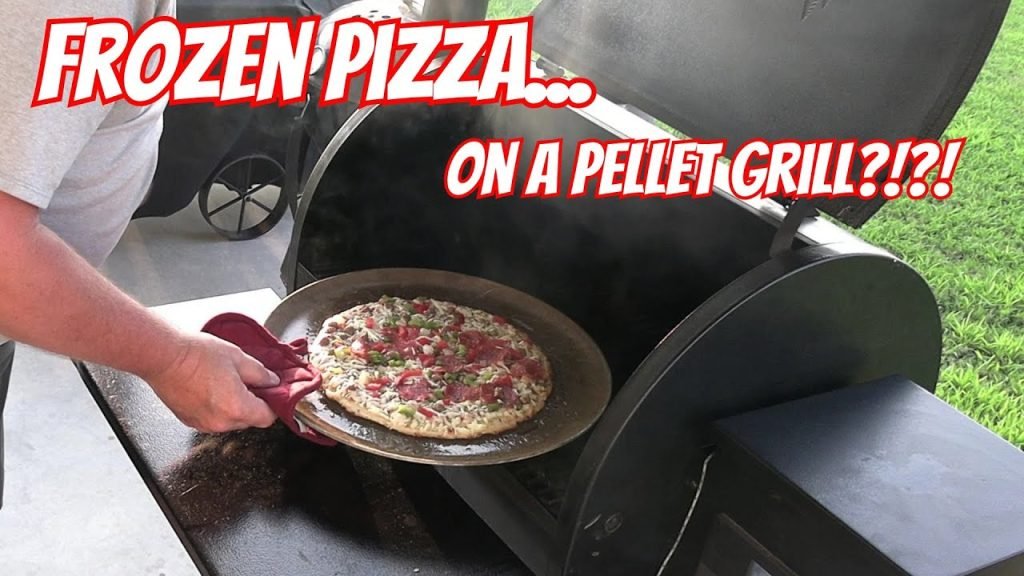
Skip the oven this summer and fire up the grill for frozen pizza night: you’ll get a smoky, charred crust and perfectly melted cheese that no indoor oven can replicate, all without heating up your kitchen. Grilling frozen pizza is one of the easiest, most rewarding backyard cooking hacks, but it does require a few key adjustments to avoid common pitfalls like burnt edges, soggy bottoms, or undercooked toppings. This guide walks you through every step, from selecting the right frozen pizza to serving and storing leftovers, with pro tips tested by home grillers to guarantee crispy, restaurant-quality results every time.
 A frozen pizza cooking directly on grill grates develops a smoky, charred crust impossible to replicate in the oven.
Credit: www.aldireviewer.com
A frozen pizza cooking directly on grill grates develops a smoky, charred crust impossible to replicate in the oven.
Credit: www.aldireviewer.com
Choosing the Right Frozen Pizza for Grilling
Not all frozen pizzas are created equal when it comes to grilling. The crust type, topping composition, and size of your pizza will directly impact cooking time, texture, and ease of preparation on the grill. Picking the right option for your grill setup and skill level will set you up for success before you even light a burner.
Crust Type
Thin-crust frozen pizzas are the best choice for beginner grillers, as they cook quickly (8–10 minutes total) and crisp up evenly over medium-high heat. Thick-crust and stuffed crust pizzas require lower, more consistent indirect heat to avoid burning the exterior before the interior is fully cooked, and may take 12–15 minutes total. Hand-tossed crusts fall somewhere in the middle, but can be prone to sogginess if cooked over direct heat for too long.
Topping Composition
Opt for frozen pizzas with simple, pre-cooked toppings for the most consistent results. Pre-cooked meats (pepperoni, sausage, bacon) won’t risk undercooking on the grill, while fresh or frozen vegetables should be patted dry before cooking to avoid releasing excess moisture that sogs the crust. Avoid pizzas with heavy, watery toppings like fresh tomatoes or extra amounts of sauce, as these will soak into the crust and prevent crisping. Premium frozen pizzas with whole-milk mozzarella cheese also melt more smoothly without separating into excess oil, which can make the crust greasy.
Size and Fit
Measure your grill grates before buying a frozen pizza to ensure it fits with at least 2 inches of space on all sides. A pizza that’s too large will hang over the edges, burning the crust and making it difficult to rotate. Smaller 10–12 inch pizzas are ideal for most standard backyard grills, while larger 14+ inch pizzas work best on extra-wide grates or when using a large cast iron skillet as a cooking surface.
Pre-Grill Prep: Set Yourself Up for Success
Proper preparation before you light the grill is the difference between a perfectly crispy pizza and a burnt, soggy mess. These steps take 10 minutes upfront but eliminate almost all common grilling errors.
Prep the Pizza
While frozen pizza is designed to cook from frozen, letting it sit on your counter for 10–15 minutes while you preheat the grill (with plastic wrap removed) will melt surface ice crystals and help the crust cook more evenly, eliminating the risk of a gummy, undercooked center. For extra crispiness, lightly brush the exposed crust edge with olive oil and sprinkle a thin layer of cornmeal or flour on the area where the pizza will sit to prevent sticking.
Clean and Preheat Your Grill
Old food residue on grill grates causes flare-ups and sticking, so start by scraping off all stuck-on debris with a sturdy handled scrub brush before wiping grates clean with a damp cloth. Preheat your grill with the lid closed for 15 minutes to reach a steady temperature: 400–450°F for gas and charcoal grills, 375–400°F for pellet grills. If using a pizza stone or cast iron skillet, place it on the grates during preheating to allow it to absorb heat evenly — preheat the stone for at least 15 minutes to avoid thermal shock and cracking.
For households with young children, store propane tanks, lighter fluid, and sharp grill tools out of reach using no-drill childproof locks for low-stress cookouts. To minimize flare-ups from dripping cheese or grease, keep a spray bottle of water nearby and follow NFPA's grill safety recommendations for proper placement away from structures and overhanging trees.
Grill Type Considerations
Gas grills offer consistent, adjustable heat, making them ideal for beginners who want easy temperature control. Charcoal grills add a deeper, woodier smoky flavor, but require more attention to maintain a steady two-zone fire (one hot side for direct heat, one cool side for indirect heat). Pellet grills provide even, low-and-slow heat, perfect for thick-crust or stuffed pizzas that need longer cooking times without burning the crust.
Grilling Techniques for Perfect Results
Once your grill is preheated and your pizza is prepped, these techniques will ensure even cooking, a crispy crust, and melted, bubbly cheese every time.
Direct vs. Indirect Heat
The key to perfectly cooked grilled pizza is using a two-zone heat setup. Start by placing the pizza over direct heat (directly above the flame or hot coals) for 2–3 minutes to crisp the bottom crust and sear the edges. Then, move the pizza to the cool side of the grill (indirect heat) for the remaining cooking time to melt cheese and cook toppings evenly without burning the crust. For thick-crust or stuffed pizzas, start on indirect heat entirely to avoid burning the exterior before the interior is fully cooked.
Timing and Temperature Monitoring
Keep your grill temperature steady between 400–450°F for most thin-crust pizzas, and 375–400°F for thicker options. Total cook time ranges from 8–15 minutes depending on crust thickness and topping load. Check the pizza after 5 minutes of cooking, and rotate it 90 degrees every 3 minutes to avoid hot spots that cause uneven browning. A common mistake new grillers make is opening the lid too often, which drops the grill temperature and leads to sogginess — only open the lid to check for doneness or adjust the pizza position.
Troubleshooting Common Issues
If you experience small flare-ups from melted cheese dripping onto the grates, use your spray bottle of water to extinguish them quickly, or move the pizza to the cool side of the grill temporarily. If the crust is browning too fast before the cheese is melted, tent the pizza loosely with aluminum foil to reflect excess heat. If the bottom is still soggy after 8 minutes, move the pizza to direct heat for 1–2 minutes to crisp it up, watching carefully to avoid burning.
Pro Tips for Extra Crispy Crust
Getting that perfect snap-worthy crust on grilled frozen pizza comes down to controlling heat and moisture. These small adjustments make a massive difference in final texture.
Use a Preheated Cooking Surface
Placing pizza directly on bare grill grates is possible, but a preheated pizza stone, cast iron skillet, or heavy aluminum baking sheet will deliver far more consistent crispiness. These surfaces conduct heat evenly and absorb excess moisture from the crust, preventing sogginess. If using a pizza stone, opt for a grill-specific model rated for high heat to avoid cracking from thermal shock — standard ceramic baking stones can shatter when exposed to direct grill flame.
Control Moisture Effectively
Steam buildup is the number one cause of soggy grilled pizza crust. Keep the grill lid closed as much as possible to trap heat and allow moisture to evaporate, but crack it for 10 seconds if you see excessive steam pooling around the pizza. For pizzas with watery toppings like pineapple, fresh mushrooms, or tomatoes, pat the toppings dry with a paper towel or pre-cook them in the microwave for 1 minute to remove excess liquid before adding them to the frozen pizza.
Post-Cooking Resting Step
Let your grilled pizza rest for 2 minutes on a cutting board before slicing to allow the cheese to set and prevent toppings from sliding off. For an extra burst of flavor, finish with a drizzle of extra virgin olive oil, fresh basil, red pepper flakes, or a sprinkle of parmesan cheese after cooking, rather than before, to avoid burning delicate ingredients.
 Preheating your cooking surface ensures the crust crisps immediately instead of turning soggy.
Credit: scarlatifamilykitchen.com
Preheating your cooking surface ensures the crust crisps immediately instead of turning soggy.
Credit: scarlatifamilykitchen.com
Topping and Cheese Best Practices
The high, uneven heat of a grill can turn delicate toppings and cheese into a burnt, mushy mess if you don’t adjust your approach from oven cooking. These tips keep flavors balanced and textures perfect.
Adding Custom Toppings
If you want to customize your frozen pizza with extra toppings, add them 2–3 minutes before the pizza is done cooking to give them time to heat through without burning. For raw meats like Italian sausage or bacon, pre-cook them to an internal temperature of 160°F to avoid foodborne illness, per USDA's safe grilling guidelines for meat handling. Pre-cook watery vegetables like zucchini or bell peppers for 1 minute in the microwave to remove excess moisture, and pat all fresh toppings dry before adding them to the pizza. Prepping extra toppings? A complete cleaning brush set makes quick work of wiping down countertops and washing produce.
Preventing Burnt Cheese
High grill heat can cause cheese to burn and separate into oil before the crust is fully cooked. To avoid this, use indirect heat for the majority of cooking time, and tent the pizza loosely with aluminum foil for the last 2 minutes if the cheese is browning too quickly. Avoid overloading the pizza with extra cheese, as this releases more oil and can make the crust soggy.
Balancing Moisture Levels
Drain canned toppings like jalapeños, olives, or artichoke hearts before adding them to the pizza to avoid excess liquid soaking into the crust. If your pizza has a heavy sauce layer, you can blot the surface with a paper towel before grilling to remove extra moisture without affecting flavor.
Serving, Storing, and Reheating Leftovers
Proper handling of leftover grilled pizza preserves its crispy texture and fresh flavor for later meals, while keeping it safe to eat.
Serving Suggestions
Use a sharp pizza cutter or chef’s knife to slice the pizza into even pieces for easy sharing. Grilled pizza pairs perfectly with crisp side salads, grilled vegetables, or cold drinks for backyard cookouts. After serving, scrub grill grates and prep surfaces with a heavy-duty grill brush to remove stuck-on cheese and grease for easy cleanup.
Reheating Tips
To keep the crust crispy when reheating leftovers, place slices on a preheated grill over indirect heat for 2–3 minutes, or in a cast iron skillet on the stovetop over medium heat for 1–2 minutes per side. Avoid microwaving leftover grilled pizza, as this will make the crust soggy and rubbery.
Storage Best Practices
Let leftover pizza cool completely to room temperature (no more than 2 hours, per USDA food safety rules) before storing to avoid bacterial growth. Wrap individual slices in parchment paper, then place them in an airtight container in the refrigerator for up to 3 days. For longer storage, freeze slices on a baking sheet for 1 hour first to prevent sticking, then transfer to a freezer bag for up to 2 months. Reheat frozen slices directly on the grill, no need to thaw, and add 2–3 minutes to the total cook time. Keep grill tools and accessories stored securely with child-safe cabinet latches to prevent accidental access by little ones.
 Let grilled pizza rest 2 minutes before slicing to let cheese set and prevent sliding toppings.
Credit: butcherbbq.com
Let grilled pizza rest 2 minutes before slicing to let cheese set and prevent sliding toppings.
Credit: butcherbbq.com
Frequently Asked Questions
How long does it take to cook frozen pizza on a grill?
Cook time ranges from 8–15 minutes, depending on crust thickness and pizza size. Thin-crust pizzas cook in 8–10 minutes, while thick-crust or stuffed crust options may take 12–15 minutes. Always check for doneness by looking for melted, bubbly cheese and a golden-brown crust, rather than relying solely on time.
Can I use a charcoal or gas grill for frozen pizza?
Yes, both grill types work well. Gas grills offer consistent, adjustable heat that’s easy for beginners to manage, while charcoal grills add a deeper smoky flavor. For charcoal, arrange coals in a two-zone fire to create both direct and indirect heat zones for best results.
Should I use a pizza stone on the grill?
A preheated pizza stone or cast iron skillet is highly recommended for consistent, crispy results. These surfaces conduct heat evenly and absorb excess moisture from the crust, preventing sogginess. Avoid using unrated ceramic baking stones, as they can crack from the high heat of the grill.
How do I prevent frozen pizza from burning on the grill?
Use a two-zone heat setup, starting the pizza on indirect heat to melt cheese and cook toppings, then moving to direct heat for 1–2 minutes at the end to crisp the crust. Keep the grill lid closed as much as possible to maintain steady temperature, and rotate the pizza every 3 minutes to avoid hot spots that cause burning.
Can I cook frozen pizza directly on grill grates?
Yes, but you’ll need to oil the grates heavily and use a thin metal spatula to lift the pizza carefully to avoid sticking. A preheated cooking surface like a pizza stone or cast iron is recommended for easier cleanup and more even cooking.
What if my pizza is burning before the cheese is melted?
If the crust is browning too quickly, move the pizza to the cool side of the grill (indirect heat) and close the lid to trap heat, which will melt the cheese without further browning the crust. You can also tent the pizza loosely with aluminum foil to reflect excess heat.
Conclusion
Grilling frozen pizza is a simple, delicious way to enjoy a classic meal with a smoky, outdoor twist that no oven can replicate. By choosing the right pizza, setting up a two-zone heat source, controlling moisture, and following the timing guidelines above, you’ll avoid common pitfalls like burnt edges and soggy bottoms to get a perfectly crispy crust and melted, bubbly cheese every time. It’s the perfect solution for summer cookouts when you don’t want to heat up your kitchen, quick weeknight meals, or impromptu backyard gatherings with friends. Experiment with different frozen pizza varieties, add your favorite custom toppings, and don’t be afraid to adjust heat settings to match your grill’s unique hot spots. For more easy outdoor cooking tips, kitchen hacks, and meal prep ideas to simplify your time in the kitchen, browse our full library of guides.

I’m Abby Lu, a passionate home cook who loves simplifying everyday meals. At PlugChef.com, I share product reviews and cooking guides to help you find the best tools for your kitchen.
Related posts:
 How to Make a Fruit Basket for a Gift: Easy DIY Guide
 Mesh Desk Organizer With Sliding Drawer: Maximize Efficiency
 Decorative Woven Baskets for Wall: Transform Your Space
 Rubbermaid Large Dish Drying Rack: Ultimate Kitchen Solution
 Gray Kitchen With Stainless Steel Appliances: Modern Elegance
 Appliance Play Food Kitchen Toys: Ignite Imaginative Play

