

There’s nothing worse than reaching for a store-bought Chex Mix only to find soggy cereal, overly salty seasoning, and a weird aftertaste from artificial preservatives. Oven-baked homemade Chex Mix solves all those problems: it’s warm, extra crispy, fully customizable, and takes less than 45 minutes total from prep to finished snack. This foolproof recipe works for first-time bakers and snack pros alike, with zero stovetop stirring required. You’ll never go back to the pre-packaged version once you try it.
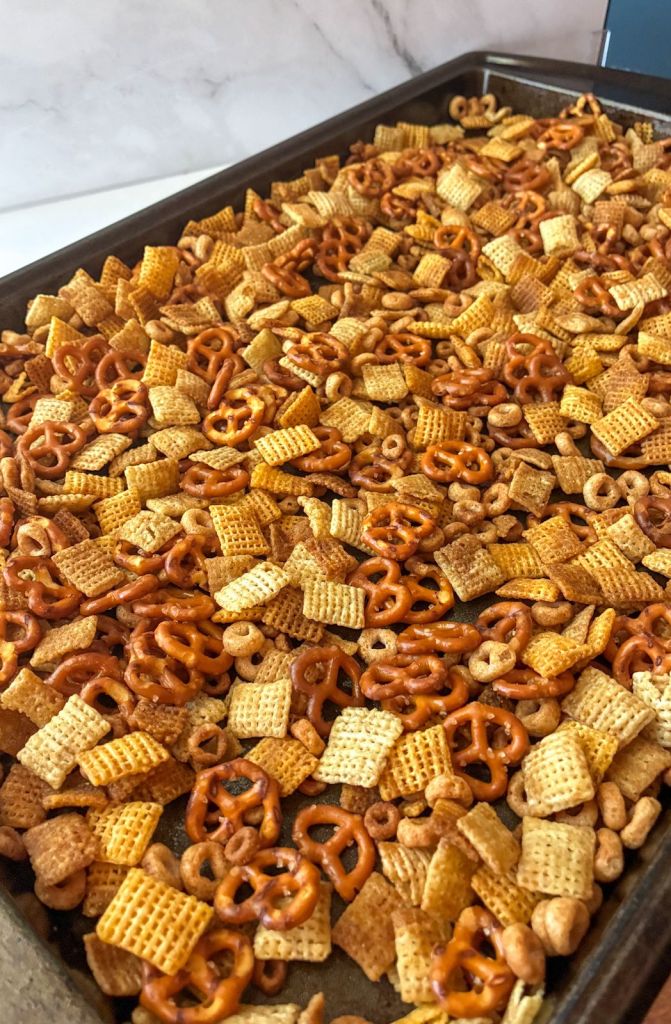 Fresh out of the oven, this Chex mix has evenly toasted spices and a perfect crunch
Why Oven-Baked Chex Mix Beats the Stovetop Version
Many traditional Chex Mix recipes call for stovetop cooking, but the oven method delivers consistently better results with way less effort. Stovetop cooking requires constant stirring to avoid burning the butter and spices, and it’s easy to end up with chewy cereal if you step away for even 30 seconds. The oven’s low, even heat toasts every piece uniformly, locks in crunch, and lets the seasoning infuse fully into the cereal and add-ins. It’s also completely hands-off after the initial prep, so you can multitask while it bakes. In practice, most home cooks who switch to the oven method report far fewer burnt batches and a crispier final product.
What You’ll Need: Ingredients & Equipment
This recipe makes 6 cups of Chex Mix, enough for a small party or weeks of snacks for your household. All ingredients are easy to find at any grocery store, and you likely already have most of them in your pantry.
Core Ingredients
- 4 cups total Chex cereal (1.5 cups Rice Chex, 1 cup Corn Chex, 0.5 cups Wheat Chex) – General Mills, the manufacturer of Chex, offers five core varieties including Rice, Corn, Wheat, Chocolate, and Cinnamon Chex, so you can mix and match based on your texture and flavor preferences. Explore the full Chex product line to find your favorite combination.
- 2 cups add-ins (1 cup mini pretzels, 0.5 cups roasted unsalted peanuts, 0.5 cups cashews)
- ½ cup unsalted butter, melted
- 2 tbsp Worcestershire sauce
- 1 tsp garlic powder
- 1 tsp onion powder
- ½ tsp smoked paprika
- ¼ tsp cayenne pepper (optional, for heat)
- 1 tsp fine sea salt (adjust to taste)
Essential Equipment
- Large mixing bowl (at least 6-quart capacity)
- Rimmed baking sheet
- Parchment paper (for easy cleanup)
- Silicone spatula
- Airtight storage container
Start by scrubbing your baking sheet clean with a sturdy kitchen cleaning brush to remove any leftover crumbs or burnt residue that could affect your mix’s flavor.
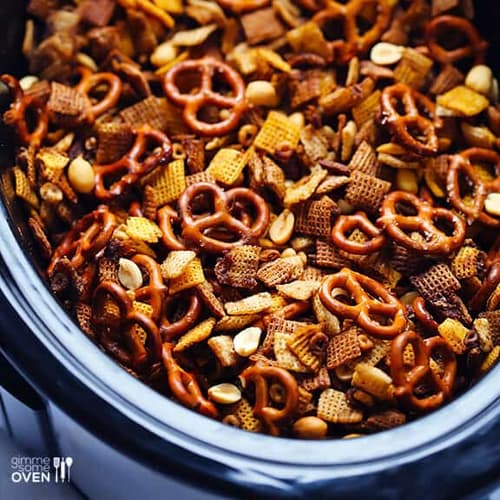 All core ingredients and add-ins prepped and ready to mix
Step-by-Step Oven Chex Mix Recipe
Follow these exact steps for foolproof, crispy Chex Mix every single time.
1. Prep Your Workstation & Oven
Preheat your oven to 250°F (120°C) – this low, slow heat is the secret to crispy, unburnt Chex Mix. High heat will burn the spices and leave the cereal chewy before it fully crisps. Line your rimmed baking sheet with parchment paper to prevent sticking and make cleanup easier later.
2. Mix the Seasoning Blend
In a small bowl, combine the melted butter, Worcestershire sauce, garlic powder, onion powder, smoked paprika, cayenne (if using), and salt. Whisk thoroughly until fully combined, with no separated butter or clumped spices. Sift the dry spices first if you notice any lumps, as these will stick to the cereal in uneven, bitter clumps. Taste the seasoning blend before adding it to the mix – it should taste slightly saltier and spicier than your final preference, as the flavor will mellow slightly as it bakes.
3. Combine Cereal & Add-ins
Pour the Chex cereal, pretzels, peanuts, and cashews into your large mixing bowl. Pour the melted seasoning blend over the top, and use a gentle folding motion to coat every piece evenly. Avoid over-mixing, as aggressive stirring will crumble the delicate Chex pieces and create unwanted crumbs in your final mix.
4. Bake for Perfect Crispiness
Spread the coated Chex Mix in an even, thin layer across your prepared baking sheet. If you’re making a double batch, use two baking sheets to avoid overcrowding – overcrowding leads to steamed, soggy spots instead of even toasting. Bake for 30 minutes total, stirring every 10 minutes with your spatula to rotate the pieces and prevent burning. Stirring also ensures the seasoning coats every piece evenly as it toasts.
5. Cool Fully Before Storing
Let the Chex Mix cool completely on the baking sheet for 15 minutes before transferring to a storage container. This cooling period lets the butter and seasoning set fully, which prevents sogginess later. Let the mix cool completely on the baking sheet before transferring to storage – this step follows USDA food safety guidance for baked goods to prevent bacterial growth and keep your snack safe to eat.
 Evenly spread mix ensures every piece toasts evenly during baking
Pro Tips for Extra Crispy, Flavor-Packed Chex Mix
Even with the basic recipe, these small tweaks will take your Chex Mix from good to great:
- Use room temperature butter for the seasoning blend, as it mixes more evenly with the spices and coats the cereal better than cold, clumpy melted butter.
- Toast raw nuts in a 350°F oven for 5 minutes before adding them to the mix for an extra nutty, toasty flavor.
- Add delicate add-ins like cheese crackers, dried fruit, or chocolate chips in the last 2-5 minutes of baking to prevent them from getting soggy or melted.
- For extra crunch, sprinkle a pinch of flaky sea salt over the mix immediately after taking it out of the oven.
- If you prefer a less buttery mix, substitute half the melted butter with light olive oil or avocado oil for a crispier, less rich final product.
Customizable Flavor Variations to Try
The basic recipe is a great starting point, but you can easily tweak the seasoning and add-ins to match your taste preferences. Try these popular variations:
- Spicy Southwest: Add 1 tsp ground cumin, ½ tsp chili powder, and an extra ¼ tsp cayenne to the seasoning blend. Swap peanuts for roasted wasabi peas for an extra kick.
- Sweet & Salty: Reduce the salt in the seasoning by ¼ tsp, add 2 tbsp pure maple syrup and 1 tsp ground cinnamon to the melted butter. Add mini chocolate chips in the last 2 minutes of baking for a sweet, salty contrast.
- Herb & Garlic: Add 1 tsp dried rosemary, 1 tsp dried thyme, and ¼ tsp freshly ground black pepper to the seasoning. Toss with ¼ cup grated parmesan in the last 5 minutes of baking for a savory, umami-packed mix.
- Holiday Cheer: Add ½ cup dried cranberries, ¼ cup white chocolate chips, and 1 tsp ground nutmeg to the mix. Package in mason jars for easy homemade holiday gifts – you can personalize the lids with an engraved design using our guide to engraving wooden kitchenware for a custom touch.
Storing & Serving Your Homemade Chex Mix
When stored and served correctly, your homemade Chex Mix will stay crispy for up to 2 weeks.
Storage Guidelines
Let the mix cool completely before transferring to an airtight storage container. Store it in a cool, dry pantry, away from direct sunlight. Never store Chex Mix in the refrigerator, as the cold, moist environment will make the cereal soggy within hours. If you want to keep it fresh for longer, you can store it in a resealable plastic bag with as much air removed as possible. Wash your storage containers thoroughly between uses with a complete kitchen cleaning brush set to avoid stale flavor transfer between batches.
Serving Ideas
Chex Mix is a versatile snack that works for almost any occasion:
- Serve in small individual cups for potlucks, movie nights, or road trips to avoid mess.
- Add it to a charcuterie board for a crunchy, salty contrast to soft cheeses and cured meats – you can find easy tips for prepping perfect cheese slices to pair with the mix.
- Use it as a crunchy topping for creamy soups, green salads, or mac and cheese for extra texture.
- Package small portions in paper cones or mason jars as party favors or holiday gifts.
- For kid-friendly snacking, portion into small servings to avoid mess, and keep the storage container on a high shelf secured with no-drill child safety locks to limit unsupervised snack access.
Frequently Asked Questions
How long do I cook Chex Mix in the oven?
Bake Chex Mix for 30 minutes total at 250°F (120°C), stirring every 10 minutes to ensure even toasting. If you’re adding delicate add-ins like chocolate chips or dried fruit, add them in the last 2-3 minutes of baking to prevent sogginess.
What temperature is best for oven-baked Chex Mix?
250°F (120°C) is the ideal temperature for Chex Mix. This low heat crisps the cereal and toasts the spices without burning them, which is impossible to achieve with higher heat settings.
Can I customize the seasoning to avoid allergens?
Yes. For gluten-free Chex Mix, use Rice Chex and Corn Chex (naturally gluten-free) and swap Worcestershire sauce for tamari or soy sauce labeled gluten-free. For nut-free mixes, swap peanuts and cashews for roasted pumpkin seeds or extra pretzels. For dairy-free mixes, substitute the melted butter with vegan butter or light olive oil.
Why is my Chex Mix soggy instead of crispy?
Sogginess is almost always caused by one of three mistakes: overcrowding the baking sheet (which steams the mix instead of toasting it), not stirring frequently enough during baking, or not cooling the mix fully before storing. Stick to the 250°F temperature, stir every 10 minutes, and let the mix cool completely on the baking sheet before transferring to a container for best results.
Final Tips for Perfect Oven Chex Mix Every Time
The key to perfect Chex Mix is low heat, even coating, and patience. Don’t skip the preheating step, and don’t cut the baking time short – the mix won’t be fully crispy if you take it out early. This recipe is incredibly versatile, so feel free to experiment with add-ins and seasonings to find your family’s favorite combination. It’s a great make-ahead snack for parties, road trips, and holiday gift giving, and it’s always a hit with kids and adults alike.
Conclusion
Cooking Chex Mix in the oven is one of the easiest, most rewarding homemade snack projects you can tackle. It takes just 10 minutes of prep, requires minimal active time, and delivers a crispy, flavorful treat that’s far better than anything you can buy pre-packaged. With endless customization options, you can tailor it to any taste preference or dietary need, and it stores well for weeks for easy snacking. This oven Chex Mix recipe is fast, customizable, and far more flavorful than anything you can buy pre-made. It’s perfect for busy weeknight snacks, party platters, and even homemade holiday gifts. Save this recipe to your collection so you can whip up a batch whenever a craving hits, and experiment with the flavor variations to find your family’s favorite combination.

I’m Abby Lu, a passionate home cook who loves simplifying everyday meals. At PlugChef.com, I share product reviews and cooking guides to help you find the best tools for your kitchen.
Related posts:
 Seville Expandable Cabinet And Pantry Organizer: Space Savior
 Glideware Pull Out Cabinet Organizer for Pots & Pans: Space Saver
 Small 3-Tier Shelf Organizer: Maximize Space Effortlessly
 Trader Joe’S Spicy Lentil Wrap: Delicious, Healthy, and Quick Meal!
 Easy Way to Peel Pumpkin: Quick Tips for Effortless Prep
 How Long Do Grapes Last: Ultimate Freshness Guide Revealed

