
Dry, tough chicken breast is one of the most common kitchen frustrations, even for experienced home cooks. Traditional baking and grilling methods often dry out lean chicken breast before the center is fully cooked, leaving you with bland, chewy results. Cooking chicken breast with parchment paper is a low-effort, foolproof hack that solves this problem for good, locking in moisture and flavor with minimal cleanup. Whether you’re meal prepping for the week, making a quick weeknight dinner, or cooking for a crowd, this method delivers consistently tender, juicy results every time, no special skills required.
Why Parchment Paper Beats Other Cooking Methods for Chicken Breast
Parchment paper cooking, also called steam-braising, uses the paper’s heat-resistant, non-stick properties to create a sealed, steam-filled pocket around the chicken. This environment cooks the meat gently and evenly, eliminating the dry edges and uneven cooking that come with open-pan baking or grilling. Unlike aluminum foil, uncoated parchment won’t react with acidic ingredients like lemon juice or vinegar, so you can add bright, tangy flavors without worrying about a metallic aftertaste. It also creates a tighter seal than foil, trapping more steam for juicier results.
Locks In Moisture Without Added Fat
As the chicken cooks, natural juices and steam circulate inside the sealed packet, basting the meat from the inside out. This means you don’t need to add butter, oil, or broth to keep the chicken moist, cutting back on unnecessary saturated fat and calories. The result is tender, flavorful chicken that stays juicy all the way through, with no dry, tough spots.
Infuses Flavor With Aromatics
The enclosed pocket traps and concentrates the scent and taste of herbs, spices, citrus, and other aromatics you add to the packet. Unlike open cooking, where delicate herb flavors can burn off or dissipate, the steam circulates these flavors directly into the meat, creating a deeply infused dish with minimal effort. In my experience cooking this recipe dozens of times for meal prep, the most common mistake home cooks make is under-seasoning, as the steam slightly mutes salt and spice flavors – aim for 20% more seasoning than you would use for grilled chicken to get bold, balanced taste.
Cuts Down Cleanup Time
Cooking in parchment contains all juices, fat, and drippings inside the packet, so there’s no greasy baking sheet to scrub or stuck-on bits to soak. Once you’re done eating, you can simply toss the used parchment in the trash, leaving your cookware nearly spotless. For context, cleaning a greasy baking sheet can take 5-10 minutes of scrubbing, while cleanup for this method takes less than 30 seconds.
 Parchment-wrapped chicken steams gently in the oven for ultra-tender, juicy results.
Image source: whereismyspoon.co
Parchment-wrapped chicken steams gently in the oven for ultra-tender, juicy results.
Image source: whereismyspoon.co
Selecting the Best Chicken Breast for Parchment Cooking
The quality and cut of chicken you choose will directly impact the final texture and flavor of your dish. While this method works with almost any boneless, skinless chicken breast, a few small tips will help you pick the best option for your needs.
Fresh vs. Frozen Chicken
Fresh chicken breast has a brighter, more robust flavor and a firmer texture that holds up well to steaming. If you’re using frozen chicken, always thaw it completely in the refrigerator (never at room temperature) before cooking to ensure even doneness. Avoid refreezing thawed chicken, as this can break down cell walls and lead to a mushy texture after cooking.
Size and Portion Considerations
Standard boneless, skinless chicken breasts range from 4 to 8 ounces. For single servings, opt for 4-5 ounce breasts, which cook in 20-25 minutes. For heartier appetites or meal prep, 6-8 ounce breasts work well, just add 3-5 minutes of cooking time. If you have an extra-large breast, cut it into two even, 2-inch thick pieces to ensure it cooks evenly without drying out the thinner end.
Quality and Sourcing Tips
Look for chicken with a pale pink color, firm texture, and no off-putting odor when you open the package. Avoid breasts that are sitting in excess liquid, as this is a sign of poor handling and can lead to a soggy texture after cooking. If you have the option, organic or free-range chicken often has a richer, more robust flavor, though conventional chicken works perfectly well for this recipe. When prepping raw chicken, always properly sanitize your prep surface after handling raw chicken to avoid cross-contamination with other foods.
Prepping and Seasoning Your Chicken for the Parchment Packet
Proper prep is the key to avoiding dry, bland results, and takes less than 10 minutes start to finish.
Trimming and Pre-Seasoning Prep
Start by trimming any excess fat or tough, white connective tissue from the edges of the chicken breast with a sharp knife. Pat the chicken completely dry with paper towels – this step is critical, as excess moisture on the surface will create steam before the oven heats up, leading to a soggy exterior. Use a sharp paring knife with sheath to trim cleanly and safely. Season the chicken generously with kosher salt, black pepper, and any dry spices you prefer. Paprika, garlic powder, onion powder, and dried thyme are all excellent options that pair well with the steam-infused cooking method. Avoid overfilling the packet with wet ingredients, as excess liquid can weaken the parchment seal and cause leaks.
Adding Aromatics and Herbs
Fresh aromatics take this dish from basic to restaurant-quality with almost no extra work. Place sprigs of fresh thyme, rosemary, or parsley on top of the chicken, along with thin slices of garlic, lemon, or fennel if you prefer. The steam will infuse these flavors directly into the meat, creating a bright, herbaceous taste without any extra effort.
Quick Brine Hack for Extra Juiciness
For ultra-tender, foolproof results, brine the chicken for 30 minutes before prepping. Mix ¼ cup kosher salt into 4 cups of cold water until dissolved, submerge the chicken breasts, and refrigerate for 30 minutes. Pat the chicken completely dry before seasoning and wrapping – the brine helps the meat retain moisture during cooking, making it nearly impossible to overcook.
How to Wrap Chicken Breast in Parchment Paper (Step-by-Step)
A properly sealed parchment packet is the foundation of this recipe – follow these steps for a leak-proof seal every time.
- Cut a 12×18 inch sheet of unbleached parchment paper (large enough to fit 1-2 chicken breasts, depending on size). Fold the paper in half lengthwise and crease sharply, then unfold to create a clear center line.
- Place your prepped chicken breast near the fold line, add any aromatics or wet ingredients on top, then fold the other half of the paper over the chicken to cover it completely.
- Make small, tight pleats along the open edges of the parchment, pressing firmly after each pleat to lock the seal. The pleats should be small enough that no steam can escape.
- Fold the sealed edge over itself twice to create a double barrier against leaks during cooking.
- Place the packet seam-side down on a rimmed baking sheet, leaving 1 inch of space between multiple packets for even heat circulation.
Common mistakes to avoid: using old, crumpled parchment that tears easily, overfilling the packet with ingredients, and skipping the double fold on the sealed edge.
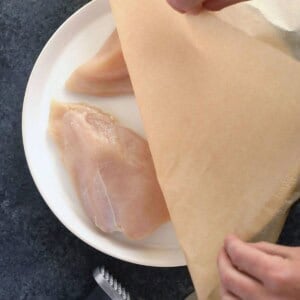 Patting chicken dry before seasoning helps the seasoning stick and prevents a soggy exterior.
Image source: fitfoodiefinds.com
Patting chicken dry before seasoning helps the seasoning stick and prevents a soggy exterior.
Image source: fitfoodiefinds.com
Cooking Methods and Exact Times for Perfect Results
All cooking methods require the chicken to reach an internal temperature of 165°F (74°C) to be safe to eat, per USDA’s safe minimum internal temperature for poultry. Use a meat thermometer inserted through the parchment into the thickest part of the breast to check doneness without opening the packet fully.
Oven Baking (Most Popular Method)
Preheat your oven to 375°F (190°C). Place the sealed packet seam-side down on a rimmed baking sheet and bake for 22-25 minutes for 4-5 ounce breasts, or 28-30 minutes for 6-8 ounce breasts. No need to flip or baste – the steam does all the work. Let the chicken rest for 5 minutes before opening to let juices redistribute.
Stovetop Steaming (Ultra-Moist Result)
Fill a large pot with 1 inch of simmering water, place a steamer basket inside, and cover. Place the sealed packet in the basket, making sure the water doesn’t touch the parchment, then cover the pot and steam for 18-22 minutes for 4-5 ounce breasts. This method produces extremely tender, soft chicken with zero added fat, perfect for babies or people with dietary restrictions.
Air Fryer (Quick, Crisp-Edged Result)
Preheat your air fryer to 375°F (190°C). Place the sealed packet in the air fryer basket and cook for 16-19 minutes for 4-5 ounce breasts. For a lightly crisped exterior, open the packet for the final 2 minutes of cooking – no need to flip. This method is ideal for busy weeknights, as it cooks 30% faster than oven baking.
 Adding fennel and lemon inside the packet infuses the chicken with bright, subtle flavor without extra fat.
Image source: food52.com
Adding fennel and lemon inside the packet infuses the chicken with bright, subtle flavor without extra fat.
Image source: food52.com
Serving Ideas and Meal Prep Hacks
This versatile chicken works with nearly any side dish or flavor profile, making it perfect for meal prep and casual weeknight meals.
Quick Serving Pairings
- Roasted vegetables: toss broccoli, bell peppers, carrots, and asparagus with a little olive oil and seasoning, and roast on the same baking sheet as the chicken (if using the oven) for a no-fuss one-pan meal.
- Whole grains: pair with quinoa, brown rice, farro, or couscous for a fiber-rich, balanced meal that keeps you full for hours.
- Fresh toppings: a squeeze of fresh lemon juice, chopped parsley, or a dollop of plain Greek yogurt adds brightness and creaminess without extra calories. For a sweet, savory twist, top roasted sweet potato with a sprinkle of sour cream and chives.
Meal Prep Friendly Tips
Cooked parchment-wrapped chicken stays fresh in an airtight container in the refrigerator for up to 4 days. To reheat and retain moisture, place the chicken (still wrapped in parchment) in the oven at 350°F (175°C) for 10-12 minutes – avoid microwaving if possible, as it can make the chicken rubbery. For longer storage, let the chicken cool completely after cooking, then freeze the sealed packet for up to 3 months. Thaw in the fridge overnight before reheating. Store prepped portions in airtight, leak-proof containers to keep them fresh and prevent cross-contamination with other fridge items.
Eco-Friendly Alternatives to Single-Use Parchment Paper
If you’re looking to reduce kitchen waste, there are several reusable alternatives to single-use parchment paper that work equally well for this recipe.
Reusable Options
Silicone baking mats are the most popular alternative: they’re heat-resistant up to 450°F (232°C), non-stick, and can be washed and reused hundreds of times. Unbleached, compostable parchment paper is a good middle ground if you prefer single-use options, as it breaks down faster than coated parchment and has no chemical bleaching. Beeswax wraps work for lower-heat cooking, but they can melt at temperatures above 350°F (175°C), so they’re not ideal for oven use.
Proper Disposal of Single-Use Parchment
Standard coated parchment paper cannot be recycled or composted, as the silicone coating prevents it from breaking down. Always throw used parchment in the regular trash, and avoid burning it, as it can release harmful fumes when exposed to high heat.
Frequently Asked Questions
Can I use aluminum foil instead of parchment paper for chicken breast?
Yes, foil works for higher-heat cooking methods like broiling, but it can react with acidic ingredients like lemon juice or vinegar, imparting a metallic taste to your chicken. Parchment paper creates a tighter steam seal, so it will produce juicier results for this recipe.
How do I know if my parchment packet is sealed properly?
After folding the edges, run your finger along the seam – if you feel any gaps, add an extra pleat and press firmly. A properly sealed packet will hold its shape when tilted slightly, with no steam escaping from the edges.
Can I freeze cooked parchment-wrapped chicken?
Yes, let the chicken cool completely after cooking, then wrap the sealed packet in aluminum foil and freeze for up to 3 months. Thaw in the refrigerator overnight before reheating in the oven at 350°F (175°C) for 15 minutes.
Will this method make my chicken crispy?
This method produces tender, juicy chicken with a soft, steamed exterior. If you prefer a crispy texture, open the packet for the final 2 minutes of cooking and broil on high for 60-90 seconds, watching closely to avoid burning the parchment.
Pro Tips for Juicy Chicken Every Time
Even with this foolproof method, a few small tweaks will help you get perfect results every time:
- Avoid overcooking: Check the chicken 2-3 minutes before the minimum recommended cooking time, as oven temperatures can vary. The chicken will continue cooking slightly after you remove it from the heat, so pulling it a degree or two below 165°F (74°C) is fine.
- Don’t skip the rest step: Letting the chicken rest for 5 minutes after cooking allows the juices to redistribute evenly, so every bite is moist and flavorful.
- Use unbleached parchment: Unbleached parchment is more heat-resistant than bleached varieties, so it’s less likely to tear or burn during cooking.
- Don’t overfill the packet: Stick to 1-2 chicken breasts per packet, plus a small amount of aromatics, to ensure the seal stays tight.
Cooking chicken breast with parchment paper is one of the simplest, most reliable ways to get juicy, flavorful chicken with zero guesswork. This low-effort method requires no special equipment, cuts down on cleanup, and works for everything from quick weeknight dinners to bulk meal prep. Whether you’re a beginner cook or a seasoned home chef, this hack will quickly become a staple in your rotation. Experiment with different seasoning blends, marinades, and aromatics to customize the flavor to your taste – from zesty lemon and herb to smoky paprika and garlic, the possibilities are endless. For more easy, tested recipes perfect for busy weeknights, browse our full library on our blog.

Hi, I’m Daniel Brooks—a food lover and kitchen gear enthusiast. I enjoy testing cookware, utensils, and gadgets to see what really works in everyday cooking. At PlugChef.com, I share honest reviews, comparisons, and simple guides to help you choose the best tools for a safer, smarter, and more enjoyable kitchen.
Related posts:
 How to Make a Fruit Basket for a Gift: Easy DIY Guide
 Do You Need a Basket? Essential Guide for Air Fryers
 How to Adjust Syrup Dispenser Pressure: Expert Tips
 Kitchen Cabinets With Black Appliances: Trendy Design Tips
 White Kitchen And Stainless Steel Appliances: A Perfect Duo
 Kitchen Colors With White Cabinets And White Appliances: Vibrant Ideas

