
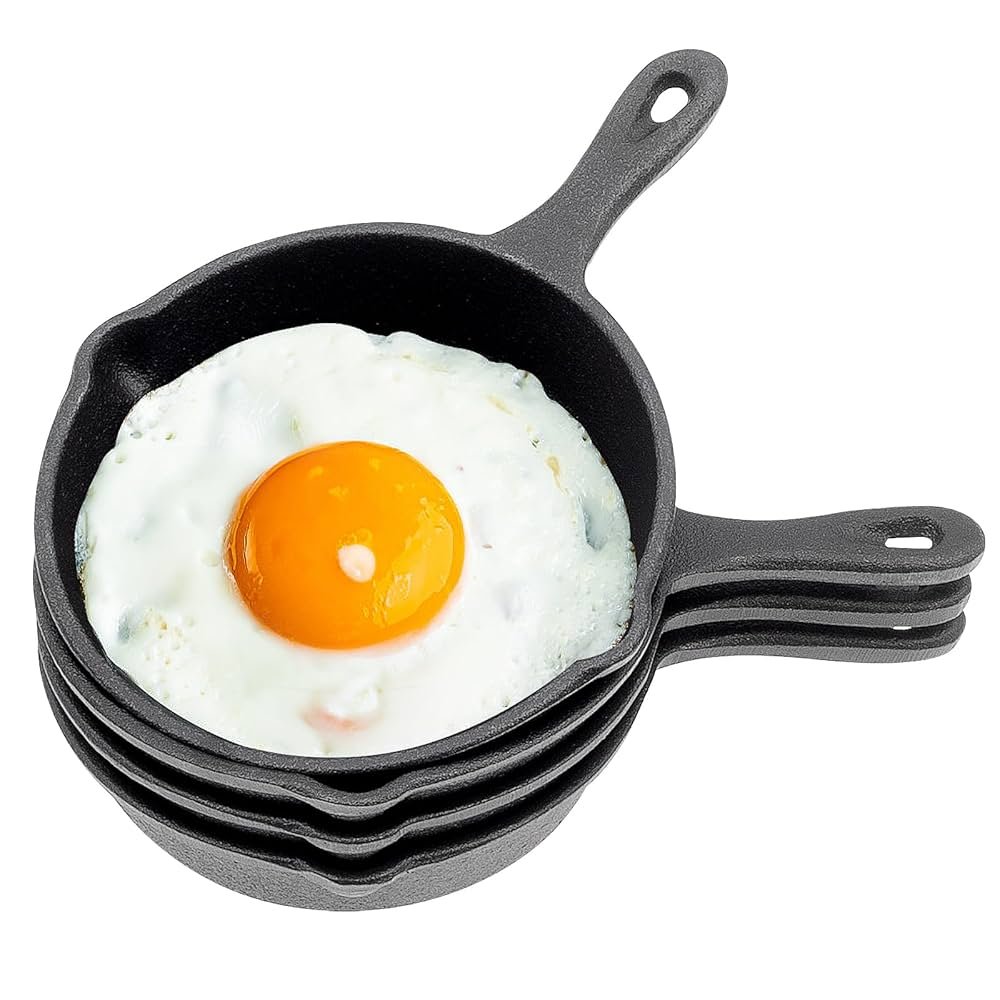
You know the frustration: you crack an egg into a hot pan, turn away for 30 seconds, and come back to a stuck, torn mess with burnt edges and raw, runny whites. Or you’re making scrambled eggs for the family, and they turn out rubbery and dry before everyone sits down to eat. The culprit is almost always your cookware—and a well-seasoned cast iron skillet for eggs solves all of these problems, delivering crispy, golden edges and fluffy, tender centers every single time.
Unlike flimsy non-stick pans that degrade after 2–3 years and may release toxic PTFE fumes if overheated, cast iron gets better with age, distributes heat evenly to eliminate hot spots, and requires no synthetic coatings. In this guide, we’ll walk you through choosing the right skillet, mastering seasoning, cooking perfect eggs, and maintaining your pan for decades of use, plus share easy recipes to elevate your breakfast routine.
Pro Tip for Family Breakfasts
If you’re cooking with kids nearby, install childproof cabinet locks to keep harsh cleaning products and sharp utensils out of reach while you prep breakfast.
Why Cast Iron Is the Ultimate Pan for Eggs
Cast iron’s unique physical properties make it far superior to other cookware for egg dishes, with benefits that compound the more you use it:
- Unmatched heat retention: Cast iron holds heat 2–3 times longer than stainless steel, so once it reaches cooking temperature, it stays consistent even when you add cold ingredients. This eliminates hot spots that cause uneven cooking or burnt edges.
- Natural, non-toxic non-stick surface: Properly seasoned cast iron develops a polymerized oil layer that is completely chemical-free, far safer than worn non-stick pans. This layer improves with every use, getting smoother and more non-stick over time.
- Durability that lasts generations: A high-quality cast iron skillet can easily last 100+ years with proper care, making it a one-time investment that outperforms dozens of disposable non-stick pans. Many vintage skillets from the early 1900s are still in daily use today.
- Subtle iron boost: Cooking acidic or high-moisture foods like eggs in cast iron can transfer small amounts of dietary iron to your meal, a welcome bonus for people with mild iron deficiencies.
The only real trade-off is weight: cast iron skillets are heavier than aluminum or non-stick pans, so they may be cumbersome for people with limited wrist strength. For most home cooks, however, the benefits far outweigh this minor downside.
How to Choose the Right Cast Iron Skillet for Egg Cooking
Not all cast iron skillets are created equal for egg dishes. Keep these factors in mind when shopping:
Ideal Size and Weight
- 8-inch: Perfect for 1–2 eggs, ideal for single servings or couples. It heats up quickly and is easy to maneuver.
- 10-inch: The universal sweet spot for 3–4 eggs, small frittatas, or omelets. It fits on most standard stovetop burners without overcrowding, and is light enough for most people to lift safely when full.
- 12-inch: Best for feeding a crowd, making shakshuka, or large breakfast casseroles. It retains heat extremely well, but can be heavy to move when full.
Look for a skillet with a long, ergonomic handle that stays cool during cooking (silicone handle sleeves are a nice added feature), and a small helper handle on the opposite side for lifting heavy pans. Avoid skillets with rough, uneven casting, as these trap food and make building a smooth seasoning layer much harder.
Pre-Seasoned vs. Bare Cast Iron
Pre-seasoned skillets (the most common option from brands like Lodge) are factory-treated with a layer of polymerized oil, so they are ready to use out of the box with minimal initial maintenance. This is the best choice for beginners. Bare cast iron requires full at-home seasoning before first use, which gives you full control over the seasoning layer, but takes 1–2 hours of active work.
Seasoning 101: The Foundation of Non-Stick, Flavorful Eggs
Seasoning is the process of heating oil on the cast iron surface until it polymerizes, forming a hard, smooth, non-stick layer that protects the pan from rust and improves with every use. A well-seasoned skillet is the difference between eggs that slide right out and a stuck, torn mess.
Step-by-Step Initial Seasoning for New Skillets
- Wash the skillet with warm water and a small amount of dish soap to remove factory wax or debris (this is the only time you should use soap on a new skillet).
- Dry it completely with a towel, then place it on the stovetop over low heat for 5 minutes to evaporate all remaining moisture.
- Apply a thin, even layer of high-smoke-point oil (avocado oil, grapeseed oil, or vegetable shortening are best; avoid olive oil, which has a low smoke point and can turn rancid) to the entire surface, inside and out. Use a paper towel to wipe off all excess oil—too much oil will cause sticky, flaky seasoning.
- Place the skillet upside down in an oven preheated to 375°F (190°C) for 1 hour, with a sheet of aluminum foil on the bottom rack to catch drips.
- Let it cool completely before using.
For science-backed cast iron care guidance, the University of Minnesota Extension recommends using oils with a high smoke point for seasoning to ensure proper polymerization. University of Minnesota Extension cast iron care guide
Common Seasoning Mistakes to Avoid
- Using too much oil, which creates a sticky, gummy layer instead of a smooth polymerized surface.
- Using low-smoke-point oils like extra virgin olive oil, which break down before they can polymerize.
- Skipping the pre-drying step, which causes the oil to steam and create a rough, uneven layer.
- Flaxseed oil is often touted as a top seasoning oil, but it can flake off over time if applied too thickly, so stick to canola or grapeseed oil for reliable, long-lasting results.
Prepping Your Skillet for Flawless Eggs
Even a well-seasoned skillet will produce stuck eggs if you skip these prep steps:
- Preheat properly: Place the skillet on the stovetop over medium-low heat for 3–5 minutes, until a few drops of water sizzle and evaporate instantly when dropped on the surface. This confirms the pan is hot enough to create a non-stick barrier.
- Choose the right fat: Use high-smoke-point fats like avocado oil, ghee, or bacon fat for high-heat frying. For low-heat scrambled eggs, unsalted butter works perfectly for added richness. Clarified butter is best for high-heat cooking, as regular butter’s milk solids can burn quickly.
- Use the right amount of fat: You only need a thin, even coating—about 1 teaspoon for an 8-inch pan, 1 tablespoon for a 10-inch pan. Too much fat will make greasy eggs; too little will cause sticking.
- Avoid temperature shocks: Never add cold eggs to a lukewarm skillet, as this causes the whites to spread and stick before they set. Always add eggs to a fully preheated pan.
Common Cast Iron Egg Cooking Mistakes (And How to Fix Them)
Even experienced home cooks run into these issues—here’s how to troubleshoot them:
- Burnt edges, runny whites: Caused by cooking on too high heat. Fix: preheat on medium-low, and reduce heat slightly before adding eggs.
- Stuck, torn eggs: Caused by insufficient seasoning, skipping preheating, or moving eggs before the edges set. Fix: let eggs cook undisturbed for 2–3 minutes until the edges are golden before lifting with a spatula.
- Rubbery scrambled eggs: Caused by cooking on high heat or overcooking. Fix: cook on low heat, and remove the skillet from the burner when eggs are 90% set, as they will continue cooking from residual heat.
- Greasy eggs: Caused by using too much fat. Fix: stick to 1 teaspoon per 8-inch pan, and use a paper towel to wipe away excess fat before adding eggs.
- Sticky skillet after cooking: Caused by stripped seasoning. Fix: do a quick stovetop re-season by heating a thin layer of oil on low for 10 minutes, then wiping off excess.
How to Cook Perfect Crispy Fried Eggs in Cast Iron
Crispy fried eggs are one of the simplest, most satisfying breakfast dishes you can make in cast iron, with a crunchy, golden edge and a rich, runny yolk.
- Preheat your 8 or 10-inch cast iron skillet over medium-low heat for 3–5 minutes, until water droplets sizzle and evaporate on contact.
- Add 1 teaspoon of avocado oil or rendered bacon fat, swirling to coat the entire surface.
- Crack the egg gently into the center of the pan, keeping it away from the edges to avoid splattering.
- Let the egg cook undisturbed for 2–3 minutes, until the edges are golden and crisp, and the whites are mostly set.
- If you prefer a firm yolk, slide a thin, flexible spatula under the egg and flip quickly for 10–15 seconds. For a runny yolk, serve sunny-side up.
- Sprinkle with flaky salt and black pepper before serving.
For food safety, cook eggs until the whites are fully set and the yolk reaches 160°F (71°C) if you’re serving pregnant people, young kids, or immunocompromised guests, per USDA safe egg handling guidelines.
Pro tip: For extra crispy edges, tilt the pan slightly to pool the fat around the edges of the egg as it cooks.
 Image credit: food52.com
How to Make Ultra-Fluffy Cast Iron Scrambled Eggs
The even heat retention of cast iron makes it ideal for scrambled eggs, eliminating hot spots that cause rubbery, overcooked curds.
- Crack 2–3 eggs per serving into a bowl, add a pinch of salt and a splash of milk, cream, or half-and-half (1 tablespoon per 2 eggs), and whisk until the yolks and whites are fully combined and slightly frothy. The salt breaks down egg proteins for a softer texture, and the dairy adds richness without making eggs soggy.
- Preheat your cast iron skillet over low heat, add 1 tablespoon of butter, and swirl to coat.
- Pour the beaten eggs into the skillet, and let them sit undisturbed for 30 seconds until small curds start to form at the edges.
- Use a silicone spatula to gently stir the eggs from the edges to the center, folding them over slowly, until soft, creamy curds form. Do not overcook—remove the skillet from heat when the eggs are 90% set, as they will continue cooking from residual heat.
- Top with fresh chives, grated cheese, or a dollop of sour cream before serving.
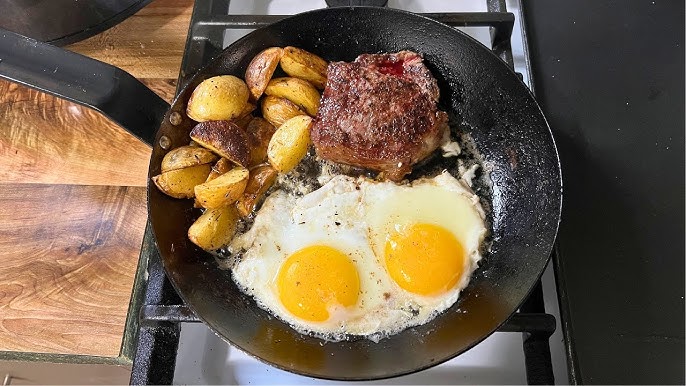 Image credit: www.youtube.com
3 Easy Cast Iron Egg Recipes to Master
Once you’ve mastered the basics, try these simple, flavorful recipes to switch up your breakfast routine.
1. Classic Cast Iron Fried Eggs
Follow the steps above for crispy fried eggs, and add toppings like crumbled bacon, avocado slices, or hot sauce for a quick, satisfying breakfast. Pro tip: Cook a few slices of bacon in the skillet first, then use the rendered bacon fat to cook the eggs for extra smoky flavor. Pair your crispy fried eggs with a spread of perfectly cut cheese slices for a weekend brunch spread.
2. Fluffy Cast Iron Skillet Omelet
- Preheat your 10-inch cast iron skillet over medium-low heat, add 1 teaspoon of butter.
- Whisk 2–3 eggs with a pinch of salt, a splash of milk, and your choice of fillings (diced bell peppers, sautéed spinach, shredded cheese, cooked ham).
- Pour the egg mixture into the skillet, and let it cook for 2–3 minutes until the edges are set.
- Use a spatula to lift one edge of the omelet and fold it in half, then slide it onto a plate. Pro tip: Add fillings halfway through cooking to avoid sogginess, and don’t overstuff the omelet, or it will be hard to fold.
3. Easy Cast Iron Shakshuka
- Preheat your 10 or 12-inch cast iron skillet over medium heat, add 1 tablespoon of olive oil.
- Sauté 1 diced onion and 1 diced red bell pepper for 3–4 minutes until soft, then add 2 cloves of minced garlic and 1 teaspoon of smoked paprika, and cook for 30 seconds until fragrant.
- Add a 28-ounce can of crushed tomatoes, a pinch of salt, and a pinch of cumin, and simmer for 10 minutes until the sauce thickens slightly.
- Crack 4–6 eggs directly into the sauce, spacing them evenly.
- Cover the skillet and cook for 5–7 minutes, until the egg whites are set and the yolks are still runny.
- Top with crumbled feta cheese and fresh parsley before serving with crusty bread for dipping. Pro tip: Shakshuka is perfect for meal prep—reheat it in the cast iron skillet for a quick, flavorful breakfast any day of the week.
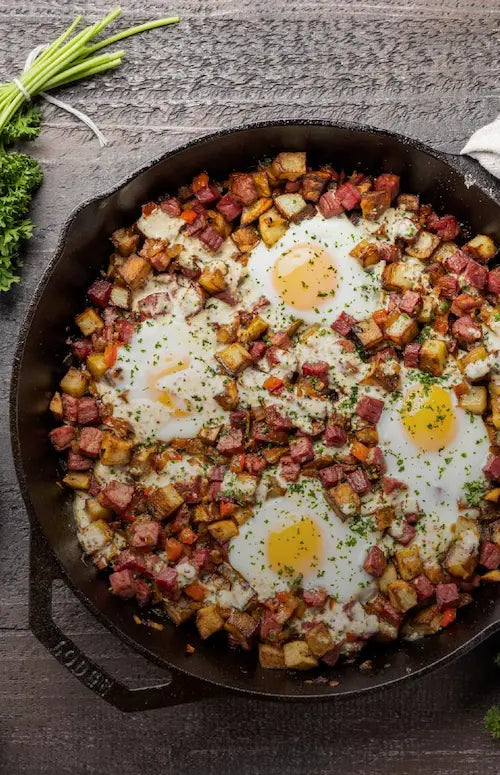 Image credit: www.lodgecastiron.com
Cleaning and Maintaining Your Skillet for Long-Term Performance
Proper care is the key to making your cast iron skillet last for decades and keep cooking perfect eggs. Follow these simple steps:
Safe Cleaning Practices
Never put your cast iron skillet in the dishwasher, soak it in water for long periods, or use harsh steel wool, as these will strip the seasoning and cause rust. After cooking, while the skillet is still warm (not hot), rinse it with hot water and use a non-abrasive brush or sponge to remove stuck-on bits. For tough, baked-on egg residue, sprinkle a tablespoon of coarse kosher salt into the skillet and scrub with a paper towel or heavy-duty kitchen scrubber to lift the bits without damaging the seasoning.
Dry the skillet immediately with a towel, then place it on the stovetop over low heat for 2–3 minutes to evaporate any remaining moisture.
Re-Seasoning After Use
If you notice food sticking, rust spots, or a dull, uneven surface, it’s time to re-season your pan. Follow the initial seasoning steps outlined earlier, or do a quick stovetop re-season by heating a thin layer of oil on low for 10 minutes, then wiping off excess. You don’t need to fully strip the skillet unless the seasoning is flaking off in large chunks.
Storage Tips to Prevent Rust
Rust is the easiest issue to prevent with simple storage habits:
- Store your skillet in a dry place, away from moisture and humidity. If you live in a humid climate, place a paper towel inside the skillet to absorb excess moisture, and store it in a cabinet secured with drawer safety latches to keep it away from excess dampness.
- Keep the lid off or slightly ajar to allow air circulation, which prevents moisture buildup.
- Avoid storing the skillet in an oven, as residual moisture from cooking can cause rust over time.
Frequently Asked Questions
How do you keep eggs from sticking to a cast iron skillet?
The two most important steps are proper seasoning and preheating. Make sure your skillet is fully preheated before adding eggs, and use enough fat to coat the surface. If eggs still stick, your skillet likely needs a fresh layer of seasoning.
Can you use butter in a cast iron skillet for eggs?
Yes, but use clarified butter (ghee) for high-heat frying, as regular butter’s milk solids burn at high temperatures. For low-heat scrambled eggs, regular unsalted butter works perfectly and adds rich flavor.
Why are my fried eggs turning out rubbery instead of crispy?
This is almost always caused by cooking on too high heat, which overcooks the whites before the edges have time to crisp. Reduce the heat to medium-low, and preheat the skillet longer to ensure even heat distribution.
Can you cook eggs in a rusty cast iron skillet?
Yes, but you’ll need to strip the rust and re-season the skillet first. Rust is not toxic, but it will give your eggs a metallic flavor and cause them to stick. Scrub the rust off with steel wool and a mixture of water and vinegar, then dry and re-season the pan immediately.
Do you need to re-season your skillet after cooking eggs?
Only if you notice food sticking, dull spots, or rust. Eggs are low-fat, so they don’t strip seasoning as much as high-fat foods like bacon, but if you wash your skillet with soap regularly, you may need to re-season it every 3–6 months to maintain the non-stick layer.
Final Tips for Breakfast Perfection
Mastering cast iron egg cooking takes minimal practice, but the payoff is unmatched: crispy, golden edges, fluffy, tender curds, and a pan that only gets better with every use. Unlike disposable non-stick pans that end up in landfills after a few years, a well-cared-for cast iron skillet is a lifelong investment that will deliver perfect eggs for decades. Whether you’re making quick weekday fried eggs, fluffy scrambled eggs for the family, or a weekend shakshuka for brunch guests, the steps above will help you avoid common mistakes and get consistent results every time.
For more kitchen hacks to simplify your morning routine, browse our full library of kitchen safety and cleaning guides to keep your space functional and family-friendly. If you’re gifting a cast iron skillet to a fellow breakfast lover, add a personalized touch with custom engraved details (the same technique works for wooden cutting boards, too) for a one-of-a-kind present.

I’m Abby Lu, a passionate home cook who loves simplifying everyday meals. At PlugChef.com, I share product reviews and cooking guides to help you find the best tools for your kitchen.
Related posts:
 Seville Expandable Cabinet And Pantry Organizer: Space Savior
 Glideware Pull Out Cabinet Organizer for Pots & Pans: Space Saver
 Small 3-Tier Shelf Organizer: Maximize Space Effortlessly
 Trader Joe’S Spicy Lentil Wrap: Delicious, Healthy, and Quick Meal!
 Easy Way to Peel Pumpkin: Quick Tips for Effortless Prep
 How Long Do Grapes Last: Ultimate Freshness Guide Revealed

