
Have you ever wondered how to turn tough cuts of meat into tender, flavorful dishes that melt in your mouth? Braising is the secret cooking method that can do just that.
It’s simple, yet powerful, and once you understand it, your meals will never be the same. You’ll discover exactly what it means to braise meat, why it works so well, and how you can use this technique to impress your family and friends with delicious, juicy results every time.
Keep reading, because mastering braising could change the way you cook forever.

Credit: www.youtube.com
Braising Basics
Braising is a cooking technique that transforms tough cuts of meat into tender, flavorful dishes. Understanding the basics of braising helps you create meals that are both rich and satisfying. Let’s break down what braising involves, the key ingredients you need, and the essential equipment to get started.
What Braising Means
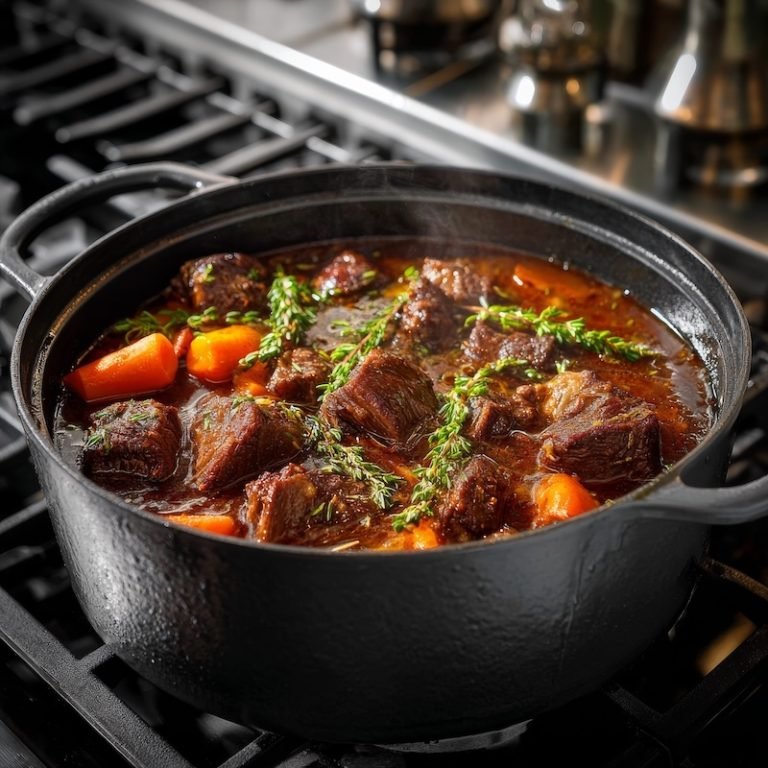
Braising means cooking meat slowly in a small amount of liquid, usually at low heat. This method combines both dry and moist heat: first, you brown the meat to develop flavor, then cook it covered in liquid. The slow cooking process breaks down tough fibers, making the meat tender and juicy.
Have you ever wondered why some stews taste so deep and rich? That’s the magic of braising working its way through your dish.
Key Ingredients Needed
- Meat:Tougher cuts like chuck, brisket, or short ribs work best because they become tender with slow cooking.
- Liquid:Use broth, wine, beer, or even water to create steam and moisture for cooking.
- Aromatics:Vegetables like onions, garlic, carrots, and herbs add layers of flavor.
Choosing the right liquid is crucial—it not only cooks the meat but also infuses it with taste. Think about what flavors you want to highlight and pick your liquid accordingly.
Essential Equipment
- Heavy-bottomed pot or Dutch oven:Retains heat well and allows even cooking.
- Lid:Keeps the moisture locked in during cooking.
- Stove and oven:You’ll start braising on the stove for browning, then finish in the oven for slow, steady heat.
Using the right equipment makes braising easier and ensures your meat cooks evenly. Do you have a favorite pot that holds heat well? It might be your best tool for braising success.
Credit: www.reluctantgourmet.com
Choosing The Right Meat
Choosing the right meat is a key step to braising success. The type of meat you pick affects the texture, flavor, and cooking time. Knowing which cuts work best helps you get tender, flavorful results every time.
Best Cuts For Braising
Look for cuts with plenty of connective tissue and marbling. These include:
- Chuck roast
- Short ribs
- Brisket
- Oxtail
- Shank
These cuts might seem tough at first but transform beautifully under low and slow cooking. Have you tried braising a brisket that melts in your mouth? It’s all about the right cut.
Why Tough Cuts Work Best
Tough cuts have more collagen and connective tissue. When braised slowly in liquid, this collagen breaks down into gelatin, making the meat juicy and tender. This process turns a seemingly tough piece into a succulent dish.
Lean cuts lack this collagen, so they can dry out or become chewy with braising. Are you ready to give tough cuts a chance? They reward your patience with rich, deep flavors you won’t get from tender steaks.
Preparing Meat For Braising
Braising meat means cooking it slowly in liquid to make it tender and flavorful. Preparing involves cutting tough cuts and seasoning well before browning. This helps lock in juices and improve taste during slow cooking.
Preparing meat for braising is an essential step that can make or break your dish. This process involves a few key techniques to enhance flavor and ensure tenderness. Let’s dive into the essentials that set the foundation for a perfectly braised meal.Trimming And Seasoning
Begin by trimming excess fat from the meat. While some fat is necessary for flavor, too much can make your dish greasy. Aim for a balance that enhances rather than overwhelms. Season generously with salt and pepper. This initial seasoning is crucial as it penetrates the meat, enhancing its natural flavors. Consider additional herbs or spices that complement your recipe, like rosemary or garlic powder.Browning Techniques
Browning the meat is a step you should not skip. Use a hot pan with a bit of oil to sear the meat on all sides. This creates a flavorful crust that enriches the overall taste of your dish. Be patient and avoid overcrowding the pan. Crowding drops the temperature and results in steaming rather than browning. Work in batches if necessary, ensuring each piece gets a rich, golden-brown sear. Does the thought of perfectly braised meat excite you? Imagine the complex flavors and tender texture you can achieve by mastering these simple steps.
Credit: kikifoodies.com
Cooking Process
Braising meat is a slow cooking process that makes tough cuts tender and flavorful. It uses moisture and low heat to break down the meat’s fibers. This method combines both dry and wet heat for rich taste and soft texture. Understanding the cooking process helps create perfect braised dishes every time.
Liquid Choices
Choosing the right liquid is key in braising. Common options include broth, wine, beer, or water. Each liquid adds unique flavors to the meat. Using stock or broth gives a deeper taste. Wine or beer adds complexity. Water works but is best combined with herbs or spices for flavor.
Temperature And Time
Braising requires low, steady heat to cook meat slowly. The ideal temperature is around 275°F to 325°F (135°C to 160°C). Cooking at this range breaks down collagen and fat without drying the meat. Time varies by cut and size, often from 1.5 to 4 hours. Patience results in tender, juicy meat.
Covering And Simmering
Covering the pot traps steam and moisture. This keeps the meat from drying out during cooking. Use a tight-fitting lid or foil to seal the pot. The liquid should simmer gently, not boil. A slow simmer helps flavors blend and meat become tender. Stir occasionally to prevent sticking.
Flavor Enhancements
Braising meat is a slow cooking method that brings deep flavors to the dish. The magic lies not just in the cooking time, but in the ingredients that enhance the taste. Flavor enhancements make braised meat rich, tender, and aromatic. Small additions during the braising process create layers of taste that delight the palate.
Using Herbs And Spices
Herbs and spices add unique character to braised meat. Fresh herbs like thyme, rosemary, and bay leaves infuse earthy, green notes. Dried spices such as black pepper, paprika, and cloves introduce warmth and depth. These ingredients blend with the meat’s natural juices, creating a complex flavor profile. They also help balance the richness of the dish.
Adding Vegetables
Vegetables contribute sweetness and texture to braised meat. Onions, carrots, and celery form a classic base called mirepoix. These vegetables soften and release sugars during cooking. Garlic, leeks, and mushrooms add more layers of aroma and umami. Vegetables absorb the braising liquid, enriching both the meat and the sauce.
Creating Rich Sauces
The braising liquid transforms into a flavorful sauce. Wine, broth, or stock serve as the cooking base. Reducing this liquid concentrates flavors, making the sauce thicker and tastier. Adding tomato paste or mustard can boost the taste further. Finish the sauce with a touch of cream or butter for smoothness and shine.
Common Mistakes To Avoid
Braising meat is a slow-cooking technique that requires careful attention. Avoiding common mistakes helps achieve tender and flavorful results. Understanding these errors improves your cooking and saves time.
Overcooking Or Undercooking
Cooking meat too long makes it dry and tough. Too little cooking leaves it chewy and hard to eat. Keep an eye on cooking time and check meat regularly. Use a fork to test tenderness. Meat should be soft but not falling apart.
Insufficient Liquid
Too little liquid causes meat to burn or stick to the pan. The liquid should cover about halfway up the meat. It helps meat stay moist and cook evenly. Add broth, wine, or water to maintain the right level. Check liquid during cooking and add more if needed.
Skipping Browning
Skipping browning reduces flavor and color. Browning meat first creates a rich, deep taste. It also seals juices inside the meat. Use a hot pan and brown meat on all sides before braising. This step builds a tasty base for the sauce.
Serving Braised Dishes
Serving braised dishes offers a rich and comforting meal experience. Braising makes the meat tender and full of flavor. Presenting these dishes properly enhances their appeal. Pairing them with the right sides brings balance to the plate.
Presentation Tips
- Use wide, shallow bowls to hold the meat and sauce.
- Arrange meat slices neatly for a clean look.
- Pour some braising liquid over the meat to keep it moist.
- Garnish with fresh herbs like parsley or thyme for color.
- Serve warm plates to keep the dish hot longer.
Perfect Side Dishes
- Mashed potatoes absorb the rich braising sauce perfectly.
- Steamed vegetables add a fresh, light contrast.
- Crusty bread helps soak up the flavorful juices.
- Rice or polenta can provide a creamy base.
- Roasted root vegetables complement the deep flavors.
Braised Meat Recipes To Try
Braising meat offers a unique way to transform tougher cuts into tender, flavorful dishes that melt in your mouth. If you’re curious about trying your hand at braising, starting with some classic recipes can build your confidence and expand your cooking skills. These dishes show how simple ingredients and slow cooking can create incredible meals that impress every time.
Classic Beef Bourguignon
This French dish is a perfect introduction to braising. You’ll need beef chuck, red wine, garlic, onions, and mushrooms. Slow-cooked for hours, the beef becomes incredibly tender and absorbs the rich flavors of the wine and herbs.
Try adding a splash of brandy for a deeper taste. Don’t rush the simmering process—patience is key to letting the flavors fully develop. Have you ever noticed how the smell of this dish fills the entire house, making everyone eager to eat?
Coq Au Vin
Coq au Vin is another traditional French recipe that uses chicken braised in red wine with bacon, mushrooms, and pearl onions. The slow cooking breaks down the meat, making it juicy and tender while infusing it with complex flavors.
This recipe is a great way to explore how braising works with different proteins. You might find that the combination of wine and herbs brings out a surprising depth in chicken that you didn’t expect. What wine would you choose to give your Coq au Vin a personal touch?
Braised Short Ribs
Short ribs are perfect for braising because of their marbling and connective tissue, which melt into a rich sauce during cooking. Use beef stock, red wine, and aromatic vegetables like carrots and celery to enhance the flavor.
I once braised short ribs overnight, and the next day, the meat fell off the bone effortlessly. That level of tenderness can turn any dinner into a special occasion. How do you think slow cooking changes the texture compared to grilling or roasting?
Frequently Asked Questions
What Does It Mean To Braise Meat?
Braising meat means cooking it slowly in liquid over low heat. This method tenderizes tough cuts and enhances flavor. It combines searing and simmering, resulting in juicy, flavorful dishes.
Which Meats Are Best For Braising?
Tough cuts like beef chuck, pork shoulder, and lamb shanks are ideal for braising. These cuts become tender and flavorful when cooked slowly in liquid.
How Long Does It Take To Braise Meat?
Braising typically takes 1. 5 to 3 hours, depending on the meat cut and size. Slow cooking ensures the meat becomes tender and absorbs flavors well.
What Liquids Can Be Used For Braising Meat?
Common braising liquids include broth, wine, beer, and tomato sauce. These liquids add moisture and enhance the meat’s taste during slow cooking.
Conclusion
Braising meat is a simple cooking method that makes food tender and tasty. It uses low heat and liquid to cook meat slowly. This helps break down tough fibers, making meat soft and juicy. Anyone can try braising at home with basic ingredients.
It works well for many types of meat and vegetables. Remember, patience is key to get the best results. Enjoy the rich flavors and soft texture braising creates. Give braising a try and see how it changes your meals.

I’m Abby Lu, a passionate home cook who loves simplifying everyday meals. At PlugChef.com, I share product reviews and cooking guides to help you find the best tools for your kitchen.
Related posts:
 What Type of Cooking Utensils are Safe: Expert Picks
 What Innovations Could Blenders Make: Unleashing Future Tech
 Smart Strategies to Organize a Small Kitchen: Maximize Space
 How to Organize a Kitchen Cabinet: Expert Tips & Tricks
 How to Organize Kitchen Drawers: Expert Tips and Tricks
 How to Organize a Corner Kitchen Cupboard: Expert Tips

