

Are you craving a dish that perfectly balances tangy and sweet flavors with the tender taste of shrimp? Shrimp Sweet and Sour Sauce is exactly what you need to satisfy your taste buds and impress your family or guests.
Imagine the juicy shrimp coated in a glossy, flavorful sauce that’s both zesty and just a little bit sweet—it’s a combination that keeps you coming back for more. You’ll discover an easy recipe and tips to make your own irresistible Shrimp Sweet and Sour Sauce right at home.
Ready to turn your cooking into a mouthwatering experience? Keep reading, and let’s get started!
Ingredients For Sweet And Sour Sauce
Creating the perfect sweet and sour sauce starts with the right ingredients. Each component plays a specific role in balancing the tangy, sweet, and savory flavors that make this sauce so irresistible. Knowing what goes into your sauce helps you adjust it to your taste and elevate your shrimp dish.
Key Components
- Vinegar:Usually white vinegar or rice vinegar, it provides the essential tanginess that defines the sauce.
- Sugar:Balances the acidity with sweetness, commonly white or brown sugar.
- Ketchup:Adds a rich tomato flavor and a hint of umami.
- Soy Sauce:Brings depth and saltiness to the mix.
- Pineapple Juice:A natural sweetener that also enhances the fruity notes.
- Cornstarch:Used to thicken the sauce and give it a glossy finish.
- Water:Helps adjust the sauce’s consistency.
Each ingredient has a clear purpose, so try not to skip any if you want that classic taste. Have you noticed how just a little extra vinegar can completely change the flavor profile?
Optional Additions
- Garlic:Adds a subtle punch and depth.
- Ginger:Provides warmth and a slight spiciness.
- Red Pepper Flakes or Fresh Chili:For those who like a bit of heat.
- Bell Peppers:Sometimes added to the sauce or cooked with the shrimp for extra texture and color.
- Sesame Oil:A few drops can introduce a nutty aroma.
Think about what flavors you enjoy most. Would a touch of spice make your shrimp dish more exciting? Small tweaks can turn a basic sauce into something uniquely yours.
Selecting The Best Shrimp
Choosing shrimp for sweet and sour sauce requires attention to freshness and size. Fresh shrimp should smell of the sea and have a firm texture. Opt for medium-sized shrimp for a balanced flavor in your dish.
Selecting the best shrimp is crucial for achieving that perfect balance of flavors in your sweet and sour sauce. The right shrimp can elevate your dish, offering a delightful texture and taste. Here’s how you can choose the best shrimp for your culinary masterpiece.Fresh Vs Frozen
Consider your options: fresh or frozen shrimp. Fresh shrimp can offer a succulent taste, but only if you have access to a reliable seafood market. In many cases, frozen shrimp can be just as good because they are often frozen immediately after being caught, preserving their flavor and texture. Frozen shrimp also come with the added benefit of convenience, allowing you to store them and use them whenever you’re ready to cook. Remember to check packaging dates for the best quality. Have you ever wondered why some frozen shrimp taste better than others? It often comes down to how quickly they were frozen and how they’ve been stored.Size And Quality Tips
Size matters when it comes to shrimp. For a balanced sweet and sour shrimp dish, medium-sized shrimp work best. They cook quickly and evenly, ensuring each bite is juicy and flavorful. Quality is non-negotiable. Look for shrimp that are firm to the touch and have a mild, ocean-like smell. Avoid those that are mushy or have an overpowering fishy odor. When shopping, consider buying shrimp labeled as “deveined” to save time. This simple step can make your cooking process much smoother. Have you ever spent more time cleaning shrimp than actually cooking them? Choosing pre-cleaned shrimp can make your meal prep less of a hassle.Preparing Shrimp For Cooking
Getting your shrimp ready for cooking is a crucial step that shapes the final flavor and texture of your sweet and sour dish. Proper preparation not only ensures a clean taste but also helps the shrimp absorb the sauce perfectly. Let’s dive into how you can prepare shrimp to get the most out of your cooking.
Cleaning And Deveining
Start by rinsing the shrimp under cold water to remove any surface dirt. Peel off the shell, leaving the tail on if you prefer a nicer presentation. Removing the vein is essential; it’s the dark line along the back that can taste gritty or bitter if left in.
To devein, use a small paring knife or a deveining tool to make a shallow cut along the back. Then, gently lift out the vein with the tip of your knife or your fingers. Have you noticed how clean shrimp look and taste better in dishes? That’s the difference this step makes.
Marinating Options
Marinating shrimp adds a burst of flavor and keeps them tender. A simple marinade could include a splash of soy sauce, a bit of garlic, and a squeeze of lemon juice. These ingredients not only enhance taste but also help balance the sweet and sour sauce later.
For something more adventurous, try mixing in grated ginger, a pinch of chili flakes, or even a dash of honey. Let your shrimp soak in the marinade for 15 to 30 minutes—any longer and the acid might start to “cook” the shrimp, changing the texture. Have you experimented with different marinades before? It can completely transform your dish.
Credit: therecipecritic.com
Cooking Techniques For Perfect Shrimp
Getting the perfect texture and flavor in shrimp is crucial for your sweet and sour sauce to truly shine. Cooking shrimp correctly ensures it stays tender and juicy without becoming rubbery or overcooked. Let’s look at two popular techniques that can help you achieve shrimp perfection every time.
Sautéing
Sautéing shrimp lets you control the cooking speed and develop a subtle caramelization. Heat a small amount of oil or butter in a pan over medium-high heat until shimmering.
Add the shrimp in a single layer, giving each piece space to cook evenly. Stir occasionally, cooking just until they turn pink and opaque—usually 2-3 minutes per side.
Have you noticed how quickly shrimp can go from perfectly cooked to tough? Watch them closely and remove them from heat the moment they change color.
Stir-frying
Stir-frying is ideal if you want to combine shrimp with vegetables and your sweet and sour sauce in one quick pan. Use a wok or large skillet over high heat with a bit of oil.
Keep the shrimp moving constantly to avoid sticking and overcooking. This method takes just 1-2 minutes for shrimp to cook through while maintaining a slight snap.
Try adding aromatics like garlic or ginger early in the stir-fry to build extra flavor that complements the sauce perfectly. What fresh veggies will you toss in to make your dish vibrant and healthy?
Making The Sweet And Sour Sauce
Making the sweet and sour sauce for shrimp is all about crafting a perfect balance of taste and texture. The sauce should complement the natural sweetness of the shrimp while adding a tangy kick that excites your taste buds. Getting the flavors right and achieving the ideal thickness are key to making your dish stand out.
Balancing Flavors
The heart of a great sweet and sour sauce lies in balancing sweetness, sourness, and a touch of saltiness. You’ll want to mix ingredients like sugar, vinegar, and soy sauce carefully. Too much sugar can overwhelm the dish, while too much vinegar might make it too sharp.
Try starting with equal parts sugar and vinegar, then adjust to your taste. Adding a small amount of ketchup or pineapple juice can add depth and a subtle fruity note. Taste as you go, and don’t be afraid to tweak the balance until it feels just right for your palate.
Thickening Methods
Thickening your sweet and sour sauce helps it cling beautifully to each shrimp piece, enhancing every bite. Cornstarch slurry is the most common and effective thickener. Simply mix cornstarch with cold water before adding it to the simmering sauce.
Stir the sauce continuously while heating to avoid lumps. The sauce will quickly thicken and become glossy. If you prefer a natural thickener, pureed vegetables like cooked carrots or red bell peppers can add body and extra flavor.

Credit: www.youtube.com
Combining Shrimp And Sauce
Combining shrimp with sweet and sour sauce is where the magic happens in this dish. The balance between the tender shrimp and the tangy, slightly sweet sauce can make or break the flavor experience. Getting this combination right ensures every bite is juicy, flavorful, and perfectly coated without being soggy or overpowering.
Timing And Temperature
Timing is key when adding shrimp to the sweet and sour sauce. Shrimp cook very quickly—usually in just 2 to 3 minutes—so adding them too early can turn them rubbery. Wait until the sauce is fully prepared and simmering before gently folding in the shrimp.
Temperature matters just as much as timing. Keep the sauce hot enough to coat the shrimp evenly but avoid boiling after adding shrimp, which can toughen their texture. A medium heat works best to maintain that perfect shrimp tenderness while allowing the sauce to thicken slightly around them.
Presentation Tips
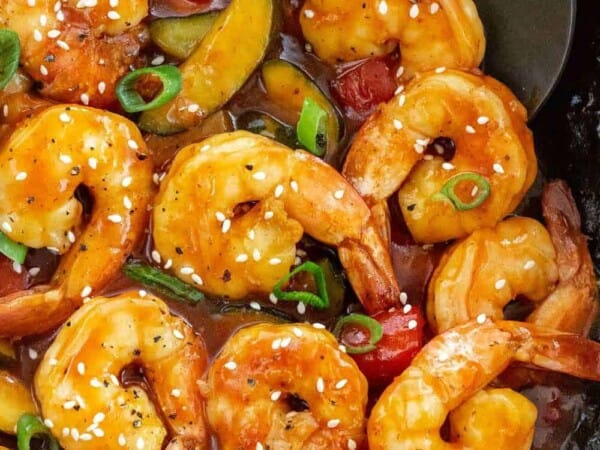
How you present shrimp with sweet and sour sauce can elevate the entire dish visually and sensorially. Use bright garnishes like sliced green onions or a sprinkle of toasted sesame seeds to add contrast and fresh texture.
Serving the dish in a shallow, wide bowl lets the sauce spread evenly and showcases the shrimp nicely. Try arranging the shrimp on top rather than mixing them fully in the sauce—this keeps their shape intact and makes the dish look inviting.
Have you ever noticed how a small touch like a lemon wedge on the side can brighten flavors? It’s a simple trick that invites diners to customize their meal and adds a burst of freshness to every bite.
Serving Suggestions
Shrimp sweet and sour sauce is a vibrant dish that shines with the right accompaniments. Serving it well brings out its full flavor and appeal. This sauce pairs beautifully with a range of side dishes and beverages. Each pairing enhances your meal, making it a delightful experience.
Side Dishes
- Steamed white rice balances the tangy sauce perfectly.
- Fried rice adds texture and a savory touch.
- Stir-fried vegetables like bell peppers and broccoli add crunch.
- Spring rolls offer a crispy contrast to the tender shrimp.
- Simple noodles tossed in light soy sauce complement the flavors.
Beverage Pairings
- Light lager beer refreshes the palate between bites.
- Green tea cleanses the mouth and aids digestion.
- Crisp white wine, such as Sauvignon Blanc, highlights the dish’s sweetness.
- Fresh lemonade provides a citrusy balance to the sauce.
- Sparkling water with a slice of lime adds a refreshing fizz.
Variations To Try
Experimenting with variations of shrimp sweet and sour sauce can transform a familiar dish into an exciting new experience. Tweaking the flavor or adding fresh ingredients lets you tailor the meal to your taste buds or what’s available in your kitchen. Curious about ways to change things up? Here are some ideas that might surprise you.
Spicy Twist
Adding a spicy kick can balance the sweetness and tanginess of the sauce perfectly. Try mixing in chili flakes, sriracha, or fresh chopped jalapeños to give your shrimp a bold edge.
Start with a small amount and taste as you go, so the heat doesn’t overpower the other flavors. I once added a dash of hot sauce and it turned a simple dinner into a lively, memorable meal that my whole family loved.
Vegetable Additions
Vegetables can add texture, color, and nutrition to your shrimp sweet and sour dish. Bell peppers, pineapple chunks, and snap peas are popular choices that complement the sauce’s flavor.
Try tossing in diced carrots or water chestnuts for a satisfying crunch. Have you ever thought about using baby corn or zucchini? These unexpected veggies can add a fresh twist and make the dish even more vibrant on your plate.
Storing And Reheating
Storing and reheating Shrimp Sweet and Sour Sauce properly keeps its flavors fresh and textures just right. You want to avoid soggy shrimp or a watery sauce that loses its punch. Knowing the right way to store and warm up your dish can make all the difference the next day.
Best Practices
Store the shrimp and sauce separately if possible. This prevents the shrimp from becoming mushy and the sauce from thinning out. Use airtight containers to keep odors out and freshness in.
Cool the shrimp and sauce to room temperature before refrigerating. Putting hot food directly in the fridge can cause condensation, which affects texture and safety. When reheating, warm the sauce gently over low heat and add the shrimp last to avoid overcooking.
Shelf Life
Freshly cooked shrimp with sweet and sour sauce lasts about 2 to 3 days in the refrigerator. Beyond that, the shrimp texture degrades and the sauce can separate. If you want to keep it longer, freezing is an option but expect some slight changes in texture.
Always check for off smells or slimy textures before reheating. Have you ever noticed a strange odor from leftovers and ignored it? That’s often a sign it’s time to toss the dish. Trust your senses to keep your meals safe and tasty.

Credit: parade.com
Frequently Asked Questions
What Ingredients Make The Best Shrimp Sweet And Sour Sauce?
The best shrimp sweet and sour sauce uses vinegar, sugar, ketchup, soy sauce, and pineapple juice. These ingredients balance tangy, sweet, and savory flavors perfectly for shrimp dishes.
How Do I Make Shrimp Sweet And Sour Sauce At Home?
To make shrimp sweet and sour sauce, combine vinegar, sugar, ketchup, soy sauce, and pineapple juice. Simmer until thickened, then toss with cooked shrimp. It’s quick, easy, and fresh-tasting.
Can I Use Fresh Or Frozen Shrimp For Sweet And Sour Sauce?
Both fresh and frozen shrimp work well with sweet and sour sauce. Just thaw frozen shrimp fully and pat dry before cooking to ensure the best texture and flavor.
What Side Dishes Pair Well With Shrimp Sweet And Sour Sauce?
Shrimp sweet and sour sauce pairs well with steamed rice, fried rice, or stir-fried vegetables. These sides complement the tangy sauce and make a balanced, delicious meal.
Conclusion
Shrimp with sweet and sour sauce offers a tasty, easy meal. The mix of flavors makes every bite enjoyable. You can prepare it quickly at home. It suits dinner or lunch, pleasing all ages. Try this recipe to enjoy a fresh, simple dish.
Cooking shrimp this way brings joy to your table. Give it a chance and taste the balance of sweet and tangy. A dish like this fits well in any kitchen. Simple ingredients, big flavor. Perfect for any day.

Hi, I’m Daniel Brooks—a food lover and kitchen gear enthusiast. I enjoy testing cookware, utensils, and gadgets to see what really works in everyday cooking. At PlugChef.com, I share honest reviews, comparisons, and simple guides to help you choose the best tools for a safer, smarter, and more enjoyable kitchen.
Related posts:
 What Type of Cooking Utensils are Safe: Expert Picks
 What Innovations Could Blenders Make: Unleashing Future Tech
 Smart Strategies to Organize a Small Kitchen: Maximize Space
 How to Organize a Kitchen Cabinet: Expert Tips & Tricks
 How to Organize Kitchen Drawers: Expert Tips and Tricks
 How to Organize a Corner Kitchen Cupboard: Expert Tips

