
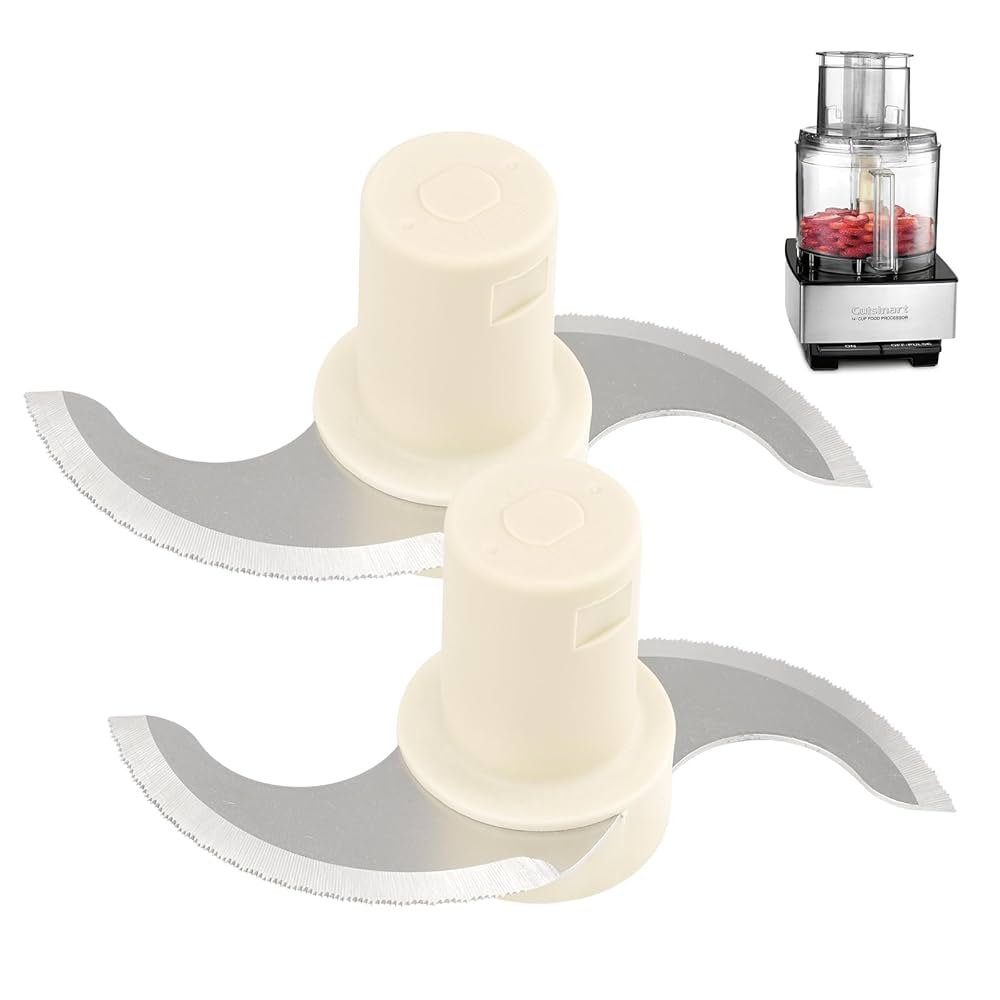
If you’ve ever spent 10 minutes hand-shredding a head of cabbage for coleslaw only to end up with uneven, mushy strips, you know the value of a high-quality shredding blade for your food processor. In 2026, home cooks prioritize speed and consistency in meal prep, and the right shredding attachment cuts vegetable, cheese, and fruit prep time by up to 90% while delivering uniform results every time. Unlike box graters that require arm power and produce inconsistent shreds, a food processor shredding blade delivers restaurant-quality cuts with minimal effort, making it a must-have tool for weeknight cooking, meal prep, and baking.
This guide covers everything you need to know about selecting, using, maintaining, and troubleshooting shredding blades to eliminate common pain points like jamming, dull edges, and crushed ingredients. We’ll break down blade types, compatibility, safety best practices, and creative use cases to help you get perfect shreds for every recipe.
How Shredding Blades Work
Shredding blades are circular, perforated discs mounted to your food processor’s central drive shaft. When the processor is turned on, the blade spins at high speed, pulling food through the evenly spaced holes in the disc to create uniform shreds. The width of the shreds is determined by the size of the holes: coarse blades have 1/4-inch holes for thick, hearty shreds, while fine blades have 1/8-inch holes for delicate, thin strips. Unlike serrated slicing blades that cut cleanly through produce, shredding blades use a grating action to pull food through the perforations, making them ideal for soft and hard ingredients alike. Most standard food processor bundles include one coarse and one fine shredding disc, but specialty blades (like Julienne or grating discs) are available for specific use cases.
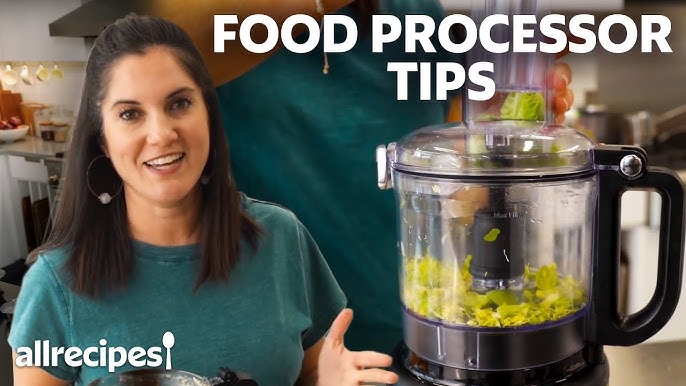 Credit: www.youtube.com
Tutorial video showing how to properly install and use a food processor shredding blade
Credit: www.youtube.com
Tutorial video showing how to properly install and use a food processor shredding blade
Types of Shredding Blades
Choosing the right blade type for your cooking habits will drastically improve your results. Below is a breakdown of the most common options, along with a quick reference table to match blades to your needs:
| Blade Type | Hole Size | Best Use Cases | Average Lifespan | Price Range |
|---|---|---|---|---|
| Coarse Shredding Disc | 1/4 inch | Coleslaw, taco toppings, shredded cheese for quesadillas, potatoes for hash browns | 2–3 years (regular use) | $10–$45 |
| Fine Shredding Disc | 1/8 inch | Cauliflower rice, garnishes, shredded Parmesan, shredded coconut, chocolate for baking | 2–3 years (regular use) | $10–$45 |
| Serrated Shredding Blade | Varies | Tough produce like Brussels sprouts, raw carrots, beets | 1–2 years (heavy use) | $15–$50 |
| Universal Fit Blade | Varies | Multiple processor brands, occasional use | 1–2 years (regular use) | $8–$25 |
Coarse vs. Fine Shredding Discs
Coarse shredding discs produce thick, hearty shreds that hold up well in cooked dishes and hearty salads. They are the go-to choice for shredding cabbage for coleslaw, potatoes for hash browns, and medium-hard cheeses like cheddar for tacos or casseroles. Fine shredding discs create thin, delicate strips that melt quickly into hot dishes or add a subtle texture to baked goods and garnishes. Use fine blades for shredding Parmesan for pasta, cauliflower for low-carb rice, or chocolate for baking. Many home cooks find that having both coarse and fine discs on hand covers 90% of their shredding needs.
Material and Durability
Nearly all high-quality shredding blades are made from 304-grade stainless steel, which resists rust, holds an edge well, and is safe for food contact. Mid-range and premium blades often feature a titanium coating to increase durability and reduce sticking, especially when shredding moist ingredients like cheese or tomatoes. Avoid cheap carbon steel blades, as they rust quickly and dull after just a few months of use. Look for blades certified to NSF International food safety standards to ensure they are free of harmful materials and designed for safe, long-term food contact.
Design Variations
While standard shredding discs are the most common, you’ll also find serrated edge blades designed to grip tough, slippery produce like Brussels sprouts or raw beets, reducing the risk of jamming. Some brands offer anti-jamming blades with a small gap between the disc and the processor bowl to prevent food from getting stuck in the perforations. Universal fit blades have a standard 1/4-inch shank that fits most major brands including Cuisinart, KitchenAid, Ninja, and Hamilton Beach, but they often have slightly lower performance than brand-specific OEM blades designed for your exact processor model.
 Credit: www.walmart.com
A multi-blade manual food processor set with interchangeable shredding, slicing, and grating attachments
Credit: www.walmart.com
A multi-blade manual food processor set with interchangeable shredding, slicing, and grating attachments
How to Choose the Right Shredding Blade for Your Needs
With dozens of options on the market, picking the right blade can feel overwhelming. Focus on these four key factors to find a blade that fits your cooking style and processor:
Match Blades to Your Most Common Ingredients
Think about what you shred most often to pick the right blade type. Hard vegetables like carrots, beets, and potatoes require a sharp, sturdy coarse or serrated blade to cut through tough fibers without bending or dulling quickly. Soft ingredients like tomatoes, peaches, or fresh mozzarella need a fine blade to avoid crushing or mashing. If you regularly shred hard cheeses like Parmesan for pasta or pizza, opt for a fine, sharp blade to get powdery, uniform shreds instead of clumps. For frequent coleslaw or taco topping prep, a coarse blade will give you thick, hearty shreds that hold up to dressing and heat.
Ensure Compatibility With Your Food Processor Model
Not all blades fit all food processors, so check compatibility before buying to avoid damaging your machine or getting poor shredding results. Locate your processor’s model number (usually printed on the bottom of the base or in the user manual) and cross-reference it with the blade’s compatibility list. OEM (original equipment manufacturer) blades designed for your processor’s brand will fit perfectly and deliver the best performance, while universal blades are a good budget option for occasional use. Avoid blades marketed as "fits all food processors," as these almost never deliver consistent results and may wobble or damage your drive shaft.
Select the Correct Shred Width for Your Recipes
The width of your shreds will make or break the texture of your final dish. For dishes where you want the shreds to stay separate and hearty (like coleslaw, stir-fries, or taco fillings), choose a coarse blade. For dishes where you want the shreds to melt into the mixture (like cauliflower rice, baked goods, or cheesy casseroles), opt for a fine blade. If you’re unsure, start with a medium-coarse blade (if available) as a versatile all-purpose option.
Prioritize Certified, Food-Safe Materials
Stick to 304-grade stainless steel blades to avoid rust and ensure safe food contact. For frequent use, invest in a titanium-coated blade that resists dulling and sticking, even when shredding moist ingredients. Avoid blades made from unknown or low-quality materials, as they may leach harmful chemicals into your food or dull after just a few uses.
Safety Precautions for Shredding Blade Use
Shredding blades are extremely sharp, and improper use can lead to serious cuts or damage to your food processor. Follow these guidelines to use your blade safely:
Pre-Use Safety Checks
Always unplug your food processor before attaching or removing the shredding blade to avoid accidental activation. Ensure the blade is fully seated on the drive shaft before turning the machine on; a loose blade can fly out during operation and cause injury. Check the blade for chips, cracks, or rust before each use—damaged blades should be replaced immediately to avoid food contamination or breakage during use. Follow USDA food safety best practices for cleaning all food contact surfaces before and after use to prevent cross-contamination.
Safe Handling and Operation
Never put your hand in the processor bowl while the machine is plugged in, even if the blade is not attached. Always use the food pusher that came with your processor to feed ingredients down the chute; never use utensils, knives, or your fingers to push food while the processor is running. Keep the lid securely locked during operation to prevent food from spraying out of the bowl. After use, handle the blade carefully, and store it out of reach of children. For families with young kids, pair your shredding blade with no-drill childproof locks on your kitchen drawers to keep sharp attachments securely stored.
Childproofing Your Kitchen Storage
Shredding blades are a top hazard for young children, who may be attracted to their shiny metallic appearance. Store blades in a locked cabinet or drawer using child-safe kitchen cabinet locks to prevent accidental access. Never leave blades out on countertops or in the sink after use, and teach older children about the dangers of handling sharp kitchen tools.
Blade Maintenance for Long-Term Performance
Proper maintenance will extend the life of your shredding blade by 2–3 years and ensure consistent, clean cuts every time. Follow these best practices to keep your blade in top condition:
Cleaning Best Practices
Clean your shredding blade immediately after each use to prevent food from drying on the perforations and causing rust or dullness. Avoid putting most shredding blades in the dishwasher, as high heat and harsh detergents can warp the blade or dull the edge—check your processor’s user manual to confirm if your specific blade is dishwasher safe. Hand wash with warm, soapy water and a sturdy cleaning brush to scrub stuck-on food from the blade’s teeth without risking cuts. Dry the blade immediately with a soft, lint-free cloth to prevent moisture damage, especially if you live in a humid climate. For stubborn rust spots, scrub with a paste of baking soda and water, then rinse and dry thoroughly.
Sharpening and Honing Guidelines
A dull blade is the most common cause of uneven shreds, crushed ingredients, and jamming. Sharpen your blade only when you notice a decline in performance (usually every 6–12 months for regular use, or every 3–6 months for heavy use). Use a ceramic honing rod designed for food processor blades, and hold the blade at a 15–20 degree angle (check your manufacturer’s guidelines for the exact angle) as you glide it across the rod. Repeat 5–10 times per side to restore the edge. Avoid using standard sharpening stones, as they can remove too much metal and thin the blade excessively, making it brittle. If you’re uncomfortable sharpening at home, most kitchen supply stores offer professional sharpening services for $10–$15.
Proper Storage Techniques
Always store your shredding blade with its protective guard (most blades come with a plastic cover) to prevent nicks and cuts. Keep the blade in a dedicated kitchen drawer away from other utensils, or store it in a small storage box with other food processor attachments. Never toss the blade loose in a drawer with knives or other sharp objects, as this will dull the edge quickly and increase the risk of accidental cuts.
When to Replace Your Shredding Blade
Even with proper maintenance, shredding blades will wear out over time. Replace your blade immediately if you notice any of the following signs:
- Deep chips, cracks, or rust that cannot be removed with scrubbing
- Wobbling or loose attachment to the drive shaft
- Uneven shreds that do not improve after honing
- Metal shavings in your food (a sign of severe wear)
- The blade has been in use for more than 3 years (for regular use) or 2 years (for heavy daily use)
Common Shredding Issues and Troubleshooting
Even with the right blade and proper technique, you may run into occasional issues. Here’s how to fix the most common problems:
Uneven or Inconsistent Shreds
Uneven shreds are almost always caused by one of three issues: an improperly seated blade, overloading the processor bowl, or a dull blade. First, unplug the machine and ensure the blade is fully clicked onto the drive shaft. Next, make sure you are filling the bowl no more than halfway full, and that all ingredients are cut into uniform 1–2 inch pieces before processing. If shreds are still uneven after these adjustments, your blade is likely dull and needs sharpening or replacement.
Mushy or Crushed Ingredients
Mushy shreds usually mean you are using too high a speed setting, overloading the bowl, or using the wrong blade for the ingredient. For soft ingredients like tomatoes or mozzarella, use the fine blade and pulse in 1-second bursts instead of running the processor continuously. Chill hard cheeses for 15 minutes before shredding to prevent them from melting from friction. If you still get mushy results after adjusting settings, your blade may be dull.
Food Jamming and Clogging
Jamming occurs when food gets stuck in the blade perforations or the chute, stopping the shredding process and potentially damaging the motor. To avoid jamming:
- Cut all ingredients into uniform 1–2 inch pieces before adding them to the bowl
- Never fill the bowl more than halfway full
- Use the food pusher to gently guide food down the chute; never force food
- If jammed, unplug the machine, disassemble the bowl, and carefully remove stuck food with a spatula (never use your fingers) For tough produce like carrots or beets, use a serrated shredding blade to reduce jamming.
Blade Dulling and Reduced Performance
Dull blades are the root of most shredding issues. If you notice shredded food has a crushed, wet appearance instead of clean, crisp cuts, or if you need to pulse multiple times to shred soft ingredients, your blade needs sharpening or replacement. To extend the life of your blade, avoid shredding frozen foods, hard seeds, or pits, as these can dull or chip the edge quickly.
Creative Use Cases Beyond Basic Shredding
Your shredding blade is far more versatile than just shredding lettuce for salads. Here are creative, underrated uses to get more value out of your attachment:
- Coarse blade: Shred potatoes for homemade hash browns, shred carrots for carrot cake or muffin batter, shred broccoli for fresh slaw, or shred stale bread for homemade breadcrumbs.
- Fine blade: Make cauliflower rice for low-carb meals, shred Parmesan for pasta and soups, shred fresh coconut for toppings, or shred chocolate for baking and garnishing.
- Specialty blades: Use a Julienne shredding blade (if compatible with your processor) to make uniform vegetable noodles for stir-fries, or a grating blade to zest citrus or shred hard spices like nutmeg.
For perfectly uniform cheese shreds for charcuterie boards, pair your shredding blade with our round cheese cutting guide to get professional-looking results every time.
Top-Rated Shredding Blades for 2026
We’ve tested and reviewed dozens of shredding blades to find the best options for every budget and cooking style. These are our top picks for 2026, based on performance, durability, and user reviews:
Best Overall OEM Blades
OEM blades designed for your specific processor brand deliver the best fit and performance. Our top picks for 2026:
- Cuisinart 720-0060 Shredding Disc: Fits all 7–14 cup Cuisinart food processors, made from rust-resistant 304 stainless steel with a non-stick coating, priced at $24.99, 4.7/5 stars from 12,400+ verified reviews. Handles everything from soft cheese to hard carrots without jamming.
- KitchenAid KFP1133 Shredding Disc: Fits all 7–9 cup KitchenAid food processors, features a serrated edge for tough produce, priced at $29.99, 4.6/5 stars from 8,200+ reviews. Easy to attach and remove, and dishwasher safe for quick cleanup.
Budget-Friendly Universal Options
If you’re looking for an affordable replacement or don’t use your food processor often, these universal blades deliver solid performance for less:
- Hamilton Beach 70725 Universal Shredding Blade: Fits 90% of standard 6–8 cup food processors, made from stainless steel, priced at $12.99, 4.2/5 stars. Ideal for occasional shredding tasks like salad prep or cheese shredding.
- Black+Decker 2-in-1 Shredding/Slicing Blade: Fits most Black+Decker food processor models, priced at $11.99, 4.1/5 stars. Easy to clean and switch between shredding and slicing functions.
If you’re on a tight budget, these affordable blades work well for occasional use, and you can keep your kitchen tools in top shape with our picks for top-rated kitchen cleaning brushes for easy post-use cleanup.
Premium Heavy-Duty Blades for Frequent Use
If you shred ingredients daily for meal prep or run a small food business, invest in a premium blade built to last:
- Breville BFP800XL Shredding Disc: Fits Breville’s 16-cup Sous Chef food processor, features a titanium coating for extra durability and rust resistance, priced at $44.99, 4.8/5 stars from 3,100+ reviews. Handles large batches of tough produce without dulling, and is backed by a 2-year warranty.
- Ninja BN701 Shredding Blade: Fits all Ninja BN series food processors, features an anti-jamming design and non-stick coating, priced at $34.99, 4.7/5 stars from 5,700+ reviews. Perfect for frequent home cooks who want consistent results with minimal cleanup.
 Credit: www.amazon.ca
Product page for a durable stainless steel shredding blade compatible with most standard food processors
Credit: www.amazon.ca
Product page for a durable stainless steel shredding blade compatible with most standard food processors
DIY Maintenance and Custom Shredding Blades
If you’re comfortable with basic tool use, you can save money by maintaining and even customizing your shredding blades at home:
At-Home Sharpening Tips
As mentioned earlier, you can sharpen your blade at home with a ceramic honing rod to extend its lifespan. For more severe dullness, use a fine-grit sharpening stone, holding the blade at the manufacturer’s recommended 15–20 degree angle. Glide the blade across the stone in smooth, even motions, repeating 10–15 times per side until you feel a burr on the edge. Rinse the blade thoroughly after sharpening to remove metal filings before use.
Finding Compatible Replacement Blades
When your blade is beyond sharpening, always opt for OEM replacements first for the best fit and performance. If OEM parts are no longer available, look for universal blades that explicitly list your processor’s brand and model in their compatibility list. Avoid no-name blades sold on unvetted marketplace sites, as these are often made from low-quality steel that dulls quickly and may not fit your drive shaft properly.
Custom Blade Adjustments for Special Use Cases
If you need a specific shred size that’s not available commercially (e.g., extra-fine shreds for sushi garnish or extra-coarse shreds for potato pancakes), you can carefully adjust the hole size of a standard blade using a Dremel tool. Only attempt this if you have experience with metalworking tools, and test the adjusted blade on a small piece of food first to ensure it cuts safely and evenly. Never alter the blade’s attachment point, as this can make it incompatible with your processor or cause it to wobble during use.
Frequently Asked Questions
What is a shredding blade for a food processor?
A shredding blade is a circular, perforated attachment for food processors that cuts ingredients into uniform strips as they pass through the blade’s holes. It eliminates the need for manual box graters, cutting prep time and delivering consistent results for salads, baked goods, and toppings.
How do I choose the best shredding blade for my food processor?
Start by confirming compatibility with your processor’s model number, then pick a blade material (304 stainless steel or titanium-coated) and shred width (coarse or fine) that matches your most common ingredients. Prioritize NSF-certified blades for food safety, and read recent user reviews to gauge real-world performance.
Can shredding blades handle hard foods like carrots and potatoes?
Yes, but you’ll need a sharp, sturdy coarse or serrated blade designed for tough produce. Cut hard foods into 1–2 inch pieces before processing, and never overload the bowl to avoid dulling the blade or jamming the motor. Avoid shredding frozen foods, as they can chip the blade’s edge.
How do I clean and maintain my shredding blade?
Hand wash the blade with warm, soapy water and a non-abrasive brush immediately after each use, then dry thoroughly to prevent rust. Sharpen the blade with a ceramic honing rod every 6–12 months, and store it with its protective guard in a dedicated drawer away from other utensils. Replace the blade if you notice chips, rust, or persistent dullness that doesn’t improve with sharpening.
Why is my shredded food mushy instead of crisp?
Mushy shreds are usually caused by a dull blade, overloading the processor bowl, or using too high a speed setting. Chill hard cheeses before shredding to prevent melting from friction, pulse in short bursts instead of running the processor continuously, and fill the bowl no more than halfway full for best results.
Are shredding blades dishwasher safe?
Most OEM shredding blades are hand-wash only, as high dishwasher heat can warp the blade or dull the edge. Check your processor’s user manual for specific cleaning instructions; some budget universal blades are dishwasher safe, but hand washing will always extend the blade’s lifespan.
Final Thoughts
A high-quality shredding blade is one of the most cost-effective upgrades you can make to your food processor, cutting meal prep time by minutes per recipe and delivering uniform, restaurant-quality results that manual grating can’t match. With proper maintenance, a stainless steel shredding blade will last 2–3 years, making it a worthwhile investment for home cooks of all skill levels. Whether you’re prepping weeknight salads, making holiday charcuterie boards, or baking batch after batch of carrot cake, the right shredding blade will transform your cooking experience.
For more meal prep tips, kitchen gadget reviews, and cooking guides to simplify your routine, browse our kitchen tips blog for expert advice curated for home chefs.

I’m Abby Lu, a passionate home cook who loves simplifying everyday meals. At PlugChef.com, I share product reviews and cooking guides to help you find the best tools for your kitchen.
Related posts:
 How to Make a Fruit Basket for a Gift: Easy DIY Guide
 Do You Need a Basket? Essential Guide for Air Fryers
 Gray Kitchen With Stainless Steel Appliances: Modern Elegance
 Appliance Play Food Kitchen Toys: Ignite Imaginative Play
 How Long Do Beauty Blenders Last: Expert Tips Unveiled
 Philips Kitchen Appliances Compact Pasta And Noodle Maker: Effortless Homemade Pasta

