
Imagine biting into a warm, tangy slice of rhubarb pie that melts in your mouth. Now, what if you could make that delicious treat anytime, even when fresh rhubarb isn’t in season?
Using frozen rhubarb makes it easy for you to enjoy this classic dessert year-round without sacrificing taste or texture. You’ll discover simple tips and tricks to turn frozen rhubarb into a perfect pie that will impress your family and friends.
Ready to bring comfort and sweetness to your kitchen? Keep reading and let’s get baking!
Choosing Frozen Rhubarb
Choosing frozen rhubarb for your pie can save you time and keep the tangy flavor alive year-round. But not all frozen rhubarb is created equal. Knowing what to look for ensures your pie tastes fresh and vibrant, just like homemade.
Benefits Of Frozen Rhubarb
Frozen rhubarb is picked and frozen at peak ripeness, locking in its natural tartness and nutrients. This means you can enjoy rhubarb pie even when the fresh stalks are out of season.
It also saves prep time since the rhubarb is usually washed, trimmed, and cut before freezing. You avoid the hassle of peeling and chopping, making your baking process smoother.
Have you noticed how some frozen fruits lose texture after thawing? Rhubarb holds up well, maintaining enough firmness to create a delicious pie filling.
Selecting Quality Frozen Rhubarb
When shopping, check the packaging for clumps of rhubarb. Ideally, the pieces should be separated or easily broken apart. This helps you measure and mix ingredients evenly.
Look for vibrant red or pink stalks rather than dull or darkened ones. Bright color usually means fresher quality and better flavor.
Avoid packages with frost buildup or freezer burn marks. These can indicate improper storage and affect taste and texture.
Have you ever tasted rhubarb pie that was watery or bland? Choosing a trusted brand that uses no added sugar or preservatives can make all the difference.
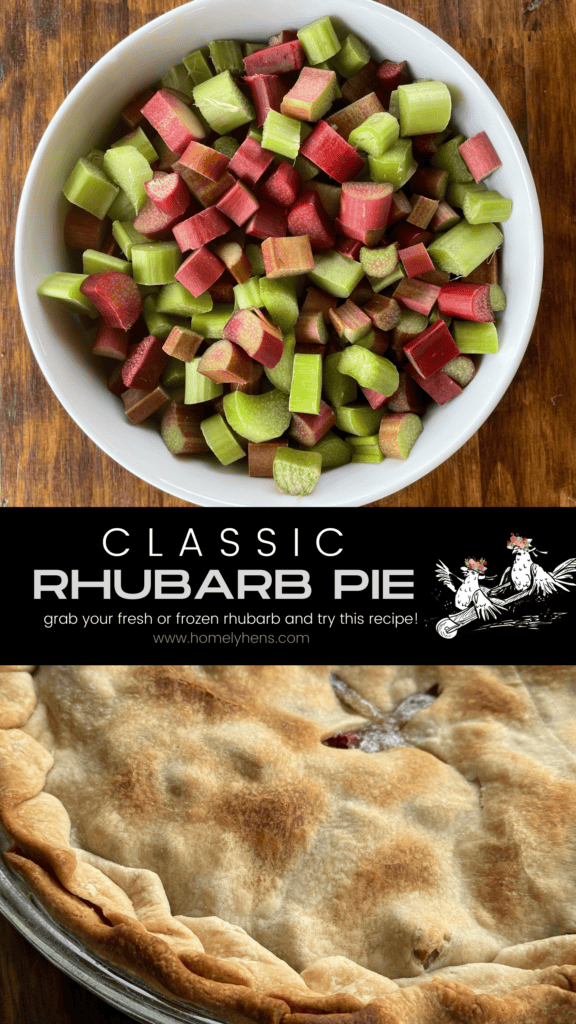
Credit: homelyhens.com
Preparing Rhubarb For Pie
Preparing rhubarb for pie is a crucial step that can make a big difference in texture and flavor. Frozen rhubarb often contains excess moisture, which can lead to a soggy crust if not handled properly. Taking time to prepare it right ensures a delicious, well-balanced pie that highlights rhubarb’s natural tartness.
Thawing Tips
Start by thawing your frozen rhubarb slowly in the refrigerator. This gradual thaw helps maintain the fruit’s structure and prevents it from becoming overly mushy. Avoid using a microwave for thawing because it can cook the rhubarb unevenly, ruining the texture you want in your pie filling.
If you’re in a hurry, spread the frozen rhubarb on a plate at room temperature for about 30 minutes. Keep an eye on it so it doesn’t get too warm or watery. You want it soft enough to work with but not falling apart.
Draining Excess Moisture
Once thawed, excess water will be released from the rhubarb. If you pour the rhubarb directly into your pie, the filling will be watery and may not set properly. To avoid this, use a fine mesh strainer or cheesecloth to drain the juice.
Press gently on the rhubarb to squeeze out extra liquid, but don’t overdo it—you still want some juice to keep the pie moist. You can save the drained juice to add a splash of flavor to sauces or drinks, so don’t throw it away.
Have you ever noticed your pie filling turning soggy despite following the recipe? Managing moisture content is often the missing piece. Paying close attention to thawing and draining can transform your rhubarb pie into a perfect balance of tart and tender.
Pie Crust Options
Choosing the right pie crust can enhance the taste of rhubarb pie made from frozen rhubarb. A flaky, buttery crust pairs well with the tart filling. Alternatively, a crumbly graham cracker crust adds a sweet contrast.
Rhubarb pie is a delightful treat, especially when you use frozen rhubarb, making it accessible year-round. But what truly elevates this dessert is the crust. Whether you love the satisfaction of making your own or prefer the convenience of store-bought options, the crust is where your pie can shine. Each choice has its own merits and can significantly influence the flavor and texture of your pie.Homemade Crust Recipes
Creating a homemade pie crust can be a rewarding experience. You control the ingredients, allowing you to tweak the recipe to suit your taste. A classic option is an all-butter crust, which offers a rich, flaky texture. – Ingredients: Flour, butter, salt, and water. – Tip: Keep your butter and water cold for the flakiest crust. – Suggestion: Try adding a teaspoon of sugar for a hint of sweetness. If you’re feeling adventurous, consider incorporating whole wheat flour for a nuttier flavor. This adds a hearty texture that pairs beautifully with the tangy rhubarb filling.Store-bought Crust Choices
Not everyone has the time to craft a crust from scratch, and that’s perfectly okay. Store-bought crusts are a convenient alternative that can still result in a delicious pie. – Pre-Rolled Dough: Easy to use; simply unroll and place in your pie pan. – Frozen Pie Shells: Already in a tin, these are perfect for a quick assembly. Have you ever considered trying a graham cracker crust for your rhubarb pie? It adds a sweet contrast to the tart rhubarb and requires no rolling. Just press it into the pan, and you’re set. Choosing between homemade and store-bought crusts often depends on your schedule and occasion. Which will you choose for your next rhubarb pie adventure?
Credit: www.cleverlysimple.com
Making The Filling
Making the filling for your rhubarb pie from frozen rhubarb is where the magic starts. The filling needs to be just right—not too tart, not too sweet, and perfectly spiced to complement the unique flavor of rhubarb. Handling frozen rhubarb requires a bit of care to maintain texture and flavor, but with the right approach, you can create a filling that bursts with balanced taste and aroma.
Sweeteners And Spices
Choosing the right sweetener is crucial because rhubarb is naturally quite tart. Granulated sugar is the classic choice, but you can mix in brown sugar for a deeper, caramel-like sweetness. Some people also use honey or maple syrup, which add a subtle complexity and pair well with rhubarb’s tanginess.
Spices bring warmth and depth to the filling. Cinnamon is a popular choice, adding a comforting note that blends beautifully. You might also try a pinch of ground ginger or nutmeg to introduce a little zing. Don’t overdo it—too much spice can overpower the rhubarb’s natural flavor.
Balancing Tartness
Frozen rhubarb tends to release more liquid as it thaws, which can dilute the filling’s flavor. To keep the filling from becoming watery, drain excess liquid or add a thickener like cornstarch or tapioca starch. This ensures the filling sets nicely when baked.
Think about how tart you like your pie. If you enjoy a sharper bite, reduce the sugar slightly. If you prefer a milder, sweeter taste, add a bit more. Tasting the filling before baking can help—though it might be raw, you can adjust sugar and spice levels for the perfect balance.
Have you experimented with different sweeteners or spices in your rhubarb pie filling? What helped you get the balance just right? Your experience can inspire others to try new combinations and make their pies uniquely delicious.
Assembling The Pie
Assembling your rhubarb pie is where the magic starts to take shape. Handling frozen rhubarb requires a bit of care to keep the filling from becoming too watery. Paying attention to how you layer and seal will make a big difference in the final texture and appearance of your pie.
Layering The Filling
Start by gently thawing the frozen rhubarb to avoid excess liquid pooling in your pie. Drain any extra juice before adding the rhubarb to the crust.
Sprinkle a thin layer of sugar and a little flour or cornstarch on the bottom crust to help absorb moisture. Then, evenly spread the rhubarb over this base.
Consider adding small pockets of butter on top of the rhubarb. This will add richness and help the filling bubble up without drying out.
Sealing And Venting
Use a cold top crust or lattice to cover the filling, pressing the edges firmly to seal. This prevents the filling from leaking out during baking.
Cut several vents or slits in the top crust to allow steam to escape. This step keeps your crust from getting soggy and helps the filling thicken properly.
Have you noticed how a well-vented pie smells better as it bakes? That’s the steam escaping and the sugars caramelizing—don’t skip this step for a perfectly baked rhubarb pie.
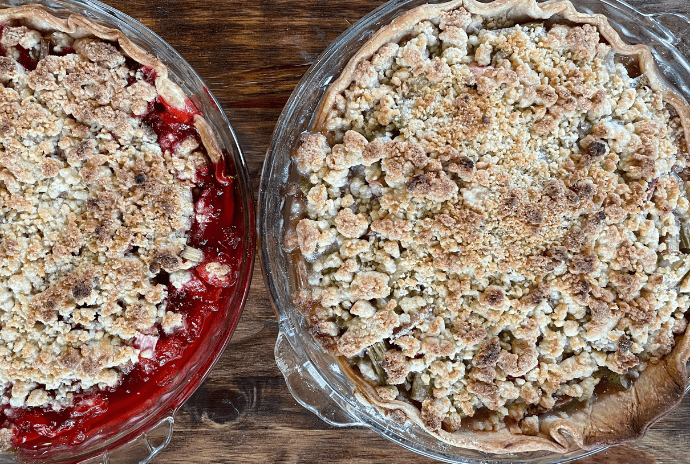
Credit: homelyhens.com
Baking Tips
Baking a rhubarb pie from frozen rhubarb needs special care. The frozen rhubarb releases extra moisture while baking. This moisture can affect your crust and the pie’s texture. Follow these baking tips to get a perfect pie with a crisp crust and tasty filling.
Oven Temperature And Timing
Start baking the pie at a high temperature. Set your oven to 425°F (220°C) for the first 15 minutes. This helps the crust to set and become crispy. Then lower the heat to 350°F (175°C) to finish baking. This slower baking lets the filling thicken without burning the crust.
Keep an eye on the pie from 35 to 45 minutes. The filling should bubble, and the crust should turn golden brown. Oven times may vary, so check often to avoid overbaking.
Preventing A Soggy Bottom
Frozen rhubarb adds more water to the pie. To stop the crust from getting soggy, try these tips:
- Thaw the rhubarb and drain excess liquid before baking.
- Mix the rhubarb with sugar and a thickener like cornstarch or tapioca. These absorb extra juice.
- Brush the bottom crust with a beaten egg white before adding filling. This creates a barrier.
- Use a metal or dark-colored pie pan for better heat conduction.
- Place the pie on the lower oven rack to bake the bottom crust well.
Serving Suggestions
Serving rhubarb pie made from frozen rhubarb offers a delightful experience. The tartness of rhubarb blends well with sweet and creamy accompaniments. Presenting your pie with the right toppings and drinks enhances every bite. Simple touches can bring warmth and comfort to this classic dessert.
Best Toppings
- Vanilla ice cream melts beautifully on warm pie slices.
- Whipped cream adds lightness and a creamy texture.
- A sprinkle of powdered sugar brightens the tart flavor.
- Drizzle honey or maple syrup for extra sweetness.
- Chopped toasted almonds offer a nice crunch.
Pairing With Beverages
- A hot cup of black coffee balances the pie’s tartness.
- Chilled white wine, like Riesling, complements the flavors.
- Herbal teas, such as chamomile, soothe the palate.
- Fresh lemonade adds a refreshing, citrusy note.
- Milk provides a creamy, cooling contrast to the pie.
Storing And Reheating
Storing and reheating rhubarb pie made from frozen rhubarb helps keep its fresh flavor. Proper storage prevents sogginess and loss of texture. Reheating the pie carefully brings back its warm, delicious taste.
Freezing Leftovers
Wrap leftover rhubarb pie tightly in plastic wrap. Then cover with aluminum foil to avoid freezer burn. Store in an airtight container or freezer bag for extra protection.
Label the package with the date. Frozen pie stays good for up to three months. Thaw overnight in the refrigerator before reheating.
Reheating Methods
Use an oven or toaster oven to reheat the pie. Preheat to 350°F (175°C) for best results. Place pie on a baking sheet to catch drips.
- Heat for 15-20 minutes until warm throughout.
- Cover loosely with foil to prevent crust burning.
- For a crisp crust, remove foil for last 5 minutes.
A microwave can reheat quickly but may make crust soggy. Use medium power and heat in short bursts. Let pie rest a few minutes before eating.
Frequently Asked Questions
Can I Use Frozen Rhubarb For Pie Filling?
Yes, frozen rhubarb works well for pie filling. Thaw it completely and drain excess liquid before baking. This prevents a soggy crust and ensures a perfect texture.
How Do I Prevent A Watery Rhubarb Pie?
To avoid watery pie, drain thawed rhubarb well. Add thickening agents like cornstarch or flour to the filling. This helps absorb moisture and gives a firm pie consistency.
What Is The Best Crust For Rhubarb Pie?
A flaky, buttery pie crust complements rhubarb’s tartness best. Pre-bake the crust slightly for extra crispness. This balances the filling and prevents sogginess.
Should I Add Sugar To Frozen Rhubarb Pie?
Yes, adding sugar balances rhubarb’s tart flavor. Adjust sweetness based on your taste and rhubarb’s natural tartness. Typically, 3/4 to 1 cup sugar works well for one pie.
Conclusion
Frozen rhubarb makes pie baking easy and tasty. It saves time and keeps flavor fresh. This pie offers a sweet and tangy treat everyone enjoys. Perfect for any season or special meal. Try this simple recipe and enjoy homemade pie anytime.
Baking with frozen rhubarb is a smart choice for great taste. Give it a try and share the joy of fresh pie.

Hi, I’m Daniel Brooks—a food lover and kitchen gear enthusiast. I enjoy testing cookware, utensils, and gadgets to see what really works in everyday cooking. At PlugChef.com, I share honest reviews, comparisons, and simple guides to help you choose the best tools for a safer, smarter, and more enjoyable kitchen.
Related posts:
 What Type of Cooking Utensils are Safe: Expert Picks
 What Innovations Could Blenders Make: Unleashing Future Tech
 Smart Strategies to Organize a Small Kitchen: Maximize Space
 How to Organize a Kitchen Cabinet: Expert Tips & Tricks
 How to Organize Kitchen Drawers: Expert Tips and Tricks
 How to Organize a Corner Kitchen Cupboard: Expert Tips

