
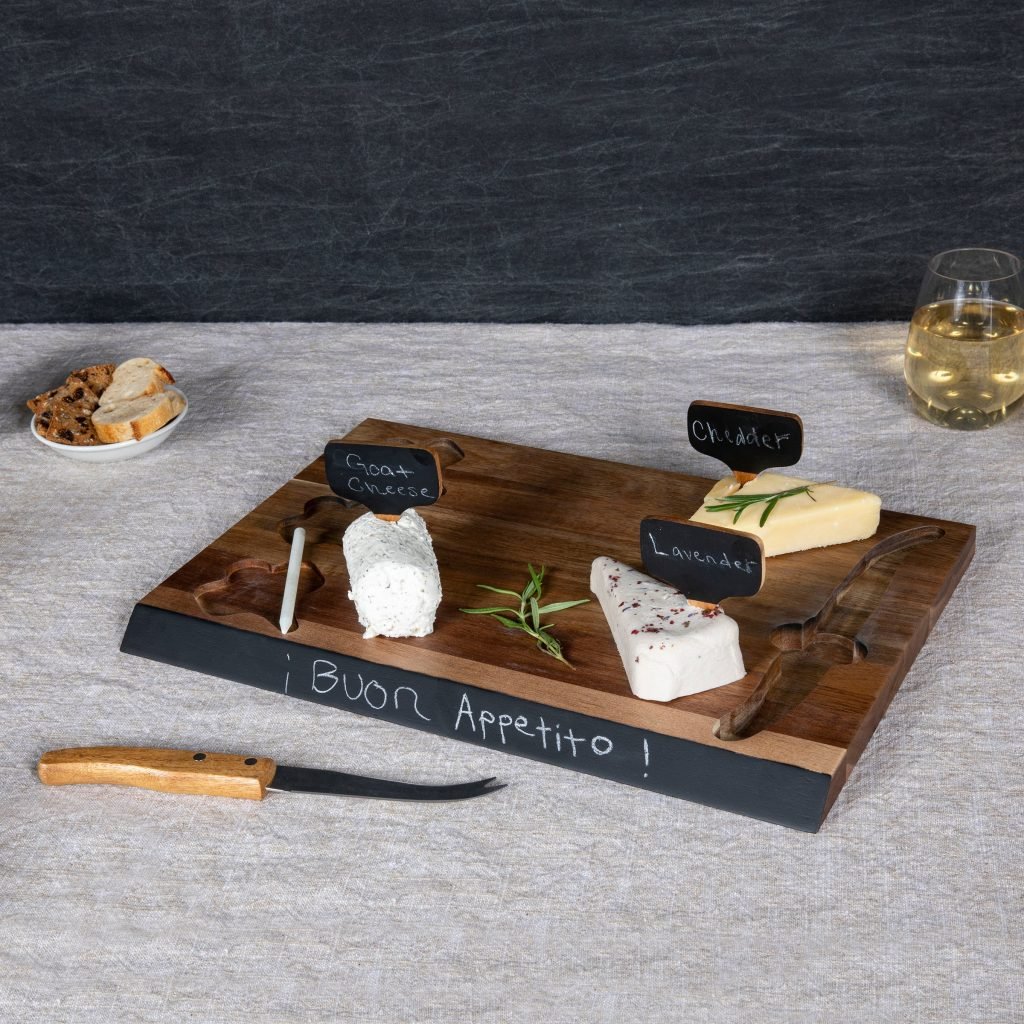
A well-crafted cheese board looks effortless — but the difference between “meh” and “memorable” is knowing which tools to use, how to use them, and how to care for them. This guide walks through the tools, step-by-step cutting and serving techniques, food-safety and temperature guidance, layout and pairing strategies, maintenance tips, and common mistakes to avoid. Read on to serve cleaner cuts, faster service, and tastier bites.
Quick overview: the essential toolkit
- Cheese knives (soft, semi-hard, hard/cleaver)
- Cheese plane or slicer
- Spreader and butter/cheese knife
- Fork-tipped serving fork and small tongs
- Cheese markers/labels and chalk (for slate boards)
- Small bowls and honey/dip spoons
- Cutting board or serving board (wood, marble, slate)
- Cheese wire or parmesan knife for very hard wedges
Choosing a board: material, size, and practical trade-offs
Pick a board for both aesthetics and function.
- Wood (maple, acacia, bamboo): warm appearance, gentle on blades, best hand-washed and oiled; ideal for mixed boards.
- Marble or stone: naturally cool surface that helps keep soft cheeses firmer; heavier and fragile to store.
- Slate: modern look and easy to label with chalk; avoid acidic foods directly on untreated slate.
- Composite/resin: stain-resistant and easy-clean, good for outdoor use.
Size and shape
- Match board size to guest count: for a small tasting (4–6 people) a medium board is fine; for parties, use multiple boards or a large rectangular surface.
- Rectangular/oval boards give more layout flexibility; round boards create a centralized focal display.
Practical tip: choose a board with enough negative space so guests can cut without crowding other cheeses.
Knife types, what they do, and how to use them
Use the right blade to preserve texture, presentation, and flavor. In practice, choosing the wrong knife is one of the most common causes of crushed or smeared cheese.

Image source: us.emiliafood.love
- Soft cheese knife / spreader: short, wide, sometimes with holes. Use for Brie, Camembert, chèvre — slice then spread directly on crackers.
- How to use: cut a wedge, then use the spreader to transfer and smooth onto bread.
- Cheese plane (fluted blade or slicer): makes thin, even slices for semi-soft cheeses such as Havarti or Gouda.
- How to use: hold the plane at a shallow angle and glide along the cheese face for consistent ribbons.
- Hard-cheese knife / cleaver: thick, sturdy blade for firm cheeses (aged Cheddar, Manchego).
- How to use: slice with controlled downward pressure; for very hard wedges, score then break along the grain.
- Parmesan/Spade knife or cheese spear: short, pointed blade for breaking pieces from a hard wedge (Parmigiano-Reggiano).
- How to use: insert tip and pry small shards away rather than trying to slice.
- Crumbly-cheese knife (forked tip): good for blue cheeses and feta. Forked end serves and lifts pieces.
- Wire cutter or cheese harp: ideal for clean slices of soft to semi-soft cheeses (good for fresh mozzarella or chèvre logs).
Cutting technique quick guide
- Work from the outside of a wheel: cut wedges by slicing from the center to the rind for even portions.
- For blocks, cut into manageable slabs then create bite-sized slices or cubes.
- For logs, slice rounds about 1/4–1/2 inch thick or halve lengthwise for spreading.
- Label cheeses with markers immediately after cutting so guests know what they’re tasting.
How to cut specific cheese styles (step-by-step)
Soft-ripened wheels (Brie, Camembert)
- Remove rind if desired for spreads, or leave on for wedges.
- Cut into even wedges from center outward for neat presentation.
- Use a spreader for serving to avoid crushing.
Semi-soft (Havarti, Raclette)
- Use a plane for ribbons, or thin slices with a soft-cheese knife.
- Serve slices slightly overlapping for easy picking.
Semi-hard (Cheddar, Gouda)
- Use a chef-style or cleaver knife.
- Slice into slabs then into sliders or cubes depending on guest needs.
Very hard (Parmigiano-style)
- Use a spade or break into shards with a spade knife.
- Offer small shards rather than trying to slice cleanly.
Serving temperature and food-safety essentials
Cheeses reveal much more flavor at the right temperature. At the same time, safety and storage matter.
- Bring cheeses to serving temperature: remove from refrigerator 30–60 minutes before serving. Soft cheeses need less time; dense, aged cheeses benefit from slightly longer.
- Keep perishable items safe: do not leave soft cheeses out for more than two hours at room temperature in warm conditions. For longer events, rotate small batches from chilled storage.
- For guidance on proper refrigeration and food safety practices, consult USDA food-safety guidance and the FDA’s food and dairy information for up-to-date recommendations.
Practical tip: use a chilled marble board or place smaller boards over ice for outdoor events to keep soft cheeses safer for longer.
Layout, pairings, and presentation — do this in order
Arrange your board to guide tasting, not to overwhelm.
- Start with cheeses: place larger wheels/blocks first, spaced apart.
- Provide a logical tasting flow: mild to strong, left to right or clockwise.
- Add accompaniments: small bowls for jams, olives, and honey; scatter nuts and fruit clusters to create balance.
- Include textures: crackers, baguette slices, and crispbreads.
- Label each cheese using markers to avoid confusion and questions.
Pairing examples (quick, practical)
- Fresh goat cheese — honey, lemon, toasted walnuts
- Brie — fig jam, sliced apples or pear, toasted baguette
- Aged Cheddar — chutney, quince paste, robust crackers
- Blue cheese — honeycomb or salted nuts, dense bread
Staging tip: leave some space for guests to place scraps and used utensils — it keeps the board tidy.
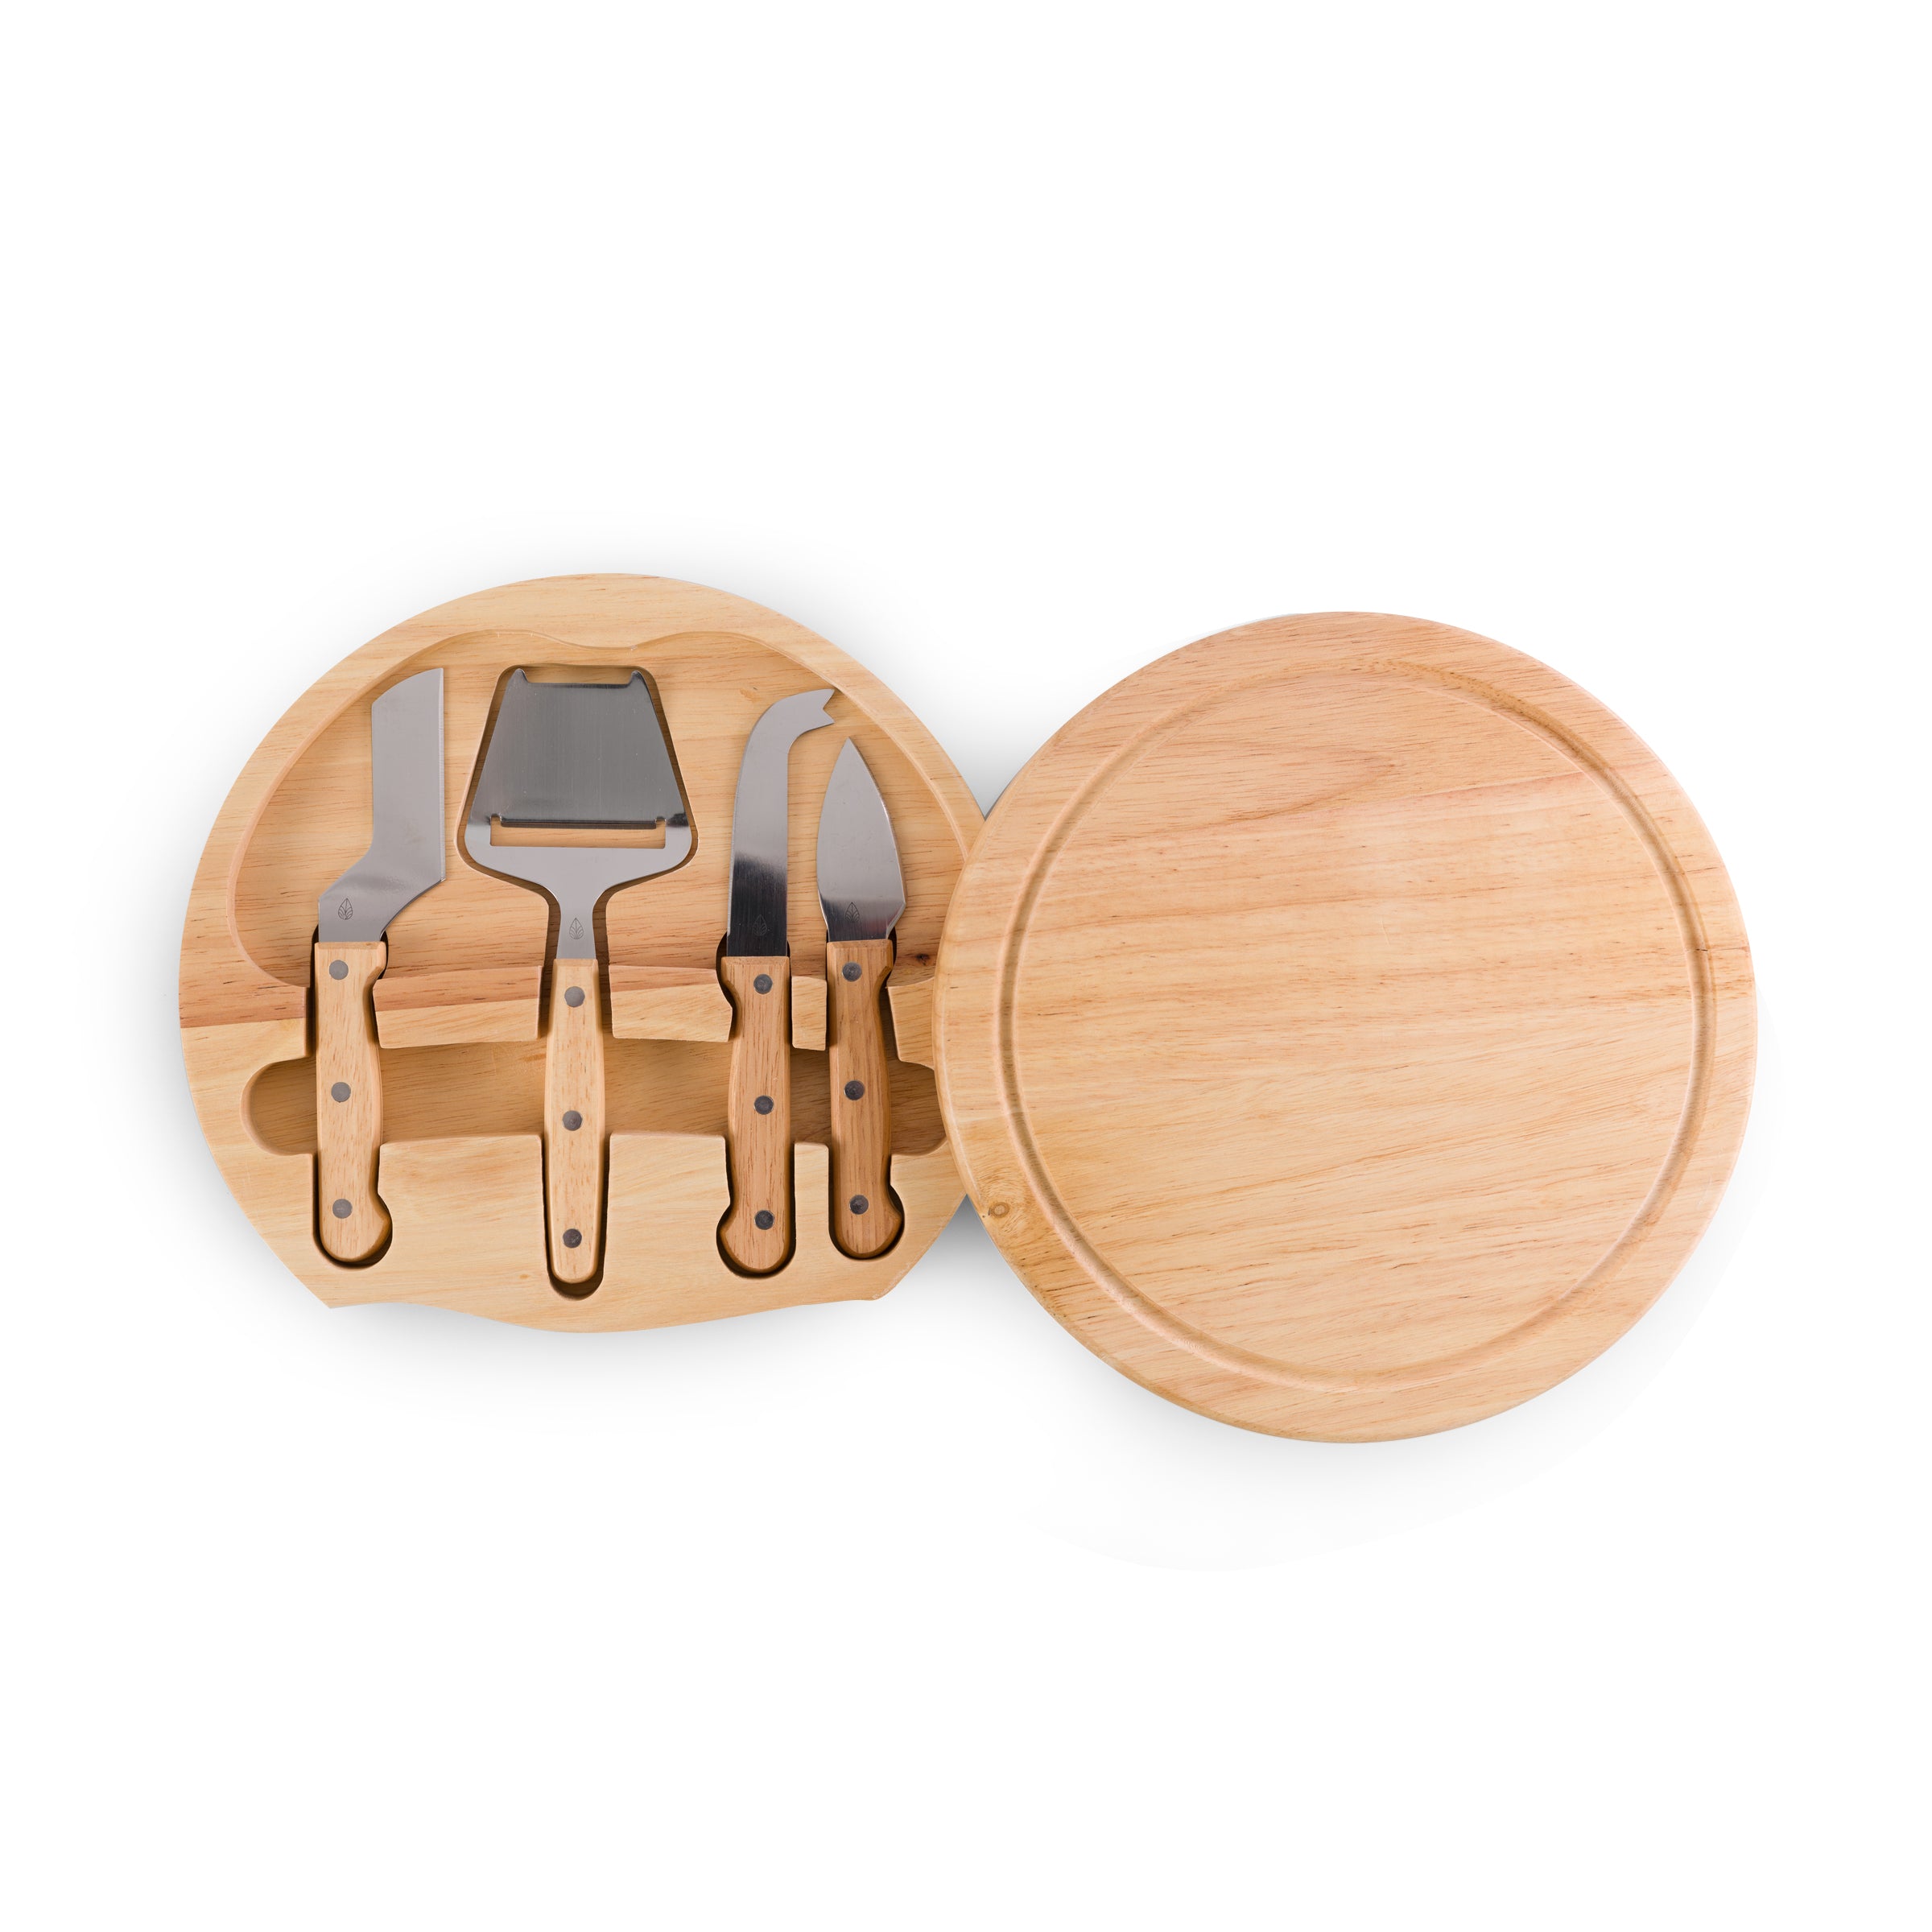
Image source: www.picnictime.com
Small bowls separate sticky accompaniments from crackers.
Serving tools and etiquette
- Fork-tipped serving fork: hold a piece steady while slicing and pick up slices hygienically.
- Small tongs: useful for pickable items like grapes or cured meats.
- Dedicated spreaders: one for cheese, one for sweet spreads to avoid cross-flavor contamination.
- Toothpicks vs forks: prefer small forks for shared boards — more dignified and sanitary.
Etiquette notes: instruct guests to use the tool that corresponds to the cheese (markers and signs help). Replace knives or wash between cheeses with very different profiles if cross-flavor is a concern.
Maintenance and care: keep tools performing
Proper cleaning and maintenance extend tool life and protect flavor.
Cleaning
- Stainless steel tools: usually dishwasher-safe, but hand-washing preserves finish. Rinse promptly to remove acidic residues.
- Wooden boards and handles: hand-wash with warm water and mild soap, never soak. Dry upright.
- Marble/slate: wipe with warm water; avoid acidic cleaners that can etch stone.
Oiling and storage
- Oil wooden boards and handles with food-grade mineral oil or beeswax polish every 1–3 months depending on use.
- Store knives in a block or sheath to protect edges.
Sharpening
- Hone knives before service and sharpen with a whetstone or professional service as needed. For occasional home use, hone monthly and sharpen when the blade fails the paper-slice test.
Common maintenance mistakes
- Leaving wood in dishwasher or soaking wood tools (causes warping and cracking).
- Using the same spreader for different condiments without cleaning (cross-contamination of flavors).

Image source: www.amazon.com
Keep one spreader per condiment to avoid flavor transfer.
Common mistakes and how to avoid them
- Mistake: Serving cheeses straight from fridge — can mute flavors. Fix: remove 30–60 minutes prior.
- Mistake: Using a generic knife for everything — causes smearing and tearing. Fix: match the knife to cheese texture.
- Mistake: Overcrowded board — makes cutting awkward. Fix: use extra boards or bowls and leave cutting space.
- Mistake: Mixing utensils between cheeses and condiments — leads to flavor contamination. Fix: assign separate spreaders and forks.
Expert troubleshooting (in practice)
- If soft cheese sticks to the knife: chill the knife briefly, or use a thin-bladed knife with holes.
- If a very hard wedge crumbles unpredictably: use a spade to break natural shards rather than forcing a slice.
- If guests are unsure where to start: label cheeses with flavor notes (mild, nutty, tangy) to guide tasting.
FAQ
Q: Which knife for Brie vs. Parmesan?
A: Brie: soft-cheese knife or spreader. Parmesan: spade or small forked spear to break shards.
Q: How long can a cheese board sit out?
A: Generally, soft cheeses should not sit out more than two hours in warm conditions; use chilled boards or rotate small batches for long events. For official food-safety timelines, see USDA guidance.
Q: Are wooden boards sanitary?
A: Yes — when cared for properly. Hand-wash, dry quickly, and re-oil periodically. Wood has natural antimicrobial properties when maintained, but do avoid deep cuts where debris can lodge.
Q: Can I put tools in the dishwasher?
A: Many stainless-steel tools are dishwasher-safe, but hand-washing is gentler and extends life. Avoid dishwashing wood, marble, or knives with delicate finishes.
Conclusion — practical next steps
Start simple: pick three cheeses (soft, semi-hard, hard), one sweet and one crunchy accompaniment, and practice cutting and arranging with the right tool for each cheese. Label the cheeses, keep a separate spreader per condiment, and make sure soft cheeses reach serving temperature before guests arrive.
Ready to upgrade your next gathering? Choose one new tool to practice with (a cheese plane, spade, or dedicated spreader) and test it with a small tasting — you’ll notice cleaner cuts and happier guests.
For current food-safety practices and refrigeration guidelines, consult the USDA and the FDA for reliable, up-to-date information.

I’m Abby Lu, a passionate home cook who loves simplifying everyday meals. At PlugChef.com, I share product reviews and cooking guides to help you find the best tools for your kitchen.
Related posts:
 How to Make a Fruit Basket for a Gift: Easy DIY Guide
 Do You Need a Basket? Essential Guide for Air Fryers
 How to Choose Kitchen Appliances: Expert Tips Revealed
 Kitchen Cabinets With Black Stainless Steel Appliances: Modern Elegance
 White Kitchen Cabinets Stainless Steel Appliances: Timeless Elegance
 Top 10 Best Non-Toxic Cooking Utensils – Safe & Durable Choices for Healthy Homes

