
You’ve just finished a marathon frying session for a family dinner, and the kitchen is thick with the smell of fried chicken and leftover grease. You turn on your range hood to clear the air, but the suction feels weak, and that greasy smell lingers for hours. More often than not, the culprit is a clogged stove filter—an often-overlooked component that works hard to keep your kitchen air fresh, your appliances running efficiently, and your home safe from fire hazards. The NFPA identifies accumulated grease in range hood filters as a leading contributing factor to residential kitchen fires, making regular cleaning a critical safety task, not just a cosmetic chore NFPA kitchen fire safety guidelines. This step-by-step guide walks you through everything you need to know to clean any type of stove filter quickly, safely, and effectively, no harsh chemicals or specialized tools required. We’ll cover how to identify your filter type, spot early signs of clogs, use the best cleaning methods for your needs, and build a low-effort maintenance routine to keep your kitchen sparkling year-round. For more comprehensive kitchen maintenance guidance, browse our full our full kitchen care library.
Why Stove Filter Maintenance Matters
Your stove filter is the first line of defense against airborne grease, smoke, and cooking odors. When it works properly, it traps these particles before they can enter your range hood ductwork, circulate through your kitchen, or build up on your walls and appliances. A clogged filter reduces suction efficiency by up to 50% per most range hood manufacturer guidelines, forcing the motor to work harder, raising your energy bills, and shortening the unit’s lifespan by years if left unaddressed. Beyond performance and cost, regular cleaning eliminates fire risks from accumulated grease and keeps your kitchen air safe to breathe, especially for households with asthma or allergy sufferers.
Types of Stove Filters
Different range hood models use different filter designs, each with unique cleaning and replacement needs. Knowing which type you have will help you build the right maintenance routine.
| Filter Type | Core Material | Grease Trapping Performance | Odor Control Performance | Cleanable? | Typical Replacement/Care Schedule |
|---|---|---|---|---|---|
| Metal Mesh | Aluminum or stainless steel | Excellent | Poor | Yes (washable) | Clean every 1-3 months; replace if warped or rusted (5+ year lifespan) |
| Charcoal | Activated carbon | Poor | Excellent | No | Replace every 3-6 months, depending on cooking frequency |
| Combination | Metal mesh + charcoal layer | Excellent | Excellent | Partial (wash mesh, replace charcoal insert) | Clean mesh every 1-3 months; replace charcoal insert every 3-4 months for heavy cooks |
Metal Mesh Filters
The most common type of range hood filter, metal mesh filters are constructed from either aluminum (lightweight, affordable, prone to rust if not dried properly) or stainless steel (durable, rust-resistant, more expensive). Their fine mesh design traps airborne grease and food particles before they can enter your range hood ductwork, making them highly effective at grease capture. They are fully washable, so you can reuse them for years with proper care.
Charcoal Filters
Also called activated carbon filters, these are designed to absorb odors, smoke, and tiny airborne particles that pass through mesh filters. They are made from charcoal treated to have millions of tiny pores that trap odor molecules. Unlike mesh filters, they cannot be washed—water fills the pores and renders them useless for odor absorption. They are often used in ductless range hoods that do not vent to the outside.
Combination Filters
Hybrid filters combine a metal mesh outer layer for grease trapping with an inner charcoal layer for odor control, offering the benefits of both types in a single unit. They are ideal for homes where cooking produces strong odors (e.g., fish, curry, fried foods) and are common in mid-range range hoods. Maintenance requires washing the mesh component and replacing the charcoal insert on separate schedules.
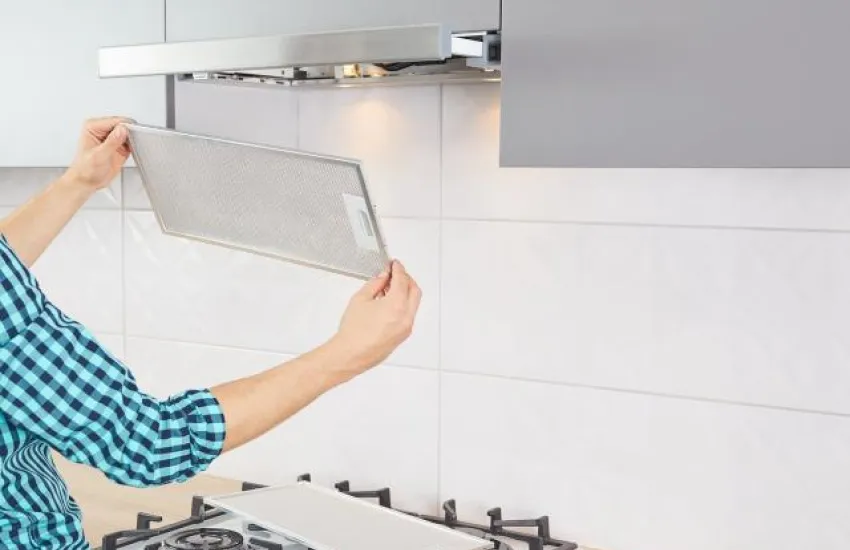 Credit: cltappliance.com
A clogged metal mesh filter removed from a residential range hood, ready for deep cleaning
Credit: cltappliance.com
A clogged metal mesh filter removed from a residential range hood, ready for deep cleaning
Signs Your Filter Needs Immediate Cleaning
Waiting until you notice a strong greasy smell means grease has already caked onto the filter, requiring twice as much scrubbing as a routine clean. Watch for these early warning signs to address clogs before they cause damage:
Reduced Airflow
If you find yourself turning your range hood to its highest setting just to clear cooking smells, or notice that steam and smoke linger near the stovetop instead of being pulled away, your filter is likely clogged. A blocked filter restricts airflow, forcing the motor to work harder and increasing energy use. You may also hear a louder-than-normal humming or rattling noise from the hood as the motor strains to pull air through the clogged filter.
Unpleasant Odors
A lingering greasy or burnt smell in your kitchen that persists even after cleaning the stovetop is a clear sign your filter is saturated with trapped grease and food particles. These residues break down over time, releasing strong odors every time you turn on the range hood or heat up your stove.
Visible Grease Buildup
Inspect your filter monthly by holding it up to a light: if you see thick, sticky, translucent grease layers, or dust and debris caked onto the surface, it’s past time for a clean. You may even notice grease drips on your backsplash or stovetop before you see buildup on the filter itself—if that’s the case, a complete surface cleaning kits can help you tackle grease on all kitchen surfaces at once.
Tools and Supplies You’ll Need
You don’t need specialized equipment to clean your stove filter—most supplies are already in your kitchen. Avoid harsh chemicals like bleach or oven cleaner, as these can corrode metal filters and damage their finish:
- Highly concentrated, grease-cutting dish soap (avoid gentle hand soaps, which are not formulated for thick grease)
- White vinegar (cuts through mineral deposits and neutralizes odors)
- Baking soda (mild abrasive that lifts stuck-on grime without scratching)
- Soft-bristle nylon brush (avoid steel wool, which scratches aluminum filters)
- Heat-resistant rubber gloves (protect hands from hot water and degreasers)
- Large basin or sink (big enough to fully submerge the filter)
- Drop cloth or old towels (protect countertops from grease drips)
- Microfiber cloth (for drying)
Step-by-Step Guide to Cleaning Your Stove Filter
Follow this process for a thorough, scratch-free clean that restores your filter’s performance in under 30 minutes:
Step 1: Safely Remove the Filter
Wait until your stove and range hood have cooled completely (at least 15 minutes after cooking) to avoid burns. Most filters are held in place by small latches on the front of the hood, or slide out from a slot at the top or bottom—consult your range hood’s owner’s manual if you can’t locate the release mechanism. Place a drop cloth under the hood to catch any dripping grease, then gently slide or lift the filter out. Pro tip: take a quick photo of the filter in its slot before removal so you remember how to reinstall it correctly later.
Step 2: Pre-Soak to Loosen Grease
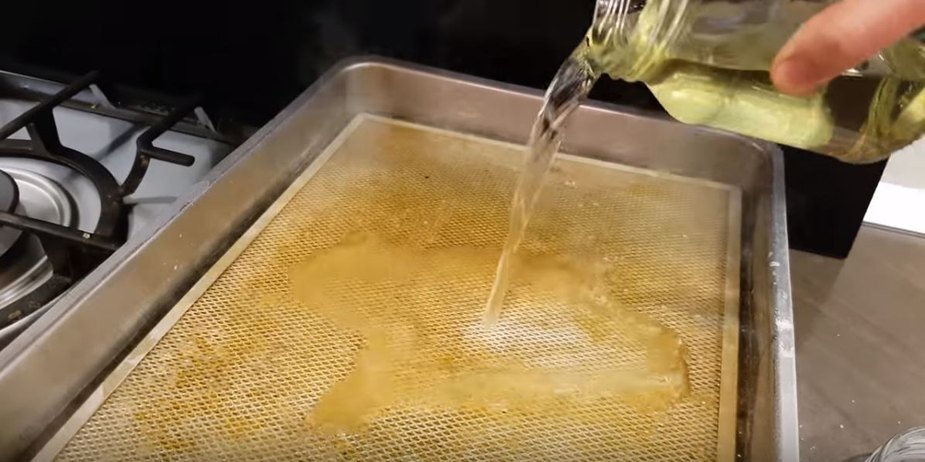
Fill a large basin or sink with hot water (120°F/49°C for aluminum filters, 140°F/60°C for stainless steel to avoid warping thin aluminum), add 2-3 squirts of grease-cutting dish soap and ½ cup white vinegar. Submerge the filter fully, weighing it down with a heavy mug if it floats. Let it soak for 20-30 minutes—this will loosen 90% of surface grease without any scrubbing. For extremely clogged filters, extend the soak time to 1 hour.
Step 3: Scrub Away Stuck-On Grime
Use a soft-bristle nylon brush to gently scrub both sides of the filter, focusing on thick grease spots and mesh corners. For baked-on buildup that doesn’t come off with soap alone, apply a paste of baking soda and water to the spot, let it sit for 5 minutes, then scrub gently. For extremely stubborn grime, our recommended heavy-duty scrubbing tools work without damaging filter coatings. A common mistake is using steel wool or abrasive scrubbers, which scratch the filter surface and create tiny grooves where grease can stick even after cleaning.
Step 4: Rinse and Dry Thoroughly
Rinse the filter under warm running water until all soap, vinegar, and loosened grease residue is gone. Shake off excess water, then pat the filter dry with a clean microfiber cloth. Place it on a drying rack in a well-ventilated area and let it air dry completely for at least 1 hour before reinstalling. Skipping this step can lead to moisture buildup inside your range hood, causing mold, mildew, and even rust on metal filters.
Step 5: Reinstall and Test
Slide the filter back into its slot, making sure it is seated evenly and the latches are secure if applicable. Turn on your range hood and test the suction: you should notice a significant improvement in airflow immediately. If suction is still weak, check for grease buildup in the range hood ductwork, which may require professional cleaning.
For combination filters: remove the charcoal insert before washing the mesh component, and set a reminder to replace the charcoal insert per the manufacturer’s schedule (usually every 3-4 months for households that cook frequently).
 Credit: www.youtube.com
Gently scrubbing a soaked metal filter to remove baked-on grease buildup
Credit: www.youtube.com
Gently scrubbing a soaked metal filter to remove baked-on grease buildup
Alternative Cleaning Methods
If you don’t have time for a full soak-and-scrub routine, these alternative methods work well for different levels of grease buildup:
Vinegar and Baking Soda (Non-Toxic Option)
For light to medium grease buildup, skip the soap and use a vinegar and baking soda solution. Soak the filter in hot water mixed with 1 cup of white vinegar for 30 minutes, then sprinkle baking soda over the surface and scrub gently with a soft brush. The fizzing reaction lifts grease without harsh chemicals, making it ideal for homes with kids or pets. Pros: non-toxic, inexpensive, safe for all filter types. Cons: takes longer to work on thick, baked-on grease.
Dishwasher Cleaning (Hands-Free Option)
Most metal mesh filters are dishwasher safe, making this a great option for busy households. Place the filter on the top rack (to avoid exposure to high heat from the bottom heating element) and run a normal gentle cycle with mild detergent. Pros: no scrubbing required, thorough cleaning. Cons: high-heat cycles can warp thin aluminum filters over time, and this method is not suitable for charcoal or combination filters. Always check your manufacturer’s guidelines before using the dishwasher.
Commercial Degreasers (Heavy-Duty Option)
For filters coated in thick, baked-on grease from weeks of frying or grilling, a kitchen-specific commercial degreaser will cut through buildup in 5 minutes or less. Spray the degreaser evenly over both sides of the filter, let it sit for the time specified on the product label, then rinse thoroughly with warm water. Pros: fast, effective on extreme buildup. Cons: harsh chemicals require good ventilation and rubber gloves; opt for plant-based formulas for homes with kids or pets. Pair with grease-cutting brush options to avoid scrubbing for extended periods.
Steam Cleaning (Chemical-Free Fast Option)
If you own a handheld steam cleaner, you can skip soaking entirely. Hold the steam nozzle 2-3 inches from the filter surface, moving slowly across both sides to loosen grease with hot steam. Wipe the filter down with a microfiber cloth to remove loosened grime. Pros: no chemicals, fast, great for hard-to-reach mesh crevices. Cons: requires a steam cleaner, may not work on extremely thick, caked-on grease.
Pro Tips for Long-Term Filter Maintenance
Building a simple maintenance routine will cut down on cleaning time and keep your range hood working at peak performance:
Match Your Cleaning Schedule to Your Cooking Habits
There is no one-size-fits-all cleaning timeline: if you fry, sear, or cook with oil 3 or more times a week, clean your metal mesh filter monthly. If you mostly bake, steam, or cook low-fat meals, cleaning every 2-3 months is sufficient. For charcoal and combination filters, replace the charcoal component every 3-6 months, depending on usage—you’ll know it’s time when cooking odors no longer dissipate after cleaning the mesh.
Reduce Grease Buildup Before It Reaches Your Filter
Small changes to your cooking routine can drastically cut down on filter grime: always use lids on pots and pans when frying or sautéing to trap airborne grease, and turn on your range hood 5-10 minutes before you start cooking to catch excess particles before they settle. Wipe down your stovetop and the area around your range hood after each cooking session with an extended-handle cleaning brushes to catch drips and splatters before they harden.
Don’t Neglect the Rest of Your Range Hood
When you clean your filter, take 2 minutes to wipe down the interior walls of the range hood and the fan blades with a degreaser to remove accumulated grease that can drip onto the filter later. If you notice persistent smells or low suction even after a fresh filter cleaning, your ductwork may be clogged with grease and require professional cleaning.
When to Replace Your Stove Filter Entirely
Even with regular cleaning, filters don’t last forever. Replace your filter immediately if you notice any of the following signs:
- Warped, bent, or corroded metal mesh that no longer fits securely in the range hood slot
- Rust that cannot be removed (common with low-quality aluminum filters that are not dried properly after cleaning)
- Charcoal inserts that no longer absorb odors even after replacement
- Broken or torn mesh that allows grease and particles to pass through into the ductwork
Replacement filters are available directly from your range hood manufacturer for a perfect fit, or as universal sizes for most standard hood models. Replacing a worn-out filter is far cheaper than repairing a damaged range hood motor or dealing with grease-related fire damage.
 Credit: www.realtor.com
A freshly cleaned and dried filter reinstalled, restoring full range hood suction
Credit: www.realtor.com
A freshly cleaned and dried filter reinstalled, restoring full range hood suction
Frequently Asked Questions
How often should I clean my stove filter?
For most households, clean metal mesh filters every 1-3 months. If you cook with high heat, fry, or grill indoors frequently, clean monthly. For charcoal filters, replace them every 3-6 months depending on usage—you’ll know it’s time when you can no longer eliminate cooking odors even after cleaning the mesh component. Combination filters require washing the mesh part every 1-3 months and replacing the charcoal insert every 3-4 months for heavy cooks.
What materials do I need to clean a stove filter?
You only need basic household supplies: hot water, grease-cutting dish soap, white vinegar, baking soda, a soft-bristle nylon brush, heat-resistant gloves, and a basin large enough to submerge the filter. Avoid harsh chemicals like bleach, ammonia, or oven cleaner, as these can corrode metal filters and damage their finish.
Can I clean a stove filter in the dishwasher?
Yes, most metal mesh filters are dishwasher safe. Place them on the top rack to avoid exposure to high heat from the bottom element, and use a gentle detergent cycle. Never put charcoal or combination filters in the dishwasher, as water will ruin the activated carbon layer. Always check your manufacturer’s guidelines first, as some filters with non-stick coatings may be damaged by high heat or harsh detergents.
How do I remove stubborn, baked-on grease from stove filters?
Soak the filter in hot soapy water mixed with ½ cup of white vinegar for 30 minutes to loosen grease. Apply a paste of baking soda and water to thick, stuck-on spots, let it sit for 5 minutes, then scrub gently with a soft-bristle brush. For extreme buildup, use a kitchen-specific commercial degreaser, following the product instructions carefully and wearing gloves.
Can I use bleach to clean my metal stove filter?
No. Bleach can corrode aluminum and stainless steel filters over time, causing rust, weakening the mesh, and damaging the finish. Stick to mild dish soap, baking soda, and vinegar for safe, effective cleaning that will not harm your filter.
Why does my range hood still smell bad after cleaning the filter?
If you’ve washed a metal mesh filter and still notice lingering grease or burnt odors, the issue is likely one of three things: 1) grease buildup in the range hood ductwork that requires professional cleaning, 2) a worn-out charcoal insert in a combination filter that needs replacing, or 3) grease splattered on the interior walls of the range hood itself, which can be wiped down with a degreaser during your next filter cleaning.
Conclusion
Cleaning your stove filter is a small task with outsized benefits: fresher kitchen air, a longer-lasting range hood, lower energy costs, and reduced fire risk from accumulated grease. By following the step-by-step guide above and tailoring your cleaning schedule to your cooking habits, you’ll keep your kitchen sparkling with minimal time and effort. For more easy kitchen maintenance tips and product recommendations to simplify your cleaning routine, explore our full our full kitchen care library today. If you have young kids or pets, pair your deep cleaning days with childproofing steps like no-drill childproofing locks to keep hazardous supplies out of reach.

I’m Abby Lu, a passionate home cook who loves simplifying everyday meals. At PlugChef.com, I share product reviews and cooking guides to help you find the best tools for your kitchen.
Related posts:
 How to Make a Fruit Basket for a Gift: Easy DIY Guide
 Mesh Desk Organizer With Sliding Drawer: Maximize Efficiency
 Decorative Woven Baskets for Wall: Transform Your Space
 Rubbermaid Large Dish Drying Rack: Ultimate Kitchen Solution
 Gray Kitchen With Stainless Steel Appliances: Modern Elegance
 Appliance Play Food Kitchen Toys: Ignite Imaginative Play

