
A slow-draining sink or rotten egg smell when you turn on your garbage disposal is more than a nuisance—it’s a sign of built-up grease, food residue, and odor-causing bacteria hiding in your drain and disposal unit. In practice, most homeowners only clean their disposal when it starts smelling, which leads to far more frequent and severe clogs than routine monthly maintenance. This 2026-updated guide walks you through safe, effective, chemical-free cleaning steps that work for all standard and batch-feed garbage disposal models, plus tips for preventing future issues and knowing when to call a plumber.
Why Your Garbage Disposal Drain Gets Clogged & Smelly
Understanding the root cause of disposal problems makes prevention far easier. The most common culprits are:
- Congealed grease and oil that harden on disposal blades and pipe walls, trapping food particles
- Fibrous food scraps (like celery or corn husks) that wrap around impeller blades and cause jams
- Biofilm, a slimy layer of bacteria that grows from trapped food residue and causes persistent foul odors
- Mineral buildup from hard water that narrows drain openings over time
Early signs of a problem include slow drainage, gurgling sounds when the disposal runs, water backing up into the sink, or a sour, rotten smell coming from the drain. Industry plumbing data consistently cites improper food waste disposal as the top cause of garbage disposal clogs, so small habit changes make a huge difference.
Safety Precautions You Shouldn't Skip
Garbage disposals have extremely sharp shredder blades, even when unpowered, so taking a few minutes to prep safely will prevent injury:
- Disconnect power completely: Unplug the disposal unit from the outlet under your sink, or flip the dedicated circuit breaker in your electrical panel. Never rely solely on the wall switch, as it can fail or be flipped on accidentally by someone else in your home.
- Wear non-slip rubber gloves to protect your hands from sharp metal parts and harmful bacteria.
- Never stick your bare hand or a regular utensil down the drain—use tongs, pliers, or a dedicated disposal wrench to remove debris.
- If you have a septic system, avoid harsh chemical cleaners that can kill the beneficial bacteria required to break down waste.
A common mistake homeowners make is assuming turning off the wall switch is enough safety prep—always disconnect the power source entirely before reaching into the drain chamber.
Tools & Supplies You’ll Need
You don’t need expensive specialty products to clean your disposal effectively. Most supplies are already in your pantry:
Natural Cleaning Supplies
- 1 cup baking soda
- 1 cup white distilled vinegar (5% acidity standard)
- 2 lemons (for deodorizing and grease cutting)
- 1 gallon hot tap water (never boiling)
- Old toothbrush or dedicated disposal cleaning brush
- Rubber gloves, tongs, or needle-nose pliers
Optional Heavy-Duty Supplies (for tough clogs only)
- Plunger designed for sink drains
- Drain snake (plumber’s snake)
- Enzymatic drain solution for septic-safe deep cleaning
- Heavy-duty cleaning scraper for caked-on grime
Avoid lye-based chemical drain cleaners, which the EPA warns can corrode metal pipes and degrade the rubber seals in your garbage disposal unit over time. Bleach is also not recommended, as it breaks down rubber components and harms septic system bacteria.
Step-by-Step Garbage Disposal Drain Cleaning Guide
This process takes 20–30 minutes total and works for even the most smelly, slow-draining disposals.
Step 1: Prep the Area & Cut Power
Start by clearing all dishes, cleaning supplies, and clutter from around the sink to give yourself plenty of working space. Place a sink stopper in the drain to catch any loose debris that falls back into the chamber when you’re cleaning. Locate the disposal’s power cord under the sink and unplug it completely, or flip the dedicated circuit breaker in your home’s electrical panel to eliminate any risk of accidental startup.
Step 2: Remove Visible Debris Safely
Use tongs or needle-nose pliers to pull out any stuck food scraps, fruit pits, grease clumps, or other large debris from the drain opening. Never stick your bare hand down the drain, even if the power is disconnected—shredder blades remain sharp even when unpowered. For batch feed disposals, remove the splash guard first to access the internal chamber; for continuous feed models, lift the rubber splash guard at the top of the drain to reach the interior. A common oversight here is ignoring small caked-on coffee grounds or food paste stuck to the sides of the disposal chamber—scrape these out with an old spoon before moving on to avoid pushing them deeper into the pipes.
Step 3: Apply Natural Cleaning Solution
Pour 1 cup of baking soda directly into the drain, making sure it reaches the disposal chamber. Follow immediately with 1 cup of white distilled vinegar—you’ll see immediate fizzing as the mild acid in the vinegar reacts with the alkaline baking soda to break down grease, food residue, and odor-causing biofilm. Let the mixture sit undisturbed for 15–20 minutes (do not run water during this time, as it will dilute the solution and reduce its effectiveness). For extra deodorizing power, pour ½ cup of lemon juice into the drain along with the baking soda before adding vinegar—citric acid cuts through light grease even faster than vinegar alone.
Step 4: Scrub the Disposal & Drain Interior
While the cleaning solution sits, use an old toothbrush or dedicated disposal brush to scrub the interior walls of the disposal chamber, the shredder blades, and the upper section of the drain pipe. Focus on any visible stained or caked-on areas. For hard-to-reach spots under the blades, use a heavy-duty cleaning scraper to scrape away grime without risking cuts to your hands. Don’t forget to scrub the rubber splash guard at the top of the drain—this is a common hiding spot for mold and food particles that cause persistent odors even after cleaning the rest of the unit. If you have stubborn buildup, let the baking soda-vinegar solution sit for up to 30 minutes before scrubbing for best results.
Step 5: Flush the Entire System
Remove the sink stopper, then turn on a steady stream of hot tap water (around 120°F/49°C, never boiling) while running the garbage disposal for 30–60 seconds. Hot water melts any remaining congealed grease and flushes all loosened debris down the drain. For extra cleaning power, grind 1–2 small lemon wedges (seeds removed) while the water is running—the citrus oils will coat the disposal blades and leave a fresh, natural scent without harsh chemicals. Once the water runs clear, turn off the disposal and let the water run for an additional 30 seconds to flush the entire drain pipe.
Step 6: Freshen & Deodorize (Optional)
If you still notice a faint odor after flushing, grind ½ cup of ice cubes along with 1 tablespoon of coarse salt while running cold water. The ice and salt scrub away any remaining residue on the blades, and the salt absorbs lingering odors. Alternatively, pour 1 cup of a baking soda-based sink cleaner down the drain, let sit for 10 minutes, then flush with hot water for a longer-lasting fresh scent. Avoid using commercial air fresheners in the disposal, as they can leave a waxy residue that attracts more food buildup over time.
 The fizzing reaction breaks down grease, food residue, and odor-causing bacteria
Image source: www3.drano.com
The fizzing reaction breaks down grease, food residue, and odor-causing bacteria
Image source: www3.drano.com
How to Fix Tough Clogs & Persistent Odors
If the basic cleaning steps above don’t resolve slow drainage or bad smells, the issue is likely deeper in the drain line or disposal unit.
Unclogging Stubborn Drain Blockages
If water is still draining slowly after cleaning, use a sink-specific plunger (not a toilet plunger) to dislodge the clog. Fill the sink with 2–3 inches of water, place the plunger firmly over the drain, and pump vigorously 10–15 times. If that doesn’t work, use a drain snake to reach deep into the pipe and pull out trapped debris. For extreme clogs, an enzymatic drain solution is safe for garbage disposals and septic systems, as it uses natural bacteria to break down organic clogs instead of harsh corrosive chemicals. Avoid using wire hangers or other sharp objects, as they can scratch the interior of the disposal and pipes, leading to rust and leaks over time.
Eliminating Lingering Foul Odors
If odors persist after multiple cleanings, the problem may be trapped gunk in the P-trap (the U-shaped pipe under your sink). To fix this, place a bucket under the P-trap, loosen the slip nuts with a wrench, and remove the trap to clean out any accumulated waste. Reassemble the trap tightly, then run hot water through the disposal for 1 minute. If the smell is coming from the disposal unit itself, it may be a sign of a worn rubber seal—contact a licensed plumber to inspect the unit for leaks, as DIY repairs to internal disposal components can void your warranty and cause injury.
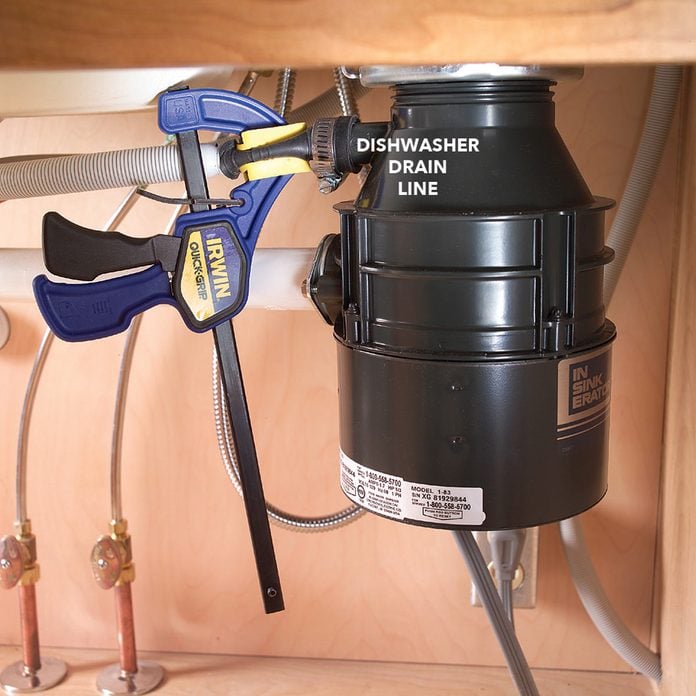 Scrubbing all interior surfaces removes hidden food particles and biofilm
Image source: www.familyhandyman.com
Scrubbing all interior surfaces removes hidden food particles and biofilm
Image source: www.familyhandyman.com
Prevent Future Clogs & Odors With Simple Habits
Small, consistent habits will drastically reduce the frequency of disposal clogs and odors, per plumbing industry recommendations. Following these rules will also cut down on the need for frequent outdoor drain maintenance, saving you time and plumbing costs.
Foods to Never Put in Your Garbage Disposal
Even a small amount of the wrong food waste can cause major clogs:
- Fibrous vegetables: celery, corn husks, asparagus, and artichoke leaves wrap around shredder blades and cause jams
- Starchy foods: pasta, rice, and potato peels expand when wet, forming a thick paste that clogs pipes
- Grease, oil, and fat: these congeal as they cool, sticking to pipes and blades to trap food particles
- Hard items: bones, fruit pits, nutshells, and eggshells can dull or break shredder blades
- Coffee grounds: they form a dense, sludge-like mass that sticks to pipe walls
- Non-food items: plastic, glass, metal, and paper will damage the disposal and cause immediate clogs
Monthly & Weekly Maintenance Routine
- Run cold water for 10–15 seconds before and after every use of the disposal to flush debris down the pipe and solidify any grease so it doesn’t stick to the blades.
- Grind 1–2 small citrus wedges (lemon, lime, or orange) once a week to deodorize and cut through light grease buildup.
- Do a full baking soda-vinegar deep clean once a month to prevent biofilm and odor buildup. If you don’t have time for DIY mixes, a plant-based disposal cleaner used once a week works just as well to break down buildup and eliminate odors.
- Sharpen disposal blades occasionally by grinding 1 cup of ice cubes with 1 tablespoon of rock salt while running cold water—this chills the unit and scrapes off stuck food without damaging the blades.
- Avoid overloading the disposal: only put in small amounts of food waste at a time, and never add more than 1 cup of waste per use.
If you have a septic system, stick to natural cleaning methods to protect the beneficial bacteria that break down waste, per EPA septic system care guidelines.
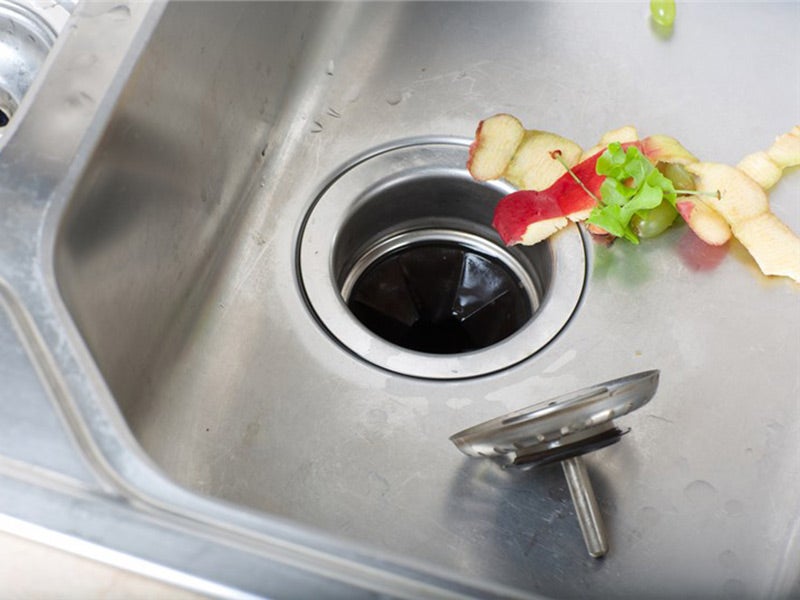 Always disconnect power before cleaning to avoid accidental startup
Image source: www.fourseasonsheatingcooling.com
Always disconnect power before cleaning to avoid accidental startup
Image source: www.fourseasonsheatingcooling.com
When to Call a Professional Plumber
DIY cleaning fixes most common disposal issues, but some problems require professional help to avoid costly damage:
- Water backs up into the sink or dishwasher when the disposal runs
- You notice leaks under the sink around the disposal unit
- The disposal hums but doesn’t turn on (this could indicate a jammed blade or motor failure)
- Foul odors persist even after thorough cleaning, which may signal a sewer gas leak from a damaged pipe
Never attempt to repair motor or electrical issues yourself—garbage disposals have sharp internal parts and require specialized tools to disassemble safely. A licensed plumber can also inspect your full drain line for hidden clogs that DIY methods can’t reach. If you’re also dealing with slow bathroom drains, our bathroom pipe unclogging tips can help you tackle small clogs without calling a plumber.
Frequently Asked Questions
Can I use boiling water to clean my garbage disposal drain?
No. Boiling water can crack porcelain sink surfaces and warp the plastic or metal components of the garbage disposal unit over time. Stick to hot tap water (around 120°F/49°C) for flushing, which is hot enough to melt grease without causing damage.
Is it safe to use bleach to clean a garbage disposal?
No. Regular household bleach can degrade the rubber seals and internal components of the disposal over time, leading to leaks and reduced lifespan. It also kills beneficial bacteria in septic systems. Stick to natural cleaners like baking soda, vinegar, and citrus for safe, effective cleaning.
Why does my garbage disposal smell even after I clean it?
Persistent odors usually come from trapped food particles in the splash guard, P-trap, or deep in the drain pipe. Scrub the splash guard thoroughly with a toothbrush, clean out the P-trap under the sink, or use an enzymatic drain cleaner to break down hidden biofilm.
Can I use a garbage disposal if I have a septic system?
Yes, but only if you avoid harsh chemical cleaners and limit the amount of food waste you grind. Stick to small amounts of biodegradable food waste, and use natural cleaning methods to protect the beneficial bacteria in your septic tank. Avoid grinding fibrous or starchy foods, as they can clog septic lines.
How often should I deep clean my garbage disposal drain?
Do a quick flush with hot water and citrus every week, and a full baking soda-vinegar deep clean once a month. If you use your disposal frequently (more than 3 times a week), do a full clean every two weeks to prevent buildup.
Conclusion
Cleaning your garbage disposal drain regularly takes less than 30 minutes a month, but it prevents costly plumbing repairs, eliminates foul kitchen odors, and extends the life of your disposal unit significantly. The natural cleaning method outlined above is safe for kids, pets, and septic systems, with no harsh chemicals required. To prevent stubborn clogs, avoid putting fibrous, starchy, or greasy food waste down the drain, and stick to a simple weekly and monthly maintenance routine.
If you’re tackling other kitchen cleaning tasks, our guide to hood upkeep best practices will help you eliminate hidden grease and odors from your cooking space. For a fully sanitized kitchen, follow our full kitchen sanitization steps to eliminate hidden bacteria on countertops and appliances. After cleaning your drain, wipe down the sink and disposal exterior with a gentle all-purpose cleaner to remove any splattered food or grease residue.

I’m Abby Lu, a passionate home cook who loves simplifying everyday meals. At PlugChef.com, I share product reviews and cooking guides to help you find the best tools for your kitchen.
Related posts:
 3 Tier Lazy Susan Spice Rack: Organize & Maximize Space
 How to Make a Spice Rack: DIY Guide for Kitchen Bliss
 Sweet Cream for Coffee Recipe: Easy, Rich & Delicious Delight
 Good Sides for Beef Tenderloin: Perfect Pairings to Impress Guests
 Penne Pasta Broccoli And Chicken: Easy, Delicious, and Healthy Recipe
 Shrimp in the Crock Pot: Easy, Flavorful Recipes for Busy Nights

