
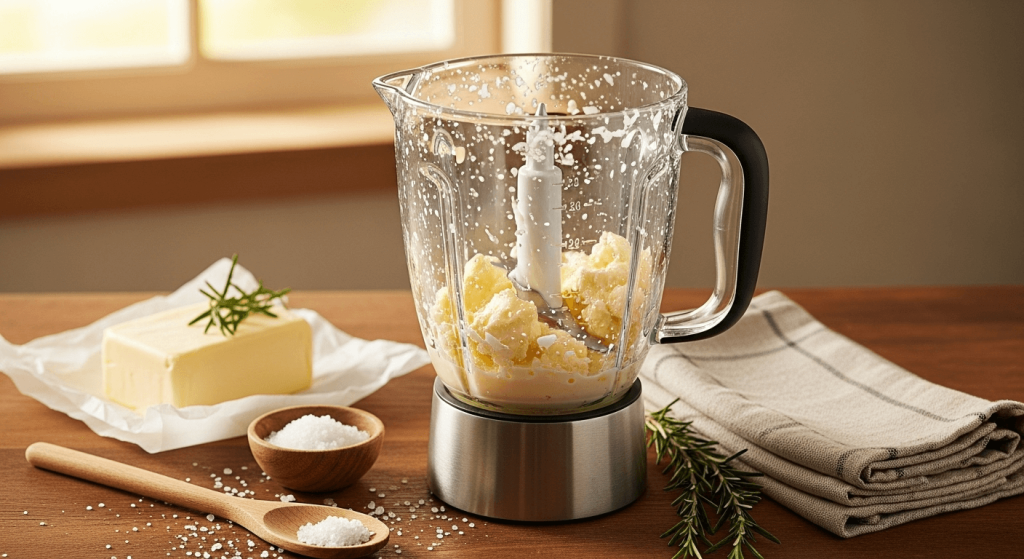
Have you ever wondered how fresh, creamy butter straight from your kitchen tastes? Making homemade butter in a blender is easier than you think.
You don’t need fancy tools or special skills—just cream and a blender. Imagine the rich flavor and unbeatable freshness you can enjoy with butter made by your own hands. In this post, you’ll discover simple steps to create delicious butter quickly, saving money and adding a personal touch to your meals.
Ready to transform your cooking experience? Keep reading, and let’s get blending!

Credit: food52.com
Ingredients Needed
Making homemade butter in a blender is surprisingly simple, but getting the ingredients right is key to perfect results. You only need a few basics, yet each plays an important role in the flavor and texture of your butter. Let’s dive into what you’ll need to get started.
Fresh Heavy Cream
Choose fresh, high-quality heavy cream with at least 36% fat content. The fat is what transforms into butter, so cream from a local dairy or organic brand often works best. Have you noticed how cream freshness can change the taste of store-bought butter? It really makes a difference.
Salt (optional)
Adding salt is a personal choice. A pinch enhances flavor and helps preserve your butter longer. If you prefer unsalted butter for cooking or baking, you can skip this or add it later when you use the butter.
Cold Water
Cold water is essential for rinsing the butter once it forms. This step removes leftover buttermilk, which helps the butter last longer without spoiling. Keep some ice-cold water ready—it’s a small detail that improves your butter’s quality.
Optional Flavorings
You can experiment by adding herbs, garlic, or honey to create unique butter flavors. I once added fresh rosemary and a touch of lemon zest—it turned simple butter into a gourmet spread. What flavors would you like to try with your homemade butter?
Choosing The Right Cream
Choosing the right cream is key for making homemade butter in a blender. The cream affects taste, texture, and how fast the butter forms. Not all creams work well for butter making, so knowing which to pick helps you get the best results.
Fresh cream with a high fat content creates richer, smoother butter. Lower fat creams might take longer or yield less butter. The cream’s freshness also matters. Older cream can spoil the taste and affect the butter’s quality.
Understanding Cream Fat Content
Cream with at least 35% fat works best for butter. Higher fat means more butter and better texture. Whipping cream or heavy cream usually meets this fat level. Light cream or half-and-half have less fat and won’t whip into butter easily.
Choosing Between Pasteurized And Raw Cream
Pasteurized cream is safe and easy to find. It has been heat-treated to kill germs. Raw cream comes straight from the cow and has a fresh taste. It can make richer butter but might carry bacteria. Use raw cream only if you trust the source.
Considering Organic And Grass-fed Cream
Organic cream comes from cows fed without chemicals. Grass-fed cream often tastes fresher and has a deeper yellow color. These creams can add a richer flavor and more nutrients to your butter. They usually cost more but offer quality benefits.
Checking Cream Freshness And Storage
Always check the cream’s expiration date before buying. Fresh cream whips better and makes tastier butter. Store cream in the fridge and use it within a few days. Avoid cream that smells sour or looks clumpy.
Preparing Your Blender
Preparing Your Blender Ensure your blender is clean and dry for the best results. A well-prepared blender ensures smooth, creamy butter. Start with fresh cream for optimal texture and taste.
Preparing your blender for making homemade butter is crucial. A well-prepared blender ensures smooth and creamy butter. The right setup enhances the blending process, making it efficient and enjoyable. Let’s dive into the essential steps to get your blender ready.
Check The Blender Capacity
Ensure your blender can handle the volume of cream. Overfilling might cause spills. A half-full blender works best for even blending. This prevents the motor from straining.
Clean The Blender Thoroughly
Start with a clean blender. Wash it with warm soapy water. Rinse well to remove any soap residue. Dry it completely before use. This prevents unwanted flavors in your butter.
Inspect The Blades
Check the blades for sharpness. Dull blades may not blend cream efficiently. Make sure they are securely attached. Loose blades can cause leaks or uneven blending.
Ensure A Secure Lid Fit
The lid should fit snugly on the blender. A loose lid can lead to spills. Test the lid by pressing it down gently. This ensures it will stay in place during blending.
Prepare For Noise
Blending can be noisy. Set your blender on a stable surface. This reduces vibrations and noise. Consider using a blender with a sound shield if available. It minimizes disruption while blending.
Step-by-step Butter Making
Making butter at home with a blender is simple and fun. It takes just a few minutes and cream as the main ingredient. The process has clear stages to watch and enjoy. Each step changes the cream into fresh, creamy butter.
Pouring And Blending
Pour cold heavy cream into the blender jar. Use fresh cream for the best taste. Secure the lid tightly to avoid spills. Start blending at a medium speed. The cream will begin to thicken and swirl inside.
Watching The Cream Separate
After a few minutes, the cream will turn into whipped cream. Keep blending past this point. The whipped cream will start breaking down. You will see yellow butter solids and white liquid separate. This liquid is the buttermilk. It is normal and expected.
Draining The Buttermilk
Stop blending once butter clumps form. Pour the contents into a fine strainer or cheesecloth. Let the buttermilk drain completely. Save the buttermilk for baking or cooking. Rinse the butter under cold water to remove leftover buttermilk. Press the butter gently to remove extra liquid.
Washing And Shaping Butter
After churning butter in a blender, washing and shaping are key steps. These steps ensure your butter is clean and ready to use. Proper washing removes leftover buttermilk, which helps butter last longer. Shaping gives your butter a neat form, making it easy to store and serve.
Rinsing To Remove Residue
Rinsing butter removes the buttermilk trapped inside. Use cold water for rinsing to keep butter firm. Gently press and knead the butter under running water. Keep rinsing until the water runs clear. Clear water means most residue is gone. This step helps prevent sour taste and spoilage.
Forming Butter Blocks
After rinsing, shape butter into blocks or balls. Use your hands or a butter mold for this. Press firmly to remove extra water. Smooth the surface for a nice finish. Wrap the shaped butter in parchment or wax paper. Store it in the fridge to keep fresh.
Adding Flavors And Salt
Adding flavors and salt to your homemade butter is where the magic happens. This step lets you customize your butter to match your taste perfectly. Whether you prefer it simple and salty or packed with herbs and spices, the blender makes it easy to mix in your favorite additions evenly.
Choosing The Right Salt
Salt isn’t just salt when it comes to butter. Sea salt, kosher salt, or Himalayan pink salt each bring a unique taste and texture. I like using flaky sea salt for a subtle crunch that enhances the creaminess without overpowering it.
Think about how much salt you typically enjoy on your food. Start with a small pinch and taste as you go. Too much salt can mask the fresh flavor of your butter, so patience is key.
Adding Fresh Herbs
Fresh herbs like chives, dill, or rosemary add a burst of flavor that elevates your butter for breads, vegetables, or grilled meats. Chop them finely before adding, so they blend well without leaving large bits.
Have you ever tried rosemary butter on warm bread? It’s a simple way to impress guests at dinner. Mixing herbs in the blender ensures every bite tastes consistent.
Incorporating Other Flavorings
Beyond herbs and salt, you can experiment with garlic, lemon zest, or even honey for a sweet twist. These flavors mix quickly in the blender, giving your butter a smooth texture and bold taste.
Imagine spreading garlic and herb butter on roasted potatoes or honey butter on warm cornbread. These small flavor additions can transform everyday dishes into something special.
Storing Homemade Butter
Storing homemade butter properly keeps it fresh and tasty for longer. Good storage protects the butter from air, light, and strong odors. These factors can change the flavor and texture of your butter. Use clean containers to avoid contamination and extend shelf life. Keep the butter cool to maintain its quality.
Refrigerating Homemade Butter
Place the butter in an airtight container or wrap it tightly with wax paper. Store it in the coldest part of the fridge. Homemade butter can last up to two weeks refrigerated. Avoid storing butter near strong-smelling foods. This helps prevent the butter from absorbing unwanted flavors.
Freezing Homemade Butter
Freeze butter to keep it fresh for several months. Wrap it tightly in plastic wrap or foil, then place it in a freezer-safe bag. Label the package with the date. When ready to use, thaw it slowly in the fridge. Frozen butter keeps its quality and taste well.
Room Temperature Storage
Butter can stay soft and spreadable at room temperature for a short time. Use a butter dish with a cover to protect it from dust and insects. Keep it away from heat and sunlight. Only store small amounts out for daily use. Replace the butter in the fridge after a day or two.

Credit: www.youtube.com
Common Mistakes To Avoid
Making homemade butter in a blender is simple, but a few common mistakes can turn your creamy dream into a frustrating mess. Knowing what to watch out for saves you time and ensures you get that perfect, fresh butter every time. Let’s dive into the pitfalls to avoid so your butter-making experience stays smooth and delicious.
Using Warm Or Room Temperature Cream
You might think warmer cream whips faster, but it actually slows down the butter formation. Cold cream helps the fat separate quickly, leading to better butter texture.
Keep your cream chilled before blending. Have you noticed how cold cream clumps faster in your blender? That’s the magic you want!
Over-blending The Cream
Blending too long after the butter has formed can break down the fat and water separation. This results in a grainy texture instead of smooth butter.
Once you see the butter solids separate from the liquid (buttermilk), stop blending immediately. Patience at this stage pays off.
Ignoring The Buttermilk Drain
Leaving buttermilk in the butter makes it spoil faster and affects the taste. Many skip draining the liquid properly, leading to soggy butter.
Use a fine mesh strainer or cheesecloth to squeeze out every drop of buttermilk. Have you ever noticed how much longer homemade butter lasts when it’s well drained?
Not Washing The Butter Thoroughly
Rinsing the butter under cold water removes leftover buttermilk and improves shelf life. Skipping this step causes the butter to spoil quickly.
Wash the butter gently until the water runs clear. This simple step made a huge difference the first time I tried it—it really freshened the flavor.
Using The Wrong Blender Speed
High speeds create too much heat, melting the butter and affecting its texture. Low or medium speeds work best to separate the fat without warming the cream too much.
Try pulsing your blender or starting slow. Have you tested different speeds to find what works best with your blender model?
Tips For Creamy Texture
Creating homemade butter in a blender is simple and fun. Achieving a creamy texture makes it taste better and spread easily. Small details can change the texture a lot. Follow these tips to get soft, smooth butter every time.
Use Cold Heavy Cream
Cold cream whips better and separates faster. Keep the cream chilled before blending. Warm cream can turn the butter grainy or runny. Cold cream helps form smooth, creamy butter.
Blend At Medium Speed
Start blending at medium speed for even mixing. High speed can heat the cream and break it unevenly. Medium speed lets the fat separate gently. This creates a soft and creamy texture.
Watch The Cream Carefully
Stop blending as soon as the butter forms. Over-blending makes the butter dry and crumbly. Look for clumps of butter and clear buttermilk. This means the butter is ready and creamy.
Rinse Butter Well
Rinse the butter under cold water after blending. This removes leftover buttermilk that can spoil the butter. Press the butter gently while rinsing. Clean butter stays fresh longer and feels creamy.
Add Salt Or Herbs For Flavor
Mix salt or fresh herbs into the butter after rinsing. Salt improves taste and texture. Herbs add freshness and softness. Stir gently to keep the butter fluffy and creamy.

Credit: hopewellheightsblog.com
Frequently Asked Questions
How Long Does Homemade Butter Take In A Blender?
Making butter in a blender takes about 5 to 10 minutes. The cream separates into butter and buttermilk with continuous blending. Time may vary based on blender power and cream temperature. Chilling cream slightly speeds up the process.
What Type Of Cream Is Best For Homemade Butter?
Use heavy whipping cream with at least 35% fat content. Fresh, pasteurized cream works best for rich, creamy butter. Avoid ultra-pasteurized cream, as it may not separate well. Organic cream can enhance flavor and texture.
Can I Add Salt To Butter Made In A Blender?
Yes, add salt after blending to taste. Salt enhances flavor and helps preserve butter longer. Mix salt evenly into softened butter for best results. Adjust salt quantity based on personal preference.
How Do I Store Homemade Butter Properly?
Store homemade butter in an airtight container in the refrigerator. It stays fresh for up to two weeks. For longer storage, freeze butter wrapped tightly to prevent freezer burn. Bring to room temperature before use for spreadability.
Conclusion
Making butter at home with a blender is simple and fun. You only need cream and a few minutes. The fresh taste beats store-bought butter easily. Plus, you control the ingredients and avoid additives. Try this easy method to enjoy fresh, creamy butter anytime.
It’s a small step that makes cooking more enjoyable and tasty. Give it a try and see how homemade butter can brighten your meals.

Hi, I’m Daniel Brooks—a food lover and kitchen gear enthusiast. I enjoy testing cookware, utensils, and gadgets to see what really works in everyday cooking. At PlugChef.com, I share honest reviews, comparisons, and simple guides to help you choose the best tools for a safer, smarter, and more enjoyable kitchen.
Related posts:
 What Type of Cooking Utensils are Safe: Expert Picks
 What Innovations Could Blenders Make: Unleashing Future Tech
 Smart Strategies to Organize a Small Kitchen: Maximize Space
 How to Organize a Kitchen Cabinet: Expert Tips & Tricks
 How to Organize Kitchen Drawers: Expert Tips and Tricks
 How to Organize a Corner Kitchen Cupboard: Expert Tips

