
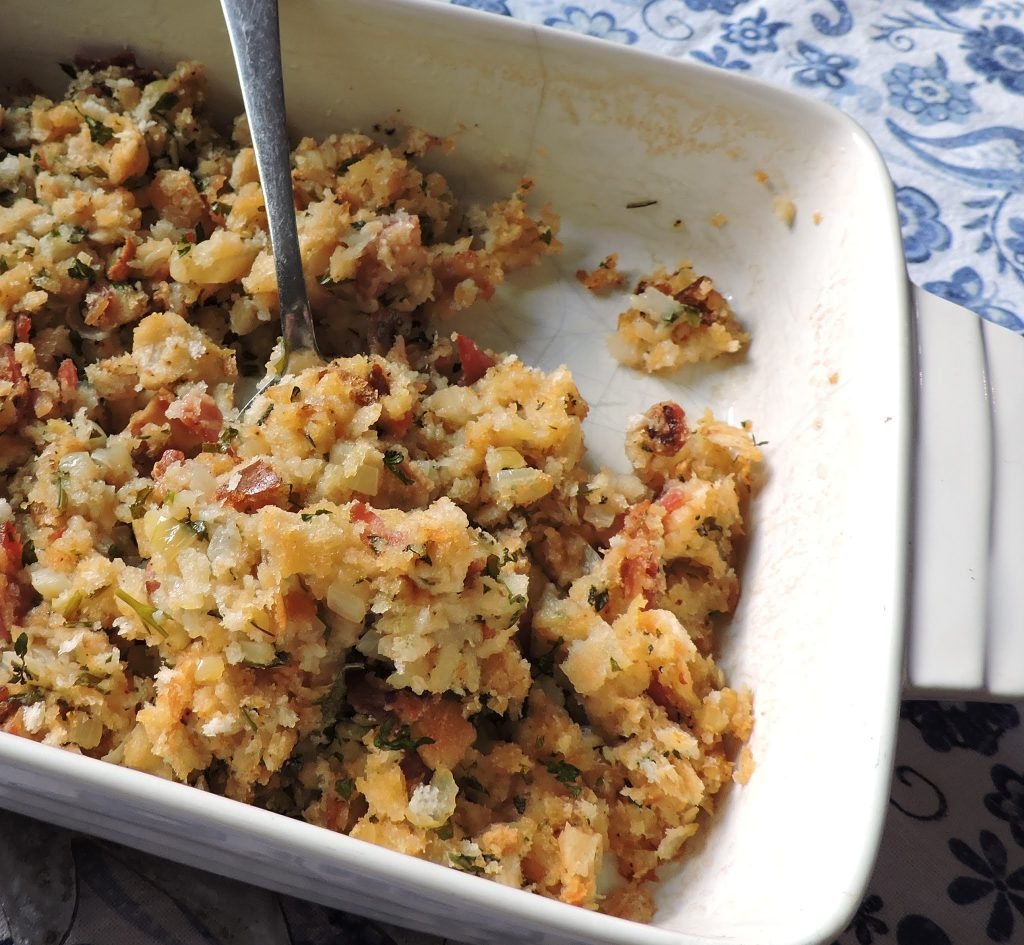
There’s nothing quite like the warm, earthy aroma of sage and onion dressing filling your kitchen, whether you’re prepping a casual weeknight roast chicken, a festive Thanksgiving spread, or a classic Sunday lunch. This foolproof recipe delivers a side with crisp, golden edges, tender, moist croutons, and a perfectly balanced herby flavor that pairs with nearly every main dish. It comes together in 30 minutes flat with minimal prep, no fancy equipment, and ingredients you likely already have in your pantry.
 Freshly baked sage and onion dressing, crispy on top and moist inside, ready to serve alongside roast chicken
Credit: www.theenglishkitchen.co
Freshly baked sage and onion dressing, crispy on top and moist inside, ready to serve alongside roast chicken
Credit: www.theenglishkitchen.co
What Is Sage And Onion Dressing?
A staple of British and American Southern cuisine, sage and onion dressing is a savory bread-based side often confused with stuffing. The key difference? Stuffing is cooked inside the cavity of poultry, while dressing is prepared separately in a skillet or baking dish, giving it a crispier texture and more customizable flavor. It’s a beloved companion to roast meats, holiday feasts, and even vegetarian mains, relying on simple, fresh ingredients to deliver big, comforting flavor. For more on this, see our guide on 1 1 2 lbs potatoes easy recipes for.
Ingredients
This recipe uses precise quantities to ensure perfect texture and balance every time. Each ingredient is chosen to build layers of flavor, with substitution options for common dietary needs:
- 4 cups (120g) 1-inch bread cubes: Day-old sourdough, white, or whole wheat bread works best, as stale bread absorbs stock without turning soggy. If using fresh bread, spread cubes on a baking sheet and toast at 300°F (150°C) for 10 minutes to dry out the surface. For gluten-free diets, use certified gluten-free cubed bread.
- 2 medium yellow onions (about 1 cup diced): Yellow onions offer a perfect balance of sweetness and mild bite, but white onions work for a sharper, more pungent flavor. Avoid sweet onion varieties like Vidalia, which can make the dressing overly sugary.
- 2 tablespoons (5g) fresh sage leaves: Fresh sage has a bright, earthy aroma that dried sage can’t fully replicate. Look for vibrant green leaves with no wilting or brown spots. If using dried sage, use 1 teaspoon, and toast it in the butter for 30 seconds before adding onions to wake up its essential oils. For guidance on selecting and storing fresh herbs, see University of Minnesota Extension’s herb storage tips.
- 4 tablespoons (56g) unsalted butter: Unsalted butter lets you control the overall salt level of the dressing. For a vegan version, swap for vegan butter or extra virgin olive oil.
- 1 ¼ cups (300ml) low-sodium chicken or vegetable stock: Homemade stock adds the deepest flavor, but low-sodium store-bought works perfectly. Adjust the quantity by ¼ cup if you prefer a moister, more crumbly texture.
- ½ teaspoon fine sea salt and ¼ teaspoon freshly ground black pepper: Adjust to taste, especially if using store-bought stock which may already contain added salt.
After prepping your ingredients, keep your cutting board and utensils spotless with a sturdy cleaning scrubber to avoid cross-contamination.
Step-By-Step Preparation
Follow these precise steps for consistent, flavorful results every time:
- Prep the base components: Peel and finely dice the onions. Remove tough stems from sage leaves and chop finely. If using fresh bread, toast cubes on a baking sheet at 300°F (150°C) for 10 minutes to dry out, then set aside.
- Cook the aromatics: Melt butter in a 10-inch oven-safe skillet or Dutch oven over medium-low heat. Add onions and sage, cook 10-12 minutes, stirring occasionally, until onions are soft, translucent, and pale golden. Do not brown the onions, as this will create a bitter, overpowering flavor.
- Combine and rest: Transfer the onion-sage mixture to a large bowl. Add bread cubes, stock, salt, and pepper. Gently fold with a silicone spatula until all bread is evenly coated and no dry spots remain. Let rest for 5 minutes to allow bread to fully absorb the stock.
- Bake to perfection: Preheat oven to 375°F (190°C). Transfer the mixture back to the skillet (if using) or a greased baking dish. Bake for 20-25 minutes, until the top is golden brown and edges are crisp. The internal temperature should reach 165°F (74°C) for food safety.
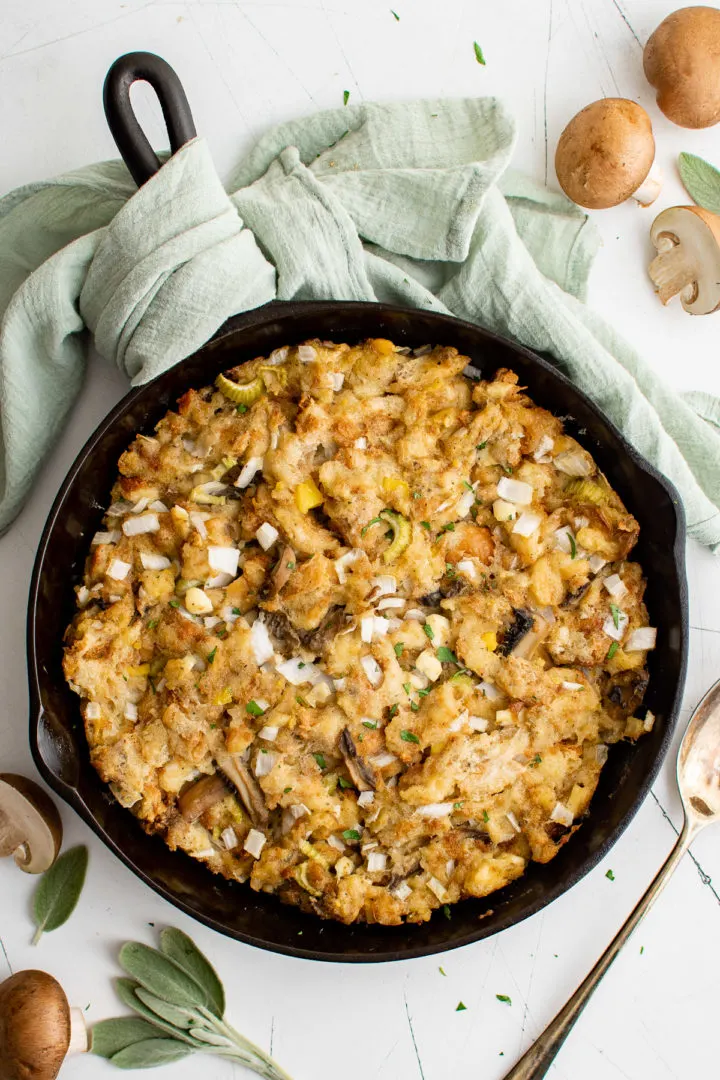 Herby sage and onion dressing with visible onion and sage flecks, perfect for holiday meals
Credit: www.berlyskitchen.com
Herby sage and onion dressing with visible onion and sage flecks, perfect for holiday meals
Credit: www.berlyskitchen.com
Choosing The Right Bread For Perfect Texture
Bread is the foundation of this dressing, so its type and preparation make a huge difference in the final result. For the best balance of chew and crisp edges, use a mix of sourdough and white bread cubes: sourdough adds a subtle tang that complements the earthy sage, while white bread stays tender and absorbs stock evenly. Avoid pre-packaged bread crumbs, which create a pasty, dense texture instead of the distinct, crouton-like bite this recipe is known for. If you only have fresh bread on hand, toasting it for 10 minutes at 300°F (150°C) dries out the surface without browning, giving you the same results as day-old bread.
Common Mistakes To Avoid
Even with a simple recipe, small missteps can lead to soggy, bland, or bitter dressing. Avoid these common pitfalls for foolproof results:
- Overbrowning the onions: Cooking over high heat or rushing the process leads to bitter, caramelized onions instead of sweet, mellow ones. Fix: cook over medium-low heat, stir often, and remove from heat as soon as onions are translucent and pale golden.
- Using fresh, un-toasted bread: Soft, fresh bread releases excess moisture as it cooks, leading to mushy, soggy dressing. Fix: always use day-old bread, or toast fresh cubes for 10 minutes at 300°F (150°C) to dry out the surface.
- Overmixing the combined ingredients: Vigorous mixing breaks down bread cubes, leading to a pasty, dense texture instead of tender, distinct croutons. Fix: fold gently with a silicone spatula just until all bread is evenly coated.
- Overbaking: Baking for too long dries out the bread and sage, leading to a tough, crumbly texture. Fix: bake for 20-25 minutes only, until the top is golden and edges are crisp, and the internal temperature hits 165°F (74°C).
Pro Tips For Next-Level Flavor
These small tweaks will take your dressing from good to unforgettable:
- Toast dried sage for extra depth: If using dried sage, toast it in the butter for 30 seconds before adding onions to wake up its essential oils, mimicking the brightness of fresh sage.
- Add umami for richness: Stir in 2 tablespoons of grated Parmesan cheese or a teaspoon of tamari (gluten-free soy sauce) after combining ingredients for a deep, savory boost that complements the earthy sage.
- Boost freshness with citrus: Add 1 teaspoon of lemon zest after cooking the onions to cut through the richness and brighten the herby flavor.
- Add a subtle crunch: Top the dressing with ¼ cup of toasted pecans or walnuts before baking for a nutty, crunchy contrast to the soft bread.
Serving Suggestions
This versatile dressing pairs with far more than just roast meats. Try these ideas to make it the star of your meal:
- Classic roast pairings: Serve alongside roast chicken, turkey, pork, or lamb for a traditional, herby side that cuts through rich, savory meat. It’s a staple for Sunday roasts and holiday feasts like Thanksgiving and Christmas.
- Stuffing base: Mix the dressing with cooked sausage, diced apples, and celery for a flavorful stuffing to fill roast poultry, or serve it as a vegetarian side on its own.
- Vegetarian and vegan mains: Pair with roasted root vegetables, stuffed squash, or lentil loaf for a hearty, plant-based meal. The herby flavor complements earthy, roasted veggies perfectly.
- Brunch twist: Serve a small portion alongside eggs benedict or a full English breakfast for a savory, herby kick.
If you’re hosting family gatherings with little ones, install cabinet safety locks to keep children away from hot cookware and sharp serving tools.
Storing, Reheating & Freezing
Proper storage ensures your dressing stays delicious for days, with minimal loss of texture or flavor:
- Refrigerator storage: Let the dressing cool completely to room temperature (no more than 2 hours after cooking, per USDA food safety guidelines) before transferring to an airtight glass container. Store for up to 3 days in the refrigerator. If storing in a low cupboard, secure the container with drawer safety latches to prevent spills.
- Reheating: Preheat oven to 350°F (175°C), cover the dressing with foil to prevent over-browning, and heat for 15-20 minutes until warmed through. If the dressing feels dry, stir in 1-2 tablespoons of stock or melted butter before reheating. Avoid microwaving on high, as it can make the bread rubbery and unevenly hot.
- Freezing: Freeze leftover dressing in airtight freezer-safe containers for up to 1 month. Thaw overnight in the refrigerator, then reheat as directed. Note that freezing will make the bread slightly crumblier, so this method is best for dressing you plan to mix into stuffing rather than serve as a standalone side.
 Moist, crumbly sage and onion stuffing, ideal for filling roast poultry or serving as a side
Credit: meghanitup.com
Moist, crumbly sage and onion stuffing, ideal for filling roast poultry or serving as a side
Credit: meghanitup.com
Easy Flavor Variations
This recipe is incredibly customizable to suit your taste and dietary needs. Try these easy twists:
- Vegan version: Swap butter for vegan butter or extra virgin olive oil, use vegetable stock, and add 2 tablespoons of ground flaxseed mixed with 6 tablespoons of water (a flax "egg") to bind the mixture. Top with toasted nuts for extra crunch.
- Gluten-free: Use certified gluten-free bread cubes and ensure your stock and seasonings are gluten-free. The recipe works exactly the same as the original.
- Sweet and savory: Add ½ cup of diced tart apples (like Granny Smith) and ¼ cup of dried cranberries to the mixture before baking for a sweet, tangy twist perfect for holiday meals.
- Spicy kick: Add ¼ teaspoon of red pepper flakes or a diced jalapeño to the onion-sage mixture while cooking for a subtle heat that pairs beautifully with roasted pork or chicken.
Frequently Asked Questions
What’s the difference between sage and onion dressing and stuffing?
The key difference is cooking method: stuffing is cooked inside the cavity of poultry, while dressing is cooked separately in a dish or skillet. Dressing has a crispier texture and is easier to customize, as it doesn’t have to account for the moisture and cooking time of raw meat.
Can I make sage and onion dressing ahead of time?
Yes! Assemble the dressing up to 24 hours in advance, cover, and store in the refrigerator. Add 10 minutes to the baking time if baking from cold. For even better flavor, make it 1-2 days ahead, as the herbs and onions have time to infuse the bread.
Is sage and onion dressing gluten-free?
Traditional recipes use wheat-based bread, but you can easily make a gluten-free version by substituting certified gluten-free bread cubes and ensuring your stock and seasonings are gluten-free.
Can I make sage and onion dressing without bread?
Yes! For a low-carb or grain-free version, use 2 cups of cooked cauliflower rice, grated potato, or cooked quinoa as a base. Reduce the stock quantity to ¾ cup, as these ingredients absorb less liquid than bread.
How do I keep my sage and onion dressing from getting soggy?
Use day-old or toasted bread, avoid over-adding stock, and don’t cover the dressing while baking. Let it rest for 5 minutes after removing from the oven to let excess moisture evaporate.
Conclusion
This sage and onion dressing recipe delivers warm, herby flavor, crisp edges, and a tender, moist crumb with minimal effort and zero fancy equipment. It’s the perfect versatile side for everything from casual weeknight roast chicken to festive holiday feasts, and can be customized to suit any dietary need or taste preference. Prep it ahead for stress-free hosting, pair it with your favorite proteins and veggies, and watch it become a new family staple. For more easy, crowd-pleasing recipes and kitchen tips, browse our site blog to make every meal a hit. Give this recipe a try this week, and let us know how you customize it to your taste!

Hi, I’m Daniel Brooks—a food lover and kitchen gear enthusiast. I enjoy testing cookware, utensils, and gadgets to see what really works in everyday cooking. At PlugChef.com, I share honest reviews, comparisons, and simple guides to help you choose the best tools for a safer, smarter, and more enjoyable kitchen.
Related posts:
 What Oil to Use on Cutting Board: Best Options Revealed
 Is Teak Wood Good for Cooking Utensils: Discover Benefits
 How to Build End Grain Cutting Board: Step-by-Step Guide
 California Osha First Aid Kit Requirements: Essential Compliance Guide
 Mountain Bike First Aid Kit: Essential Gear for Safe Riding
 First Aid Kit Plastic Box: Essential Safety Organizer for Emergencies

