
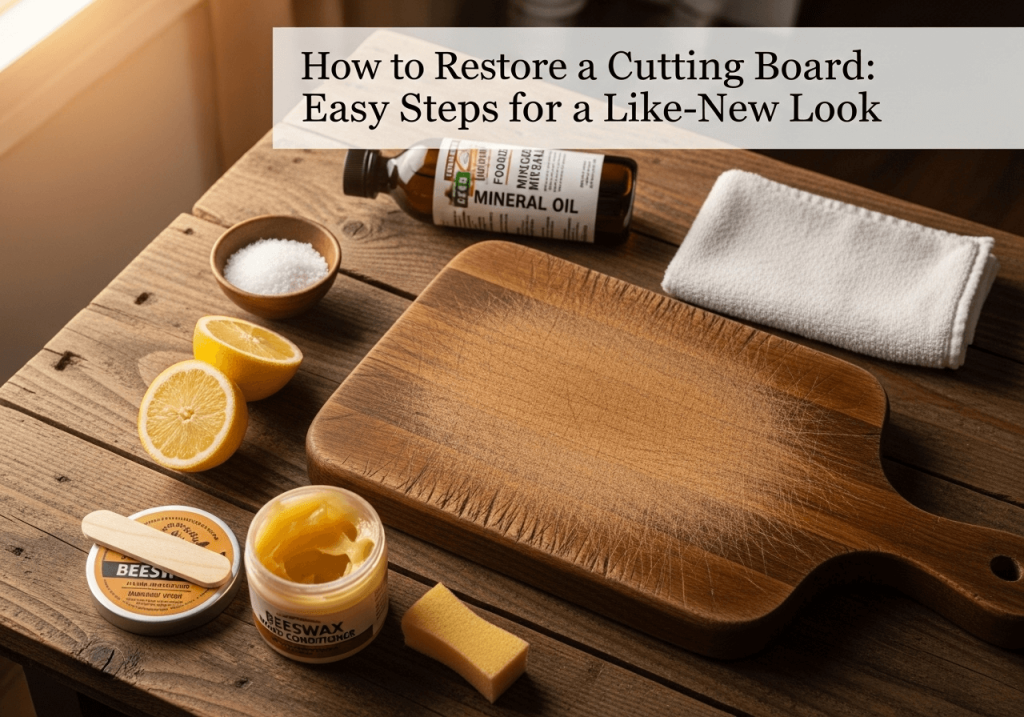
A neglected cutting board can become scratched, stained, and even harbor bacteria in knife grooves. Restoring a wooden cutting board is a low-cost, high-impact way to extend its life, improve food safety, and make meal prep more enjoyable. This guide gives a clear, practical sequence — clean, assess, repair, sand, and finish — with real-world tips, common mistakes to avoid, and a short maintenance plan so your board stays like-new.
Quick decision: restore or replace?
Restore when:
- Surface scratches, light stains, or mild warping are the only problems.
- Odors are present but respond to cleaning and sanding.
- The board is structurally sound (no long splits or loose joints).
Replace when:
- There are deep, narrow cracks or splits that trap food and can’t be cleaned.
- Glue joints are separating or large chunks are missing.
- Persistent mold or odor remains after cleaning.
- Severe warping or splintering makes the board unsafe to use.
In practice, if you can’t confidently sanitize all knife grooves or the board feels unstable, replacement is the safer choice.
Tools and supplies (what to have on hand)
- Warm water, mild dish soap, clean cloths
- White vinegar or 3% hydrogen peroxide (optional sanitizers)
- Coarse kosher salt and half a lemon (for spot-cleaning)
- Sandpaper: 80–100 grit (heavy material removal), 120–150 grit (smoothing), 220–320 grit (final finish)
- Sanding block or random-orbit sander (with dust collection if possible)
- Food-grade mineral oil and/or a food-safe beeswax conditioner (butcher-block butter)
- Plastic or bench scraper for stuck-on food
- Food-safe epoxy for butcher-block repairs (optional, use product labeled for cutting boards)
- Vacuum or soft brush for dust removal
If you need guidance for non-wood boards, see this short guide for cleaning a plastic board: clean plastic board.
Step 1 — Deep clean and sanitize (10–30 minutes)
- Scrape: Remove food residue with a plastic scraper.
- Wash: Rub both sides with warm soapy water; rinse and dry immediately. Never soak a wooden board — prolonged water weakens glue and warps wood.
- Odors & light stains: Sprinkle coarse salt, scrub with a lemon half (cut-side down) while pressing and rotating. Let sit 5–10 minutes, then rinse and dry.
- Extra sanitize: Wipe with 3% hydrogen peroxide or a solution recommended by food-safety guidance. For authoritative general sanitation guidance, refer to the USDA’s food-safety resources (USDA). Rinse and dry thoroughly.
If mold is visible, treat it before sanding — follow specific mold removal steps in this mold removal tips article: mold removal tips.
Practical tip: dry the board upright with air circulation; closing it flat before fully dry invites mold.
Step 2 — Inspect and plan the sanding depth
Assess:
- Shallow surface scratches and stains: you can restore these with light sanding (120–220 grit).
- Deep knife grooves/gouges: start with coarse grit (80–100) to remove material, then refine.
- End-grain boards: they absorb oil faster and can look uneven if over-sanded; plan for gentler finishing.
Common mistake: sanding aggressively in one spot to remove a gouge — this creates a hollow. In practice, sand evenly across the entire face so the surface stays flat.
If you’re curious about construction differences (edge-grain vs end-grain or butcher-block rebuild techniques), this primer offers background on butcher-block construction: butcher-block guide.
Step 3 — Sanding: method, grit progression, and tips
Sanding is the most important restorative step. Follow a progression to avoid visible scratches and dips.
Recommended grit progression:
- 80–100 grit: remove deep gouges or heavy discoloration
- 120–150 grit: level the surface and remove coarse scratches
- 220–320 grit: final smoothing for a silky finish
Table: sanding purpose and time
- 80–100 grit — Purpose: remove deep cuts — Time: until gouges are gone, working evenly
- 120–150 grit — Purpose: flatten and remove 80-grit marks — Time: 5–15 minutes depending on board size
- 220–320 grit — Purpose: finish and prep for oiling — Time: 5–10 minutes
Technique:
- Always sand with the grain where possible; for end-grain boards, sand the faces lightly and accept some variation.
- Keep the sander moving; don’t hold it in one spot to prevent dips.
- Check frequently by touch and sight under strong light.
- Wipe dust with a damp cloth and vacuum crevices between grit changes to avoid trapping abrasive particles.
Safety note: wear a dust mask when sanding and work in a ventilated area.
Step 4 — Repairing deep gouges, seams, and separations
Options:
- Sand out gouges: if the board thickness allows, sanding away material is the cleanest solution.
- Food-safe epoxy: for very deep or irregular holes you can fill with a butcher-block epoxy labeled food-safe. Filling is a repair, not a hygiene guarantee — inspect and reseal regularly.
- Joint separation: if lamination seams are opening or end-grain blocks come loose, professional repair or replacement is usually safer.
In practice, small repairs with food-safe fillers can extend life, but avoid DIY glues or non-food-safe fillers — they can contaminate food.
Step 5 — Oil and finish (what to use and how)
What to use:
- Food-grade mineral oil is the standard recommended finish because it penetrates, doesn’t go rancid, and is safe. University extension recommendations favor mineral oil for initial conditioning (see regional extension guidance such as extension resources for general woodworking care).
- Follow mineral oil with a beeswax or commercial butcher-block conditioner to seal the surface and add water resistance.
- Never use olive, vegetable, or nut oils — they oxidize and become rancid.
How to oil:
- Apply 1–2 tablespoons of mineral oil to a medium-sized board; work it in with a clean cloth in circular motions for 2–5 minutes per side.
- Let the board rest flat for at least 4–12 hours (overnight is common) so oil penetrates.
- Wipe off excess oil and buff with a dry cloth.
- Repeat coats until the wood stops absorbing oil (typically 2–3 coats on very dry boards).
- Optional: apply a thin layer of beeswax conditioner, warm and spread, then buff for a smooth, water-shedding surface.
Common mistake: over-applying oil and not wiping excess — this leaves a sticky residue. Always wipe and buff.
Aftercare — a practical maintenance schedule
- Daily/light use: wash, rinse, dry thoroughly after each use; store upright to air.
- Monthly (or when wood looks dull): apply a light coat of mineral oil.
- Heavy daily use: oil every 2–4 weeks.
- Yearly: inspect for deep damage and do a full sand-and-refinish if needed.
Practical observation: many kitchens benefit from keeping a small bottle of mineral oil and a lint-free cloth near the prep area for quick touch-ups.
Preventing warping and damage
- Don’t soak or put wooden boards in the dishwasher — high heat and prolonged water break down glue and warp wood.
- Avoid prolonged contact with extremely hot pots or direct sunlight, which can dry and warp boards.
- Rotate usage between faces to even wear.
- Store vertically with air circulation to promote complete drying.
For more on sealing techniques, consult this sealing overview: seal wood board.
Troubleshooting quick reference
- Persistent odor: cause — absorbed oils or bacteria; fix — lemon + salt scrub, sanitize, sand if needed, then oil.
- Black/dark stains: cause — food tannins or oxidized juices; fix — sand down to fresh wood.
- Mold returning: cause — stored wet; fix — deep clean, dry fully, replace if severe (see mold removal tips).
- Rancid smell after oiling: cause — non-food-safe oil used; fix — strip surface by sanding, then refinish with mineral oil.
For targeted stain techniques, this stain removal resource is useful: get stains out.
Repairs and products worth knowing
- Food-safe epoxy: useful for gap filling on thick butcher blocks — choose products explicitly marked food-safe.
- Butcher-block butter (mineral oil + beeswax): convenient, leaves a polished finish.
- Random-orbit sander with dust extraction: speeds sanding and reduces airborne dust — beneficial for large or frequent projects.
If you need advice removing heavy oil or grease before restoration, see these oil-removal tips: remove oils from counters.
FAQs
Q: How often should I oil my cutting board? A: Oil whenever the wood looks dry or dull. That’s typically every 1–3 months for home use; heavy users may oil every few weeks.
Q: Can I use beeswax alone as a finish? A: Beeswax is a good topcoat but won’t penetrate the wood. Use mineral oil first, then beeswax as a sealant.
Q: Is sanding safe for end-grain boards? A: Yes, but sand gently. End-grain soaks oil quickly and can develop an uneven appearance if over-sanded. Finish with finer grits.
Q: Can I sanitize with bleach? A: Avoid concentrated bleach on wood. If you use any sanitizer, follow authoritative food-safety guidance (for general policies see the USDA: USDA) and rinse thoroughly.
If mold is your main concern, follow targeted removal before finishing: mold removal tips.
Image

Image source: www.smorhome.com
Conclusion
Restoring a cutting board is a straightforward sequence: clean thoroughly, assess damage, sand evenly, repair as needed with food-safe materials, and finish with mineral oil plus a beeswax seal. Regular light maintenance (wash, dry, oil) prevents heavy restoration. Next step: gather mineral oil, sandpaper (80–220 grit), and a clean cloth — start with a deep clean and follow the steps above to bring your board back to a like-new look.
Call to action: Ready to restore your board? Collect the supplies, set aside an hour for cleaning and sanding, and bring your cutting board back into safe, beautiful service.

I’m Abby Lu, a passionate home cook who loves simplifying everyday meals. At PlugChef.com, I share product reviews and cooking guides to help you find the best tools for your kitchen.
Related posts:
 How to Get Stains Out of Cutting Board: Easy & Effective Tips
 How to Get Smell Out of Wooden Cutting Board: Easy & Effective Tips
 Unbleached Vs Bleached Parchment Paper: Which Is Safer & Better?
 Using Vinegar to Mop Floors: Ultimate Guide for a Sparkling Clean
 What Time Do Brunch Start: Ultimate Guide to Perfect Timing
 How Long Does Grapes Last: Ultimate Guide to Freshness & Storage

