
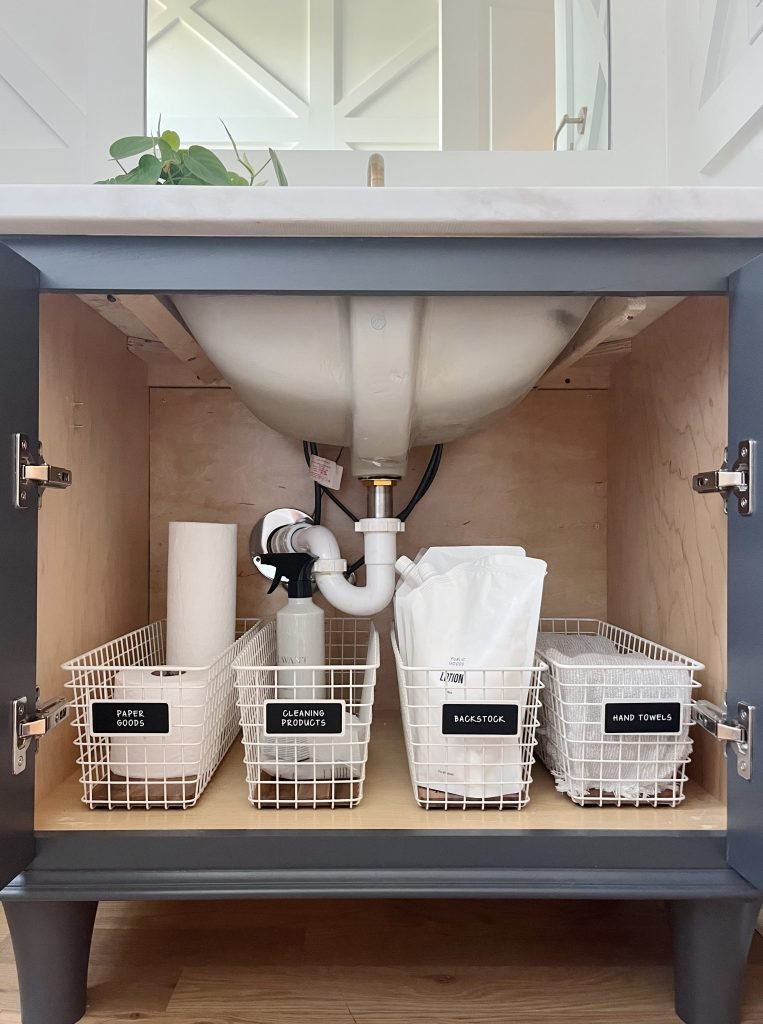
For most homeowners, the cabinet under the kitchen sink is a high-traffic clutter catch-all: half-used cleaning sprays, expired dish pods, random sponges, and forgotten tools pile up until you can’t find what you need when a leak springs or a mess strikes. A messy under-sink space also hides common issues like slow leaks, mold growth, and pest entry points that can cause costly damage if left unaddressed. This step-by-step guide covers full cleaning, organization, and long-term maintenance to turn that chaotic cabinet into a functional, easy-to-maintain space, with safety guidance aligned with U.S. EPA and OSHA household safety standards.
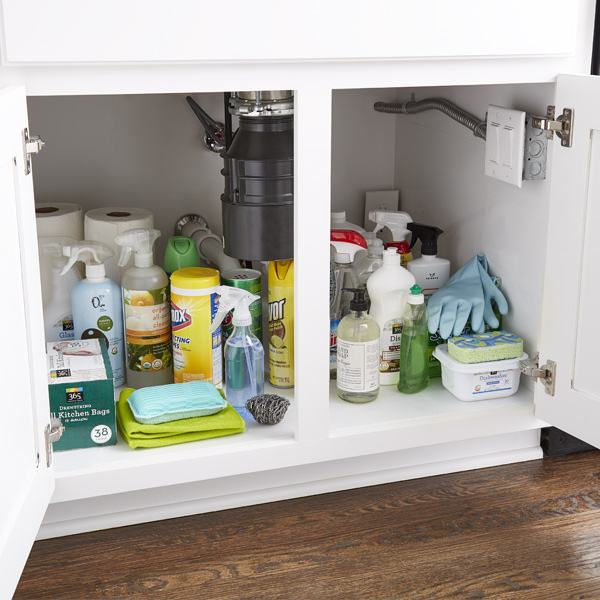 This cleared cabinet space lets you assess damage, leaks, and clutter before restocking.
Image source: www.containerstore.com
This cleared cabinet space lets you assess damage, leaks, and clutter before restocking.
Image source: www.containerstore.com
Pre-Work: Prep, Safety, and Initial Assessment
Rushing into an under-sink clean without a plan often leads to missed damage, expired products left behind, and clutter returning within a month. These prep steps take 10 minutes upfront and save you hours of rework later.
1. Prioritize Safety First
Before touching any items, put on nitrile gloves (regular latex gloves can seep through when handling harsh cleaning products) and an N95 mask if you suspect mold or mildew, which is extremely common in damp under-sink spaces. If you see standing water in the cabinet, turn off the sink’s shut-off valve immediately to avoid worsening leaks. If you have young children or pets, block off the kitchen area during the process to prevent them from grabbing hazardous products. According to U.S. Environmental Protection Agency household chemical safety guidance, common cleaning products can cause skin, eye, or respiratory irritation if handled without proper protection.
2. Do a Full Initial Clear
Remove every single item from the cabinet, including items stuffed in the back corners, old sponge collections, and products hidden behind the P-trap. Lay them out on a counter or the kitchen floor so you can see your full inventory at once. While the cabinet is empty, inspect the walls, floor, and back panel for signs of water damage: soft or warped wood, dark water stains, or black/green mold spots are all red flags that need to be addressed before you reorganize.
3. Sort and Triage Every Item
As you go through each item, sort them into four distinct piles to avoid decision fatigue:
- Keep: Items you’ve used in the last 3 months, that are not expired, and that serve a current household need (e.g., if you have a dishwasher, keep dishwasher pods; toss the old hand-washing detergent you haven’t touched in a year).
- Donate/Recycle: Unopened, unexpired cleaning supplies you don’t need, and empty plastic bottles accepted by your local recycling program. Many community shelters and food banks accept unopened cleaning product donations.
- Hazardous waste disposal: Expired cleaning products, bleach, ammonia, drain cleaner, and other chemical products that can’t go in regular trash. Check your local municipality’s website for free monthly household hazardous waste (HHW) drop-off locations.
- Trash: Used sponges, empty cardboard packaging, broken tools, and any items that are expired or damaged beyond use. In practice, most people underestimate how much expired product is hiding in the back of their cabinet — a common mistake is only clearing the front half and leaving old products behind, which can leak or degrade without you noticing.
4. Plan Your Layout Based on Use Frequency
Before putting anything back, map out where items will go based on how often you use them. The most frequently used items (dish soap, everyday sponges, paper towels) should be in the front of the cabinet or on a pull-out shelf at waist height, so you don’t have to bend or reach for them. Less frequently used items (heavy-duty drain cleaner, glass cleaner, extra trash bags) can go in the back or on lower shelves. If you have a garbage disposal, make sure its switch is accessible and not blocked by storage bins. Measure your cabinet interior before buying any organizers to avoid purchasing items that don’t fit.
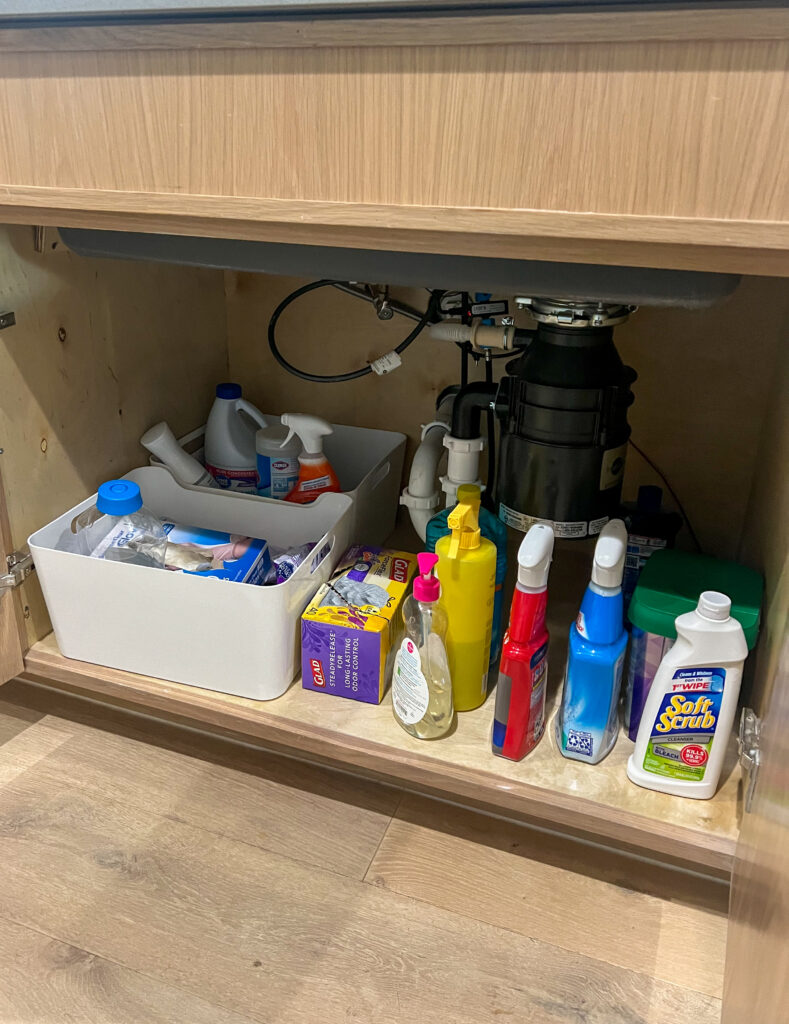 Grouping items by category first prevents duplicate purchases and streamlines storage.
Image source: tarynnewton.com
Grouping items by category first prevents duplicate purchases and streamlines storage.
Image source: tarynnewton.com
Deep Clean the Cabinet Interior
Even if your cabinet looks clean on the surface, hidden grime, mold, and bacteria can build up over time from small leaks and spills. A deep clean eliminates these issues and extends the life of your cabinet.
1. Tackle Stains, Grime, and Mold First
Start by sweeping out loose debris, dust, and crumbs with a small handheld vacuum or dry cloth. For stuck-on grime, make a paste of baking soda and warm water, or use an all-purpose cleaner rated for kitchen surfaces (avoid harsh abrasives that can damage cabinet finishes). For mold or mildew spots (common around the sink base and back walls), scrub with a solution of 1 part white vinegar to 4 parts water, or a commercial mold remover rated for household use. Let the solution sit for 5–10 minutes before scrubbing with a non-abrasive brush, then rinse thoroughly with a damp cloth and dry completely with a microfiber towel to prevent new mold growth. If you notice persistent black mold or widespread water damage, refer to EPA residential mold remediation guidance to determine if professional removal is needed.
2. Inspect and Repair Plumbing Issues
While the cabinet is empty, check all visible pipes, joints, and the P-trap for signs of leaks, corrosion, or loose fittings. Place a dry paper towel under each joint and wait 10 minutes to check for drips. If you find a small leak, tighten the joint with a plumber’s wrench; for larger leaks or corroded pipes, replace the affected part to avoid water damage to your cabinet and kitchen floor. Also check the sink faucet’s supply lines for cracks or bulging (most supply lines last 5–10 years per plumbing industry standards) and replace them if needed to avoid sudden burst leaks.
3. Disinfect All Surfaces
Once grime and mold are removed, spray the entire cabinet interior (walls, floor, back panel) with a disinfectant cleaner, let it sit for the time recommended on the label (usually 3–5 minutes) to kill bacteria and viruses, then wipe clean with a damp cloth. Dry thoroughly. If you use a cabinet liner, replace it with a new waterproof vinyl or plastic liner to protect the cabinet from future moisture.
Smart Organization Strategies That Actually Work
The best under-sink organization systems are tailored to your cabinet size, household needs, and routine. These strategies eliminate clutter and make items easy to find without digging through piles of bottles.
1. Choose Storage Solutions That Fit Your Space
The right organizers depend on your cabinet dimensions and what you’re storing:
- For narrow cabinets (12 inches wide or less): Install a slim pull-out organizer that slides out like a drawer, so you don’t have to reach into the back to grab items. These cost $15–$30 and eliminate the need to dig for hidden items. Pull-out organizers are also a worthwhile investment for people with back pain, mobility issues, or tall cabinets that make reaching the back difficult.
- For standard cabinets: Use stackable, clear plastic bins (2–3 inches tall) for small items like sponges, dish tablets, and scrub brushes. Clear bins let you see contents at a glance, though labeling is still recommended for consistency.
- For spray bottles and dishcloths: Install a tension rod or adhesive hooks on the inside of the cabinet door to hang items, freeing up floor space for larger items like trash bags and cleaning buckets.
- For all cabinet types: Line the bottom with a non-slip, waterproof mat to catch small spills and prevent bottles from sliding around. A common mistake is buying bulky bins that take up more space than the items they’re storing, which creates more clutter instead of less. Always measure your cabinet interior before purchasing organizers.
2. Arrange Items by Accessibility
Follow the "golden zone" rule for organization: items you use daily (dish soap, hand soap, everyday sponges, paper towels) go in the front of the cabinet at waist height, so you can grab them without bending or reaching. Items you use weekly (glass cleaner, all-purpose spray, dishwasher pods) go in the middle shelves. Items you use monthly or less (heavy-duty drain cleaner, oven cleaner, extra trash bags) go in the back or on the lowest shelf, out of the way. If you store hazardous cleaning products (like drain cleaner or bleach) under the sink, place them in a locked, child-proof bin on the highest shelf, out of reach of kids and pets, per CPSC child safety guidelines for cleaning products.
3. Label Everything for Consistency
Even if you use clear bins, add a simple label to each one (e.g., "Sponges & Scrub Brushes," "Dishwasher Pods," "Trash Bags") so every household member knows where to put items back. You don’t need fancy supplies: a piece of masking tape and a marker works just as well as a label maker. Labeling eliminates the guesswork that leads to misplaced items and clutter buildup over time, which is one of the most common reasons organized under-sink spaces fall back into disarray within a month.
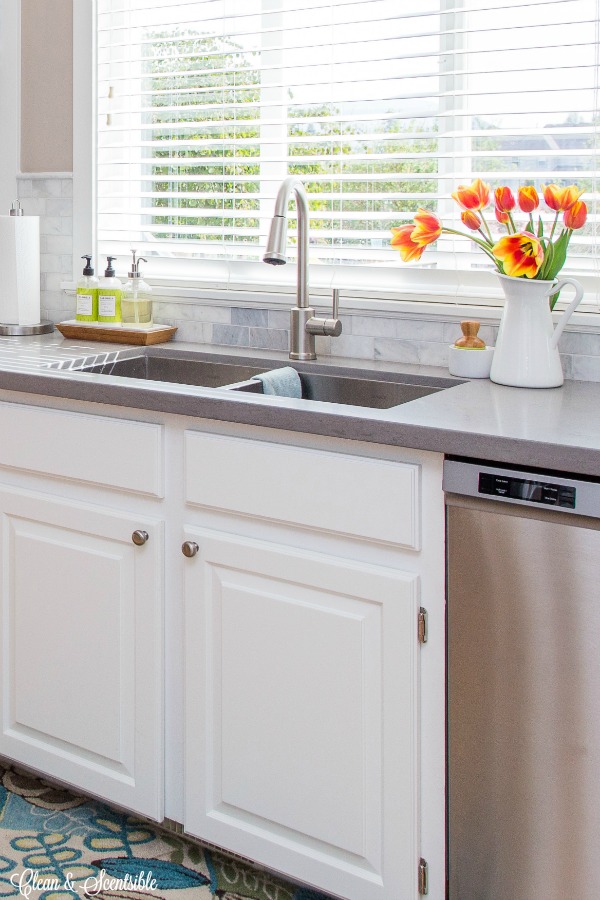 Clear labels cut down on search time and help all household members put items back correctly.
Image source: www.cleanandscentsible.com
Clear labels cut down on search time and help all household members put items back correctly.
Image source: www.cleanandscentsible.com
Long-Term Maintenance to Keep Clutter at Bay
An organized under-sink space only stays that way with small, regular maintenance checks. These habits take 5 minutes or less a month and prevent you from having to do a full clean-out again.
1. Do a Quick 5-Minute Check Every 2 Weeks
Set a reminder on your phone to scan the under-sink area every two weeks. Toss any empty bottles, used sponges, or items that have been left out of place. This quick check prevents clutter from piling up to the point where you need to do a full clear-out again.
2. Do a Full Refresh Every 6 Months
Every 6 months, do a full clear-out, sort through all items, toss expired products, wipe down the cabinet interior, and reorganize as needed. This catches any small leaks early, removes expired products before they cause damage, and ensures your storage system still works for your household’s current needs.
3. Adjust Your System as Needed
If your household needs change (e.g., you get a new pet, start using a dishwasher, have a baby), adjust your storage system accordingly. If you find you’re constantly reaching for an item that’s stored in the back of the cabinet, move it to the front. The goal is to make the space work for your routine, not the other way around.
Safety Reminders for Long-Term Use
Proper safety practices prevent accidents, water damage, and health issues in the long term.
1. Store Hazardous Products Safely
Never store flammable items (like aerosol cans, oil-based cleaning products, or candles) near hot water pipes, where heat could cause them to ignite. Keep all cleaning products in their original containers with labels intact, so you know what they are and how to use them safely. If you have young children or pets, use a child-proof lock on the cabinet door, and store all hazardous products in a locked bin inside the cabinet.
2. Prevent Water Damage and Mold
Place a small, waterproof tray under the P-trap and all pipe joints to catch small drips before they damage the cabinet floor. Check the shut-off valve and supply lines monthly for signs of leaks or corrosion. If you notice a musty smell under the sink, check for mold immediately, and dry out the area completely before reorganizing. Avoid storing absorbent items like paper towels or cardboard boxes directly on the cabinet floor, as they can soak up moisture and hide leaks.
3. Dispose of Waste Responsibly
Never pour leftover cleaning products down the drain, as they can damage your plumbing and pollute local water systems. For small amounts of liquid cleaning products, dilute with water and pour down the drain with plenty of running water, but for larger amounts or hazardous products (like bleach, ammonia, or drain cleaner), take them to your local household hazardous waste drop-off site. Empty plastic cleaning product bottles can usually be recycled, but check your local recycling guidelines first, as some areas don’t accept bottles that held harsh chemicals.
Frequently Asked Questions
How long does it take to clean and organize under the kitchen sink?
For a standard, moderately cluttered under-sink cabinet, the full process takes 45 minutes to 1 hour, including sorting, cleaning, and reorganizing. If you have heavy mold or water damage to address, or need to install new organizers, it may take 2–3 hours. Breaking the task into 15-minute chunks over a few days is also an option for people with busy schedules.
What should I never store under my kitchen sink?
Avoid storing flammable items (like aerosol cans, oil-based cleaning products, or candles) near hot water pipes, and never store food items under the sink, as moisture and cleaning product fumes can contaminate them. Also avoid stacking heavy items on top of plumbing fixtures, as this can cause pipes to shift or leak over time.
How do I prevent mold from growing back under my sink?
After cleaning, make sure the cabinet is completely dry before putting items back. Use a waterproof cabinet liner to protect the floor from moisture, and place a small desiccant packet (like silica gel) in the back of the cabinet to absorb excess humidity. Check for leaks monthly, and fix any drips immediately to eliminate the moisture that mold needs to grow.
Can I use a cabinet liner, or will it trap moisture?
Yes, but choose a waterproof, non-slip liner made of plastic or vinyl, not a fabric or cork liner, which can absorb moisture and harbor mold. Replace the liner every 6–12 months, or immediately if you notice it’s wet or stained.
How do I store cleaning supplies if I have a small under-sink cabinet?
For narrow or shallow cabinets, prioritize door storage: install adhesive hooks for spray bottles and a small over-the-door organizer for sponges and scrub brushes. Use stackable bins that fit the exact height of your cabinet to avoid wasted vertical space, and only keep 1–2 of each essential item (e.g., one dish soap, one all-purpose cleaner) to reduce clutter.
Conclusion
A clean, organized under-sink cabinet does more than just look nice — it makes kitchen tasks faster, helps you catch leaks and damage early, and reduces the risk of mold and pest issues. By following these steps, you’ll turn a chaotic, neglected space into a functional storage area that works with your routine, not against it. If you’re ready to tackle other high-traffic clutter hotspots in your kitchen, check out our guide to organizing pantry shelves for a fully streamlined cooking space.

I’m Abby Lu, a passionate home cook who loves simplifying everyday meals. At PlugChef.com, I share product reviews and cooking guides to help you find the best tools for your kitchen.
Related posts:
 How Do You Pronounce Colander: Clear Guide & Tips
 Is Nylon Or Silicone Better for Cooking Utensils: Ultimate Guide
 How to Cut Skirt Board for Stair: Expert Tips & Techniques
 Vintage First Aid Kit Metal Box: Timeless Safety and Style
 First Aid Kit for Restaurant: Essential Safety Gear You Need Today
 First Aid Kit for Sports: Essential Items for Quick Injury Care

