

Craving that iconic store-bought Chex Mix tang, but with a richer, creamier ranch kick and a crunch that stays crisp for days? This homemade Chex Mix Ranch Dressing Recipe delivers exactly that, with customizable add-ins to fit every taste and dietary need. Perfect for game days, potlucks, movie nights, or quick afternoon snacks, it comes together in under an hour with pantry staples you likely already have on hand. Unlike mass-produced mixes loaded with preservatives and excess salt, this version lets you control every ingredient for a bold, fresh flavor that will have everyone asking for the recipe.
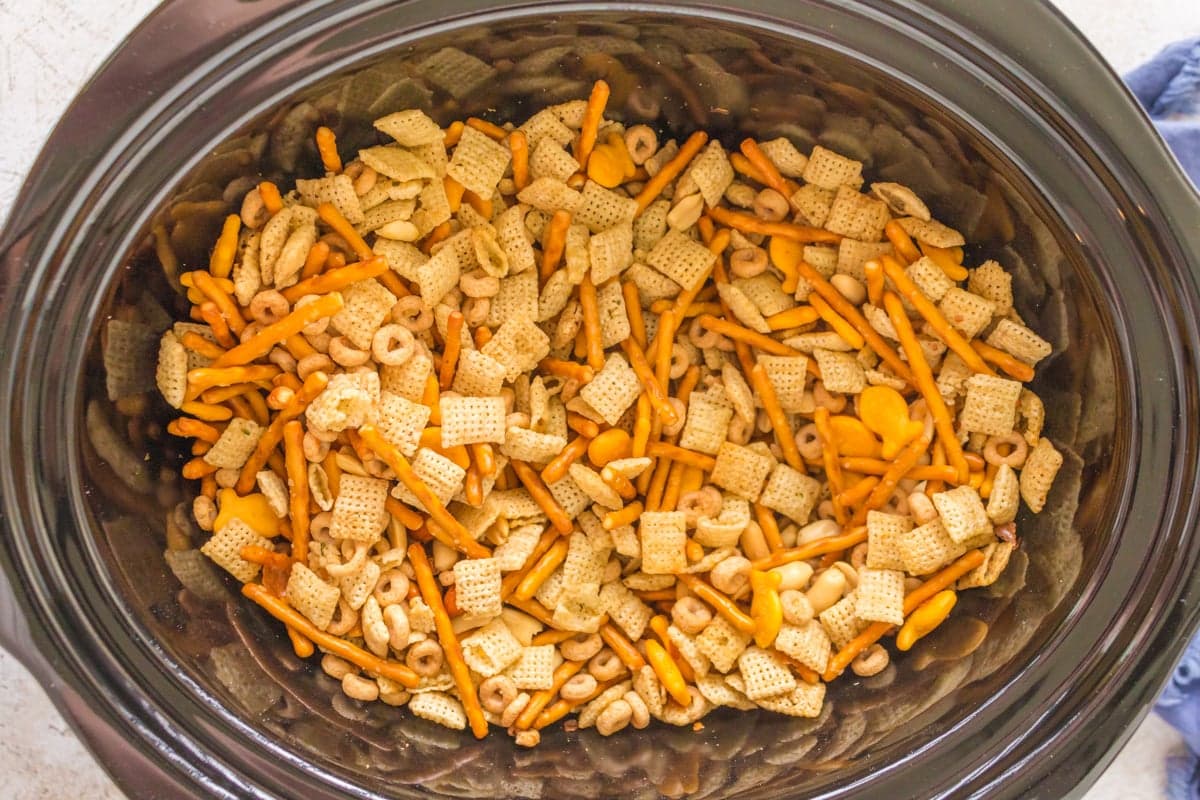
 Freshly tossed ranch Chex Mix ready for serving, with visible seasoning coating every crunchy piece.
Credit: ohsweetbasil.com
Freshly tossed ranch Chex Mix ready for serving, with visible seasoning coating every crunchy piece.
Credit: ohsweetbasil.com
Why Homemade Ranch Chex Mix Beats Store-Bought Every Time
Mass-produced Chex Mix often sits on shelves for months, leading to stale cereal and muted seasoning flavors. Many commercial varieties are also overloaded with sodium, artificial preservatives, and unnecessary fillers. Making your own at home lets you adjust salt levels, skip unwanted additives, and customize the flavor profile to match your preferences — whether you love extra garlic, a spicy kick, or a cheesy twist. It’s also far more cost-effective for feeding a crowd, with a full batch costing a fraction of premium store-bought mixes. For households with young children, pairing airtight storage with child-safe cabinet locks keeps treats out of reach, or you can use no-drill drawer locks if you store the mix in a kitchen drawer for easy access. For more on this, see our guide on chex mix recipe ranch seasoning.
What You’ll Need: Ingredients for Perfect Creamy Ranch Coating
Getting the ingredient ratios right is the key to that signature creamy coating that clings to every piece without making the mix soggy. We’ve tested this recipe extensively to balance crunch, flavor, and texture, so you won’t end up with bland or burnt seasoning.
Dry Mix Base Ingredients
These form the crunchy foundation of your mix, with varied textures to keep every bite interesting:
- 3 cups mixed Chex cereal (1 cup each corn, rice, and wheat): Corn Chex adds a light, crisp crunch, rice Chex is airy and absorbs seasoning well, and wheat Chex brings a hearty, nutty texture. Use all gluten-free varieties if needed for dietary restrictions.
- 1.5 cups mini twist pretzels: The twisted shape holds onto ranch coating better than straight pretzel sticks, and their salty tang balances the zesty ranch flavor. Opt for unsalted varieties to control sodium levels.
- 1.5 cups cheese crackers: Classic options like Cheez-Its add a buttery, cheesy crunch that amplifies the savory profile. For a gluten-free option, use gluten-free cheese crackers.
- 1 cup unsalted mixed nuts: Almonds, peanuts, and cashews add richness and make the mix more filling. Toasting the nuts for 5 minutes at 350°F (175°C) before adding them deepens their flavor.
Creamy Ranch Coating Ingredients
This is where the signature creamy, zesty flavor comes from:
- 1 packet (1 oz) dry ranch dressing mix: Use your favorite store-bought brand, or make a quick homemade mix with dried dill, parsley, garlic powder, onion powder, salt, and buttermilk powder for a preservative-free option.
- ½ cup unsalted melted butter: Melted butter acts as a binding agent for the seasoning, and adds a rich, smooth base that prevents the mix from tasting dry. For a vegan option, use melted vegan butter or refined coconut oil.
- 1 tablespoon Worcestershire sauce: A common mistake home cooks make is omitting this ingredient, which leaves the mix tasting one-dimensional. Worcestershire sauce adds a deep, savory umami kick that elevates the entire flavor profile. Look for a vegan variety if needed.
Optional Custom Add-Ins
Tailor the mix to your taste with these simple mix-ins:
- 1 teaspoon garlic powder or onion powder for extra savory depth
- ¼ teaspoon chili flakes or 1 teaspoon cayenne pepper for a spicy kick
- ¼ cup grated Parmesan cheese for a sharp, salty finish
- 1 teaspoon dried dill for a fresh, herbaceous twist
 Finished creamy ranch Chex Mix arranged as a party snack, ready for guests.
Credit: www.punchfork.com
Finished creamy ranch Chex Mix arranged as a party snack, ready for guests.
Credit: www.punchfork.com
Step-by-Step Preparation for Maximum Crunch
Following these steps exactly ensures every piece is evenly coated, perfectly crisp, and packed with flavor. The low-and-slow baking method is critical to avoid burnt seasoning and soggy cereal. For more on this, see our guide on baked chex mix original recipe.
Prep Your Workstation & Dry Ingredients
Start by preheating your oven to 250°F (120°C), and line a rimmed baking sheet with parchment paper for easy cleanup. Add all dry base ingredients (Chex, pretzels, cheese crackers, nuts) to a large mixing bowl, and stir gently to combine without breaking up the cereal or crackers.
Whip Up the Ranch Coating
In a small microwave-safe bowl, melt the butter in 15-second intervals, stirring in between to avoid burning. Stir the ranch seasoning packet and Worcestershire sauce into the melted butter until completely smooth, with no clumps of seasoning remaining. If using homemade ranch mix, make sure it’s finely ground to avoid gritty texture on the finished mix. For more on this, see our guide on classic chex mix recipe baked.
Toss, Bake & Cool for Perfect Texture
Pour the ranch coating over the dry mix, and use a rubber spatula to toss gently until every piece is evenly coated. Spread the mix in a single, even layer on your prepared baking sheet — avoid piling it up, as this will lead to uneven cooking. Bake for 45 minutes, stirring every 15 minutes to rotate the pieces and prevent burning. Once done, spread the mix on a clean surface or wire rack to cool completely for 15 minutes before storing. This step is critical: storing warm mix will trap moisture and lead to sogginess.
 Evenly spread mix on a rimmed baking sheet for consistent low-and-slow baking.
Credit: ohsweetbasil.com
Evenly spread mix on a rimmed baking sheet for consistent low-and-slow baking.
Credit: ohsweetbasil.com
Pro Tips for Foolproof Crunch & Flavor
Even small tweaks to your process can make a huge difference in the final texture and taste. Keep these expert tips in mind for consistent results every time:
- Control sodium levels: Use unsalted butter, unsalted add-ins, and a low-sodium ranch seasoning packet if you’re sensitive to salt. For evidence-based guidance on building balanced, low-sodium snack mixes, the USDA recommends prioritizing unsalted add-ins to control sodium intake without sacrificing flavor USDA snack mix best practices.
- Avoid overbaking: The low 250°F (120°C) temperature is intentional: the USDA’s food safety guidelines confirm that low-and-slow baking at this temperature is ideal for coated snack mixes, as it prevents burning while ensuring the seasoning adheres evenly without becoming bitter USDA cooking temperature guidance. Baking at a higher temperature will burn the seasoning before the cereal is fully crisp.
- Revive slightly soft mix: If your mix loses crunch after a few days of storage, spread it in a single layer on a baking sheet and bake at 250°F (120°C) for 10 minutes to restore crispness.
- Cleanup made easy: Once cooled, store the mix in an airtight container, and use heavy-duty kitchen cleaning brushes to scrub any stuck-on seasoning from your baking dish easily, or opt for a dedicated kitchen cleaning brush set for faster cleanup after baking. Wipe down any crumb-covered countertops with a durable kitchen cleaning brush to avoid attracting pests after snack prep.
Troubleshooting Common Chex Mix Issues
Even experienced home cooks run into occasional issues with this recipe. Here’s how to fix the most common problems:
- Soggy mix: This is almost always caused by storing the mix before it’s fully cooled, or adding wet add-ins like fresh herbs or diced vegetables. Always let the mix cool completely on a wire rack before storing, and stick to dry add-ins for long-term storage.
- Burnt seasoning: Caused by baking at too high a temperature, or failing to stir the mix every 15 minutes. Stick to the 250°F (120°C) temperature, and set a timer to stir the mix regularly during baking.
- Clumpy seasoning: This happens if the ranch seasoning and butter aren’t fully combined before tossing with the dry mix, or if you use too much butter. Whisk the butter and seasoning thoroughly until smooth, and measure the butter precisely to avoid excess.
- Overly salty mix: Caused by using salted add-ins alongside a standard ranch seasoning packet, or adding too much seasoning. Always use unsalted base ingredients, and start with ¾ of a ranch packet if you’re sensitive to salt, adjusting to taste after mixing.
Crowd-Pleasing Variations to Try
Once you’ve mastered the base recipe, experiment with these popular variations to suit any taste:
- Spicy Ranch: Add 1 teaspoon cayenne pepper, 1 teaspoon chili powder, and ½ teaspoon smoked paprika to the ranch seasoning for a bold, smoky heat. Top with a sprinkle of extra chili flakes before serving for extra kick.
- Dill Pickle Ranch: Stir 1 teaspoon dried dill and 1 teaspoon well-drained dill pickle relish into the ranch coating for a tangy, briny flavor that pairs perfectly with beer.
- Buffalo Ranch: Replace the Worcestershire sauce with 2 tablespoons of buffalo hot sauce for a zesty, spicy twist that’s perfect for football watch parties.
- Cheesy Ranch: Add ½ cup grated cheddar powder and ¼ cup extra grated Parmesan to the dry mix before coating for an extra cheesy, savory flavor that cheese lovers will adore.
- Vegan & Gluten-Free: Use gluten-free Chex cereal, gluten-free cheese crackers, vegan butter, vegan Worcestershire sauce, and a vegan ranch seasoning packet for a plant-based, allergen-friendly option.
Smart Serving Ideas for Every Occasion
This mix is far more versatile than a standard snack bowl — try these ideas to elevate your next gathering:
- Game day snack station: Serve the mix in large bowls alongside veggie sticks, mini sliders, and chicken wings for an easy, crowd-pleasing spread.
- Charcuterie board addition: Pair the mix with cured meats, cheeses, and fresh fruit for a balanced, crunchy element on your board. For a polished presentation, serve the mix on a custom engraved wooden serving board to add a personal touch to your spread, and use our perfect charcuterie prep tips to slice cheese evenly for ideal pairing with the crunchy mix.
- Lunchbox add-in: Pack a small container of the mix in kids’ or adults’ lunchboxes for a crunchy, savory alternative to chips. It holds up well for hours without getting soggy, making it perfect for school or work lunches.
- Salad topper: Use the mix as a crunchy, flavorful topper for green salads, potato salad, or macaroni salad instead of croutons for a fun twist.
Frequently Asked Questions
What ingredients do I need for Chex Mix Ranch Dressing?
You’ll need 3 cups of mixed Chex cereal (corn, rice, and wheat), 1.5 cups mini pretzels, 1.5 cups cheese crackers, 1 cup unsalted mixed nuts, 1 packet (1 oz) dry ranch dressing mix, ½ cup melted unsalted butter, and 1 tablespoon Worcestershire sauce. Optional add-ins include garlic powder, onion powder, chili flakes, or grated Parmesan for extra flavor. For more on this, see our guide on savory chex mix recipe oven.
How do I make Chex Mix with ranch dressing?
Start by mixing all dry base ingredients in a large bowl. In a separate small bowl, stir melted butter, ranch seasoning, and Worcestershire sauce until smooth. Drizzle the coating over the dry mix, toss gently to coat evenly, spread in a single layer on a baking sheet, and bake at 250°F (120°C) for 45 minutes, stirring every 15 minutes. Let cool completely before storing.
Can Chex Mix Ranch Dressing be made gluten-free?
Yes — use certified gluten-free Chex cereal (rice or corn varieties work best) and a gluten-free ranch seasoning packet. Double-check all add-ins like pretzels and nuts for gluten cross-contamination labels if serving someone with celiac disease. For more on this, see our guide on pumpkin delight recipe no bake.
How long does homemade Chex Mix last?
Stored in an airtight container in a cool, dry place away from direct sunlight, homemade ranch Chex Mix stays fresh and crunchy for up to 2 weeks. Avoid refrigerating it, as moisture will make the cereal soggy.
Can I make this recipe in an air fryer?
Yes — toss the coated mix in the air fryer basket in a single layer, air fry at 300°F (150°C) for 10-12 minutes, shaking the basket every 3 minutes to prevent burning. Note that air fryer batches are smaller, so you may need to cook in batches for larger quantities.
Is this ranch Chex Mix kid-friendly?
Absolutely — omit spicy add-ins like chili flakes for younger kids, and use mild ranch seasoning. It’s a great alternative to processed store-bought snack mixes, as you can control sodium and avoid artificial preservatives.
Final Thoughts
This Chex Mix Ranch Dressing Recipe delivers the perfect balance of creamy, zesty ranch flavor and satisfying, crunchy texture that beats store-bought mixes every time. With customizable add-ins, flexible dietary swaps, and a prep time of less than an hour, it’s the ultimate snack for game days, potlucks, movie nights, or quick afternoon bites. The low-and-slow baking method ensures every piece is evenly coated and crisp, while the simple ingredient list means you can whip it up with pantry staples any time a craving hits. Bookmark this recipe for your next gathering, and experiment with the variations to find your family’s favorite flavor combo.

I’m Abby Lu, a passionate home cook who loves simplifying everyday meals. At PlugChef.com, I share product reviews and cooking guides to help you find the best tools for your kitchen.
Related posts:
 How to Make a Fruit Basket for a Gift: Easy DIY Guide
 Do You Need a Basket? Essential Guide for Air Fryers
 Gray Kitchen With Stainless Steel Appliances: Modern Elegance
 Appliance Play Food Kitchen Toys: Ignite Imaginative Play
 How Long Do Beauty Blenders Last: Expert Tips Unveiled
 Philips Kitchen Appliances Compact Pasta And Noodle Maker: Effortless Homemade Pasta

