
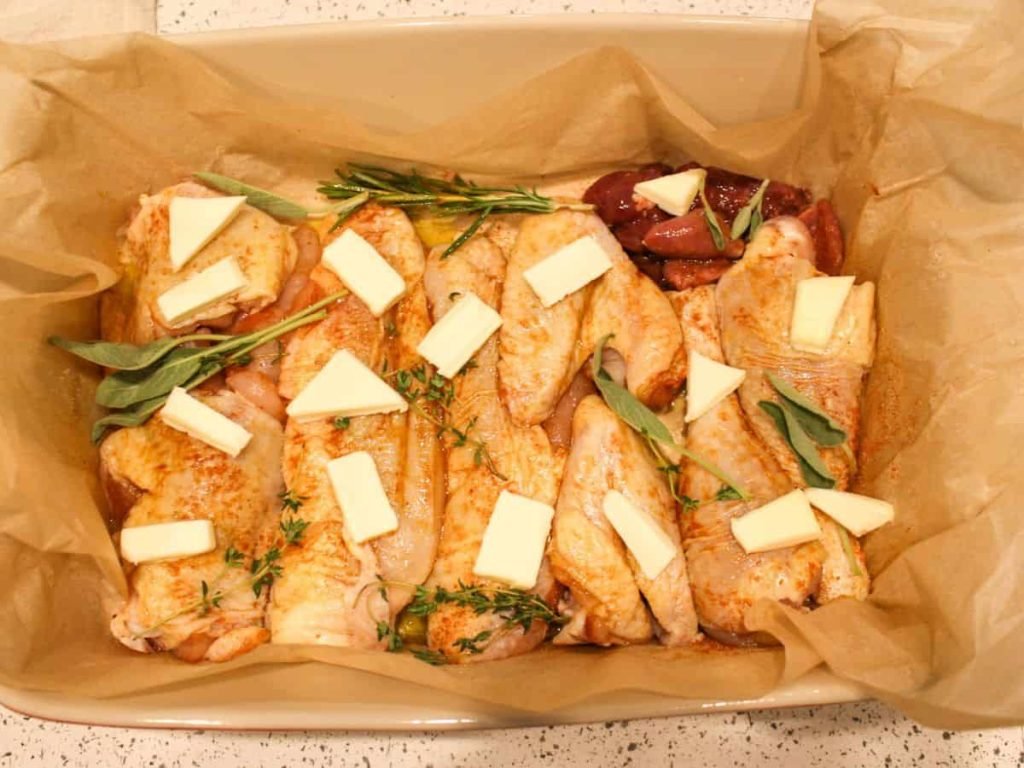
Are you tired of sticky pans and messy cleanups after cooking chicken? Imagine a simple way to bake juicy, flavorful chicken without the hassle.
Baking chicken on parchment paper is the secret you need. It locks in moisture, keeps your chicken tender, and makes cleanup a breeze. You’ll discover easy steps and tips to master this method, turning your meals into delicious, stress-free experiences.
Ready to make your next dinner effortless and tasty? Keep reading!
Benefits Of Baking On Parchment Paper
Baking chicken on parchment paper brings several benefits that improve cooking results and simplify kitchen tasks. It offers a simple way to prepare juicy, flavorful chicken without extra fat or mess. The technique suits all skill levels and fits any kitchen setup.
Non-stick Convenience
Parchment paper prevents chicken from sticking to the baking tray. This means no tearing or breaking when you remove the chicken. It removes the need for extra oil or butter to grease the pan. Your chicken stays intact and looks better served.
Even Cooking And Moisture Retention
The paper helps distribute heat evenly around the chicken. This leads to consistent cooking and a tender texture. It traps steam close to the chicken, locking in natural juices. The result is moist, flavorful meat with a perfect crust.
Easy Cleanup
Using parchment paper keeps the baking tray clean. It catches drips, grease, and crumbs, reducing scrubbing time. After cooking, simply throw away the paper. No sticky residue or burnt bits to remove.
Choosing The Right Chicken Cuts
Choosing the right chicken cuts can make a big difference in your baked chicken on parchment paper. The type of cut affects cooking time, flavor, and texture. Knowing what fits your recipe and taste helps you get the best results every time.
Boneless Vs Bone-in
Boneless chicken cooks faster and is easier to eat, especially if you want a quick, hassle-free meal. It soaks up marinades quickly, giving you a burst of flavor. Bone-in cuts, on the other hand, keep the meat juicy and add richness during cooking.
Have you noticed how bone-in chicken often tastes more tender? That’s because the bones retain moisture and heat differently, which can make a simple baked chicken more satisfying. If you have time, try both and see which you prefer.
Skin-on Vs Skinless
Skin-on chicken adds a crispy texture and locks in moisture when baked on parchment paper. It also delivers more flavor, thanks to the fat under the skin. But if you want a lighter dish, skinless is the way to go, especially if you’re watching calories.
Think about what you want from your meal. Do you crave crispy edges and a richer taste? Or do you prefer something lean and simple? Your choice here shapes the whole eating experience.
Portion Sizes
Choosing the right portion size helps control cooking time and ensures even baking. Smaller pieces cook faster but can dry out if you’re not careful. Larger cuts take longer but stay juicy and tender.
Consider who you’re serving. Are you preparing a family dinner or meal prepping for the week? Matching portion size to your needs keeps your baked chicken perfect every time.
Essential Ingredients For Juicy Chicken
Creating juicy baked chicken on parchment paper requires the right ingredients. These essentials ensure your chicken remains tender and full of flavor. Explore the key components that elevate your dish, making it a delight for any meal.
Marinades And Seasonings
Marinades infuse chicken with flavor, enhancing its taste. Choose simple ingredients like lemon juice, garlic, and soy sauce. Let the chicken soak for at least 30 minutes. It helps the flavors penetrate the meat deeply. Seasonings are equally important. Salt and pepper are basic, but effective. For more depth, try paprika or cumin. They add a warm, earthy tone. Experiment with different spices for unique flavors.
Healthy Oil Options
Oil adds moisture and helps in cooking. Opt for healthy choices like olive or avocado oil. These oils are rich in good fats. They keep the chicken juicy and add subtle flavors. Use a light coating to avoid excess greasiness. Coconut oil is another good option. It imparts a mild, sweet taste, perfect for tropical-inspired dishes. Always choose oils with a high smoke point for baking.
Fresh Herbs And Spices
Fresh herbs transform ordinary chicken into a gourmet experience. Use rosemary, thyme, or basil for an aromatic touch. Chop them finely for even distribution. Add them to the marinade or sprinkle on top before baking. Fresh spices like ginger or turmeric offer a vibrant taste. They bring a hint of spice without overpowering the dish. Always use fresh herbs and spices for the best flavor impact.

Credit: munchygoddess.com
Step-by-step Baking Process
Baking chicken on parchment paper offers a simple way to keep your meal juicy and flavorful without the mess. The process is straightforward but requires attention to detail to get the best results. Let’s walk through the steps that will help you bake perfect chicken every time.
Preparing The Parchment Paper
Start by cutting a piece of parchment paper large enough to hold your chicken pieces comfortably. Lay it flat on a baking sheet to create a non-stick surface that also makes cleanup easy.
You can fold the edges slightly to create a shallow tray, which helps keep any juices from spilling over. Have you tried folding parchment like this before? It’s a small trick that makes a big difference in handling your chicken.
Seasoning The Chicken
Pat the chicken dry with paper towels to help the seasoning stick better. Sprinkle your choice of herbs, spices, salt, and pepper evenly over the chicken.
Don’t be afraid to add a bit of olive oil or melted butter to enhance flavor and promote browning. I often use garlic powder, paprika, and a touch of lemon zest for a fresh kick. What’s your favorite spice combo for baked chicken?
Baking Temperature And Time
Preheat your oven to 400°F (200°C). This temperature is high enough to cook the chicken thoroughly while keeping it moist inside.
Place the parchment-lined tray with chicken into the oven and bake for about 25 to 30 minutes. Thicker pieces may need a few extra minutes, so adjust accordingly.
Checking For Doneness
Use a meat thermometer to check the internal temperature; it should reach 165°F (74°C) for safe consumption. If you don’t have a thermometer, cut into the thickest part and look for clear juices and no pink meat.
Rest the chicken for a few minutes after baking to let the juices redistribute. Have you noticed how resting makes the meat juicier? It’s a small step that elevates your dish from good to great.
Tips For Maximum Juiciness
Keeping baked chicken juicy and tender can be simple with the right approach. Small changes in preparation and cooking make a big difference. These tips help lock in moisture and flavor for the best results.
Brining Techniques
Brining adds moisture and flavor to the chicken. Use a simple solution of water, salt, and a bit of sugar. Soak the chicken for at least 30 minutes or up to 4 hours. This helps the meat stay juicy during baking.
- Use cold water to keep the chicken fresh.
- Keep the brine ratio about 1 tablespoon salt per cup of water.
- Add herbs or spices for extra taste.
Resting The Chicken
Resting lets the juices spread evenly in the meat. After baking, cover the chicken loosely with foil. Let it rest for 5 to 10 minutes before cutting. This step keeps the chicken moist and soft.
Avoiding Overcooking
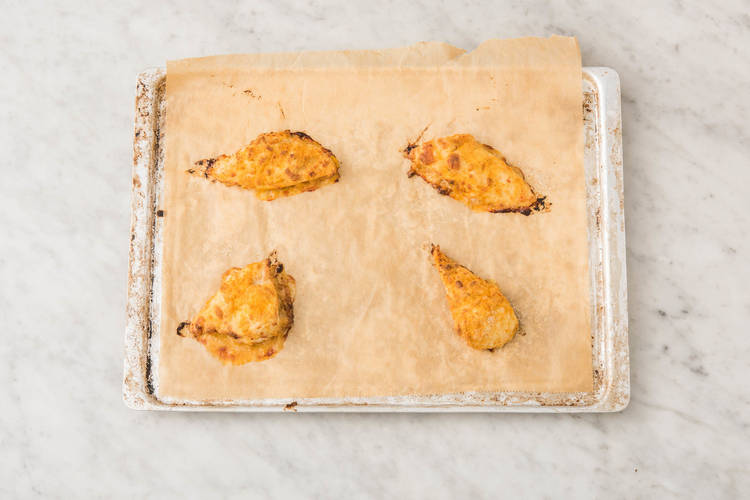
Overcooking dries out chicken quickly. Use a meat thermometer to check doneness. Aim for an internal temperature of 165°F (74°C). Remove the chicken from the oven as soon as it reaches this temperature to keep it juicy.
Credit: www.hellofresh.ca
Healthy Side Dishes To Pair
Choosing the right side dishes can elevate your baked chicken on parchment paper into a balanced and delicious meal. Healthy sides not only complement the flavors but also add essential nutrients and textures to your plate. Think about what colors, crunch, and freshness you want to bring alongside your tender chicken to keep your meal exciting and satisfying.
Roasted Vegetables
Roasted vegetables are an easy and flavorful choice to pair with baked chicken. You can toss carrots, bell peppers, zucchini, and Brussels sprouts with olive oil, salt, and herbs, then roast them until tender and slightly caramelized. This method brings out natural sweetness and adds a satisfying texture contrast to your juicy chicken.
Try mixing in some garlic or a sprinkle of smoked paprika to add depth without extra calories. Roasting keeps the veggies crisp on the outside and soft inside, making every bite enjoyable.
Whole Grains
Whole grains like quinoa, brown rice, or farro provide a hearty base that helps you feel full longer. They offer fiber and important minerals, which make your meal more nourishing. Cook them simply with vegetable broth or add fresh herbs to brighten the flavors.
Have you ever tried lemon zest or chopped parsley stirred into your grains? These little touches transform a basic side into something special that pairs beautifully with the mild flavor of baked chicken.
Fresh Salads
Fresh salads bring a crisp, refreshing element to your plate, balancing the warmth and richness of baked chicken. Choose leafy greens like spinach or arugula, and add colorful veggies such as cherry tomatoes, cucumbers, and radishes.
For extra flavor, toss your salad with a light vinaigrette made from olive oil, lemon juice, and Dijon mustard. Adding nuts or seeds can introduce a crunchy texture, making every forkful more interesting and nutritious.
Variations And Flavor Twists
Adding variety to your baked chicken on parchment paper keeps mealtime exciting and lets you tailor flavors to your mood or occasion. Small changes in seasoning or ingredients can turn a simple dish into something extraordinary.
Have you ever tried baking chicken with a completely different flavor profile and wondered why you didn’t do it sooner? Let’s dive into some flavorful twists that you can easily try at home.
Mediterranean Style
This version uses fresh ingredients like lemon, garlic, and olives to bring a bright, tangy taste to your chicken. Sprinkle your chicken with oregano, rosemary, and thyme, then add slices of lemon and a handful of pitted olives on top before wrapping it in parchment paper.
The chicken steams in its own juices, absorbing all those fresh, zesty flavors. It’s light but full of character, perfect for a quick weeknight dinner that feels gourmet.
Spicy And Tangy
Looking for a bold kick? Mix chili powder, smoked paprika, and a splash of lime juice into your marinade. This combo wakes up your taste buds and adds a smoky heat that pairs beautifully with the tender baked chicken.
Try adding a drizzle of hot sauce or a sprinkle of crushed red pepper flakes before sealing the parchment. It’s a simple way to add excitement without overwhelming the natural chicken flavor.
Herb-infused Options
Herbs like basil, tarragon, and parsley bring freshness that complements the mildness of baked chicken. Chop a handful of your favorite herbs and mix them with olive oil and garlic, then spread the mixture over the chicken before wrapping it in parchment paper.
This method infuses the meat with subtle, earthy notes that make every bite more interesting. Have you experimented with different herb blends to see how they change the overall taste?

Credit: whereismyspoon.co
Frequently Asked Questions
What Are The Benefits Of Baking Chicken On Parchment Paper?
Baking chicken on parchment paper prevents sticking and ensures easy cleanup. It helps retain moisture, keeping the chicken tender and juicy. This method also reduces the need for extra oils, making meals healthier and flavorful.
How Do You Prepare Parchment Paper For Baking Chicken?
Cut parchment paper to fit your baking sheet or dish. Lightly grease the paper with oil or cooking spray. Place the chicken pieces evenly on the paper. This setup prevents sticking and promotes even cooking.
Can Parchment Paper Be Reused For Baking Chicken?
Parchment paper is generally single-use for baking chicken. Reusing it can cause tearing and sticking. For best results, always use a fresh sheet to maintain non-stick properties and food safety.
What Temperature Is Ideal For Baking Chicken On Parchment Paper?
Bake chicken on parchment paper at 375°F to 400°F (190°C to 200°C). This range cooks the chicken evenly while keeping it juicy. Avoid higher heat to prevent burning the paper or drying the chicken.
Conclusion
Baked chicken on parchment paper cooks evenly and stays juicy. It makes cleaning up quick and simple. You can add your favorite herbs and spices for great taste. This method saves time and effort in the kitchen. Anyone can try it, even beginners.
Give it a try and enjoy a healthy, tasty meal with little fuss. Simple, delicious, and easy to make every time.

I’m Abby Lu, a passionate home cook who loves simplifying everyday meals. At PlugChef.com, I share product reviews and cooking guides to help you find the best tools for your kitchen.
Related posts:
 What Type of Cooking Utensils are Safe: Expert Picks
 What Innovations Could Blenders Make: Unleashing Future Tech
 Smart Strategies to Organize a Small Kitchen: Maximize Space
 How to Organize a Kitchen Cabinet: Expert Tips & Tricks
 How to Organize Kitchen Drawers: Expert Tips and Tricks
 How to Organize a Corner Kitchen Cupboard: Expert Tips

