
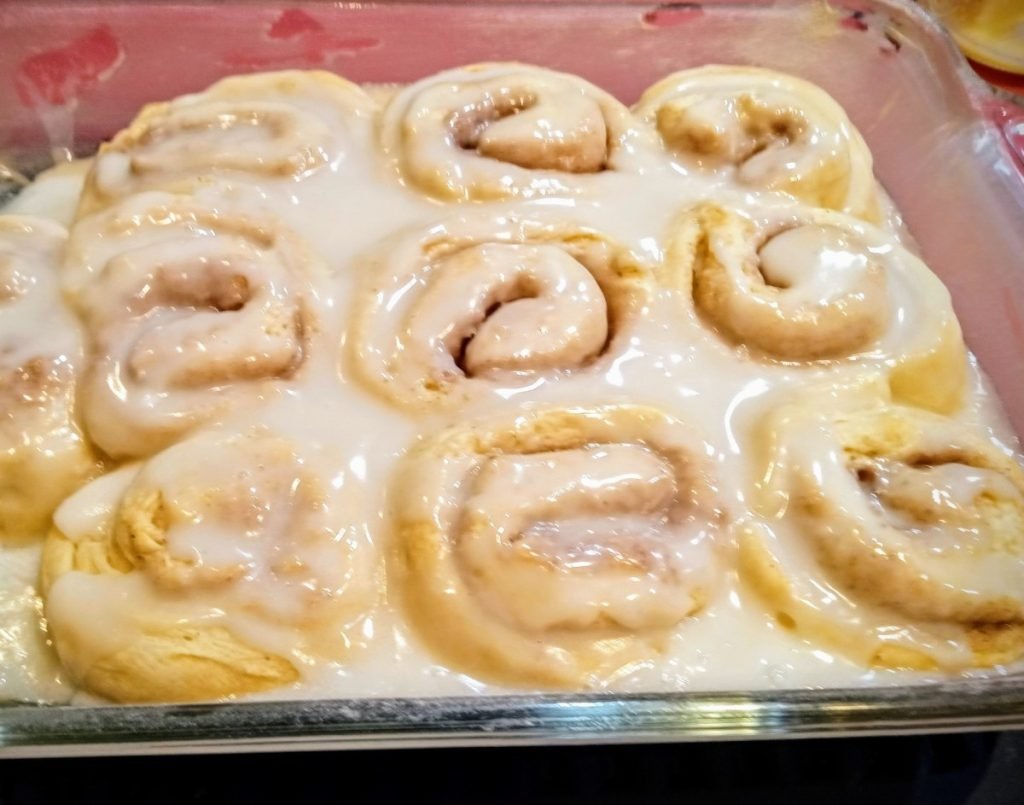
If you’ve ever craved warm, bakery-style cinnamon rolls but don’t have the time (or patience) for a 2-hour yeast rise, this self-rising flour recipe is made for you. With no yeast, no special equipment, and just 30 minutes of active prep time, you’ll get soft, fluffy, cinnamon-packed rolls that taste like they came straight from a professional bakery. If you’re baking with children in the house, lock away hazardous items like cleaning supplies with secure cabinet latches before you start to keep your kitchen safe. This guide breaks down exact measurements, pro techniques to avoid common baking mistakes, and customization ideas to make the recipe your own, all using the humble self-rising flour already in your pantry.
Ingredients For Soft Cinnamon Rolls
Creating soft, fluffy cinnamon rolls starts with the right components, and self-rising flour does most of the heavy lifting by combining all-purpose flour, baking powder, and salt in one blend. Note that leavening levels vary slightly by brand, so if your rolls turn out dense, you can add an extra ¼ tsp of baking powder to boost rise. Exact measurements for this recipe are:
- 2 cups self-rising flour
- ⅓ cup granulated sugar (for the dough)
- ½ cup warm milk (110°F, not hot—hot liquid will kill the baking powder)
- ¼ cup melted unsalted butter
- 1 large egg, room temperature
- 1 tsp pure vanilla extract
Cinnamon Filling Components
The filling is where your cinnamon rolls get their signature warm, spicy flavor. For a perfectly balanced, gooey filling, use:
- ½ cup packed brown sugar (molasses adds depth and moisture white sugar can’t match)
- 2 tbsp softened unsalted butter
- 1.5 tbsp freshly ground cinnamon (pre-ground cinnamon loses aroma after 6 months, so fresh grinding makes a noticeable difference)
- Pinch of fine sea salt (to cut sweetness and enhance spice flavor)
Sweetener Options
While granulated and brown sugar work best for this recipe, you can swap them for alternative sweeteners to match your dietary needs:
- Coconut sugar: Swap 1:1 for granulated sugar, but add 1 extra tbsp of warm milk, as coconut sugar is drier and will make the dough crumbly.
- Honey or maple syrup: Replace ⅓ cup of the granulated sugar with ¼ cup of liquid sweetener, and reduce the warm milk by 1 tbsp to compensate for extra liquid.
- Monk fruit sweetener: Use a 1:1 swap for granulated sugar for a low-carb option, and add 1 extra tbsp of melted butter to keep the rolls moist.
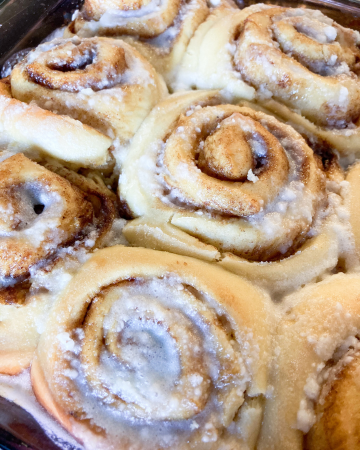 Golden, fluffy cinnamon rolls fresh out of the oven, ready for icing
Credit: knoll22.com
Golden, fluffy cinnamon rolls fresh out of the oven, ready for icing
Credit: knoll22.com
Preparing The Dough
Self-rising flour behaves differently than all-purpose flour, so small adjustments to your mixing and rising process will guarantee the fluffiest results. A common mistake I see bakers make is overmixing the dough, which develops tough gluten and leads to chewy, dense rolls instead of soft, tender ones. After mixing, wipe down your work surface with a damp cloth, and scrub any stuck-on dough with a sturdy kitchen scrub brush to keep your workspace hygienic for other baking projects.
Mixing For Optimal Texture
- In a large mixing bowl, whisk together the self-rising flour, ⅓ cup granulated sugar, and a pinch of extra sea salt (even though self-rising flour contains salt, a small extra amount enhances overall flavor).
- In a separate small bowl, whisk the warm milk, melted butter, egg, and vanilla extract until fully combined.
- Pour the wet mixture into the dry ingredients, stirring with a wooden spoon or silicone spatula until just combined—lumps are okay, do not overmix.
- Turn the dough out onto a lightly floured surface, and knead gently 3-4 times just until smooth. Over-kneading will make the rolls tough, so stop as soon as the dough no longer sticks to your hands.
First Rise For Maximum Fluffiness
Unlike yeast rolls that require 1-2 hours of rising, self-rising flour only needs a short 20-minute rest to let the baking powder fully activate. Place the kneaded dough in a greased bowl, cover with a clean kitchen towel, and set it in a warm, draft-free spot (like an oven with the light turned on) to rise. If your kitchen is cold (below 68°F), extend the rise time to 30 minutes, but no longer—self-rising flour’s leavening is short-acting, and over-rising will cause the rolls to collapse during baking. University of Minnesota Extension's guide to self-rising flour and quick baking confirms that short, warm rises are ideal for self-rising flour baked goods to avoid dense texture.
Rolling, Filling, And Cutting For Perfect Swirls
Proper rolling and cutting technique is the difference between cinnamon rolls with tight, even swirls and messy, lopsided ones that leak filling during baking.
Spreading The Filling Evenly
Roll the rested dough out into a 12×8 inch rectangle, roughly ¼-inch thick, on a lightly floured surface. Spread the softened butter for the filling over the entire surface of the dough, leaving a ½-inch border along the long edge farthest from you (this border prevents the roll from unraveling when you cut it). Sprinkle the cinnamon-sugar mixture evenly over the butter, pressing down gently with your hands to help it stick. Uneven spreading is the most common cause of bland, flavorless spots in finished rolls, so take an extra 30 seconds to make sure every inch of dough is covered.
Rolling For Tight, Even Swirls
Starting from the short edge closest to you, roll the dough tightly away from you, applying gentle, even pressure. If the dough starts to shrink back or resist rolling, let it rest for 2 minutes to let the gluten relax—this is a normal reaction, not a sign you’re doing something wrong. A tight roll ensures the filling stays evenly distributed and the swirls stay intact during baking.
Cutting For Uniform Baking
Use unflavored dental floss to cut the rolled dough into 12 even 1.5-inch pieces: slide the floss under the roll, cross the ends over the top, and pull tight to slice through the dough without squishing the layers. A sharp knife works too, but dip it in hot water between cuts to prevent sticking. Even sizing is critical: if your pieces are too thick, the centers will be doughy; too thin, and they’ll dry out during baking.
 Evenly spread cinnamon-sugar butter filling for maximum flavor in every swirl
Credit: donnascookingwithlove.wordpress.com
Evenly spread cinnamon-sugar butter filling for maximum flavor in every swirl
Credit: donnascookingwithlove.wordpress.com
Baking To Fluffy Perfection
Baking is where all your prep work pays off, and small adjustments to temperature and timing will guarantee golden, fluffy rolls every time.
Oven Setup And Baking Time
Preheat your oven to 350°F (175°C), and grease a 9×13 inch baking pan with butter or nonstick spray. Arrange the cut rolls in the pan, leaving ½ inch of space between each piece to allow room for expansion as they bake. Bake for 18-22 minutes, checking at the 18-minute mark to avoid overbaking. If your oven runs hot (most home ovens run 10-25°F off their calibrated settings, per FDA kitchen safety guidance), reduce the temperature by 10°F to prevent the edges from burning before the centers are cooked through.
Signs Of Perfectly Baked Rolls
Use these visual and tactile cues to know when your rolls are done, instead of relying solely on the timer:
- Golden brown top with a slight shine from the melted butter and sugar
- Edges that are slightly crisp to the touch
- When you press gently on the center of a roll, it springs back immediately without leaving an indentation
- A warm, cinnamon aroma filling your kitchen
Post-Bake Rest For Better Glaze Adhesion
Once you pull the rolls out of the oven, let them rest in the pan for 5 minutes before adding any glaze. This short rest lets the crumb set so the rolls don’t fall apart when handled, and prevents warm glaze from sliding right off the surface. If you’re short on time, you can pop the pan in the fridge for 2 minutes to speed up the cooling process.
Glazing And Serving Ideas
The right glaze takes these cinnamon rolls from good to irresistible, and there are options for every taste preference.
Classic Cream Cheese Icing
This rich, tangy icing is the classic pairing for cinnamon rolls, and it’s easy to adjust to your preferred thickness:
- 4 oz full-fat cream cheese, softened
- ¼ cup unsalted butter, softened
- 1.5 cups powdered sugar
- 1 tsp pure vanilla extract
- 1-2 tbsp heavy cream
Beat the cream cheese and butter together until completely smooth, then add the powdered sugar and vanilla, mixing until combined. Add heavy cream 1 tbsp at a time until you reach your desired consistency: thicker for spreading, thinner for drizzling. Spread the icing over the rolls while they are still warm (but not piping hot) so it melts slightly into the layers for extra flavor.
Alternative Glaze Options
- Maple Bourbon Glaze: Add 1 tbsp pure maple syrup and 1 tsp bourbon to the classic icing recipe, and reduce the heavy cream by 1 tbsp. Perfect for fall and winter baking.
- Lemon Zest Glaze: Omit the cream cheese and butter, and mix 1 cup powdered sugar with 2 tbsp fresh lemon juice and 1 tsp lemon zest. Bright and tangy, ideal for spring brunches.
- Vegan Glaze: Use vegan cream cheese and plant-based milk in place of dairy ingredients for a plant-based option that tastes just as rich.
Serving And Storage Tips
These rolls are best served warm, straight from the oven, with a side of coffee or tea for a cozy breakfast. For a brunch spread, pair them with a curated cheese board for a sweet-savory balance that works for every palate. If you’re gifting a batch, serve them on a custom engraved cutting board for a thoughtful, personal touch. Leftover rolls stay fresh in an airtight container at room temperature for up to 2 days, or in the refrigerator for up to 5 days. To reheat, wrap in a damp paper towel and microwave for 10-15 seconds to restore their soft, fluffy texture. You can also freeze unbaked, assembled rolls for up to 3 months: cover the pan tightly with plastic wrap, and bake from frozen for 25-30 minutes when ready to use. FDA food storage guidance for baked goods confirms that airtight storage is key to preventing stale, dry rolls.
Troubleshooting Common Issues
Even with the best technique, small mishaps can happen. Here’s how to fix the most common problems with self-rising flour cinnamon rolls:
Dense Or Flat Rolls
Dense rolls are almost always caused by inactive leavening, overmixing, or skipping the rise step. To fix this:
- Always use warm (110°F) milk, not cold or hot, to activate the baking powder in the self-rising flour.
- Mix the dough only until just combined, and knead gently 3-4 times max.
- Let the dough rest for the full 20 minutes in a warm spot to let the leavening work.
- Use an oven thermometer to confirm your oven is at the correct temperature, as cold ovens prevent proper rise.
Dry, Crumbly Texture
Overbaking is the most common cause of dry rolls, but too much flour added during kneading can also be the culprit. To avoid this:
- Check for doneness at 18 minutes, and pull the rolls out as soon as a toothpick inserted in the center comes out with just a few moist crumbs.
- Only add extra self-rising flour 1 tbsp at a time if the dough is so sticky it won’t hold its shape—self-rising flour is more absorbent than all-purpose, so it’s easy to over-add.
- If you’re using a particularly absorbent brand of flour, add 1 extra tbsp of warm milk to the dough to keep it moist.
Leaking Filling
Filling leaks out when the roll is too loose, the filling is spread too close to the edge, or the rolls are cut too thick. To prevent this:
- Leave a ½-inch border when spreading the filling on the dough.
- Roll the dough tightly, applying even pressure, and let it rest for 2 minutes if it starts to shrink back.
- Cut rolls into 1.5-inch pieces for even baking.
Adjusting For Altitude And Humidity
Self-rising flour behaves differently in extreme climates, so adjust your recipe as needed:
- High altitude (above 3,000 feet): Reduce the baking powder in your self-rising flour by ¼ tsp, or use a low-altitude self-rising flour blend, to prevent over-rising and collapse.
- High humidity (above 70% relative humidity): Add 1 extra tbsp of self-rising flour to the dough to absorb excess moisture and prevent stickiness.
- Dry climates: Add 1 extra tbsp of warm milk to the dough to prevent cracking when rolling.
If you’re short on cleanup time after baking, a dishwashing brush with handle makes scrubbing pans and mixing bowls far faster than a standard sponge.
Creative Flavor Variations
This base recipe is incredibly versatile, so you can customize it to match any taste or occasion:
Nut And Fruit Add-Ins
- Sprinkle ½ cup of chopped toasted pecans or walnuts over the filling before rolling for a crunchy, nutty twist.
- Toss ⅓ cup of raisins, dried cranberries, or chopped dried apricots with the cinnamon sugar to prevent clumping and add chewy sweetness.
- Pat ½ cup of fresh blueberries or diced apple completely dry before adding to the filling to avoid excess moisture that can make the dough soggy.
Custom Spice Blends
Swap out or add to the cinnamon for unique flavor profiles:
- Chai-spiced: Add ¼ tsp each of ground cardamom, ground ginger, and ground cloves to the filling for a warm, aromatic twist.
- Pumpkin spice: Add 1 tsp of pumpkin pie spice to the filling, and top with a maple glaze for a fall favorite.
- Mexican hot chocolate: Add ¼ tsp of cayenne pepper and 1 tbsp unsweetened cocoa powder to the filling, and drizzle with a chocolate glaze for a spicy-sweet kick.
Savory Cinnamon Roll Options
Cinnamon rolls don’t have to be sweet! For a savory version, omit all sugar from the dough and filling, and add 1 tbsp of dried rosemary and 1 tsp of garlic powder to the dough. Fill with 1 cup of shredded sharp cheddar and ½ cup of cooked crumbled bacon, brush with garlic butter before baking, and top with a sprinkle of flaky sea salt after baking. These make a perfect side dish for soup or a savory brunch option.
If you get powdered sugar spills all over your kitchen while icing, a professional kitchen cleaning brush will wipe up fine messes in seconds without scratching countertops.
 Soft, fluffy cinnamon rolls with a perfect cinnamon swirl, ready to serve
Credit: kirbiecravings.com
Soft, fluffy cinnamon rolls with a perfect cinnamon swirl, ready to serve
Credit: kirbiecravings.com
Frequently Asked Questions
Can I use self-rising flour for cinnamon rolls if I don’t have any on hand?
Yes, self-rising flour is designed specifically for quick baked goods like cinnamon rolls, biscuits, and pancakes, so it works perfectly as a yeast alternative. Just be sure to check the expiration date on your flour, as old self-rising flour has diminished leavening power that can lead to dense, flat rolls.
How does self-rising flour change the texture of cinnamon rolls compared to yeast rolls?
Self-rising flour produces a softer, more cake-like crumb than traditional yeast cinnamon rolls, which have a chewier, bread-like texture. The rise is also shorter and more tender, so these rolls are best served fresh, as they don’t hold their fluffiness as long as yeast rolls after 1-2 days.
Do I need to add extra baking powder or salt when using self-rising flour?
No, self-rising flour already contains the correct ratio of baking powder and salt for most baked goods. Adding extra can lead to a metallic, bitter taste or cause the rolls to rise too quickly and collapse. If your self-rising flour is older than 6 months, you can add ¼ tsp of fresh baking powder to boost the rise.
Can I substitute all-purpose flour with self-rising flour in a regular cinnamon roll recipe?
Yes, but you’ll need to omit any added salt and baking powder called for in the original recipe, as self-rising flour already includes both. Note that the texture will be softer and less chewy than the original yeast version, so adjust your expectations accordingly.
How do I store leftover self-rising flour cinnamon rolls?
Store leftover rolls in an airtight container at room temperature for up to 2 days, or in the refrigerator for up to 5 days. To reheat, wrap in a damp paper towel and microwave for 10-15 seconds to restore their soft, fluffy texture. You can also freeze unbaked rolls for up to 3 months: assemble the rolls, cover tightly with plastic wrap, and bake from frozen for 25-30 minutes when ready to use.
Can I make this recipe vegan or gluten-free?
For a vegan version, use plant-based milk, vegan butter, and a flax egg (1 tbsp ground flaxseed mixed with 3 tbsp water, let sit 5 minutes to thicken) instead of a regular egg. For gluten-free, use a 1:1 gluten-free self-rising flour blend, and add ¼ tsp xanthan gum if your blend doesn’t include it to help the dough hold its structure.
Conclusion
This self-rising flour cinnamon roll recipe cuts out the hours of waiting for yeast to rise, delivering soft, fluffy, cinnamon-packed rolls in under an hour total time. With pro tips to avoid common pitfalls like dense crumb or leaked filling, plus endless customization options for every taste, it’s the perfect quick baking project for busy weekdays, weekend brunches, or last-minute guest treats. Give this recipe a try this week, and customize it to match your favorite flavors—then check out our full collection of quick, easy baking recipes for more inspiration for your next kitchen project.

I’m Abby Lu, a passionate home cook who loves simplifying everyday meals. At PlugChef.com, I share product reviews and cooking guides to help you find the best tools for your kitchen.
Related posts:
 How to Make a Fruit Basket for a Gift: Easy DIY Guide
 Mesh Desk Organizer With Sliding Drawer: Maximize Efficiency
 Decorative Woven Baskets for Wall: Transform Your Space
 Rubbermaid Large Dish Drying Rack: Ultimate Kitchen Solution
 Gray Kitchen With Stainless Steel Appliances: Modern Elegance
 Appliance Play Food Kitchen Toys: Ignite Imaginative Play

