
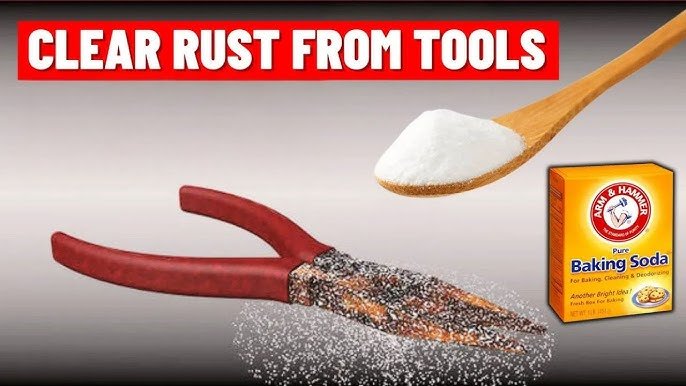
Have you ever pulled out your trusty tools, only to find them speckled with rust? It’s frustrating, isn’t it?
You’re ready to dive into your next project, but the unsightly rust makes you hesitate. Don’t worry—there’s a simple solution right in your kitchen. With just vinegar and baking soda, you can restore your tools to their former glory. Imagine the satisfaction of seeing them shine again, ready for action.
This guide will show you how to easily tackle rust, so your tools are always in top shape. Stick around to discover the step-by-step process and say goodbye to rusty tools forever. Your toolbox will thank you!
Why Tools Rust
Rust forms on tools due to moisture exposure. Vinegar and baking soda offer a simple solution to remove rust. Soak tools in vinegar, then scrub with a baking soda paste. This method restores their shine effectively.
Why Tools RustRust can be a pesky problem that creeps up on your beloved tools, slowly eating away at their metal surfaces. It’s not just unsightly; it can also seriously compromise their functionality. Understanding why your tools rust is the first step in preventing it and keeping your tools in top-notch condition.Causes Of Rust Formation
Rust forms primarily due to a chemical reaction between iron, oxygen, and moisture. This reaction, known as oxidation, occurs when your tools are exposed to water or humid environments for prolonged periods. Leaving tools outside, storing them in damp basements, or even just the natural humidity in the air can trigger this process. The presence of salt can accelerate rusting, making it a common issue for those living near coastal areas.Impact On Tool Performance
Rust can significantly hinder the performance of your tools. It creates a rough surface that can make tools hard to use or even unsafe. A rusted wrench might slip, while a rusty saw blade can make cutting a frustrating task. Not only does rust reduce the lifespan of your tools, but it can also lead to increased costs due to frequent replacements. Have you ever noticed your tools getting rusty after a rainy week? This is a reminder of how sensitive they are to moisture. Knowing what causes rust helps you take proactive steps in maintaining your tools. What steps will you take to protect your tools from the damaging effects of rust?Vinegar As A Rust Remover
Rust can ruin the look and functionality of your tools. Using vinegar is an effective way to remove rust. It is affordable and easy to use. Let’s explore how vinegar can help restore your tools.
Properties Of Vinegar
Vinegar contains acetic acid. This acid reacts with rust, breaking it down. It penetrates and loosens rust particles. It is non-toxic and environmentally friendly. Vinegar is safe for most metals. Always test on a small area first.
Steps To Remove Rust With Vinegar
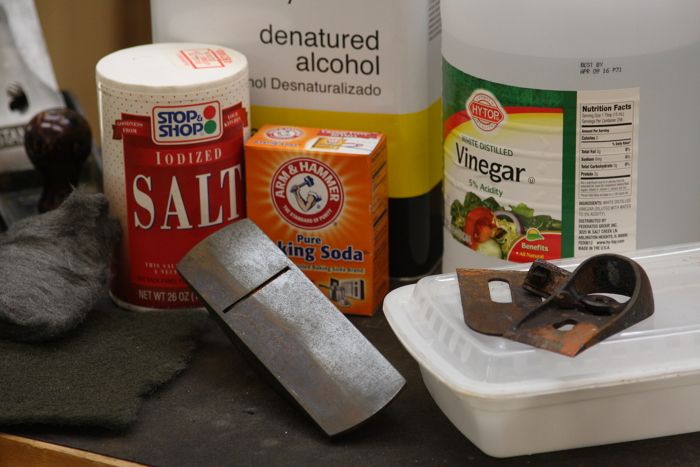
First, gather your rusty tools and a container. Pour enough vinegar to cover the rusted areas. Soak the tools in vinegar for 24 hours. After soaking, scrub the tools with a brush. Rinse them with water and dry thoroughly. Repeat if rust remains.
Safety Tips For Using Vinegar
Wear gloves to protect your skin. Avoid contact with eyes. Use vinegar in a well-ventilated area. Do not mix vinegar with bleach. Store vinegar away from children and pets.
Baking Soda As A Rust Solution
Baking soda offers a simple way to tackle rust on tools. Its abrasive nature helps scrub away rust without damaging the metal. Plus, it’s safe and easy to use, making it a preferred choice for many. Let’s dive into why baking soda works well and how to use it effectively.
Benefits Of Using Baking Soda
Baking soda is non-toxic, making it a safe option. It’s readily available in most homes, reducing the need for special purchases. Its mild abrasive properties help remove rust gently, preserving tool integrity.
Process Of Rust Removal With Baking Soda
Start by mixing baking soda with water to form a paste. Apply the paste to the rusted area with a brush or cloth. Let it sit for a few minutes to loosen the rust. Scrub the area gently, adding more paste if needed. Rinse with water and dry thoroughly.
Precautions When Using Baking Soda
Always wear gloves to protect your hands. Ensure tools are completely dry after cleaning to prevent new rust. Use a soft brush to avoid scratching surfaces. Avoid inhaling baking soda dust during application.
:max_bytes(150000):strip_icc()/homemade-rust-remover-recipes-1387936_FINAL-6c6543826627420ba5152b7ad0ea67c7.png)
Credit: www.thespruce.com
Combining Vinegar And Baking Soda
Rust on tools disappears using vinegar and baking soda. Soak tools in vinegar to loosen rust. Then, scrub with baking soda for a clean finish.
Combining vinegar and baking soda can be a game changer when it comes to removing rust from your tools. This dynamic duo, often used in household cleaning, can effectively tackle stubborn rust, making your tools look almost new. But why should you consider using these two ingredients together instead of separately?Why Combine Them
Vinegar is acidic, which helps break down rust, while baking soda is abrasive, allowing for gentle scrubbing. When you combine them, you get a fizzing reaction that can penetrate deep into the rust, making it easier to remove. This combination is not only effective but also eco-friendly and easy to find in your kitchen.Step-by-step Guide
1. Soak the Tools: Pour vinegar into a container and submerge the rusty tools. Let them soak for at least 24 hours. 2. Apply Baking Soda: Remove the tools from the vinegar and sprinkle baking soda over them. This neutralizes the acid and adds grit for scrubbing. 3. Scrub Away the Rust: Use a brush or an old toothbrush to scrub the tools gently. You’ll notice the rust lifting off. 4. Rinse and Dry: Rinse the tools with water and dry them thoroughly to prevent new rust from forming. 5. Apply a Protective Layer: Consider applying a light coat of oil to keep moisture at bay.Expected Results
You can expect to see a significant reduction in rust after following these steps. Your tools will have a cleaner, shinier appearance, and they will function better. While they may not look brand new, they’ll definitely be more effective and last longer. It’s rewarding to restore your tools with such a simple, affordable method. Have you tried this method before? If not, what are you waiting for? Give it a shot and experience the satisfaction of bringing your old tools back to life.Preventing Future Rust
Rust can be removed using vinegar and baking soda. Soak tools in vinegar to loosen rust, then scrub with baking soda for a clean finish. This method is simple and effective for maintaining tools.
Preventing rust on your tools is crucial for their longevity. Rust can degrade tools and make them ineffective. Once you’ve removed rust using vinegar and baking soda, the next step is to prevent it from coming back. This requires proper storage, regular maintenance, and using protective coatings. Let’s explore these strategies to keep your tools rust-free.Storage Tips
Proper storage can drastically reduce rust formation. Keep tools in a dry area with low humidity. Use airtight containers or cabinets to minimize exposure to air and moisture. Consider using silica gel packs to absorb excess moisture in storage spaces. Organize tools neatly to prevent them from touching each other. This avoids scratches that can expose metal surfaces to rust.Regular Maintenance Practices
Regular maintenance is key to rust prevention. After each use, wipe tools clean with a dry cloth. Remove any dirt or moisture before storing them. Inspect tools frequently for signs of rust or wear. Apply oil to metal surfaces to create a barrier against moisture. Always dry tools immediately if they come into contact with water.Protective Coatings
Protective coatings add an extra layer of defense against rust. Use rust-resistant paints or sprays on metal surfaces. Wax can also be applied for additional protection. Consider using specialized rust inhibitors available in hardware stores. These coatings form a seal that repels water and air. Regular application ensures long-term protection for your tools.
Credit: www.youtube.com
Common Mistakes To Avoid
Removing rust from tools with vinegar and baking soda is effective. But, mistakes can happen. These mistakes can make the process longer or damage your tools. Understanding what to avoid keeps your tools safe and rust-free.
Over-soaking Tools
Leaving tools in vinegar too long can harm them. Vinegar is acidic. It can eat away at metal if left too long. Soak tools for the right amount of time. Check them often. This prevents damage and preserves their quality.
Ignoring Safety Measures
Safety should be a priority. Vinegar and baking soda can irritate skin. Always wear gloves. Work in a well-ventilated area. Protect your eyes with goggles. Safety measures keep you safe from harm.
Using Abrasive Materials
Avoid harsh scrubbing tools. Steel wool or hard brushes can scratch metal. Use a soft cloth or brush instead. This gently removes rust without scratching. Your tools stay in good condition, ready for use.
Credit: www.finewoodworking.com
Frequently Asked Questions
Does Baking Soda And Vinegar Remove Rust From Tools?
Yes, baking soda and vinegar can remove rust from tools. Apply baking soda and vinegar paste, scrub gently, then rinse. This method is effective for small rust patches, restoring tools to their original condition. Ensure tools are thoroughly dried afterward to prevent further rusting.
How Long To Soak Tools In Vinegar To Remove Rust?
Soak tools in vinegar for 12 to 24 hours to effectively remove rust. Check progress after 12 hours. Scrub off loosened rust with a brush. Rinse and dry tools thoroughly after soaking to prevent further rusting. Use protective gloves while handling vinegar-soaked tools to ensure safety.
How Long Do You Let Vinegar And Baking Soda Sit?
Let vinegar and baking soda sit for 5 to 10 minutes. This allows them to react and clean effectively. For tough stains, you can extend the duration slightly. Always rinse thoroughly after use to ensure no residue remains.
Does White Vinegar Actually Remove Rust?
Yes, white vinegar effectively removes rust. It contains acetic acid, which dissolves rust. Simply soak the rusty object in vinegar for a few hours. Afterwards, scrub off the loosened rust with a brush. This method is safe, cost-effective, and eco-friendly, making it a popular choice for rust removal.
Conclusion
Removing rust from tools is simple with vinegar and baking soda. These household items work effectively. Vinegar loosens the rust, making it easy to scrub off. Baking soda cleans and polishes the surface. This method is affordable and easy. You don’t need special skills.
Just patience and a bit of effort. Your tools will look new again. Regular maintenance helps prevent future rust. Keep your tools dry and clean. This keeps rust away. Enjoy using your rust-free tools for a long time. Start today and see the difference.
Your tools will thank you!

I’m Abby Lu, a passionate home cook who loves simplifying everyday meals. At PlugChef.com, I share product reviews and cooking guides to help you find the best tools for your kitchen.
Related posts:
 What Type of Cooking Utensils are Safe: Expert Picks
 What Innovations Could Blenders Make: Unleashing Future Tech
 Smart Strategies to Organize a Small Kitchen: Maximize Space
 How to Organize a Kitchen Cabinet: Expert Tips & Tricks
 How to Organize Kitchen Drawers: Expert Tips and Tricks
 How to Organize a Corner Kitchen Cupboard: Expert Tips

