
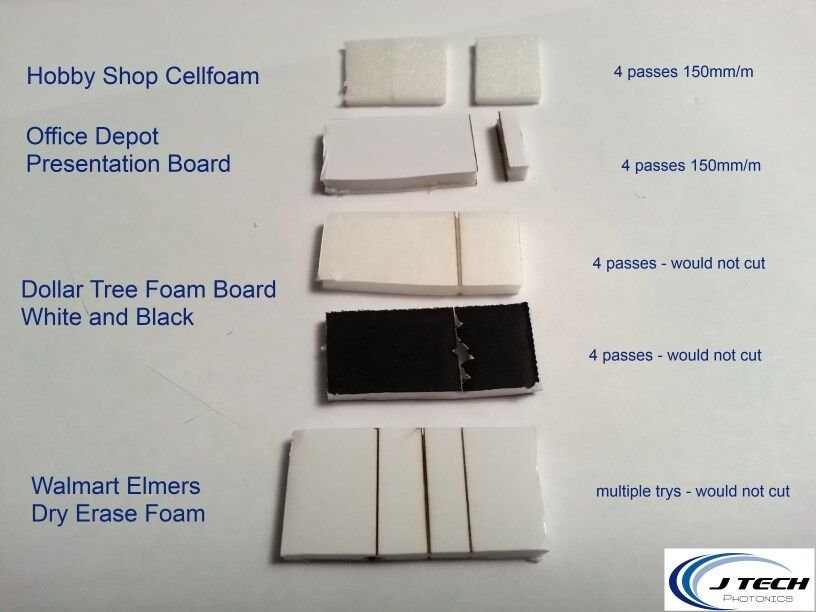
Foam board is a versatile, lightweight, and affordable material used for everything from school projects and art displays to party signage and DIY charcuterie board bases. The number one frustration beginners face when working with foam board is ragged, uneven edges that make projects look unpolished or even ruined if the foam tears mid-cut. This guide covers every method for cutting foam board, from basic hand tools for beginners to power tools for thick or intricate cuts, plus pro tips to get crisp, clean edges every time, no prior experience required.
What Is Foam Board (and Why Clean Cuts Matter)
Most standard foam boards consist of a polystyrene foam core (either expanded or extruded) sandwiched between paper or plastic facers, per EPA guidance on polystyrene foam products. While it’s easy to work with, its soft foam core is prone to tearing, chipping, and fraying if cut incorrectly, leading to rough edges that snag on fabric, look unprofessional for displays, and even create sharp, loose foam bits that pose a safety risk. Clean, straight edges also ensure your project looks polished from every angle, especially if you’re using the board as a base for food displays or signage.
Tools You’ll Need for Perfect Foam Board Cuts
The right tools make all the difference between ragged, torn edges and crisp, professional cuts. We’ve split the essentials by use case, so you can pick what fits your project and skill level.
Hand Tool Essentials (for 3/16” to 1/2” thick foam board)
These low-cost tools are all you need for most standard foam board cuts, from straight edges to simple shapes:
- Sharp retractable utility knife or craft knife: A dull blade is the top cause of ragged edges, as it drags the foam instead of slicing it cleanly. Retractable blades offer better control than fixed blades, and you can snap off the dull tip to reveal a fresh edge mid-cut for long straight lines.
- Non-slip metal straight edge (12” or 24”): Plastic rulers slip easily during cutting and can be sliced by the blade, so a metal ruler with a raised, non-slip back is ideal for guiding your cuts without shifting.
- Self-healing cutting mat (1/4” thick): This sacrificial mat protects your work surface from accidental cuts and can be reused hundreds of times. A piece of thick cardboard works in a pinch, but it will slice through quickly and doesn’t prevent blade dulling as effectively.
- Mechanical pencil: A fine, consistent point lets you mark precise cut lines without smudging the foam facer, and you won’t need to stop to sharpen it mid-project.
- Painter’s tape (optional): Apply a strip along your marked cut line on the top facer before scoring to prevent chipping of the top paper layer, which creates a smoother finished edge.
Optional Power Tools for Thick or Intricate Cuts
For foam board thicker than 1/2”, or for curved and custom shapes, these tools will save time and deliver cleaner results:
- Hot wire foam cutter: Uses a heated wire to melt through foam cleanly with no fraying, ideal for thick boards and smooth, curved cuts.
- Rotary tool with fine-tooth plastic cutting wheel: Perfect for small, detailed cutouts like letters or custom shapes.
- Jigsaw with a fine-tooth blade (10+ TPI): For straight or curved cuts on boards up to 2” thick, use a slow, steady speed to avoid melting the foam.
No matter what tools you use, always prioritize safety: wear cut-resistant gloves and safety glasses, and follow OSHA utility knife safety guidelines to reduce laceration risk when working with sharp blades.
 Scoring foam board with light, multiple passes is the key to avoiding ragged edges.
Credit: www.youtube.com
Scoring foam board with light, multiple passes is the key to avoiding ragged edges.
Credit: www.youtube.com
Step-by-Step Guide to Clean, Straight Foam Board Cuts
Follow these steps for consistent, professional results on every cut, no matter your tool of choice.
Step 1: Mark Your Cut Line Precisely
Place your metal ruler along the desired cut line, and use a mechanical pencil to draw a fine, continuous line. For extra precision, align the ruler with the factory edge of the foam board if you’re cutting to size, rather than measuring from an uneven pre-cut edge. Double-check the line with a ruler before moving on—this is the easiest step to fix, and a misaligned line will lead to a crooked cut no matter how sharp your blade is. A common mistake here is pressing too hard with the pencil, which dents the foam core and creates a weak spot that tears during cutting.
Step 2: Prep Your Workspace
Lay your foam board on top of the self-healing cutting mat, positioned so you have at least 6 inches of clearance on all sides. Clear away any clutter, loose tools, or items that could catch the blade mid-cut. If you’re working on a slippery table, apply a small piece of non-slip tape under the mat to prevent it from shifting while you cut. If you’re using painter’s tape to prevent chipping, apply it now along the marked line on the top facer of the board.
Step 3: Score the Foam Board (For Hand Tool Cuts)
Hold the metal ruler firmly with your non-dominant hand, pressing down hard enough that it doesn’t slip. Hold the utility knife at a 45-degree angle to the board, with the blade facing away from your body (never cut toward yourself). Use light, even pressure to score along the marked line in 2-3 slow passes, rather than trying to cut through the entire board in one go. The first pass should barely slice through the top facer, the second through the foam core, and the third through the bottom facer. A common mistake here is pressing too hard, which causes the blade to dive into the foam and create ragged, uneven edges. If you feel resistance, stop and snap off the dull tip of the blade to reveal a fresh edge before continuing. The same scoring technique works for other rigid sheet materials, so you can reference our dry erase board cutting guide for additional tips on working with smooth, rigid surfaces.
Step 4: Separate the Cut Pieces
Once you’ve scored all the way through the board, lift the excess piece gently—if it doesn’t separate easily, make one more light pass along the cut line with the knife. Don’t force the pieces apart, as this will tear the foam core and create ragged edges. Run your finger lightly along the cut edge to check for any loose foam bits, and trim them off with the utility knife if needed.
Step 5: Clean Up Your Workspace
Brush away all foam dust and scraps from your work surface and cutting mat, as foam dust can be slippery and cause falls. Dispose of foam scraps properly—most curbside recycling programs don’t accept polystyrene foam, so check your local waste management guidelines for drop-off locations. Always store your utility knife with the blade retracted, out of reach of children and pets.
Pro Tips for Perfect, Clean Edges Every Time
These tested tips will help you avoid common mistakes and get professional results every time:
- Use a fresh blade for every project: Blades cost less than $1 each, so there’s no reason to reuse a dull one. For extra-long cuts, snap off the dull tip every 10-12 inches of cutting to maintain a sharp edge.
- Cut away from your body at all times: Keep your non-cutting hand behind the direction of the blade stroke to avoid injury if the blade slips.
- Use light, multiple passes instead of one hard cut: Three light passes will always yield a cleaner cut than one hard press, which causes the blade to warp or skip.
- Secure the board to prevent shifting: A self-healing mat has enough grip to hold the board in place, or you can apply small pieces of painter’s tape to the corners of the board to secure it to your work surface.
- Use a hot wire cutter for smooth curves: Hand knives will create ragged edges on curved cuts, but a hot wire cutter melts through the foam cleanly for smooth, professional curves, no sanding required. For thick boards over 2”, the fine-tooth blade techniques used for cement board cutting tips work well to avoid splintering.
- Sand rough edges lightly: If you do get a rough edge, use fine-grit sandpaper (220+ grit) to smooth it out, sanding in a circular motion to avoid creating flat spots.
If you’re using your cut foam board as a base for a homemade charcuterie spread, proper edge prep ensures your arrangement looks polished from every angle. Pair it with neatly arranged strawberry slices for charcuterie for a professional-looking party display.
 A sharp blade and light pressure produce smooth, professional foam board edges every time.
Credit: www.youtube.com
A sharp blade and light pressure produce smooth, professional foam board edges every time.
Credit: www.youtube.com
Cutting Foam Board for Common Projects
Foam board’s versatility makes it a go-to for dozens of projects, and small adjustments to your cutting technique will deliver the best results for each use case:
- School and office presentations: Use standard 3/16” foam board, cut to size with a utility knife for a professional look that’s lightweight enough to hang on a wall or carry to class.
- Art and photography displays: Use acid-free foam board to prevent yellowing over time, and use a hot wire cutter for smooth, clean edges that won’t fray, even for large format prints.
- DIY charcuterie and party boards: Foam board is an affordable, lightweight base for homemade charcuterie spreads, party snack displays, and event signage. For a more durable, long-lasting option for frequent use, you can make a custom resin board that resists moisture and scratches. If you’re adding cheese to your spread, proper cheese cutting prep ensures uniform slices that match your polished board edges.
- Signage and event decor: Use self-adhesive foam board for easy application to walls or easels, and cut letters or shapes with a rotary tool for clean, detailed edges.
Choosing the Right Foam Board for Your Project
Not all foam boards are created equal, and picking the right type for your project will make cutting easier and extend the life of your finished piece:
| Foam Board Type | Core Material | Facer Material | Best Use Case | Pros | Cons |
|---|---|---|---|---|---|
| Standard Foam Board | Expanded polystyrene (EPS) | Paper | School projects, temporary signage, basic art displays | Very affordable, lightweight, easy to cut | Prone to yellowing over time, not water-resistant |
| Acid-Free Foam Board | Extruded polystyrene (XPS) | Acid-free paper | Archival art projects, photography displays, long-term signage | Won’t yellow or degrade over time, smooth facer for clean edges | More expensive than standard board |
| Self-Adhesive Foam Board | EPS or XPS | Adhesive-backed paper or plastic | Event decor, wall signage, label making | No glue needed, sticks to most smooth surfaces | Adhesive can leave residue on walls if removed |
| Moisture-Resistant Foam Board | XPS | Plastic | Outdoor signage, food service displays, wet environments | Waterproof, won’t warp or degrade with moisture | Harder to cut cleanly with hand tools, requires very sharp blades |
For projects that will see heavy use or frequent cleaning, such as a reusable charcuterie board base, a resin or bamboo board will hold up better than foam board long-term. You can learn bamboo board care tips to extend the lifespan of your natural cutting surfaces.
Troubleshooting Common Foam Board Cutting Issues
Even with the right tools and technique, small mistakes can lead to imperfect cuts. Here’s how to fix the most common issues:
- Ragged, torn edges: Caused by a dull blade, pressing too hard, or cutting too fast. Fix: Use a fresh blade, make 3 light passes instead of one hard cut, and slow down your stroke speed.
- Crooked cuts: Caused by a slipping ruler or misaligned cut line. Fix: Use a non-slip metal ruler, apply painter’s tape to the bottom of the ruler to add grip, and double-check your cut line before scoring.
- Chipped top facer: Caused by the blade catching the paper layer as it exits the board. Fix: Apply painter’s tape along the cut line before scoring, or cut with the blade at a slight angle, slicing through the top facer first, then the core, then the bottom facer.
- Melting edges (when using power tools): Caused by high speed generating heat. Fix: Use a slow speed setting on jigsaws and rotary tools, and use a hot wire cutter for thick boards, as it’s designed to melt foam cleanly without burning.
Frequently Asked Questions
What’s the easiest tool to cut foam board for beginners?
A sharp retractable utility knife and metal ruler are the easiest tools for beginners to get clean, straight cuts on standard 3/16” to 1/2” thick foam board. No special skills are required, and the tools are inexpensive and widely available.
Can I cut foam board with scissors?
Only very thin (1/8”) foam board can be cut with heavy-duty scissors, and the edges will almost always be ragged. For clean edges, a utility knife or hot wire cutter is required for all but the thinnest boards.
How do I cut foam board without a cutting mat?
If you don’t have a cutting mat, use a piece of thick, rigid cardboard as a sacrificial work surface. Avoid cutting directly on wood, laminate, or stone countertops, as the blade will damage these surfaces and dull quickly.
Can I cut foam board into curved shapes?
Yes, for smooth curved cuts, use a hot wire foam cutter, which melts through the foam cleanly without fraying. You can also use a jigsaw with a fine-tooth blade for thicker boards, but expect to sand the edges smooth after cutting.
Is foam board safe for food contact?
Standard foam board is not food-safe, as the paper facers can absorb moisture and bacteria, and the polystyrene core can leach chemicals if it comes into contact with acidic or fatty foods. If you’re using foam board as a base for food displays, cover it with a layer of food-safe parchment paper or a decorative tray before adding food.
How do I dispose of foam board scraps?
Most curbside recycling programs do not accept polystyrene foam, so check with your local waste management department for drop-off locations for foam scrap. If no drop-off is available, wrap scraps in newspaper and dispose of them in your regular trash.
Conclusion
Cutting foam board with clean, straight edges is simple once you have the right tools and technique: use a sharp blade, make light multiple passes, and always cut away from your body for safety. Whether you’re working on a school project, art display, or party spread, these tips will help you avoid common mistakes and get professional results every time. Ready to put your new skills to use? Check out our guide to charcuterie prep basics to create a stunning, professional-looking spread for your next gathering.

I’m Abby Lu, a passionate home cook who loves simplifying everyday meals. At PlugChef.com, I share product reviews and cooking guides to help you find the best tools for your kitchen.
Related posts:
 How to Make a Fruit Basket for a Gift: Easy DIY Guide
 Do You Need a Basket? Essential Guide for Air Fryers
 How to Adjust Syrup Dispenser Pressure: Expert Tips
 White Appliances in Kitchen Design: Elevate Your Space
 Kitchen Appliances Stainless Steel Vs White: Ultimate Showdown
 Kitchen Appliances Made in Usa: Quality and Innovation

