
A sharp draw knife transforms heavy, awkward cuts into controlled, effortless shavings. This guide teaches practical, workshop-tested methods for sharpening and maintaining straight and curved draw knives so they cut cleanly, last longer, and stay safe to use.
You’ll get: tool-by-tool workflows (file, stone, grinder), exact bevel guidance and grit progressions, how to handle curves, rust and prep steps, stropping and testing techniques, plus common mistakes and troubleshooting based on hands-on experience.

Credit: www.youtube.com
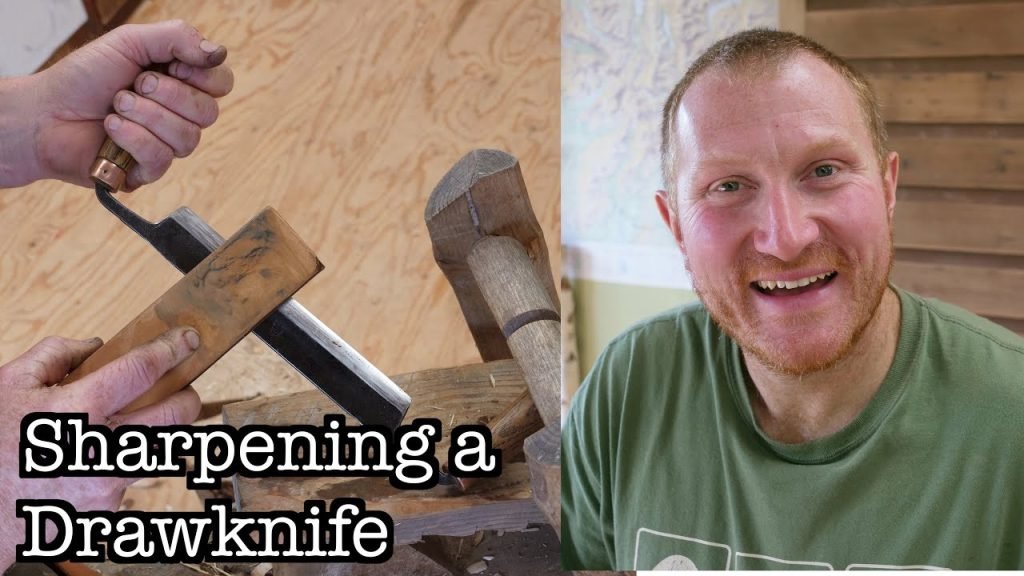
Photograph showing a draw knife blade being worked on a sharpening surface.
Quick overview: edge geometry & expected results
- Typical working bevel: 20–30° per side (40–60° inclusive). Use the lower end (20–22°) for fine paring and the higher end (25–30°) for heavy stock removal and green wood.
- Hardened steels and laminated blades keep a keen edge longer but take more care when regrinding. See the material notes below.
- Finish progression for stones: coarse reprofile (220–400 grit) → medium refine (800–1200) → polish (3000–8000) → strop with compound. For files/grinders you’ll finish on stones and strop.
For safety guidance around power tools and bench procedures, follow general shop-safety rules on the OSHA website: https://www.osha.gov.
Tools and supplies you’ll need
Essential items:
- Bench vise or dedicated sharpening jig
- Mill bastard file (for reshaping)
- Coarse and fine whetstones (water or oil stone) or diamond stones — dual-grit stones are convenient
- Slipstones or small curved stones for hollow/convex areas
- Leather strop and stropping compound (green chrome oxide or red rouge)
- Honing oil (for oil stones) or water for water stones
- Marking ink (permanent marker) to confirm bevel angle
- Sandpaper on dowels for extreme curves (80–400 grit)
- Safety gloves and eye protection
If you want to compare options for stones and grits, review this stone grit overview in the stone grit guide for practical recommendations: stone grit guide.
Preparation: clean, inspect, plan
- Clean the blade. Remove sap, dirt and loose rust with a soft cloth and a mild detergent; for tougher rust follow tested techniques like the vinegar rust method or baking soda option: vinegar rust method and baking-soda rust fix. A clean surface prevents scratches when sharpening. See a practical cleaning checklist here: cleaning supplies list.
- Inspect for chips or rolled edges. Small chips can usually be filed out by re-profiling; deep chips may require grinding.
- Secure the blade with the bevel exposed in a vise or jig so you can control pressure and angle.
- Mark the bevel with a permanent marker. This helps you see where metal is being removed and ensures you follow the original bevel.
If you need general knife-care background before sharpening, this concise knife care guide is a good primer: knife care guide.
Step-by-step: reshaping and sharpening (straight blades)
Reshape (only if needed)
- Use a mill bastard file or coarse stone (220–400 grit) to remove nicks and re-establish the bevel. File in smooth, full-length strokes, pushing the file away from you at a consistent angle. Frequently check the marker ink to see metal removal.
- If you must use a grinder, work lightly and cool frequently — never overheat the edge. Finish on stones to remove the heat-affected burr.
Establish the working bevel
- Choose target bevel: 20–22° per side for fine finishing; 25–30° per side for rough shaping. Keep the angle consistent. Use a small angle finder or the marker method for visual reference.
- Work each side evenly: 8–12 strokes on the coarse stone per side, then alternate sides to keep the edge centered.
Refine on medium and fine stones
- Move to 800–1200 grit to remove file scratches and refine the edge.
- Finish on 3000–8000 grit for a polished, durable edge. Use light pressure and full-length strokes.
Remove the burr and strop
- When a burr forms along the opposite side, switch sides until it disappears.
- Strop both sides on leather with a small amount of compound, pulling the blade away from the edge (edge trailing). 10–20 strokes per side is typical.
Test the edge
- Wood shave test: remove a thin shaving from a scrap board (should leave long continuous shavings).
- Fingernail catch or paper test are helpful quick checks, but real cutting on wood is the truest test.
For details on choosing a honing stone appropriate for draw knives, read this focused roundup: honing stone roundup.
Sharpening with a file (fast reshaping)
When the bevel is badly damaged or you need to remove a lot of metal, a mill bastard file is the fastest manual tool.
- Clamp blade bevel-up, file with long, steady strokes, keeping the same angle. Use the whole length of the file to avoid chatter and uneven wear.
- After filing, deburr on a medium stone, then progress to finer stones and strop.
- A common mistake is over-roughed filing near the handles—keep strokes centered and consistent.
A practical complement is checking the blade geometry in the knife anatomy article: knife anatomy article.
Sharpening curved draw knives (convex or hollow profiles)
Curved blades need a different approach:
- Use slipstones or rounded files that match the curve. Small oval diamond stones or shaped ceramic stones work well.
- For pronounced curves, wrap sandpaper around a dowel sized to the curve radius and run the dowel along the bevel to maintain consistent contact.
- Take light passes and frequently check the edge. You want even material removal across the entire curve.
- Finish with fine stones and strop as with straight blades.
If you prefer a visual walkthrough for curved blades, a short practical video and step examples can be helpful; practice on a scrap piece first.
Working without a grinder (hand methods)
You can get shop-quality results with just files, stones and a strop:
- Start coarse (file or coarse stone), re-establish the bevel, then work through medium and fine stones.
- Keep strokes long and even; pressure should be heavier for reshaping and lighter as you refine.
- Time estimate: a dull blade to usable edge — 20–60 minutes depending on damage and blade length.
For non-powered methods that avoid heat risks, this stepwise approach is reliable and repeatable.
Stropping: the finishing touch
- Use a clean leather strop with stropping compound. Apply compound sparingly.
- Pull the blade heel-first, edge trailing, keeping the bevel angle very low (nearly flat) to polish without cutting the leather.
- Alternate sides and count strokes—10–30 per side depending on how polished you need the edge.
- In practice, regular stropping between sessions keeps the edge razor-ready and reduces frequency of full resharpening.
Troubleshooting & common mistakes
- Uneven bevels: Usually caused by uneven pressure or inconsistent angle. Re-mark bevel, clamp securely, and use slow controlled strokes.
- Edge that’s sharp but chips quickly: Likely too thin or inappropriate angle for the wood; back off to a slightly steeper bevel for heavy work.
- Heat bluing from grinders: Overheating reduces hardness—always finish on stones and consider professional reprofiling if temper is lost.
- Rubbing/drag on wood despite appearing sharp: Strop more or polish with higher grit stones; a shiny rolled burr can make a blade feel dull.
Maintenance schedule
- Everyday: wipe blade clean after use and apply a thin oil film for rust prevention (see rust-prevention tips): rust-prevention tips.
- After heavy use: hone on a fine stone or strop before finishing the day.
- Seasonal/storage: inspect blades for rust, touch up micro-bevels, and re-oil before long-term storage. Good dry storage advice is discussed in this dry storage tips item: dry storage tips.
For more on cleaning and deep stain removal before sharpening, consult these deep-clean methods: deep-clean methods.
Handling rust and stubborn buildup
- Light surface rust: steel wool with light oil or baking-soda rub will often remove it—see the baking-soda rust fix: baking-soda rust fix.
- Heavier rust: soak small sections in vinegar then neutralize and polish — see the vinegar rust method: vinegar rust method.
- After rust removal, reprofile any lost bevel and protect the blade with a light oil.
If you need to protect the handle or fit a simple cover, a fabric sheath or DIY storage option can prevent knocks: fabric sheath option.
Safety checklist
- Secure the blade in a vise or jig before working.
- Wear eye protection when using files or grinders; use gloves that still allow feel when working with stones.
- When grinding, use a respirator if dust or smoke is present and let the blade cool frequently.
- Keep a first-aid kit and know basic wound care: first-aid checklist. Consult general shop-safety information at OSHA: https://www.osha.gov.
Material considerations and edge life
- High-carbon steels are easy to sharpen and take a fine edge, but require protection from rust.
- Stainless variants resist corrosion but may take longer to sharpen and require finer finishing steps.
- If you’re unsure about the steel or want to choose a replacement blade, these material selection notes are helpful: material selection notes.
Useful quick references (tests and angles)
- Fine paring: 20–22° per side
- General-purpose woodworking: 22–25° per side
- Heavy stock removal: 25–30° per side
- Stones: 220–400 (reprofile) → 800–1200 (refine) → 3000+ (polish)
For quick cutting tests, try controlled shavings on scrap wood rather than paper—real wood will reveal edge function and cutting feel more reliably than paper or fingertip checks. See cutting tests: cutting tests.
FAQs
Q: How often should I hone my draw knife?
A: Light honing/stropping after every few uses keeps the bevel in shape; full sharpening when you notice reduced performance or visible burrs—frequency depends on workload.
Q: Can I sharpen a serrated or ceramic draw knife?
A: Draw knives are normally carbon or stainless steel. Ceramic or serrated blades require specialty tools; serrations need individual knock-down tools and ceramics need diamond abrasives.
Q: Is a grinder required?
A: No. A grinder speeds up reprofiling but risks overheating. Hand files and stones are safer for maintaining geometry and temper.
Conclusion — next steps
Sharpening a draw knife is a sequence: prepare and clean, reprofile if needed, follow a grit progression on stones, remove the burr, and finish with a strop. Practice on a cheap blade or scrap before working on a prized tool. For continued improvement, bookmark this guide and test one method per session until it feels repeatable and safe.
For a short, useful companion on keeping edges between sessions, check the practical surface repair tips and storage suggestions: surface repair tips and proper storage guide.
Try these steps on your next project and note which angle and finish give you the best, longest-lasting shavings — then repeat and refine.
Make a note of what worked (angle, grit progression, stropping frequency) and record a few before-and-after photos of the shavings and the edge—these simple data points accelerate skill gains more than random practice.
If you encounter persistent problems (recurrent chipping, an edge that won't hold), reassess steel type, bevel angle and working technique; when in doubt, consult a blade specialist or consider having a professional reprofile the blade to restore correct geometry.
Ready to get consistent, long-lasting edges? Start by sharpening one draw knife today using the 220→800→3000→strop progression and note the difference on a scrap board.
Try this sharpening routine on your next session and share your results with a woodworking group or community to get targeted feedback.
Create a simple sharpening log: date, blade type, bevel angle, tools and grits used, time spent, and the test result (paper, wood shaving, or project performance). Over a few sessions this record quickly shows which angles and finishing steps give the longest-lasting cutting performance for the woods you work most with.
When you want targeted feedback, photograph the edge (macro/close-up of the bevel and the shaving), note the angles and progression, and post to a woodworking forum or local maker group—clear pictures plus your log entries let experienced users give precise advice instead of generic tips.
Keep one blade as your practice candidate until you consistently reproduce good results; once that’s reliable, apply the same workflow to your best tools. Save this checklist, try the 220→800→3000→strop sequence this weekend, and see how much cleaner your shavings become.

I’m Abby Lu, a passionate home cook who loves simplifying everyday meals. At PlugChef.com, I share product reviews and cooking guides to help you find the best tools for your kitchen.
Related posts:
 How to Make a Fruit Basket for a Gift: Easy DIY Guide
 Do You Need a Basket? Essential Guide for Air Fryers
 How to Choose Kitchen Appliances: Expert Tips Revealed
 Kitchen Cabinets With Black Stainless Steel Appliances: Modern Elegance
 White Kitchen Cabinets Stainless Steel Appliances: Timeless Elegance
 Top 10 Best Non-Toxic Cooking Utensils – Safe & Durable Choices for Healthy Homes

